
Updated: 16 October 2026 by Sylwia (MyCrochetory)

This crochet square pillow is the little sister of my Carina Rectangle Blanket. When I finished the blanket, I thought a matching square pillow would be so cute, so I designed one! It was 2020, I was deep in my mosaic crochet phase, and the Carina motif kept growing from one project to the next.
A calm cream square sits right in the middle, and a bold gray and cream mosaic border wraps all the way around it. The finished crochet square pillow is about 15.75 inches on each side, so it fits a standard 16 inch pillow pad.
Jump to the free Carina Square Pillow pattern. Want it all in one file? Grab the ad-free, printable PDF HERE on ETSY or HERE on Ravelry.

Want my next pattern before anyone else? Sign up below, and new patterns land straight in your inbox.
Join my Facebook Group and Official Ravelry Group where you can find necessary support, you can ask questions or share your finished projects.
You can also follow my Instagram, Facebook page and Pinterest.
Why I designed this crochet square pillow
This crochet square pillow completes my Carina family. The mosaic motif first appeared in my Carina Mosaic Shawl, then I worked it from the center out into the blanket, and a pillow was the natural next step.
I wanted a piece that could sit on the sofa right next to the blanket and look like they belong together. The same motif looks so different on each piece, and on the pillow the plain cream center gives your eyes a rest, so the mosaic border pops even more.
Want the whole set? You can get the blanket and this pillow together in my set of 2 Carina patterns.

How the crochet square pillow is made
The front of this crochet square pillow is worked in rounds from the center out, starting with a magic ring. Every round adds stitches at the 4 corners, so the square grows evenly on all sides.
First you crochet the plain cream square in single crochet, which is the relaxing part. Then the gray yarn joins in for 19 mosaic rounds, and 3 plain gray rounds frame everything at the end.
The back is made from two simple single crochet pieces worked in rows. The top piece has 4 buttonholes, so you can take the pillow pad in and out, and then you sew all three pieces together with a running stitch.
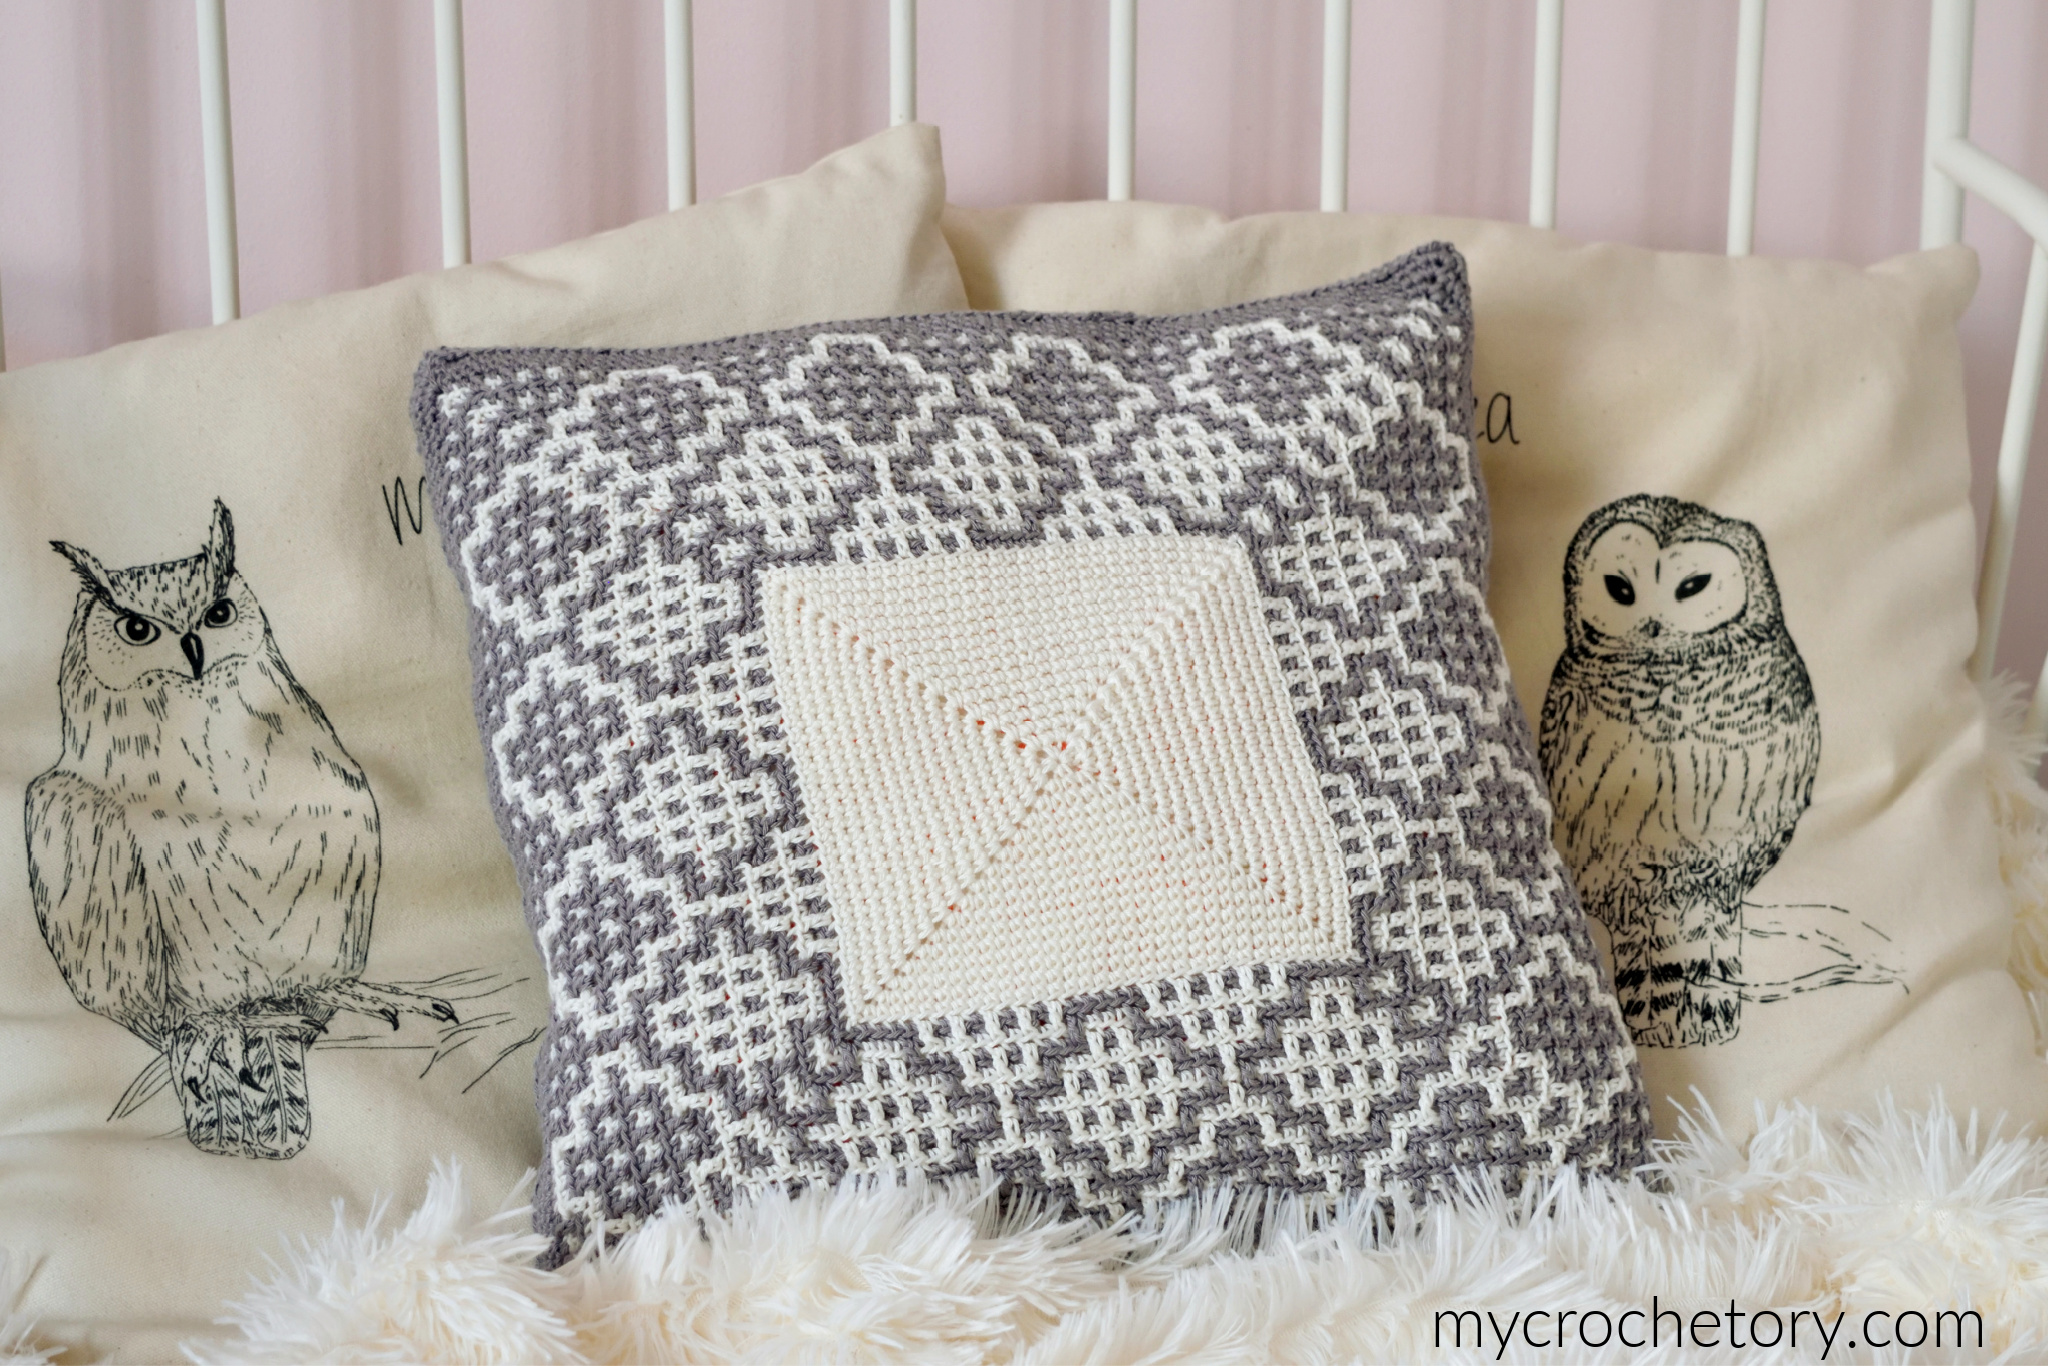
How the mosaic border on this crochet square pillow works
Mosaic crochet looks so complicated, and that’s the best trick of all. You only ever work with one color per round, so there’s no juggling two yarns at once.
In one round you skip some stitches with chains. In the next round of the same color, you work a mosaic double crochet down into those skipped stitches, and that’s what draws the pattern.
You can follow the written rounds or the chart, whichever feels easier for you. For Mosaic Rounds 1–11 I took photos of every single step, so you can check your work as often as you like.
Hungry for more mosaic? My mosaic crochet tutorial shows the technique in rows, and 10 free mosaic crochet patterns has all my other mosaic designs in one place.

Choosing colors for your crochet square pillow
Mosaic loves strong contrast, so pick one light and one dark color for your crochet square pillow. My pillow pairs Rich Cream with Antique Silver, and it looks calm and elegant on a gray sofa.
Want something bolder? Try cream with navy, mustard or black, and the motif will jump out even more. Just keep the light color for the center square, so the mosaic border frames it nicely.
Is this crochet square pillow good for beginners?
This crochet square pillow is an intermediate pattern, but it makes a really friendly first mosaic project. If you know single crochet and double crochet, the photo tutorial walks you through every tricky round.
The front is where all the fun happens. The back pieces are plain rows of single crochet, so they’re easy to pick up when you want something simple.
Yarn, size and blocking for your crochet square pillow
I made my crochet square pillow with Scheepjes Bamboo Soft, a bamboo and cotton blend with a soft shine, and I still recommend it. You need 1 skein of Rich Cream and 4 skeins of Antique Silver.
Before sewing, I wet block all three pieces to the same size. That way the front and back match perfectly and the mosaic lies nice and flat.
Love Carina but can’t start today? Pin it to your Pinterest board now, so it’s easy to find later. And while you’re there, come say hi at www.pinterest.com/mycrochetory!
Carina Square Pillow free crochet pattern
- Purchase the ad-free, printable PDF here on ETSY or here on Ravelry.
- Grab the SET of 2 patterns that includes Carina Rectangle Crochet Blanket and Carina Square Crochet Pillow for one low price HERE.
- Add this pattern to your Ravelry Queue HERE.
- Pin it for later.
Copyright 2020 – 2026 MyCrochetory. All rights reserved. This pattern is property of Sylwia Kawczyńska @MyCrochetory. Please DO NOT sell the pattern and claim this pattern as your own. The pattern is for personal use only and may not be translated or reproduced in another language. Please respect my rights, DO NOT share or publish this pattern anywhere without my permission.
The pillow cover you make following this pattern is yours, and you are free to sell it, as long as you credit MyCrochetory as the original designer. For more information, please read Terms Page.

Materials & Tools
- Yarn Scheepjes Bamboo Soft (50g/150m/164yd, 50% Bamboo, 50% Cotton), in 2 colors. Yarn A Rich Cream (265), 1 skein. Yarn B Antique Silver (264), 4 skeins.
- Hook size 3.5mm (US E/4). Adjust hook size if necessary to obtain correct gauge.
- Tapestry needle (to weave and hide yarn ends).
- Scissors.
- 4 buttons (approx. 2.8cm/1.1”).
- Stitch markers.
Level
Intermediate
Size
40cm x 40cm (15.75” x 15.75”).
Gauge after blocking
FRONT: after round 10 the pillow is 10cm (4”) wide.
BACK: 19 sts and 22.5 rows to 10 x 10cm (4 x 4”) using 3.5mm hook with single crochet.
If necessary, adjust hook size to obtain the correct gauge.
Before you measure, please take the time to block your swatch in the same manner that you will block your pillow.
General Notes
- The pattern uses US crochet terminology.
- The pillow cover is worked in 3 separate pieces: FRONT, BACK TOP AND BACK BOTTOM. They are seamed together. The pillow cover has a buttoned opening on the back to take the pillow pad in or out.
- The FRONT of the pillow is worked in unturned rounds from the center out. Each round builds on the next, and each round starts in the corner chain space.
- Both BACK BOTTOM and BACK TOP are worked in rows, back and forth.
- Stitch marker placement: When instructed to place your marker, place on the last st worked unless otherwise instructed. It should lie on a stitch, not between stitches.
- STITCHES: When in the instructions you have a stitch followed by a number, eg sc14, this means you have to work 1sc stitch into each of the next 14 sts. When in the instructions you have a number followed by a stitch, eg 2sc, this means you have to work 2 sc stitches into the next (same) stitch.
- Instructions in square brackets […] are worked as many times as indicated.
- Instructions in *…* are worked as many times as indicated.
Mosaic Pattern Notes
- You can either follow the chart or written instructions.
- Color is changed after every one round.
- You can avoid weaving in all those ends by not cutting the yarn when you finish a round. Simply carry the other color along the inside and pick it back up with your hook when you need to use it again.
How to read the Mosaic Chart
- Chart is read from bottom to top and each row of squares represents a quarter of a round.
- All rounds are read from right to left.
- Each square of the chart represents 1 stitch or 1 skipped stitch.
- Whenever you see a square of color dedicated to that round, work single crochet.
- Whenever you see a square of different color in that round, skip that stitch (make chain). To prevent puckering, make the same number of chains as the number of skipped sts plus ch1. For example, for 1 skipped st – make ch2, for 2 skipped sts – make ch3, for 3 skipped sts – make ch4, etc.
- Pay special attention to number of skipped stitches.
- BLmosaicdc will be worked in these skipped sts from one round below. Remember, BLmosaicdc are always worked in front of chains of previous round.
Stitches & Abbreviations (US terms)
st(s) – stitch(es)
BOR – beginning of the row/round
BLsc – back loop only single crochet
BLslst – back loop only slip stitch
yo – yarn over
M – marker
PM – place marker
RPM – reposition marker
rep – repeat
sp – space
sk – skip
RS – right side
WS – wrong side
BLmosaicdc (back loop only mosaic double crochet) – work regular BLdc in unworked/skipped st of the same color two rounds below in front of chain space (in front of work). These chains will stay behind mosaicdc and will stay unworked.
BORcorner – BLsc1 in same ch, ch2, RPM, BLsc1 in next ch.
Corner – BLsc1 in next ch, ch2, RPM, BLsc1 in next ch.
Endslst2 – slst1 in first sc of the round, BLslst1 in the first ch of the next ch-2sp.

Crochet square pillow pattern
Read all Notes before you start.
FRONT
With 3.5mm hook and Yarn A.
Start with a magic ring or with 4ch and slst in the first st to close the round.
Round 1: ch1 (doesn’t count as a stitch here and throughout), [sc1 in ring, ch2, PM] rep 4 times in total, slst1 in first sc of the round to close the round, slst1 in ch-2sp.
Round 2: ch1, (sc1, ch2, RPM, sc1) in same ch-2sp, [sc in each st until next ch-2sp, (sc1, ch2, RPM, sc1) in ch-2sp] rep 3 times in total, sc in each st until first sc of the round, slst1 in first sc of the round to close the round, slst1 in next ch-2sp.
Repeat Round 2 13 more times.
Next Round: ch1, (sc1, ch2, RPM, sc1) in same ch-2sp, [sc in each st until next ch-2sp, (sc1, ch2, RPM, sc1) in ch-2sp] rep 3 times in total, sc in each st until first sc of the round, slst1 in first sc of the round to close the round, slst1 in first ch of ch-2sp. Change to Yarn B in last slst.
You should have multiple of 14 plus 3 single crochet stitches on each side of the square.

MOSAIC SECTION
Mosaic Round 1 (with Yarn B): ch1, BORcorner, *BLsc3, [BLsc1, ch2, sk 1st, BLsc1, ch2, sk 1st, BLsc1, ch2, sk 1st, BLsc1, ch2, sk 1st, BLsc1, ch2, sk 1st, BLsc4] rep until next ch-2sp with M, Corner* rep 3 times in total, BLsc3, [BLsc1, ch2, sk 1st, BLsc1, ch2, sk 1st, BLsc1, ch2, sk 1st, BLsc1, ch2, sk 1st, BLsc1, ch2, sk 1st, BLsc4] rep until first sc of the round, Endslst2. Change to Yarn A in last BLslst.
Mosaic Round 2 (with Yarn A): ch1, BORcorner, ch2, sk 1st, BLsc3, ch2, sk 1st, *[BLmosaicdc1 (in unworked st of same color two rows below, in front of chains – here and throughout), BLsc1, BLmosaicdc1, BLsc1, BLmosaicdc1, BLsc1, BLmosaicdc1, BLsc1, BLmosaicdc1, ch2, sk 1st, BLsc3, ch2, sk 1st] rep until next ch-2sp with M with M, Corner* rep 3 times in total, [BLmosaicdc1, BLsc1, BLmosaicdc1, BLsc1, BLmosaicdc1, BLsc1, BLmosaicdc1, BLsc1, BLmosaicdc1, ch2, sk 1st, BLsc3, ch2, sk 1st] rep until first sc of the round, Endslst2. Change to Yarn B in last BLslst.

Mosaic Round 3 (with Yarn B): ch1, BORcorner, *BLsc1, BLmosaicdc1, ch2, sk 1st, BLsc1, ch2, sk 1st, BLmosaicdc1, BLsc1, [BLsc1, ch2, sk 1st, BLsc1, ch2, sk 1st, BLsc1, ch2, sk 1st, BLsc2, BLmosaicdc1, ch2, sk 1st, BLsc1, ch2, sk 1st, BLmosaicdc1, BLsc1] rep until next ch-2sp with M, Corner* rep 3 times in total, BLsc1, BLmosaicdc1, ch2, sk 1st, BLsc1, ch2, sk 1st, BLmosaicdc1, BLsc1, [BLsc1, ch2, sk 1st, BLsc1, ch2, sk 1st, BLsc1, ch2, sk 1st, BLsc2, BLmosaicdc1, ch2, sk 1st, BLsc1, ch2, sk 1st, BLmosaicdc1, BLsc1] rep until first sc of the round, Endslst2. Change to Yarn A in last BLslst.
Mosaic Round 4 (with Yarn A): ch1, BORcorner, *ch2, sk 1st, BLsc2, BLmosaicdc1, BLsc1, BLmosaicdc1, BLsc2, ch2, sk 1st, [BLmosaicdc1, BLsc1, BLmosaicdc1, BLsc1, BLmosaicdc1, ch2, sk 1st, BLsc2, BLmosaicdc1, BLsc1, BLmosaicdc1, BLsc2, ch2, sk 1st] rep until next ch-2sp with M, Corner* rep 3 times in total, ch2, sk 1st, BLsc2, BLmosaicdc1, BLsc1, BLmosaicdc1, BLsc2, ch2, sk 1st, [BLmosaicdc1, BLsc1, BLmosaicdc1, BLsc1, BLmosaicdc1, ch2, sk 1st, BLsc2, BLmosaicdc1, BLsc1, BLmosaicdc1, BLsc2, ch2, sk 1st] rep until first sc of the round, Endslst2. Change to Yarn B in last BLslst.
Mosaic Round 5 (with Yarn B): ch1, BORcorner, *BLsc1, BLmosaicdc1, ch2, sk 1st, BLsc1, ch2, sk 1st, BLsc1, ch2, sk 1st, BLsc1, ch2, sk 1st, BLmosaicdc1, BLsc1, [BLsc1, ch2, sk 1st, BLsc2, BLmosaicdc1, ch2, sk 1st, BLsc1, ch2, sk 1st, BLsc1, ch2, sk 1st, BLsc1, ch2, sk 1st, BLmosaicdc1, BLsc1] rep until next ch-2sp with M, Corner* rep 3 times in total, BLsc1, BLmosaicdc1, ch2, sk 1st, BLsc1, ch2, sk 1st, BLsc1, ch2, sk 1st, BLsc1, ch2, sk 1st, BLmosaicdc1, BLsc1, [BLsc1, ch2, sk 1st, BLsc2, BLmosaicdc1, ch2, sk 1st, BLsc1, ch2, sk 1st, BLsc1, ch2, sk 1st, BLsc1, ch2, sk 1st, BLmosaicdc1, BLsc1] rep until first sc of the round, Endslst2. Change to Yarn A in last BLslst.
Mosaic Round 6 (with Yarn A): ch1, BORcorner, *ch2, sk 1st, BLsc2, BLmosaicdc1, BLsc1, BLmosaicdc1, BLsc1, BLmosaicdc1, BLsc1, BLmosaicdc1, BLsc2, ch2, sk 1st, [BLmosaicdc1, ch2, sk 1st, BLsc2, BLmosaicdc1, BLsc1, BLmosaicdc1, BLsc1, BLmosaicdc1, BLsc1, BLmosaicdc1, BLsc2, ch2, sk 1st] rep until next ch-2sp with M, Corner* rep 3 times in total, ch2, sk 1st, BLsc2, BLmosaicdc1, BLsc1, BLmosaicdc1, BLsc1, BLmosaicdc1, BLsc1, BLmosaicdc1, BLsc2, ch2, sk 1st, [BLmosaicdc1, ch2, sk 1st, BLsc2, BLmosaicdc1, BLsc1, BLmosaicdc1, BLsc1, BLmosaicdc1, BLsc1, BLmosaicdc1, BLsc2, ch2, sk 1st] rep until first sc of the round, Endslst2. Change to Yarn B in last BLslst.
Mosaic Round 7 (with Yarn B): ch1, BORcorner, *ch2, sk 1st, [BLmosaicdc1, BLsc2, ch2, sk 1st, BLsc1, ch2, sk 1st, BLsc1, ch2, sk 1st, BLsc1, ch2, sk 1st, BLsc2, BLmosaicdc1, ch2, sk 1st] rep until next ch-2sp with M, Corner* rep 3 times in total, ch2, sk 1st, [BLmosaicdc1, BLsc2, ch2, sk 1st, BLsc1, ch2, sk 1st, BLsc1, ch2, sk 1st, BLsc1, ch2, sk 1st, BLsc2, BLmosaicdc1, ch2, sk 1st] rep until first sc of the round, Endslst2. Change to Yarn A in last BLslst.
Mosaic Round 8 (with Yarn A): ch1, BORcorner, *BLsc1, BLmosaicdc1, BLsc1, [BLsc1, ch2, sk 1st, BLmosaicdc1, BLsc1, BLmosaicdc1, BLsc1, BLmosaicdc1, BLsc1, BLmosaicdc1, ch2, sk 1st, BLsc2, BLmosaicdc1, BLsc1] rep until next ch-2sp with M, Corner* rep 3 times in total, BLsc1, BLmosaicdc1, BLsc1, [BLsc1, ch2, sk 1st, BLmosaicdc1, BLsc1, BLmosaicdc1, BLsc1, BLmosaicdc1, BLsc1, BLmosaicdc1, ch2, sk 1st, BLsc2, BLmosaicdc1, BLsc1] rep until first sc of the round, Endslst2. Change to Yarn B in last BLslst.
Mosaic Round 9 (with Yarn B): ch1, BORcorner, *ch2, sk 1st, BLsc3, ch2, sk 1st, [BLmosaicdc1, BLsc2, ch2, sk 1st, BLsc1, ch2, sk 1st, BLsc2, BLmosaicdc1, ch2, sk 1st, BLsc3, ch2, sk 1st] rep until next ch-2sp with M, Corner* rep 3 times in total, ch2, sk 1st, BLsc3, ch2, sk 1st, [BLmosaicdc1, BLsc2, ch2, sk 1st, BLsc1, ch2, sk 1st, BLsc2, BLmosaicdc1, ch2, sk 1st, BLsc3, ch2, sk 1st] rep until first sc of the round, Endslst2. Change to Yarn A in last BLslst.
Mosaic Round 10 (with Yarn A): ch1, BORcorner, *BLsc1, BLmosaicdc1, ch2, sk 1st, BLsc1, ch2, sk 1st, BLmosaicdc1, BLsc1, [BLsc1, ch2, sk 1st, BLmosaicdc1, BLsc1, BLmosaicdc1, ch2, sk 1st, BLsc2, BLmosaicdc1, ch2, sk 1st, BLsc1, ch2, sk 1st, BLmosaicdc1, BLsc1] rep until next ch-2sp with M, Corner* rep 3 times in total, BLsc1, BLmosaicdc1, ch2, sk 1st, BLsc1, ch2, sk 1st, BLmosaicdc1, BLsc1, [BLsc1, ch2, sk 1st, BLmosaicdc1, BLsc1, BLmosaicdc1, ch2, sk 1st, BLsc2, BLmosaicdc1, ch2, sk 1st, BLsc1, ch2, sk 1st, BLmosaicdc1, BLsc1] rep until first sc of the round, Endslst2. Change to Yarn B in last BLslst.
Mosaic Round 11 (with Yarn B): ch1, BORcorner, *ch2, sk 1st, BLsc2, BLmosaicdc1, BLsc1, BLmosaicdc1, BLsc2, ch2, sk 1st, [BLmosaicdc1, BLsc3, BLmosaicdc1, ch2, sk 1st, BLsc2, BLmosaicdc1, BLsc1, BLmosaicdc1, BLsc2, ch2, sk 1st] rep until next ch-2sp with M, Corner* rep 3 times in total, ch2, sk 1st, BLsc2, BLmosaicdc1, BLsc1, BLmosaicdc1, BLsc2, ch2, sk 1st, [BLmosaicdc1, BLsc3, BLmosaicdc1, ch2, sk 1st, BLsc2, BLmosaicdc1, BLsc1, BLmosaicdc1, BLsc2, ch2, sk 1st] rep until first sc of the round, Endslst2. Change to Yarn A in last BLslst.
Mosaic Round 12 (with Yarn A): ch1, BORcorner, *BLsc1, BLmosaicdc1, ch2, sk 1st, BLsc1, ch2, sk 1st, BLsc1, ch2, sk 1st, BLsc1, ch2, sk 1st, BLmosaicdc1, BLsc1, [BLsc1, ch2, sk 1st, BLsc2, BLmosaicdc1, ch2, sk 1st, BLsc1, ch2, sk 1st, BLsc1, ch2, sk 1st, BLsc1, ch2, sk 1st, BLmosaicdc1, BLsc1] rep until next ch-2sp with M, Corner* rep 3 times in total, BLsc1, BLmosaicdc1, ch2, sk 1st, BLsc1, ch2, sk 1st, BLsc1, ch2, sk 1st, BLsc1, ch2, sk 1st, BLmosaicdc1, BLsc1, [BLsc1, ch2, sk 1st, BLsc2, BLmosaicdc1, ch2, sk 1st, BLsc1, ch2, sk 1st, BLsc1, ch2, sk 1st, BLsc1, ch2, sk 1st, BLmosaicdc1, BLsc1] rep until first sc of the round, Endslst2. Change to Yarn B in last BLslst.
Mosaic Round 13 (with Yarn B): ch1, BORcorner, *ch2, sk 1st, BLsc2, BLmosaicdc1, BLsc1, BLmosaicdc1, BLsc1, BLmosaicdc1, BLsc1, BLmosaicdc1, BLsc2, ch2, sk 1st, [BLmosaicdc1, ch2, sk 1st, BLsc2, BLmosaicdc1, BLsc1, BLmosaicdc1, BLsc1, BLmosaicdc1, BLsc1, BLmosaicdc1, BLsc2, ch2, sk 1st] rep until next ch-2sp with M, Corner* rep 3 times in total, ch2, sk 1st, BLsc2, BLmosaicdc1, BLsc1, BLmosaicdc1, BLsc1, BLmosaicdc1, BLsc1, BLmosaicdc1, BLsc2, ch2, sk 1st, [BLmosaicdc1, ch2, sk 1st, BLsc2, BLmosaicdc1, BLsc1, BLmosaicdc1, BLsc1, BLmosaicdc1, BLsc1, BLmosaicdc1, BLsc2, ch2, sk 1st] rep until first sc of the round, Endslst2. Change to Yarn A in last BLslst.
Mosaic Round 14 (with Yarn A): ch1, BORcorner, *ch2, sk 1st, [BLmosaicdc1, BLsc2, ch2, sk 1st, BLsc1, ch2, sk 1st, BLsc1, ch2, sk 1st, BLsc1, ch2, sk 1st, BLsc2, BLmosaicdc1, ch2, sk 1st] rep until next ch-2sp with M, Corner* rep 3 times in total, ch2, sk 1st, [BLmosaicdc1, BLsc2, ch2, sk 1st, BLsc1, ch2, sk 1st, BLsc1, ch2, sk 1st, BLsc1, ch2, sk 1st, BLsc2, BLmosaicdc1, ch2, sk 1st] rep until first sc of the round, Endslst2. Change to Yarn B in last BLslst.
Mosaic Round 15 (with Yarn B): ch1, BORcorner, *BLsc1, BLmosaicdc1, BLsc1, [BLsc1, ch2, sk 1st, BLmosaicdc1, BLsc1, BLmosaicdc1, BLsc1, BLmosaicdc1, BLsc1, BLmosaicdc1, ch2, sk 1st, BLsc2, BLmosaicdc1, BLsc1] rep until next ch-2sp with M, Corner* rep 3 times in total, BLsc1, BLmosaicdc1, BLsc1, [BLsc1, ch2, sk 1st, BLmosaicdc1, BLsc1, BLmosaicdc1, BLsc1, BLmosaicdc1, BLsc1, BLmosaicdc1, ch2, sk 1st, BLsc2, BLmosaicdc1, BLsc1] rep until first sc of the round, Endslst2. Change to Yarn A in last BLslst.
Mosaic Round 16 (with Yarn A): ch1, BORcorner, *ch2, sk 1st, BLsc1, ch2, sk 1st, BLsc1, ch2, sk 1st, [BLmosaicdc1, BLsc2, ch2, sk 1st, BLsc1, ch2, sk 1st, BLsc2, BLmosaicdc1, ch2, sk 1st, BLsc1, ch2, sk 1st, BLsc1, ch2, sk 1st] rep until next ch-2sp with M, Corner* rep 3 times in total, ch2, sk 1st, BLsc1, ch2, sk 1st, BLsc1, ch2, sk 1st, [BLmosaicdc1, BLsc2, ch2, sk 1st, BLsc1, ch2, sk 1st, BLsc2, BLmosaicdc1, ch2, sk 1st, BLsc1, ch2, sk 1st, BLsc1, ch2, sk 1st] rep until first sc of the round, Endslst2. Change to Yarn B in last BLslst.
Mosaic Round 17 (with Yarn B): ch1, BORcorner, *BLsc1, BLmosaicdc1, BLsc1, BLmosaicdc1, BLsc1, BLmosaicdc1, BLsc1, [BLsc1, ch2, sk 1st, BLmosaicdc1, BLsc1, BLmosaicdc1, ch2, sk 1st, BLsc2, BLmosaicdc1, BLsc1, BLmosaicdc1, BLsc1, BLmosaicdc1, BLsc1] rep until next ch-2sp with M, Corner* rep 3 times in total, BLsc1, BLmosaicdc1, BLsc1, BLmosaicdc1, BLsc1, BLmosaicdc1, BLsc1, [BLsc1, ch2, sk 1st, BLmosaicdc1, BLsc1, BLmosaicdc1, ch2, sk 1st, BLsc2, BLmosaicdc1, BLsc1, BLmosaicdc1, BLsc1, BLmosaicdc1, BLsc1] rep until first sc of the round, Endslst2. Change to Yarn A in last BLslst.
Mosaic Round 18 (with Yarn A): ch1, BORcorner, *ch2, sk 1st, BLsc1, ch2, sk 1st, BLsc1, ch2, sk 1st, BLsc1, ch2, sk 1st, BLsc1, ch2, sk 1st, [BLmosaicdc1, BLsc3, BLmosaicdc1, ch2, sk 1st, BLsc1, ch2, sk 1st, BLsc1, ch2, sk 1st, BLsc1, ch2, sk 1st, BLsc1, ch2, sk 1st] rep until next ch-2sp with M, Corner* rep 3 times in total, ch2, sk 1st, BLsc1, ch2, sk 1st, BLsc1, ch2, sk 1st, BLsc1, ch2, sk 1st, BLsc1, ch2, sk 1st, [BLmosaicdc1, BLsc3, BLmosaicdc1, ch2, sk 1st, BLsc1, ch2, sk 1st, BLsc1, ch2, sk 1st, BLsc1, ch2, sk 1st, BLsc1, ch2, sk 1st] rep until first sc of the round, Endslst2. Change to Yarn B in last BLslst.
Mosaic Round 19 (with Yarn B): ch1, BORcorner, *BLsc1, [BLmosaicdc1, BLsc1] rep 5 times in total, [BLsc4, *BLmosaicdc1, BLsc1* rep 5 times in total] rep until next ch-2sp with M, Corner* rep 3 times in total, BLsc1, BLmosaicdc1, BLsc1, BLmosaicdc1, BLsc1, BLmosaicdc1, BLsc1, BLmosaicdc1, BLsc1, BLmosaicdc1, BLsc1, [BLsc4, BLmosaicdc1, BLsc1, BLmosaicdc1, BLsc1, BLmosaicdc1, BLsc1, BLmosaicdc1, BLsc1, BLmosaicdc1, BLsc1] rep until first sc of the round, slst1 in first sc of the round, slst1 in ch-2sp.
Continue with Yarn B.
Repeat Round 2 three times.
Fasten off yarn and weave in all ends.
BACK BOTTOM
Ch78.
Row 1: sc in 2nd ch from hook and in each ch across. Turn. (77sc)
Rows 2 – 65: ch1 (does not count as sc here and throughout), sc in each st across. Turn. (77sc)
Fasten off yarn and weave in ends.
BACK TOP
Ch78.
Row 1: sc in 2nd ch from hook and in each ch across. Turn. (77sc)
Rows 2 – 30: ch1 (does not count as sc here and throughout), sc in each st across. Turn. (77sc)
Row 31: ch1, sc7, [ch3, sk 3st, sc17] rep 3 times in total, ch3, sk 3st, sc7. Turn.
Row 32: ch1, sc in each st across working 3sc in each ch-3sp. Turn. (77sc)
Rows 33 – 34: ch1, sc in each st across. Turn. (77sc)
Fasten off yarn and weave in ends.
Assembly
- Block all the pieces to the measurements.
- Sew all parts together. Place all three pieces (FRONT, BACK BOTTOM, BACK TOP) on top of each other right sides facing. The BACK TOP (with buttonholes) should be in the center. Mark corners and using a running stitch sew all pieces around.
- Next, turn inside out and sew one button beneath each buttonhole on BACK BOTTOM piece.
- Insert pillow pad.
Stuck on a round? Leave a comment below, or ask in my Facebook Group or Ravelry Group, where other crocheters can help you too. And if you spot a mistake, email me at mycrochetory@gmail.com and I’ll fix it.
Crochet square pillow photo tutorial
Magic Ring:

Round 1:

Round 2:


The last round before Mosaic Rounds:

Mosaic Round 1:


Mosaic Round 2:


Mosaic Round 3:


Mosaic Round 4:


Mosaic Round 5:


Mosaic Round 6:


Mosaic Round 7:


Mosaic Round 8:


Mosaic Round 9:


Mosaic Round 10:


Mosaic Round 11:


Assembly pictures


Finished your Carina pillow? I’d love to see your colors! Share it on Instagram or Facebook with #mycrochetory or #carinapillow, or tag me @mycrochetory.
More free crochet square pillow patterns
Need a few more pillows for the sofa? These are all my own designs.
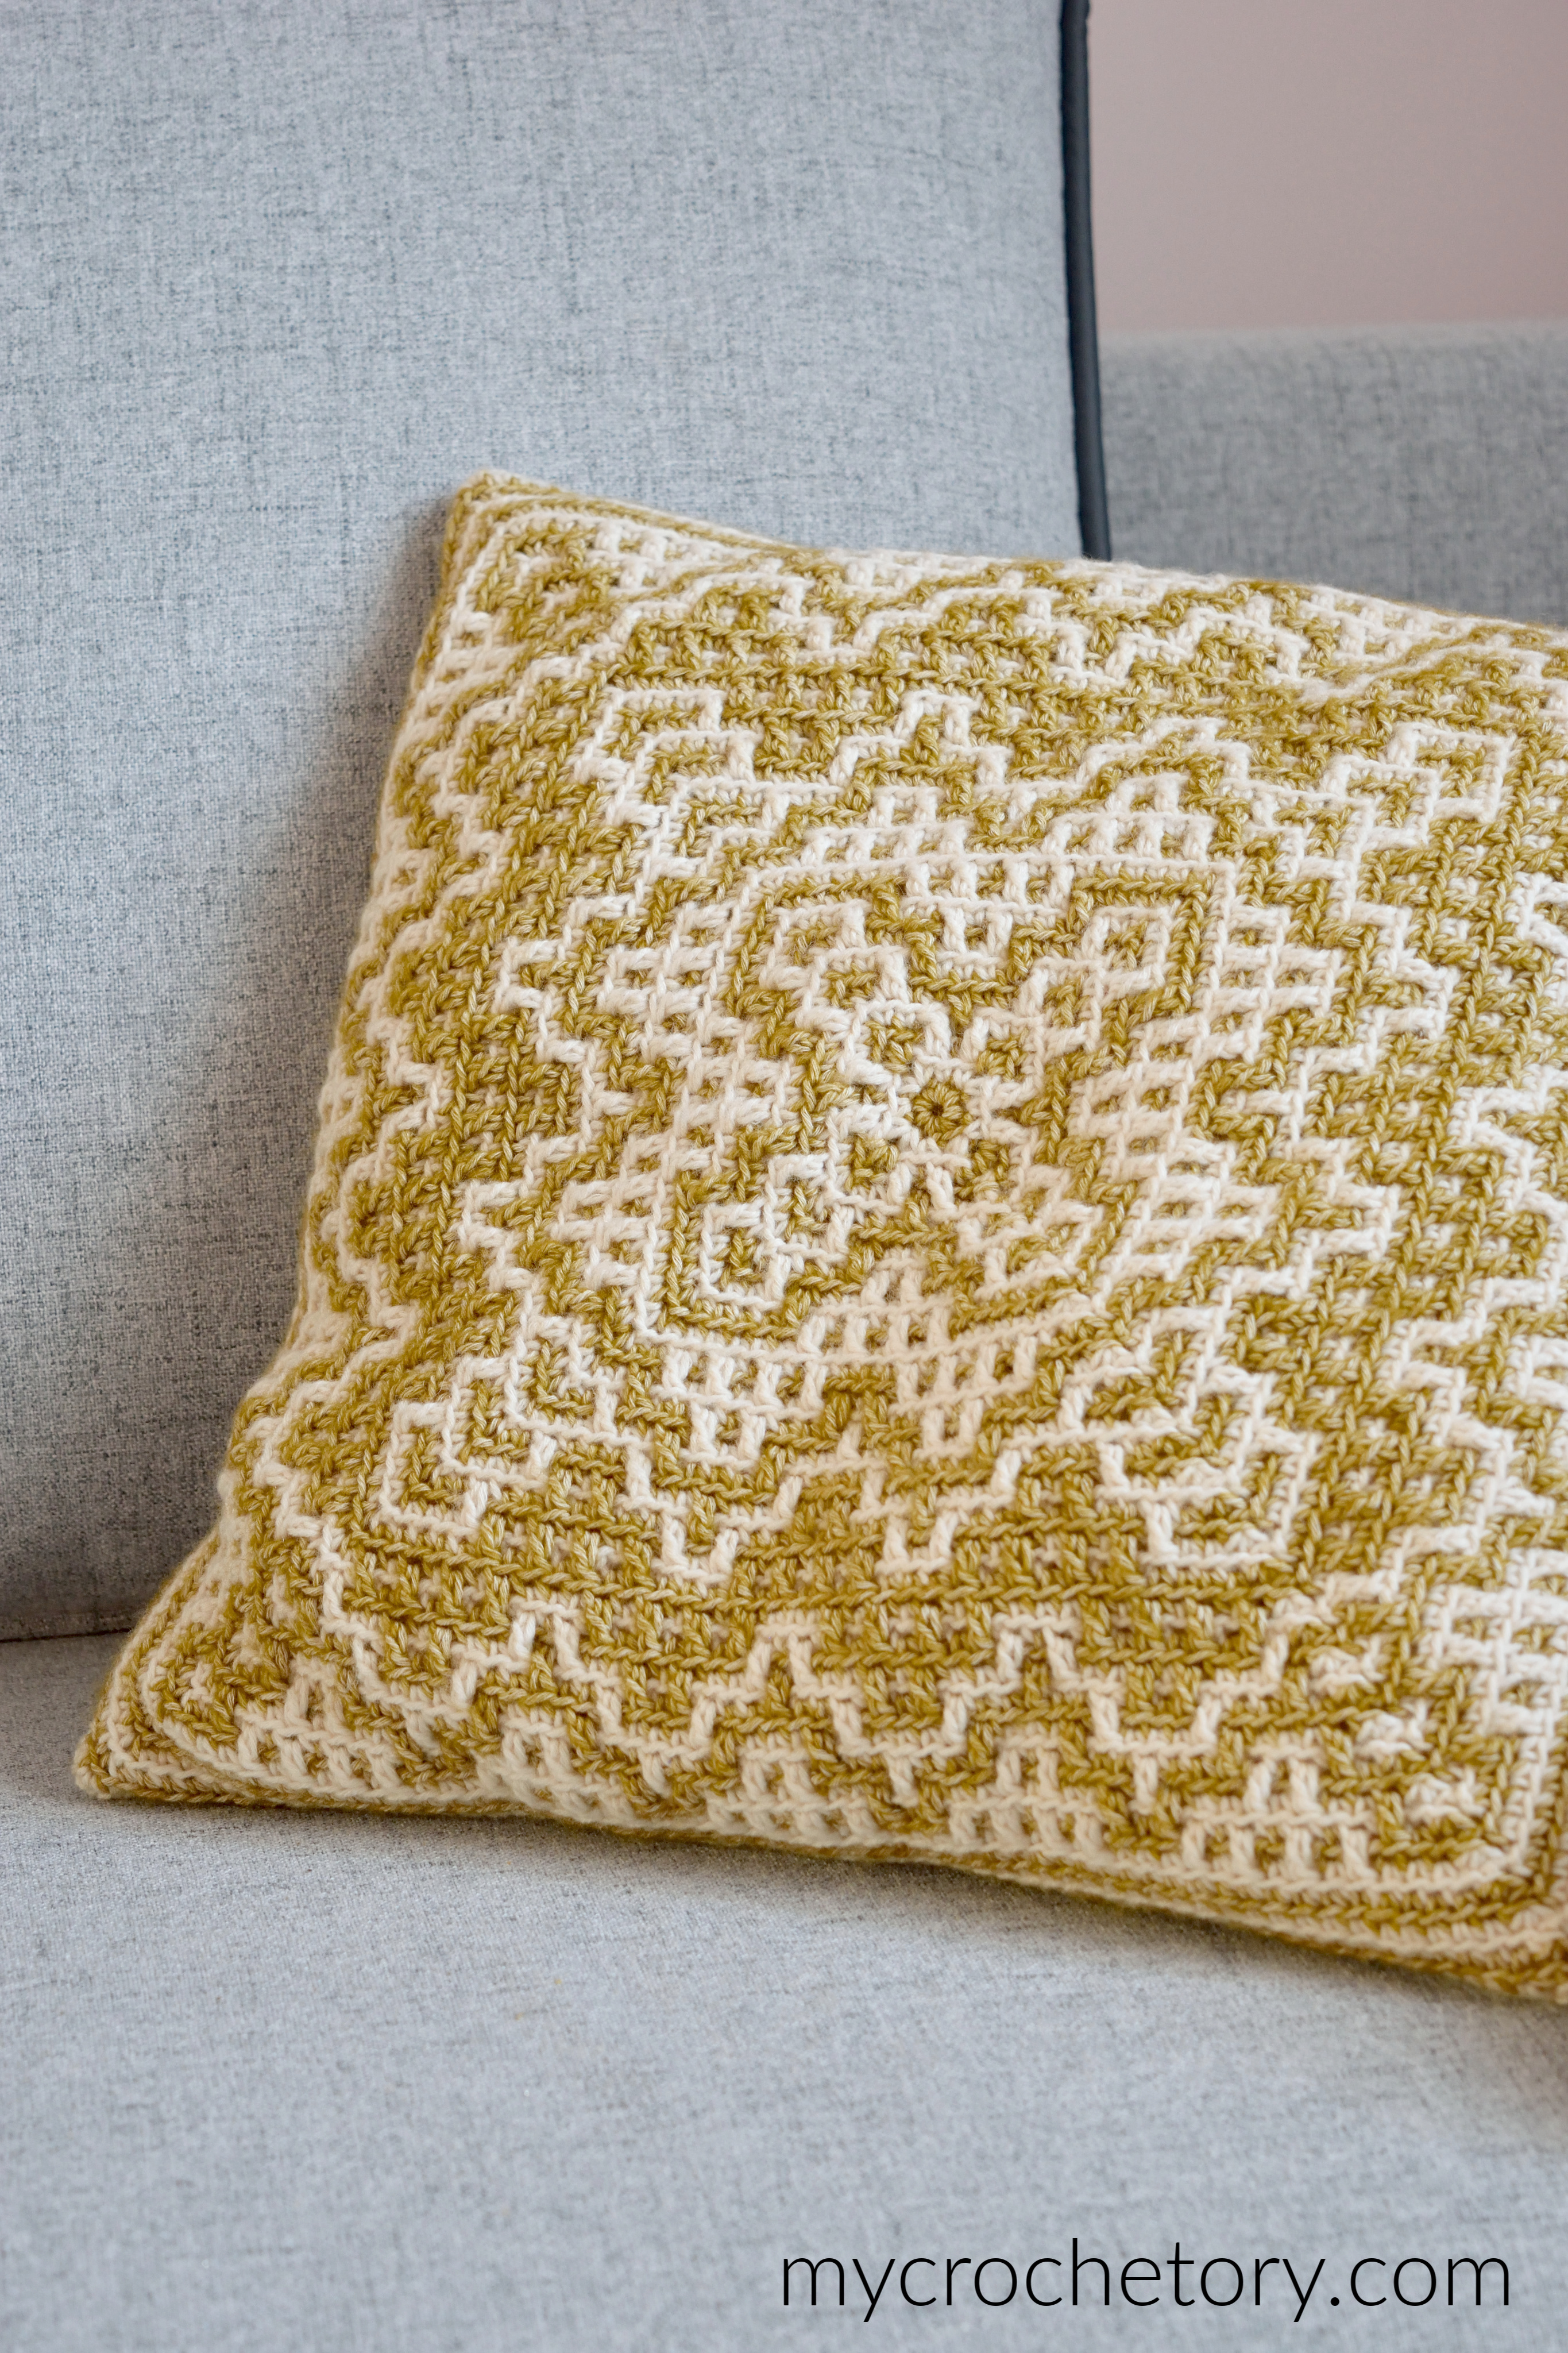


- Dioon Pillow. Another mosaic pillow, worked from the center out in 32 rounds.
- Cable Diamond Pillow. Front post cables in a diamond pattern, with an envelope closure.
- Dahlia Pillow. A mustard and off-white intarsia design in single crochet.
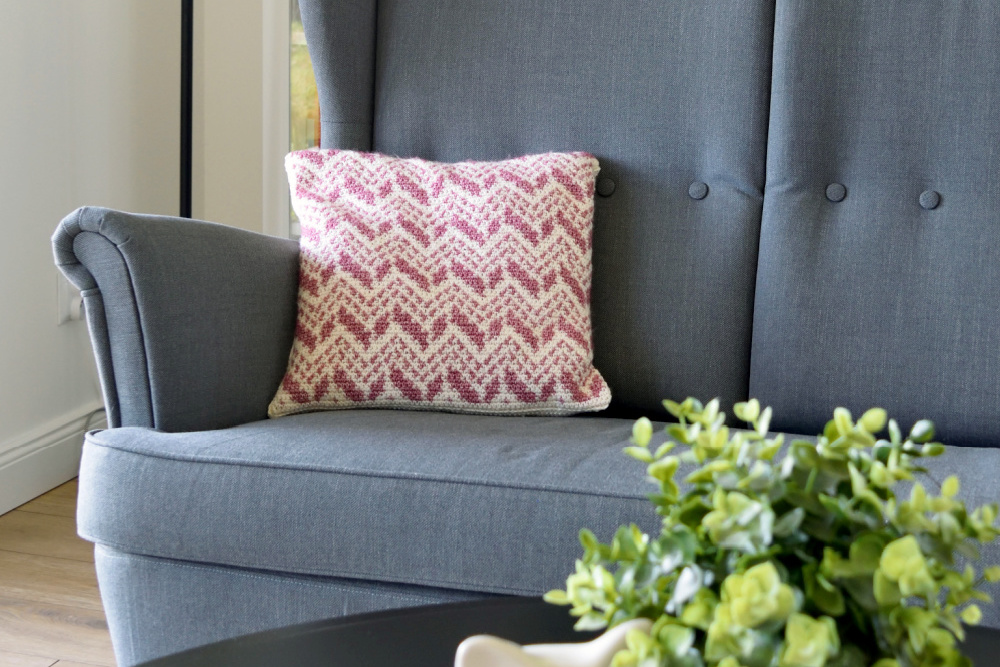
- Cevro Intarsia Pillow. A two-color chevron in intarsia, friendly for adventurous beginners.
More Carina and mosaic crochet patterns
Fell for the Carina motif? Here’s the rest of the family, plus two more mosaic favorites.
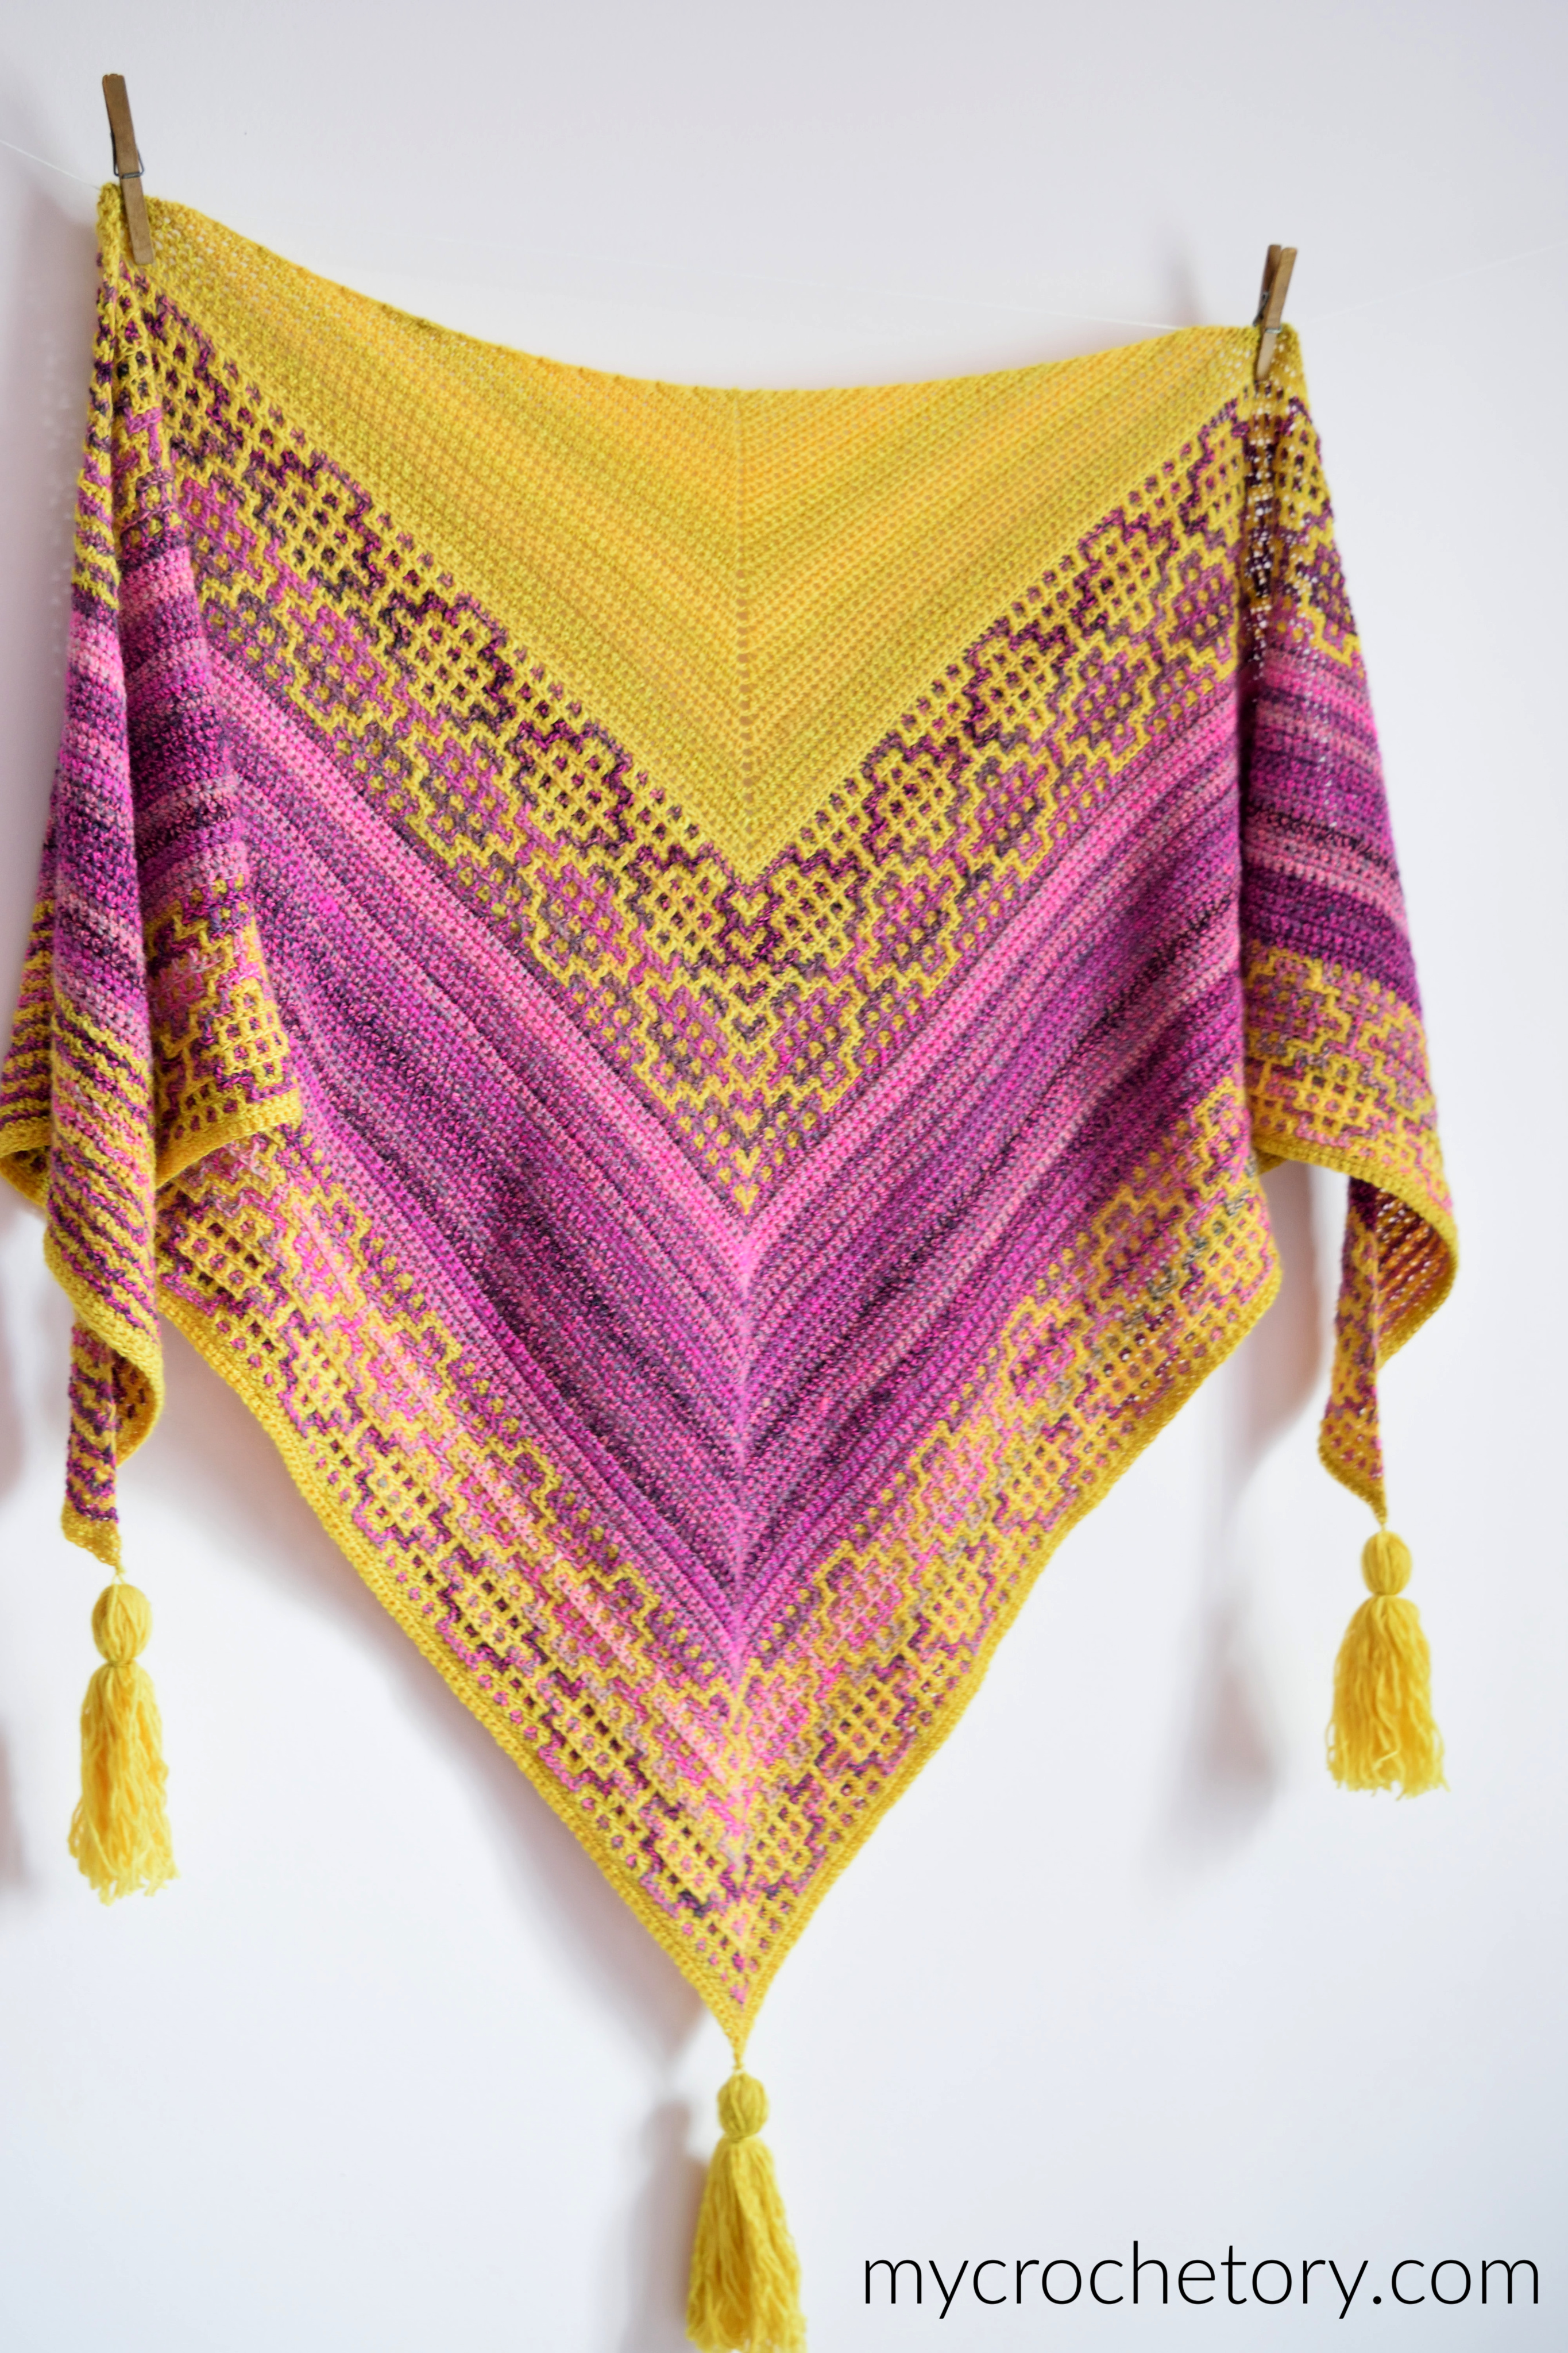
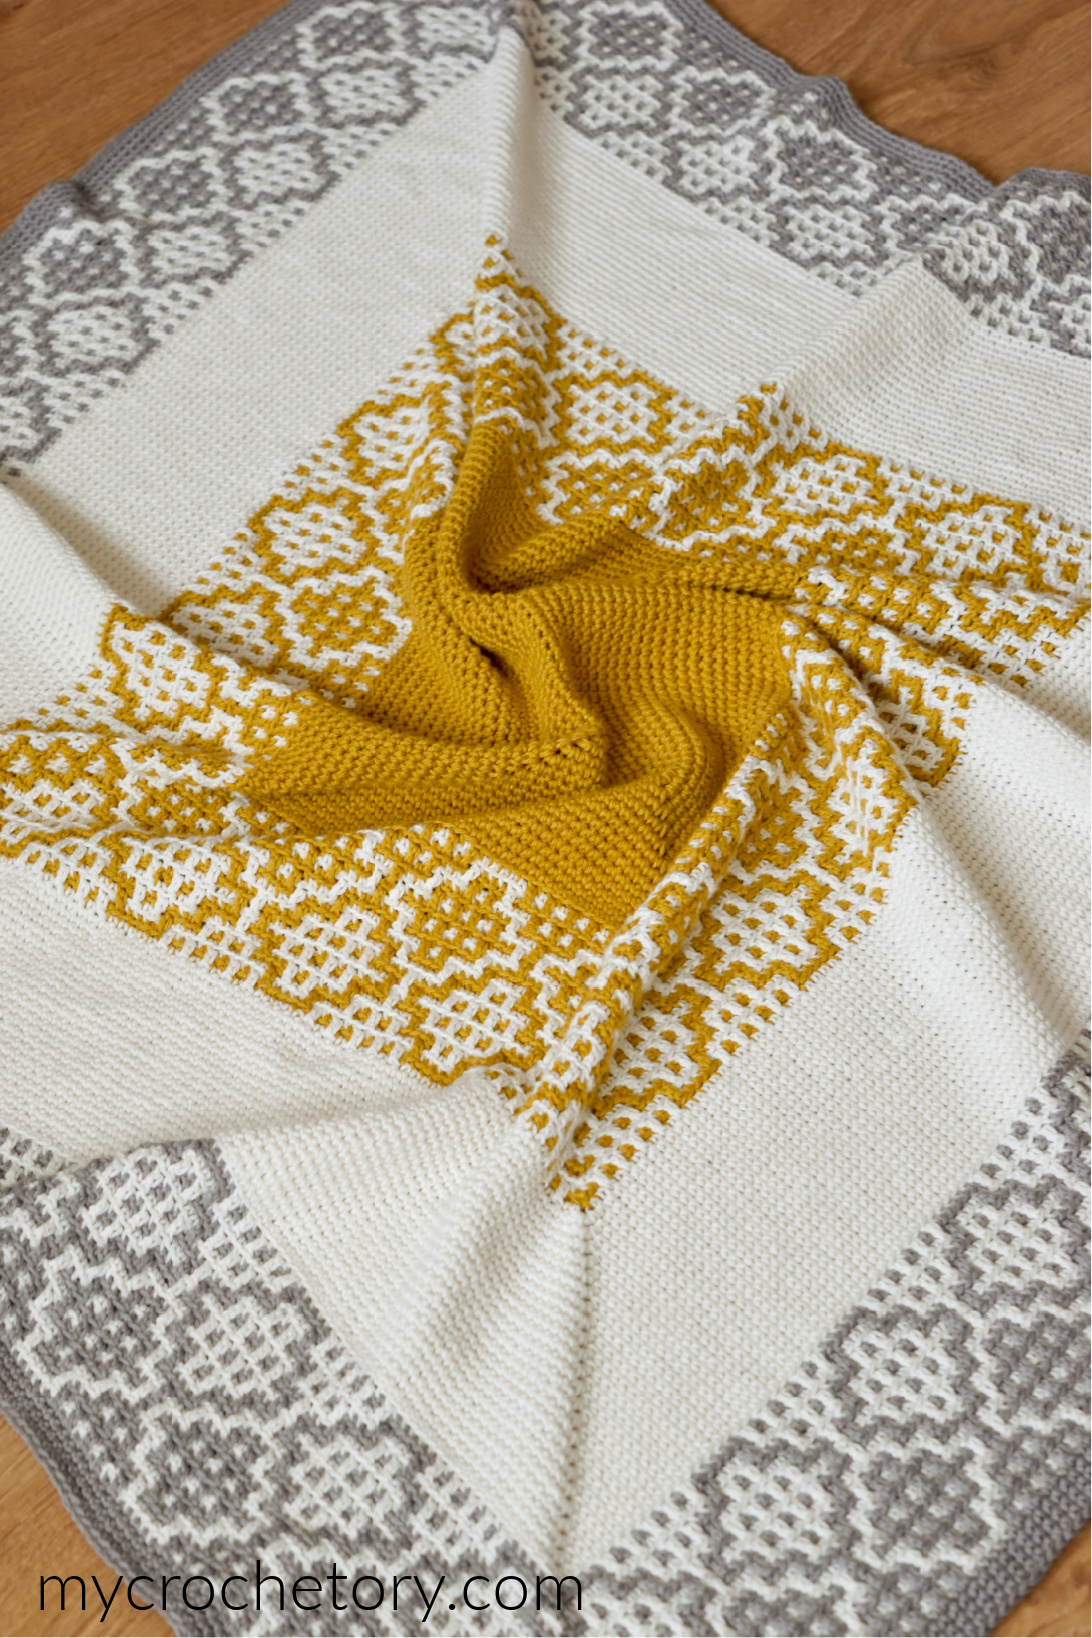

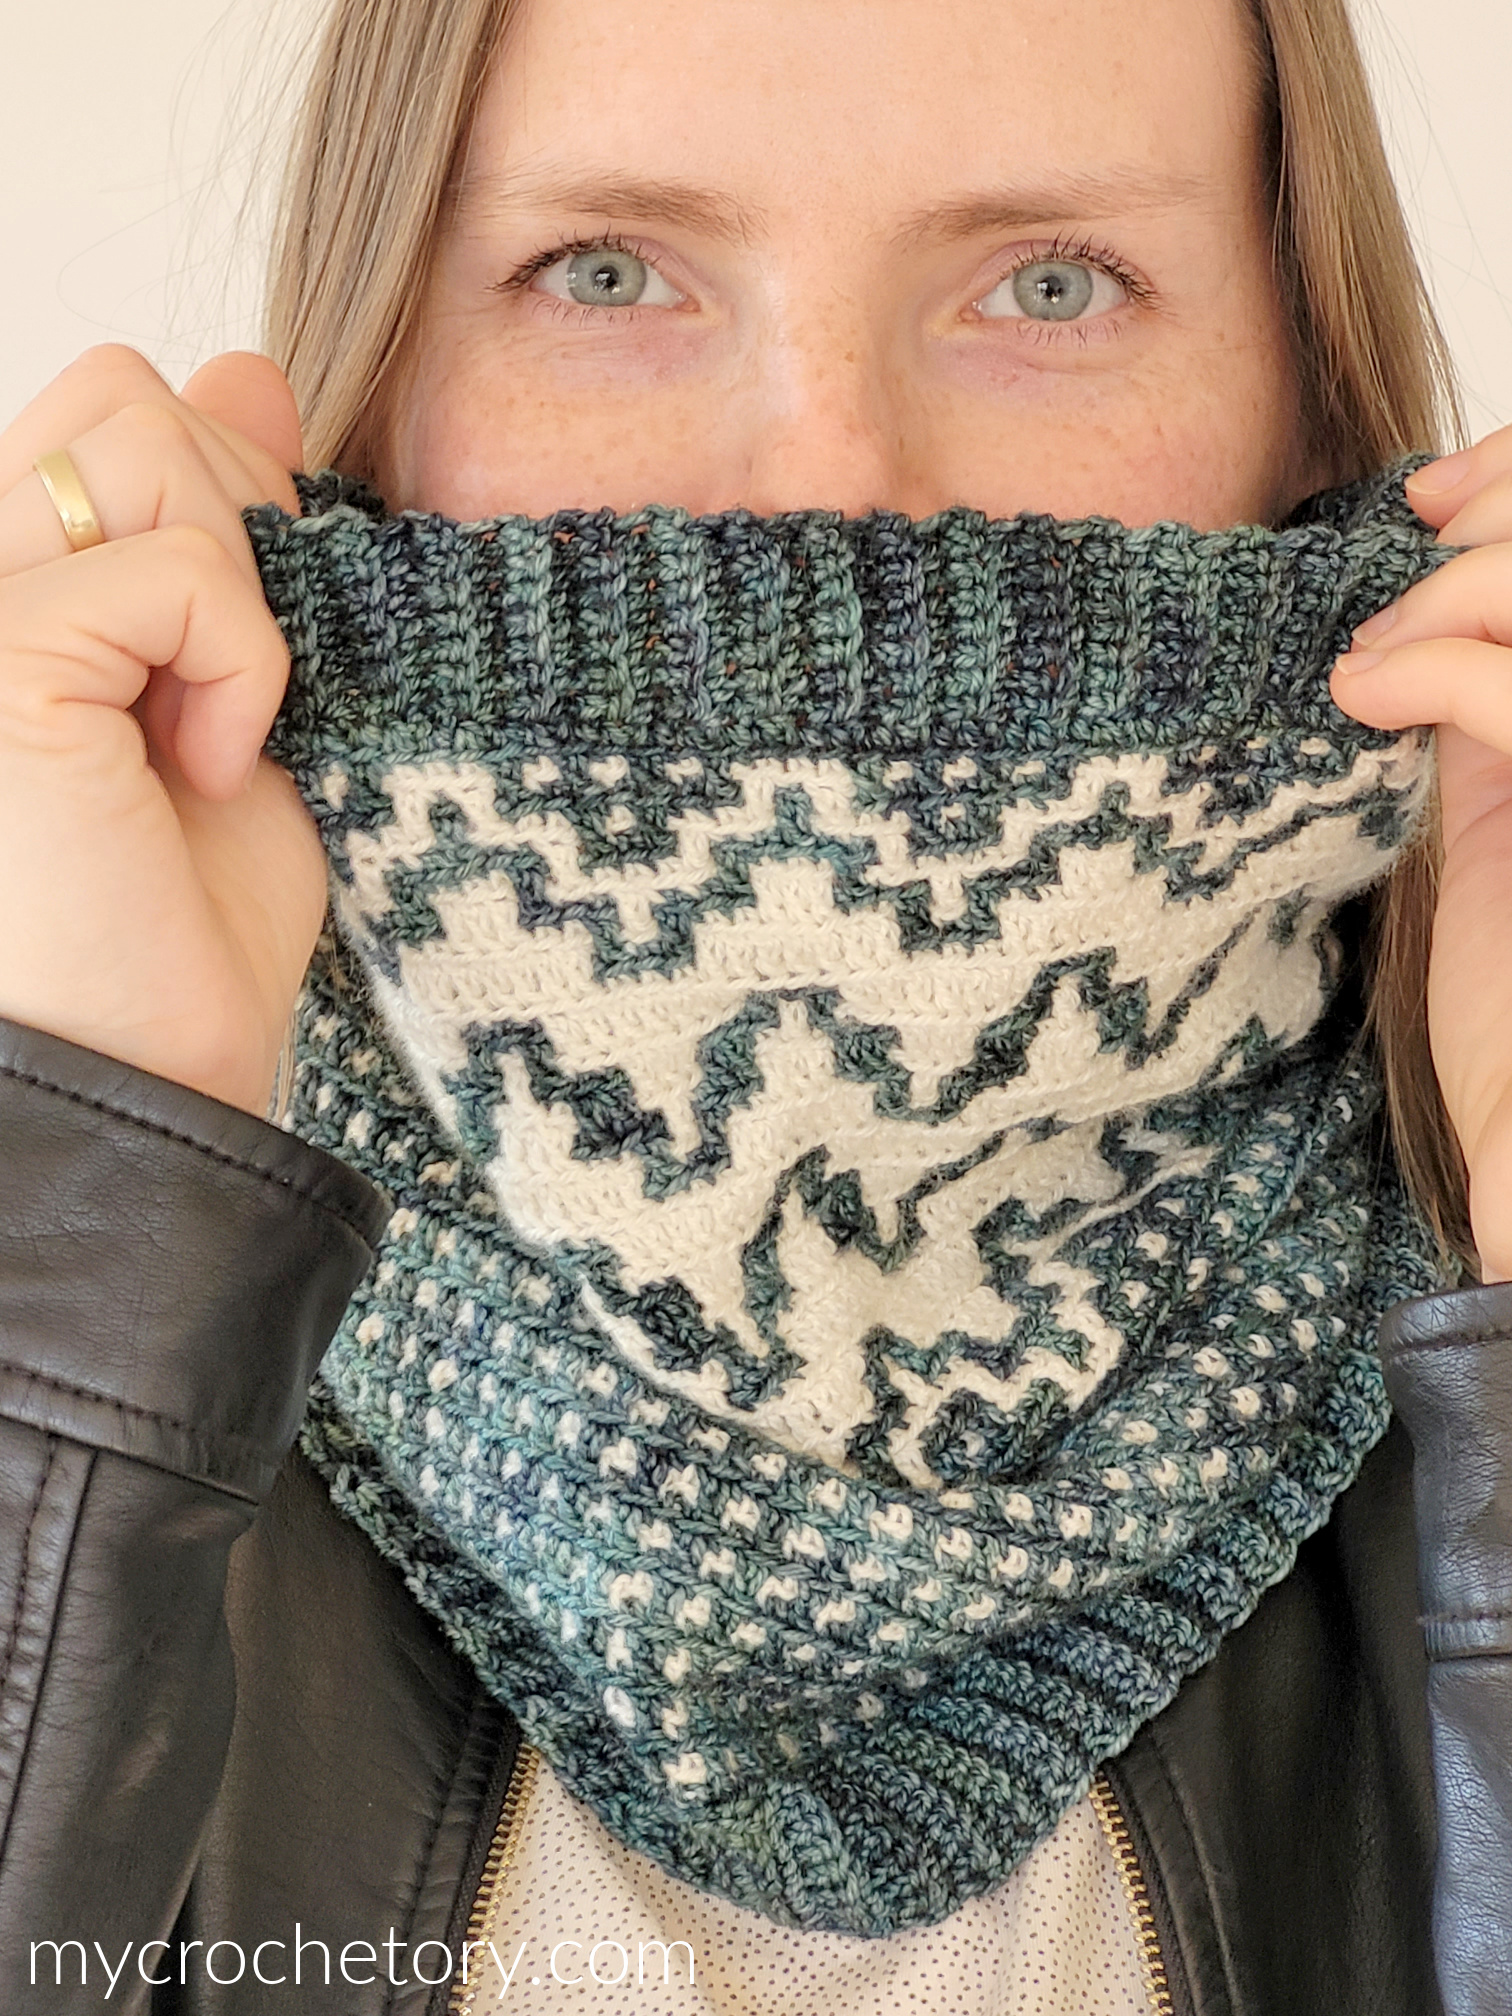
- Carina Mosaic Shawl. Where the Carina motif started, in a top-down triangle shawl.
- Carina Rectangle Blanket. The big sister of this pillow, worked from the center out in three colors.
- Thassos Mosaic Blanket. A black and white geometric blanket in mosaic crochet.
- Namari Mosaic Cowl. Mosaic in the round with ribbing at both edges.
Crochet square pillow FAQ
Can I use a different yarn?
Yes! A smooth yarn works best for mosaic, because the pattern shows clearly. A different yarn or hook changes the size, so check your gauge and pick a pillow pad that fits.
Do I have to cut the yarn after every round?
No. You can carry the color you’re not using along the inside and pick it up again when you need it, which saves you a lot of ends.
Which side is the right side of the front?
The front is worked in unturned rounds, so the right side always faces you.
Can I turn this pattern into a blanket?
Yes, and that’s exactly what the Carina Rectangle Blanket is. It uses the same idea, worked from the center out into a bigger rectangle.
BEAUTIFUL!!!!! You are very clever!!!
Will give this one a try one day when I have more free time!!
The photos and the graph of the mosaic section are very GOOD,
easy to follow when one haven’t time to read the written pattern!!
Keep up the great work Sylwia and keep the lovely new ideas coming. Cheers. Hilda
Thank you so much!