Updated: 26 January 2024 by Sylwia (MyCrochetory)
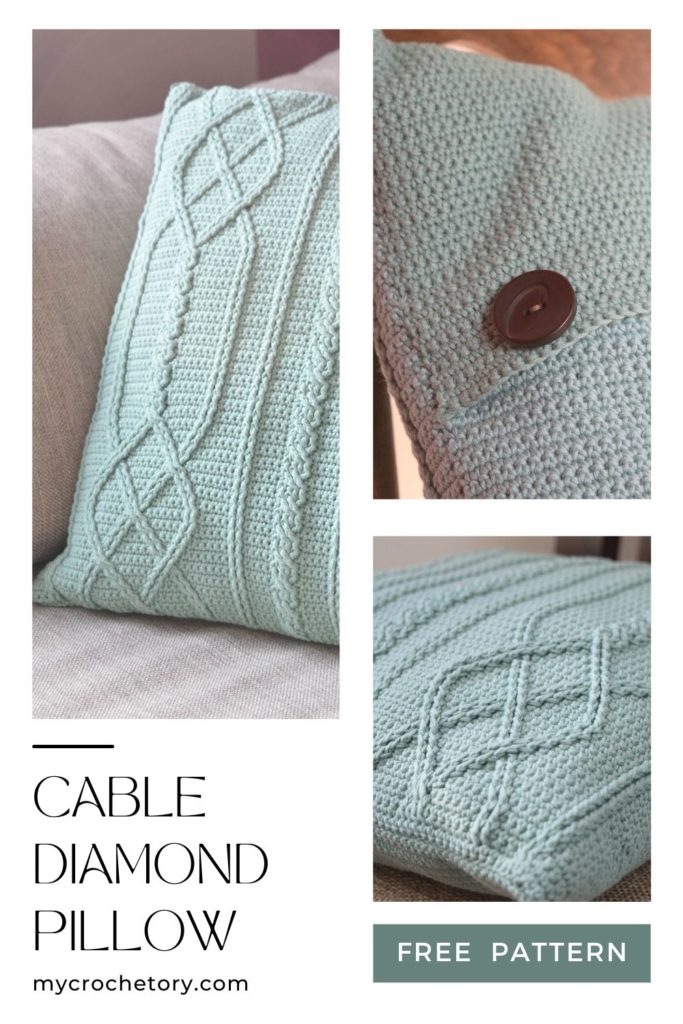
Learn how to crochet beautiful pillow covers with intricate cable designs. This blog post provides a free crochet pillow cover pattern for a Cable Diamond Pillow, along with step-by-step instructions and helpful tips.
Scroll down to see the Cable Diamond Crochet Pillow Cover Pattern free or you may choose to purchase the ad-free, printable PDF crochet pattern with stitch chart HERE on ETSY or HERE on Ravelry.
Join my Facebook Group and Official Ravelry Group where you can find necessary support, you can ask questions or share your finished projects.
You can also follow my Instagram, Facebook page and Pinterest.

If you’re a fan of crochet cables and looking to add a touch of elegance to your home decor, you’re in for a treat!
In this blog post, I’ll share an amazing crochet pillow cover pattern that features stunning cable designs.
Get ready to create a modern twist on the traditional cable texture and inject a burst of color into your living space.
This free pattern and tutorial will guide you through the process, making it a perfect project for intermediate crocheters. Let’s dive in and discover the beauty of crochet cables!

The Inspiration Behind Cable Diamond Crochet Pillow Cover Pattern
I have always admired the intricate look of knitted cables found in sweaters and home items.
Inspired by this classic technique, I set out to create a crochet design that would give a contemporary twist to the traditional cable texture.
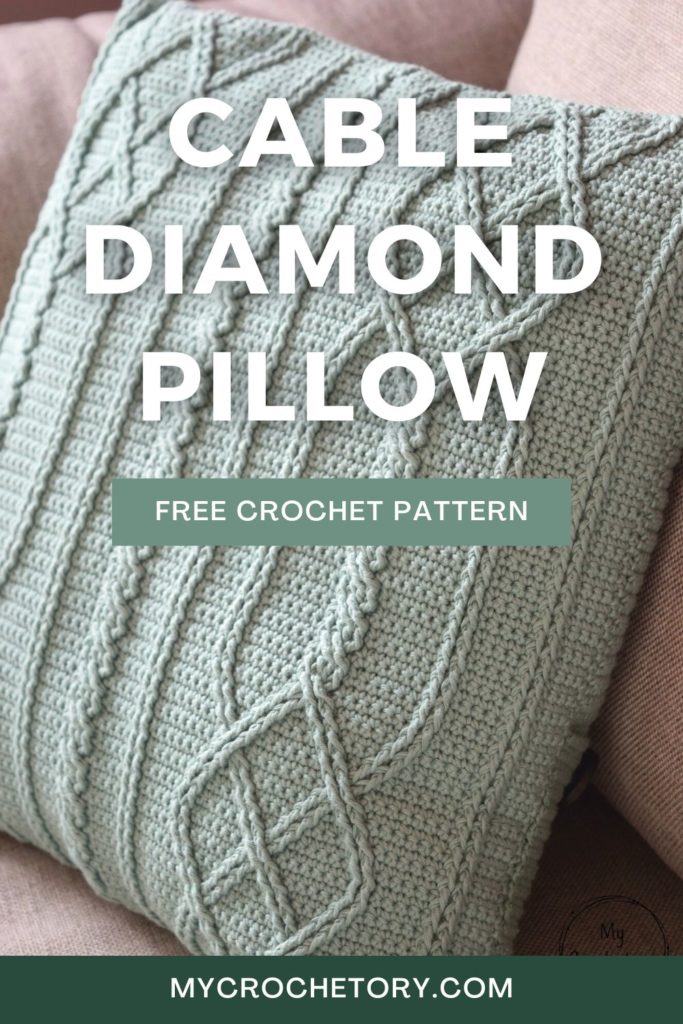
The Cable Diamond Pillow is the result of that creative journey, and I couldn’t be more thrilled with how it turned out!

Unleash Your Cable Crochet Skills with Cable Diamond Crochet Pillow Pattern
Crochet cables are the key to achieving the mesmerizing intertwined design of the Cable Diamond Pillow.
If you’re already familiar with cable techniques, you’re well-equipped to tackle this project.
Choose a shade of yarn that matches your color scheme and get ready to make your own stunning home decor piece.
Embrace the challenge, enjoy the process, and watch as your pillow covers become statement pieces in your home.

Free Crochet Pillow Cover Pattern
To make the process easier for you, I’ve prepared a free crochet pattern for the Cable Diamond Pillow cover.
The pattern includes written instructions as well as a chart to guide you through each step.
Don’t be intimidated by the seemingly complex design – with patience and attention to detail, you’ll be amazed at how quickly the cables build up.

Frequently Asked Questions about Cable Diamond Crochet Pillow Cover Pattern
Q1: Are crochet cables difficult to master?
A: While crochet cables may appear intricate, they are achievable with some practice. Start with simpler cable patterns and gradually build your skills. You’ll be amazed at what you can create!
Q2: Can I modify the pattern to fit different pillow sizes?
A: Absolutely! The pattern provides instructions for a specific pillow size, but you can easily adjust it by adding or subtracting stitches and rows. Remember to maintain the cable pattern’s multiple and symmetry for a balanced look.

Crochet cables are not only visually stunning but also incredibly rewarding to create.
Watching the cables come to life as you crochet is a thrilling experience that will inspire you to explore more cable projects in the future.
The Cable Diamond Pillow is just the beginning of your cable crochet journey!
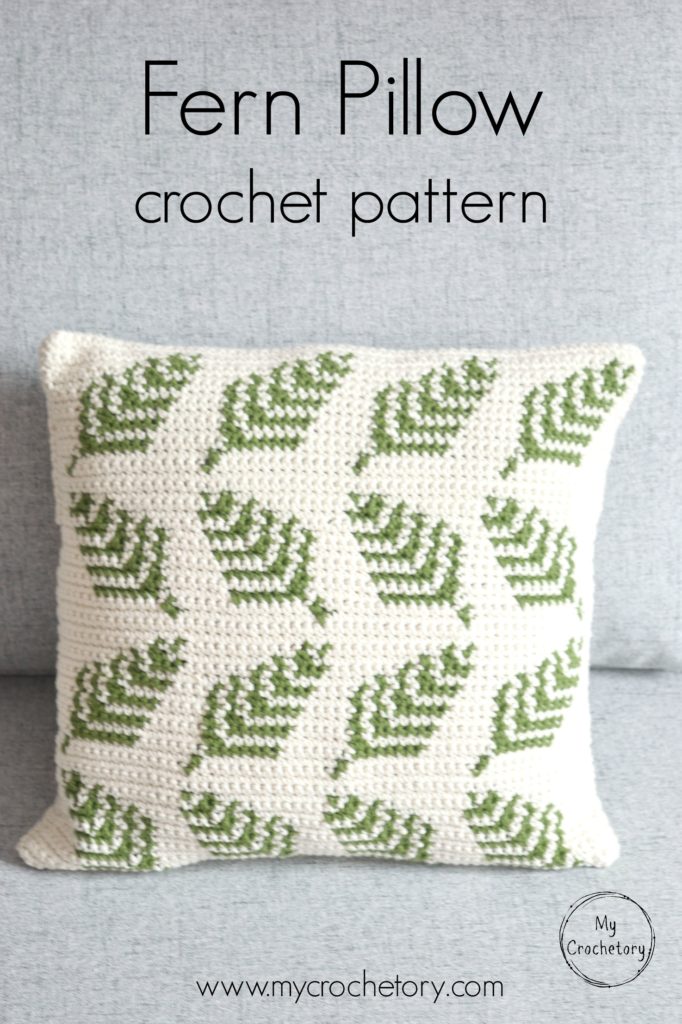
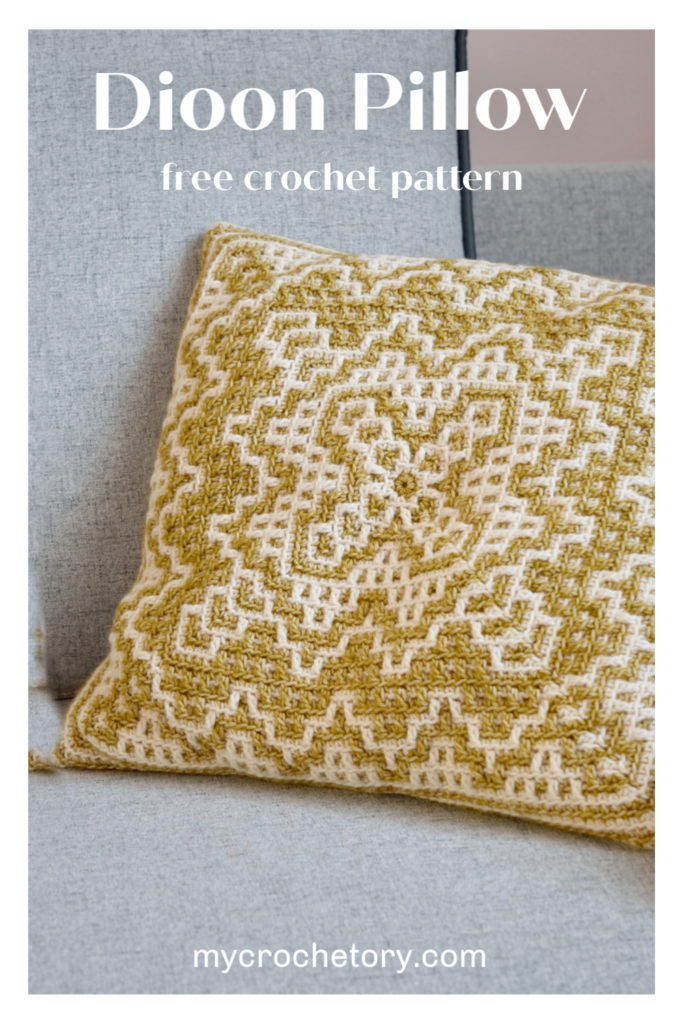
OTHER CROCHET PILLOW COVER PATTERNS YOU MIGHT LOVE

If you want to share your wips and finished Cable Diamond Pillow Cover pattern on social media, please, use hashtag #mycrochetory. I love to see your finished project!

CABLE DIAMOND CROCHET PILLOW COVER PATTERN FREE
- Purchase the ad-free, printable PDF with stitch chart here on ETSY or here on Ravelry.
- Add this pattern to your Ravelry Queue HERE.
- Pin it for later.
- Grab the MyCrochetory Pillow Pattern BUNDLE that includes 5 patterns for one low price HERE.
Copyright 2018 – 2024 MyCrochetory. All right reserved. This pattern is property of Sylwia Kawczyńska @MyCrochetory. Please DO NOT sell the pattern and claim this pattern as your own. The pattern is for personal use only and may not be translated or reproduced in another language. Please respect my rights, DO NOT share or publish this pattern anywhere without my permission.
The crochet pillow cover pattern you make following this pattern is yours you are free to sell it, as long as you credit MyCrochetory as original designer. For more information, please, read Terms Page.
Materials & Tools:
- Yarn 5 skeins of Drops Safran Green color 04, 100% cotton, 50g (1,8 oz) = 160m (175 yds).
- Hook size 3.5 mm. Adjust hook size if necessary to obtain correct gauge.
- 4 wooden buttons (Approx. 2.8 cm).
- Tapestry Needle (to weave and hide yarn ends).
- Scissors.
Level:
Intermediate – front post stitches
Finished size:
40 x 40 cm
Gauge:
21 sts and 24 rows = 10 cmx 10 cm using sc
Notes:
- Pillow cover is worked in 3 separate pieces: FRONT, BACK TOP and BACK BOTTOM. They are seamed together with a running stitch.
- This crochet cushion cover has four buttons to secure the envelope closure which allows for easy removal for laundering.
- All even rows are single crochet rows and worked in indicated stitches 1 row below.
- All FPdc(s) and FPtr(s) are worked in indicated stitches 2 rows below.
- The number of post stitches is always the same as the number of skipped st(s) so finally the stitch count is the same (82) in every row.
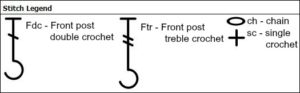
Stitches & Abbreviations (US terms):
st(s) – stitch(es)
yo – yarn over
FPdc – front post double crochet – Yo, insert hook from front to back to front around post of indicated stitch; yo and draw up loop; [ yo and draw through 2 loop on hook] twice. Skip stitch behind FPdc.
FPtr – front post treble crochet – Yo twice , insert hook from front to back to front around post of indicated stitch; yo and draw up loop; [ yo and draw through 2 loop on hook] 3 times. Skip stitch behind FPtr.
Fsc – foundation single crochet
CABLE DIAMOND PILLOW COVER PATTERN
FRONT

Click on a chart to zoom in.
Start with chain 83 or Fsc 82 and skip to Row 2.
Row 1: sc in 2nd ch from hook and in each ch across. Turn. (82 sc)
Row 2 and ALL EVEN ROWS: ch 1 (does not count as sc here and throughout), sc in each st(s) across. Turn. (82 sc)
Row 3: ch1 (does not count as sc here and throughout), sc in next 3 st(s), FPdc in next 2 st(s) two rows below, skip 2 st(s) behind FPdc(s) just made, sc 4, FPdc in next 2 st(s) two rows below, skip 2 st(s) behind FPdc(s) just made , sc 6, FPdc in next 4 st(s) two rows below, skip 4 st(s) behind FPdc(s) just made, sc 6, [FPdc in next 2 st(s) two rows below, skip 2 st(s) behind FPdc(s) just made , sc 4] 2 times, FPdc in next 4 st(s) two rows below, skip 4 st(s) behind FPdc(s) just made, [sc 4, FPdc in next 2 st(s) two rows below, skip 2 st(s) behind FPdc(s) just made] 2 times, sc 6, FPdc in next 4 st(s) two rows below, skip 4 st(s) behind FPdc(s) just made, sc 6, FPdc in next 2 st(s) two rows below, skip 2 st(s) behind FPdc(s) just made, sc 4, FPdc in next 2 st(s) two rows below , skip 2 st(s) behind FPdc(s) just made, sc 3. Turn.
Row 5: ch1, sc 3, FPdc in next 2 post st(s), skip 2 st(s) behind FPdc(s) just made, sc 4, FPdc in next 2 post st(s), skip 2 st(s) behind FPdc(s) just made, sc 6, skip 2 post st(s), FPtr in next 2 post st(s), working IN FRONT of post st(s) just made FPtr in 2 skipped post st(s), skip 4 st(s) behind FPdc(s) just made, sc 6, [FPdc in next 2 post st(s), skip 2 st(s) behind FPdc(s) just made, sc 4] 2 times, skip 2 post st(s), FPtr in next 2 post st(s), working IN FRONT of post st(s) just made FPtr in 2 skipped post st(s), skip 4 st(s) behind FPdc(s) just made , [sc 4, FPdc in next 2 post st(s), skip 2 st(s) behind FPdc(s) just made] 2 times, sc 6, skip 2 post st(s), FPtr in next 2 post st(s), working IN FRONT of post st(s) just made FPtr in 2 skipped post st(s), skip 4 st(s) behind FPdc(s) just made , sc 6, FPdc in next 2 post st(s), skip 2 st(s) behind FPdc(s) just made , sc 4, FPdc in next 2 post st(s), skip 2 st(s) behind FPdc(s) just made , sc 3. Turn.
From now on it will be just „skip sts” instead of „skip st(s) behind FPdc(s) just made”
Row 7: ch1, sc 3, FPdc in next 2 post st(s), skip 2 st(s), sc 5, FPdc in next 2 post st(s), skip 2 st(s), sc 4, FPdc in next 2 post st(s), skip 2 st(s), sc 2, FPdc in next 2 post st(s), skip 2 st(s), sc 4, FPdc in next 2 post st(s), skip 2 st(s), sc 5, FPdc in next 2 post st(s), skip 2 st(s), sc 4, FPdc in next 4 post st(s), skip 4 st(s), sc 4, FPdc in next 2 post st(s), skip 2 st(s), sc 5, FPdc in next 2 post st(s), skip 2 st(s), sc 4, FPdc in next 2 post st(s), skip 2 st(s), sc 2, FPdc in next 2 post st(s), skip 2 st(s), sc 4, FPdc in next 2 post st(s), skip 2 st(s), sc 5, FPdc in next 2 post st(s), skip 2 st(s), sc 3. Turn.
Row 9: ch1, sc 3, FPdc in next 2 post st(s), skip 2 st(s), sc 6, FPdc in next 2 post st(s), skip 2 st(s), sc 2, FPdc in next 2 post st(s), skip 2 st(s), sc 4, FPdc in next 2 post st(s), skip 2 st(s), sc 2, FPdc in next 2 post st(s), skip 2 st(s), sc 6, FPdc in next 2 post st(s), skip 2 st(s), sc 4, skip 2 post st(s), FPtr in next 2 post st(s), working IN FRONT of post st(s) just made FPtr in 2 skipped post st(s), skip 4 st(s), sc 4, FPdc in next 2 post st(s), skip 2 st(s), sc 6, FPdc in next 2 post st(s), skip 2 st(s), sc 2, FPdc in next 2 post st(s), skip 2 st(s), sc 4, FPdc in next 2 post st(s), skip 2 st(s), sc 2, FPdc in next 2 post st(s), skip 2 st(s), sc 6, FPdc in next 2 post st(s), skip 2 st(s), sc 3. Turn.
Row 11: ch1, sc 3, FPdc in next 2 post st(s), skip 2 st(s), sc 7, FPdc in next 4 post st(s), skip 4 st(s), sc 6, FPdc in next 4 post st(s), skip 4 st(s), sc 7, FPdc in next 2 post st(s), skip 2 st(s), sc 4, FPdc in next 4 post st(s), skip 4 st(s), sc 4, FPdc in next 2 post st(s), skip 2 st(s), sc 7, FPdc in next 4 post st(s), skip 4 st(s), sc 6, FPdc in next 4 post st(s), skip 4 st(s), sc 7, FPdc in next 2 post st(s), skip 2 st(s), sc 3. Turn.
Row 13: ch1, sc 3, FPdc in next 2 post st(s), skip 2 st(s), sc 7, skip 2 post st(s), FPtr in next 2 post st(s), working BEHIND post st(s) just made, FPtr in 2 skipped post st(s), skip 4 st(s), sc 6, skip 2 post st(s), FPtr in next 2 post st(s), working IN FRONT of post st(s) just made FPtr in 2 skipped post st(s), skip 4 st(s), sc 7, FPdc in next 2 post st(s), skip 2 st(s), sc 4, skip 2 post st(s), FPtr in next 2 post st(s), working IN FRONT of post st(s) just made, FPtr in 2 skipped post st(s), skip 4 st(s), sc 4, FPdc in next 2 post st(s), skip 2 st(s), sc 7, skip 2 post st(s), FPtr in next 2 post st(s), working BEHIND post st(s) just made FPtr in 2 skipped post st(s), skip 4 st(s), sc 6, skip 2 post st(s), FPtr in next 2 post st(s), working IN FRONT of post st(s) just made FPtr in 2 skipped post st(s), skip 4 st(s), sc 7, FPdc in next 2 post st(s), skip 2 st(s), sc 3. Turn.
Row 15: ch1, sc 3, FPdc in next 2 post st(s), skip 2 st(s), sc 6, FPdc in next 2 post st(s), skip 2 st(s), sc 2, FPdc in next 2 post st(s), skip 2 st(s), sc 4, FPdc in next 2 post st(s), skip 2 st(s), sc 2, FPdc in next 2 post st(s), skip 2 st(s), sc 6, FPdc in next 2 post st(s), skip 2 st(s), sc 4, FPdc in next 4 post st(s), skip 4 st(s), sc 4, FPdc in next 2 post st(s), skip 2 st(s), sc 6, FPdc in next 2 post st(s), skip 2 st(s), sc 2, FPdc in next 2 post st(s), skip 2 st(s), sc 4, FPdc in next 2 post st(s), skip 2 st(s), sc 2, FPdc in next 2 post st(s), skip 2 st(s), sc 6, FPdc in next 2 post st(s), skip 2 st(s), sc 3. Turn.
Row 17: ch1, sc 3, FPdc in next 2 post st(s), skip 2 st(s), sc 5, FPdc in next 2 post st(s), skip 2 st(s), sc 4, FPdc in next 2 post st(s), skip 2 st(s), sc 2, FPdc in next 2 post st(s), skip 2 st(s), sc 4, FPdc in next 2 post st(s), skip 2 st(s), sc 5, FPdc in next 2 post st(s), skip 2 st(s), sc 4, skip 2 post st(s), FPtr in next 2 post st(s), working IN FRONT of post st(s) just made, FPtr in 2 skipped post st(s), skip 4 st(s), sc 4, FPdc in next 2 post st(s), skip 2 st(s), sc 5, FPdc in next 2 post st(s), skip 2 st(s), sc 4, FPdc in next 2 post st(s), skip 2 st(s), sc 2, FPdc in next 2 post st(s), skip 2 st(s), sc 4, FPdc in next 2 post st(s), skip 2 st(s), sc 5, FPdc in next 2 post st(s), skip 2 st(s), sc 3. Turn.
Row 19: ch1, sc 3, FPdc in next 2 post st(s), skip 2 st(s), sc 4, FPdc in next 2 post st(s), skip 2 st(s), sc 6, FPdc in next 4 post st(s), skip 4 st(s), sc 6, FPdc in next 2 post st(s), skip 2 st(s), sc 4, FPdc in next 2 post st(s), skip 2 st(s), sc 4, FPdc in next 4 post st(s), skip 4 st(s), sc 4, FPdc in next 2 post st(s), skip 2 st(s), sc 4, FPdc in next 2 post st(s), skip 2 st(s), sc 6, FPdc in next 4 post st(s), skip 4 st(s), sc 6, FPdc in next 2 post st(s), skip 2 st(s), sc 4, FPdc in next 2 post st(s), skip 2 st(s), sc 3. Turn.
Row 21: Repeat Row 5
Row 23: Repeat Row 7
Row 25: Repeat Row 9
Row 27: Repeat Row 11
Row 29: ch1, sc 3, FPdc in next 2 post st(s), skip 2 st(s), sc 7, skip 2 post st(s), FPtr in next 2 post st(s), working IN FRONT of post st(s) just made, FPtr in 2 skipped post st(s), skip 4 st(s), sc 6, skip 2 post st(s), FPtr in next 2 post st(s), working BEHIND post st(s) just made FPtr in 2 skipped post st(s), skip 4 st(s), sc 7, FPdc in next 2 post st(s), skip 2 st(s), sc 4, skip 2 post st(s), FPtr in next 2 post st(s), working IN FRONT OF post st(s) just made, FPtr in 2 skipped post st(s), skip 4 st(s), sc 4, FPdc in next 2 post st(s), skip 2 st(s), sc 7, skip 2 post st(s), FPtr in next 2 post st(s), working IN FRONT of post st(s) just made FPtr in 2 skipped post st(s), skip 4 st(s), sc 6, skip 2 post st(s), FPtr in next 2 post st(s), working BEHIND of post st(s) just made FPtr in 2 skipped post st(s), skip 4 st(s), sc 7, FPdc in next 2 post st(s), skip 2 st(s), sc 3. Turn.

Row 31: Repeat Row 15
Row 33: Repeat Row 17
Row 35: Repeat Row 19
Row 37: Repeat Row 5
Row 39: Repeat Row 19
Row 41: Repeat Row 5
Row 43: Repeat Row 19
Row 45: Repeat Row 5
Row 47: Repeat Row 19
Row 49: Repeat Row 5
Row 51: Repeat Row 19
Row 53: Repeat Row 5
Row 55: Repeat Row 19
Row 57: Repeat Row 5
Row 59: Repeat Row 19
Row 61: Repeat Row 5
Row 63: Repeat Row 7
Row 65: Repeat Row 9
Row 67: Repeat Row 11
Row 69: Repeat Row 13
Row 71: Repeat Row 15
Row 73: Repeat Row 17
Row 75: Repeat Row 19
Row 77: Repeat Row 5
Row 79: Repeat Row 7
Row 81: Repeat Row 9
Row 83: Repeat Row 11
Row 85: Repeat Row 13
Row 87: Repeat Row 15
Row 89: Repeat Row 17
Row 91: Repeat Row 19
Row 93: Repeat Row 5
Row 95: Repeat Row 19
Row 96: ch 1, sc in each st(s) across.
Fasten off yarn and weave in ends.

BACK BOTTOM
Ch83
Row1: sc in 2nd ch from hook and in each ch across. Turn. (82sc)
Row 2 – Row 68: ch1 (does not count as sc here and throughout), sc in each st(s) across. Turn. (82sc)
Fasten off yarn and weave in ends.
BACK TOP
Ch83
Row1: sc in 2nd ch from hook and in each ch across. Turn. (82sc)
Row 2 – Row 37: ch1 (does not count as sc here and throughout), sc in each st(s) across. Turn. (82sc)
Row 38: ch1, sc in next 8 st(s), ch4, skip 4 st(s), sc in next 17 st(s), ch4, skip 4 st(s), sc in next 16 st(s), ch4, skip 4 st(s), sc in next 17 st(s), ch4, skip 4 sts(s), sc in next 8 st(s). Turn. (82sc)
Row 39 – Row 42: ch1, sc in each st(s) across. Turn. (82sc)
Fasten off yarn and weave in ends.
If you have any suggestions or have detected any mistakes, please feel free to email me at mycrochetory@gmail.com

ASSEMBLY
- Block all the parts of your pillow to give them shape.
- Sew all parts together. Place all three pieces (FRONT, BACK BOTTOM, BACK TOP) on top of each other right sides facing. The BACK TOP (with buttonholes) should be in the centre. Mark corners and using a running stitch sew all pieces around. Next, turn inside out and sew one button beneath each buttonhole on BACK BOTTOM piece. Lastly, insert pillow pad.


I’d love to hear if you make your Cable Diamond Pillow. Don’t forget to share your finished projects with me on Facebook or Instragram and tag me @mycrochetory!
If you have any suggestions or have detected any mistakes, please feel free to email me at mycrochetory@gmail.com

Be sure to check out some of my other free crochet pattern here.
It’s beautiful! I feel like I need more crocheted/knitted pillows in my life:) What do you stuff them with? Or you buy a blank pillow and calculate the pattern to fit it?
Thank you! Yes, exactly. I buy a blank pillow (for example from IKEA). Then make chain that long to fit the pillow and design all pattern.
beautiful
Hi, let me start by saying this pattern is gorgeous! I do have a question though. How big was your finished pillow? I’m trying to make them and I think mine are getting too large.
Hi, thanks for your kind word! The finished pillow should be 40cm x 40cm size. Please check the gauge. It could be your crochet tension. Probably you need to crochet little tighter.
I do have another question. You say in the beginning that you work the even rows one row bellow and the FPcrochet two rows bellow. Does this mean that you work row 4 into row 3 (the regular row) or in row 2?
When you work Row 3 every post stitches should be worked in indicated stitches 2 rows below (this means in row 1) and every single crochet in indicated stitches 1 row below (this means in row 2). For Row 4 every stitches (single crochet stitches) should be worked in indicated stitches 1 row below (Row 3). Is it helpful? Please check the chart for this pattern. Maybe it helps you easier understand the written instruction.
Sorry but i think there is something wrong in the pattern or i didnt get it right.
In row 7, there are 2 skipped stitches that were not replaced, exactly after the second 5 sc, and this happened again at row9, which finally makes the row stitch’s number less by 2.
Did i got it wrong?
I really liked your pattern and i am so excited, i am waiting for your reply :(❤️
Hi, I have just get through the pattern and for me everything is fine. Please, send me maybe a picture of your pillow and I will look closer at your work.
I am having the same issue with row 7. I have tried this row three times now and doing it exactly as written. The two skipped stitches in the pattern should follow a FPDC shouldn’t it????
Yes, I can see now! I checked the pattern one more time and, indeed, there were missing 2 FPdc(s) in Row 7 and row 9. I have just updated the pattern.
Sorry! We are only human 🙂
If I was wanting to make an afghan with this pattern what chain amount would you recommend me to do?
It depends on what yarn you are going to use and how big the afghan you want to be.
How would I increase to make it to make it approximately 20 inches?
For 20in pillow this pattern haven’t been tested unfortunately.
Hi .. love your pattern . I have altered it slightly to create a centre piece in my afghan which is 200 stitches wide . It should look amazing when I’ve finished
Thanks! Please show be when you finished 🙂
I’m in love with this pattern. In my mind I can see an afghan made with this pattern. It will just take me some time for figure number of chains for the repeats across and how many repeats of the pattern for length.
Hi, this looks absolutely amazing! I can’t wait to try it! Thank you for your hard work xx
Hello , thank you for the pattern. Please can i make a video on arabic langage with your pattern in my youtube channel? Of course i will write in the description that it’s yours. Waiting for your answer. Thank you again.
Thanks for asking but I don’t allow anybody to make any YT tutorials based on my patterns.
Hi from Australia. LOVE your beautiful aqua Cable Diamond cushion! Will put it on my to-do-list! You have done very well learning crocheting and that GOOD in a very short time! I have been crocheting for well over 54 years, on and off. Now I am retired, I have taken it up again NON_STOP!! Crocheting is not only very relaxing but VERY ADDICTIVE!!!
All the best in your new projects. Thank you again. Hilda
Hello, Love this pillow design. Can you tell me the size of the pillow you used stuff this pillow pattern? Love all your patterns and thank you. Anne
Hi. I used a 40cm x 40 cm pillow.
Thank you so much for this pattern, I absolutely love it and have just finished my 3rd cushion cover (one for me and one each for a couple of friends). I found that doing the bottom back piece directly into the front and then into the top back piece is a lot easier. Basically just one long piece that I then just sew/crochet the sides together.
Lovely pattern ! Do you have a video tutorial for this design ?
Thank you.
I don’t have a video tutorial for this pattern yet.