
Updated: 22 October 2026 by Sylwia (MyCrochetory)
I couldn’t stop at one mosaic project, and this mosaic crochet pillow pattern is the proof! First came the Duende Hat, then the Mosaic Cropped Sweater, and then I wanted mosaic in my home too. So I grabbed two colors, made a tiny magic ring and watched the design grow round by round.
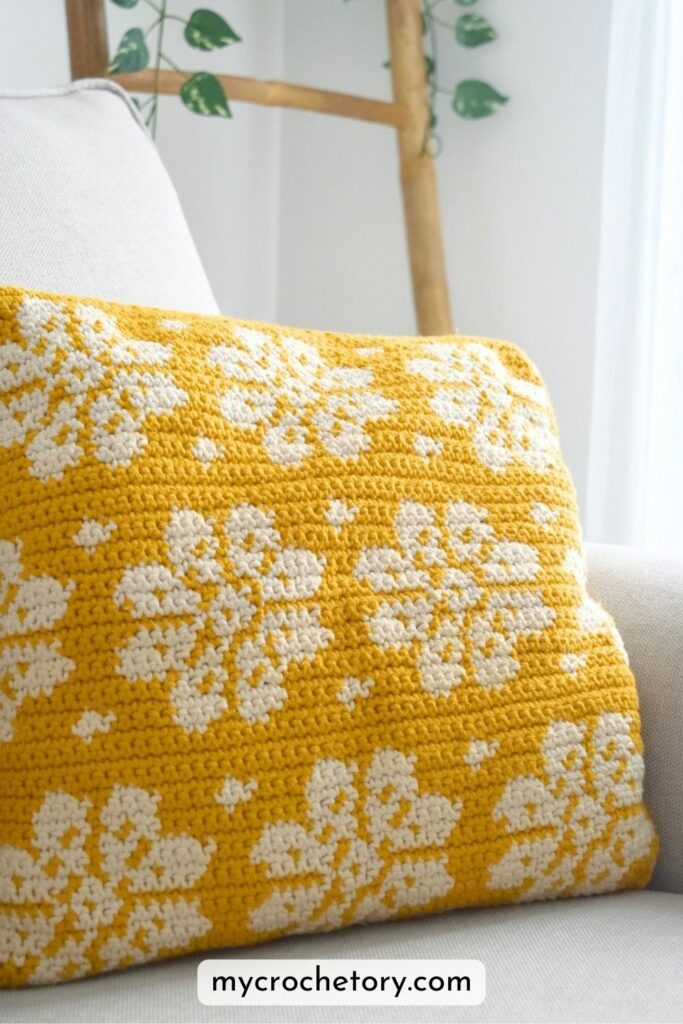
The result? Dioon, a square cushion cover with a bold mosaic front and a simple back with buttons. Thanks to the back loop stitches, the front looks almost knitted. It fits a 16-inch pillow insert, and the buttons let you take the pillow out whenever you need to.
Mosaic can look scary at first, I know. That’s why I don’t just give you the pattern here. I also show you how the front grows from the center and how the three pieces come together at the end. And for the first rounds, there’s a step-by-step photo tutorial that shows you every move.
Ready to make your own? The free pattern is below, so scroll down and grab your hook! Prefer an ad-free printable PDF? You can get it on Etsy or Ravelry.
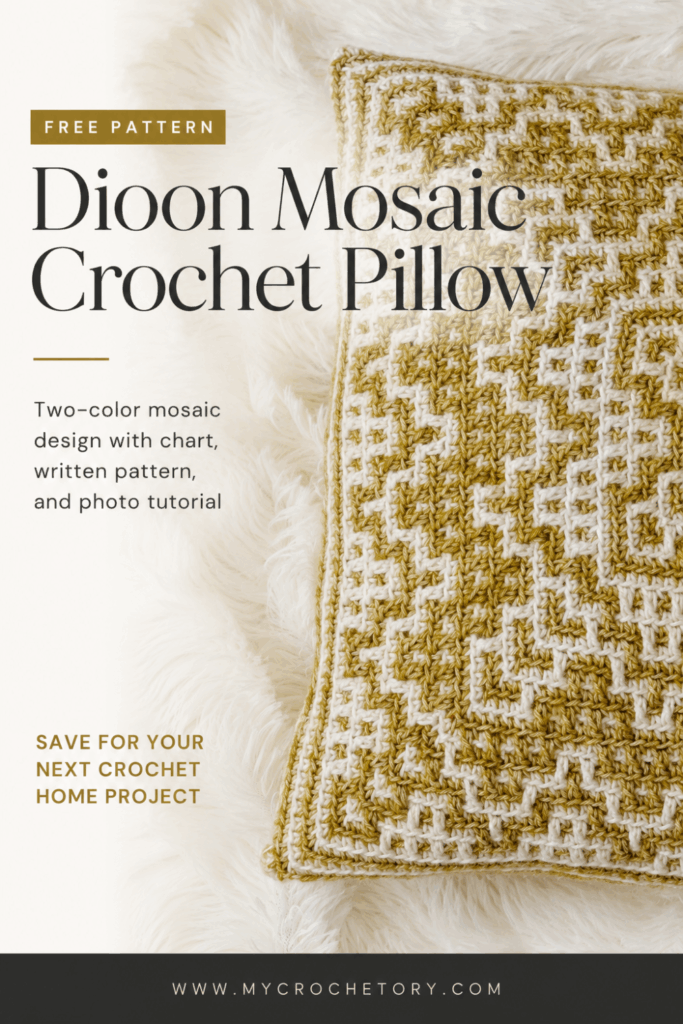
Love it but can’t start today? Save this pin to your Pinterest board, so your next pillow project is easy to find.
How the front of this mosaic crochet pillow works
The front of this mosaic crochet pillow starts with just 8 little stitches, and then it grows and grows. You make them in a magic ring, and from there, every round adds stitches at the 4 corners. So your tiny square gets a little wider every time.
My tip: place 4 stitch markers in Round 2 and move them up as you go, and you’ll never lose a corner.

Now comes the exciting part, because you change color after every single round. In each round, you skip a few stitches and chain one more than you skip. Then two rounds later, you fill those gaps with a back loop mosaic double crochet, worked in front of the chains.
That’s where the design comes from. First a small cross pops up in the center, and then stepped frames start to grow around it.
You keep going like this until Round 28, where the mosaic part ends. After that, you only work 4 easy rounds of back loop single crochet, and they give your pillow its thin striped border.

One more thing makes it all quicker. Every round ends with two slip stitches, and in the last one, you already pick up your next color. So there’s no need to cut the yarn! Just leave the other color inside and grab it again later, and you’ll have only a few ends to weave in.
How to put your crochet pillow cover together
Your crochet pillow cover is made of three pieces: the mosaic front and two plain back pieces that overlap. The back pieces are simple rows of single crochet, so they go fast after all those mosaic rounds. The bigger one is the back bottom. The smaller one, the back top, gets 4 buttonholes near its edge.
Once all three pieces are done, block them first. Then stack them with the right sides facing each other, and put the back top, the one with the buttonholes, in the middle. Sew all around the edge with a running stitch, and turn the cover right side out. You can see all three pieces laid flat in my photos, so it’s easy to check you’ve got them right.

Last step: sew a button under each buttonhole on the back bottom. I used 4 wooden buttons, about 1.1 inches wide. Now slip in your pillow insert, button it up, and your pillow is ready for the sofa!
Which yarn to use for your mosaic crochet pillow
For your mosaic crochet pillow, pick a sport weight yarn in two colors that really stand out from each other. I used Scheepjes Stone Washed, a soft cotton and acrylic blend, with 1 skein of Enstatite (832) and 3 skeins of Moon Stone (801).
Why so much more of the cream? Because the whole back is cream too, so you need three skeins of it and only one of the mustard.

Any other sport weight yarn works as well, as long as you match the gauge. After Round 8, your front should be about 4 inches wide, so measure it before you go on. And when you choose your colors, go for strong contrast. The bigger the difference, the clearer your cross and frames will be.
Dioon pillow FAQ
Is this mosaic crochet pillow pattern good for beginners? It’s an intermediate pattern, so it helps if you already know the basic crochet stitches and have worked in rounds before. If it’s your first mosaic project, take it slow and follow the photo tutorial for Rounds 1 to 10. After that, the rounds start to feel familiar.
Can I make the pillow bigger or smaller? The pattern is made for one size only, a 16-inch pillow insert. I don’t give instructions for other sizes.
Can I use a zipper instead of buttons? You can! One reader put a zipper in the seam and made the front and back the same, and she loved the result. The pattern doesn’t include instructions for that, so it’s a good option if you’re happy to change things a little.

Can the back be a different color? Yes, the back can be any color you like. Just remember to get enough of that yarn.
Is there a mosaic chart? Yes, the chart is right here in the post, just above Round 1, so you can follow the chart or the written rounds.
Can I sell the pillows I make from this pattern? Yes, the pillow you make is yours to sell. Please credit MyCrochetory as the designer. You just can’t sell or share the pattern itself.
I’d love to see your Dioon, so please share your pillow on social media with the hashtag #mycrochetory.
Stuck on a round? Ask me in my Facebook Group or my Ravelry Group. You can also find me on Instagram, Facebook and Pinterest.
Dioon mosaic crochet pillow free pattern
- Purchase the ad-free, printable PDF here on ETSY or here on Ravelry.
- Add this pattern to your Ravelry Queue HERE.
- Pin it for later.
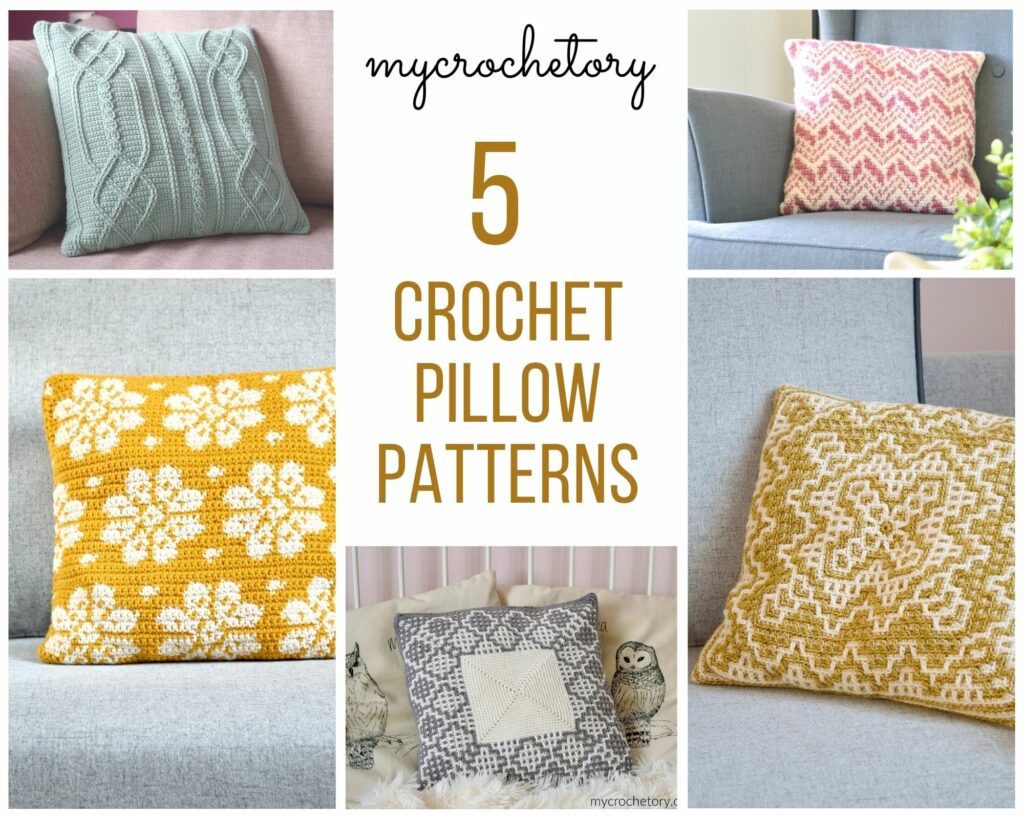
- Grab the MyCrochetory Pillow Pattern BUNDLE that includes 5 patterns for one low price HERE.
Copyright 2020 – 2026 MyCrochetory. All rights reserved. This pattern is property of Sylwia Kawczyńska @MyCrochetory. Please DO NOT sell the pattern and claim this pattern as your own. The pattern is for personal use only and may not be translated or reproduced in another language. Please respect my rights, DO NOT share or publish this pattern anywhere without my permission.
The mosaic crochet pillow you make following this pattern is yours, and you are free to sell it, as long as you credit MyCrochetory as original designer. For more information, please, read Terms Page.
Materials & tools
- Yarn Scheepjes
Stone Washed 50g = 130m, 78% Cotton, 22% Acrylic, in 2 different colours:
Yarn A: Enstatite (832) – 1 skein
Yarn B: Moon Stone (801) – 3 skeins.
- Hook size 3.5mm.
Adjust hook size if necessary to obtain
correct gauge, - Tapestry needle (to weave and hide
yarn ends), - Scissors,
- 4 buttons (approx. 2.8 cm / 1.1″)
- Stitch markers.
Level
Intermediate
Sizes
40cm x 40cm (15.75″ x 15.75″). Fits a 16-inch (40 cm) pillow insert.
Gauge after blocking
Front: after Round 8, the pillow is 10cm (4″) wide.
Back: 16 sts and 16 rows to 10 x 10cm (4 x 4″) using 3.5mm hook with single crochet.
If necessary, adjust hook size to obtain the correct gauge.
Before you measure, please take the time to block your swatch in the same manner that you will block your pillow.

General notes
- The pattern uses US crochet terminology.
- The FRONT of the pillow is worked in unturned rounds from the center out.
- Pillow cover is worked in 3 separate pieces: FRONT, BACK TOP AND BACK BOTTOM. They are seamed together. The pillow cover does have a buttoned opening on the back to take the pillow pad in or out.
- In FRONT, each round builds on the next, and each round starts in the corner chain space.
- Stitch marker placement: When instructed to place your marker, place on the last st worked unless otherwise instructed. It should lie on a stitch, not between stitches.
- STITCHES: When in the instructions you have a stitch followed by a number, eg sc14, this means you have to work 1sc stitch into each of the next 14 sts. When in the instructions you have a number followed by a stitch, eg 2sc, this means you have to work 2 sc stitches into the next (same) stitch.
- Instructions in square brackets […] are worked as many times as indicated.
- Instructions in *…* are worked as many times as indicated.
Mosaic Pattern Notes
- You can either follow the chart or written instructions.
- Color is changed after every one round.
- You can avoid weaving in all those ends by
not cutting the yarn when you finish a round. Simply carry the other color
along the inside and pick it back up with your hook when you need to use it
again.
How to read the Mosaic Chart
- Chart is read from bottom to top and each row of squares represents a quarter of a round.
- All rounds are read from right to left.
- Each square of the chart represents 1 stitch or 1 skipped stitch.
- Whenever you see a square of color dedicated to that round, work single crochet.
- Whenever you see a square of different color in that round, skip that stitch (make chain). To prevent puckering, make the same number of chain as the number of skipped sts plus ch1. For example, for 1 skipped st – make ch2, for 2 skipped sts – make ch3, for 3 skipped sts – make ch4, etc.
- Pay special attention to number of skipped stitches.
- BLmosaicdc will be worked in these skipped sts from two rounds below. Remember, BLmosaicdc are always worked in front of chains of previous round.

Stitches & Abbreviations (US terms)
st(s) – stitch(es)
BOR – beginning of the row/round
BLsc – back loop only single crochet
BLdc – back loop only double crochet
slst – slip stitch
BLslst – back loop only slip stitch
yo – yarn over
BLmosaicdc (back loop only mosaic double crochet) – work regular BLdc in unworked/skipped st of the same color two rounds below in front of chain space (in front of work). These chains will stay behind mosaicdc and will stay unworked.
BORcorner – BLsc1 in same ch, ch2, RPM, BLsc1 in next ch.
Corner – BLsc1 in next ch, ch2, RPM, BLsc1 in next ch.
Endslst2 – slst1 in next st, BLslst1 in next ch
M – marker
PM – place marker
RPM – reposition marker
sp – space
sk – skip
beg – beginning
prev – previous
RS – right side
WS – wrong side

PATTERN
FRONT
With 3.5mm hook
Start with a magic ring or with 5ch and slst in the first st to close the round.

Round 1 (with Yarn A): ch1 (doesn’t count as a stitch here and throughout), 8sc in ring, slst1 in first st to close the round. Change to Yarn B in slst.
Round 2 (with Yarn B): ch1, (BLsc1, ch2, PM, BLsc1) in same st, BLsc1, *(BLsc1, ch2, PM, BLsc1) in next st, BLsc1* rep 3 times in total, Endslst2. Change to Yarn A in last BLslst.
Round 3 (with Yarn A): ch1, BORcorner, ch2, sk 1st, BLsc1, ch2, sk 1st, *Corner, ch2, sk 1st, BLsc1, ch2, sk 1st* rep 3 times in total, Endslst2. Change to Yarn B in last BLslst.
Round 4 (with Yarn B): ch1, BORcorner, BLsc1, BLmosaicdc1 (in unworked st of same color two rounds below, in front of chains – here and throughout), ch2, sk 1st, BLmosaicdc1, BLsc1, *Corner, BLsc1, BLmosaicdc1, ch2, sk 1st, BLmosaicdc1, BLsc1* rep 3 times in total, Endslst2. Change to Yarn A in last BLslst.
Round 5 (with Yarn A): ch1, BORcorner, ch2, sk 1st, BLsc2, BLmosaicdc1, BLsc2, ch2, sk 1st, *Corner, ch2, sk 1st, BLsc2, BLmosaicdc1, BLsc2, ch2, sk 1st* rep 3 times in total, Endslst2. Change to Yarn B in last BLslst.
Round 6 (with Yarn B): ch1, BORcorner, BLsc1, BLmosaicdc1, ch2, sk 1st, BLsc3, ch2, sk 1st, BLmosaicdc1, BLsc1, *Corner, BLsc1, BLmosaicdc1, ch2, sk 1st, BLsc3, ch2, sk 1st, BLmosaicdc1, BLsc1* rep 3 times in total, Endslst2. Change to Yarn A in last BLslst.

Round 7 (with Yarn A): ch1, BORcorner, ch2, sk 1st, BLsc2, BLmosaicdc1, ch2, sk 1st, BLsc1, ch2, sk 1st, BLmosaicdc1, BLsc2, ch2, sk 1st, *Corner, ch2, sk 1st, BLsc2, BLmosaicdc1, ch2, sk 1st, BLsc1, ch2, sk 1st, BLmosaicdc1, BLsc2, ch2, sk 1st* rep 3 times in total, Endslst2. Change to Yarn B in last BLslst.
Round 8 (with Yarn B): ch1, BORcorner, BLsc1, BLmosaicdc1, ch2, sk 1st, BLsc2, BLmosaicdc1, BLsc1, BLmosaicdc1, BLsc2, ch2, sk 1st, BLmosaicdc1, BLsc1, *Corner, BLsc1, BLmosaicdc1, ch2, sk 1st, BLsc2, BLmosaicdc1, BLsc1, BLmosaicdc1, BLsc2, ch2, sk 1st, BLmosaicdc1, BLsc1* rep 3 times in total, Endslst2. Change to Yarn A in last BLslst.
Round 9 (with Yarn A): ch1, BORcorner, BLsc3, BLmosaicdc1, ch2, sk 1st, BLsc1, ch2, sk 1st, BLsc1, ch2, sk 1st, BLsc1, ch2, sk 1st, BLmosaicdc1, BLsc3, *Corner, BLsc3, BLmosaicdc1, ch2, sk 1st, BLsc1, ch2, sk 1st, BLsc1, ch2, sk 1st, BLsc1, ch2, sk 1st, BLmosaicdc1, BLsc3* rep 3 times in total, Endslst2. Change to Yarn B in last BLslst.
Round 10 (with Yarn B): ch1, BORcorner, BLsc5, BLmosaicdc1, BLsc1, BLmosaicdc1, BLsc1, BLmosaicdc1, BLsc1, BLmosaicdc1, BLsc5, *Corner, BLsc5, BLmosaicdc1, BLsc1, BLmosaicdc1, BLsc1, BLmosaicdc1, BLsc1, BLmosaicdc1, BLsc5* rep 3 times in total, Endslst2. Change to Yarn A in last BLslst.
Round 11 (with Yarn A): ch1, BORcorner, BLsc1, ch2, sk 1st, BLsc1, ch2, sk 1st, BLsc1, ch2, sk 1st, BLsc1, ch2, sk 1st, BLsc3, ch2, sk 1st, BLsc1, ch2, sk 1st, BLsc1, ch2, sk 1st, BLsc1, ch2, sk 1st, BLsc1, *Corner, BLsc1, ch2, sk 1st, BLsc1, ch2, sk 1st, BLsc1, ch2, sk 1st, BLsc1, ch2, sk 1st, BLsc3, ch2, sk 1st, BLsc1, ch2, sk 1st, BLsc1, ch2, sk 1st, BLsc1, ch2, sk 1st, BLsc1* rep 3 times in total, Endslst2. Change to Yarn B in last BLslst.
Round 12 (with Yarn B): ch1, BORcorner, [BLsc1, ch2, sk 1st, BLmosaicdc1, BLsc1, BLmosaicdc1, BLsc1, BLmosaicdc1, BLsc1, BLmosaicdc1, ch2, sk 1st] rep 2 times in total, BLsc1, *Corner, [BLsc1, ch2, sk 1st, BLmosaicdc1, BLsc1, BLmosaicdc1, BLsc1, BLmosaicdc1, BLsc1, BLmosaicdc1, ch2, sk 1st] rep 2 times in total, BLsc1* rep 3 times in total, Endslst2. Change to Yarn A in last BLslst.
Round 13 (with Yarn A): ch1, BORcorner, BLsc1, [ch2, sk 1st, BLmosaicdc1, BLsc2, ch2, sk 1st, BLsc1, ch2, sk 1st, BLsc2, BLmosaicdc1] rep 2 times in total, ch2, sk 1st, BLsc1, *Corner, BLsc1, [ch2, sk 1st, BLmosaicdc1, BLsc2, ch2, sk 1st, BLsc1, ch2, sk 1st, BLsc2, BLmosaicdc1] rep 2 times in total, ch2, sk 1st, BLsc1* rep 3 times in total, Endslst2. Change to Yarn B in last BLslst.
Round 14 (with Yarn B): ch1, BORcorner, BLsc2, [BLmosaicdc1, BLsc2, ch2, sk 1st, BLmosaicdc1, BLsc1, BLmosaicdc1, ch2, sk 1st, BLsc2] rep 2 times in total, BLmosaicdc1, BLsc2, *Corner, BLsc2, [BLmosaicdc1, BLsc2, ch2, sk 1st, BLmosaicdc1, BLsc1, BLmosaicdc1, ch2, sk 1st, BLsc2] rep 2 times in total, BLmosaicdc1, BLsc2* rep 3 times in total, Endslst2. Change to Yarn A in last BLslst.
Round 15 (with Yarn A): ch1, BORcorner, BLsc1, ch2, sk 1st, BLsc3, ch2, sk 1st, [BLmosaicdc1, BLsc3, BLmosaicdc1, ch2, sk 1st, BLsc3, ch2, sk 1st] rep 2 times in total, BLsc1, *Corner, BLsc1, ch2, sk 1st, BLsc3, ch2, sk 1st, [BLmosaicdc1, BLsc3, BLmosaicdc1, ch2, sk 1st, BLsc3, ch2, sk 1st] rep 2 times in total, BLsc1* rep 3 times in total, Endslst2. Change to Yarn B in last BLslst.
Round 16 (with Yarn B): ch1, BORcorner, BLsc2, BLmosaicdc1, ch2, sk 1st, BLsc1, ch2, sk 1st, BLmosaicdc1, BLsc2, [ch2, sk 1st, BLsc2, BLmosaicdc1, ch2, sk 1st, BLsc1, ch2, sk 1st, BLmosaicdc1, BLsc2] rep 2 times in total, *Corner, BLsc2, BLmosaicdc1, ch2, sk 1st, BLsc1, ch2, sk 1st, BLmosaicdc1, BLsc2, [ch2, sk 1st, BLsc2, BLmosaicdc1, ch2, sk 1st, BLsc1, ch2, sk 1st, BLmosaicdc1, BLsc2] rep 2 times in total* rep 3 times in total, Endslst2. Change to Yarn A in last BLslst.
Round 17 (with Yarn A): ch1, BORcorner, BLsc1, ch2, sk 1st, BLsc2, BLmosaicdc1, BLsc1, BLmosaicdc1, BLsc2, ch2, sk 1st, [BLmosaicdc1, ch2, sk 1st, BLsc2, BLmosaicdc1, BLsc1, BLmosaicdc1, BLsc2, ch2, sk 1st] rep 2 times in total, BLsc1, *Corner, BLsc1, ch2, sk 1st, BLsc2, BLmosaicdc1, BLsc1, BLmosaicdc1, BLsc2, ch2, sk 1st, [BLmosaicdc1, ch2, sk 1st, BLsc2, BLmosaicdc1, BLsc1, BLmosaicdc1, BLsc2, ch2, sk 1st] rep 2 times in total, BLsc1* rep 3 times in total, Endslst2. Change to Yarn B in last BLslst.
Round 18 (with Yarn B): ch1, BORcorner, BLsc2, [BLmosaicdc1, ch2, sk 1st, BLsc1, ch2, sk 1st, BLsc1, ch2, sk 1st, BLsc1, ch2, sk 1st, BLmosaicdc1, BLsc1] rep 3 times in total, BLsc1, *Corner, BLsc2, [BLmosaicdc1, ch2, sk 1st, BLsc1, ch2, sk 1st, BLsc1, ch2, sk 1st, BLsc1, ch2, sk 1st, BLmosaicdc1, BLsc1] rep 3 times in total, BLsc1* rep 3 times in total, Endslst2. Change to Yarn A in last BLslst.
Round 19 (with Yarn A): ch1, BORcorner, BLsc4, [BLmosaicdc1, BLsc1, BLmosaicdc1, BLsc1, BLmosaicdc1, BLsc1, BLmosaicdc1, BLsc3] rep 3 times in total, BLsc1, *Corner, BLsc4, [BLmosaicdc1, BLsc1, BLmosaicdc1, BLsc1, BLmosaicdc1, BLsc1, BLmosaicdc1, BLsc3] rep 3 times in total, BLsc1* rep 3 times in total, Endslst2. Change to Yarn B in last BLslst.
Round 20 (with Yarn B): ch1, BORcorner, ch2, sk 1st, BLsc1, ch2, sk 1st, BLsc1, ch2, sk 1st, BLsc1, ch2, sk 1st, [BLsc3, ch2, sk 1st, BLsc1, ch2, sk 1st, BLsc1, ch2, sk 1st, BLsc1, ch2, sk 1st] rep 3 times in total, *Corner, ch2, sk 1st, BLsc1, ch2, sk 1st, BLsc1, ch2, sk 1st, BLsc1, ch2, sk 1st, [BLsc3, ch2, sk 1st, BLsc1, ch2, sk 1st, BLsc1, ch2, sk 1st, BLsc1, ch2, sk 1st] rep 3 times in total* rep 3 times in total, Endslst2. Change to Yarn A in last BLslst.
Round 21 (with Yarn A): ch1, BORcorner, ch2, sk 1st, BLmosaicdc1, BLsc1, BLmosaicdc1, BLsc1, BLmosaicdc1, BLsc1, BLmosaicdc1, ch2, sk 1st, [BLsc1, ch2, sk 1st, BLmosaicdc1, BLsc1, BLmosaicdc1, BLsc1, BLmosaicdc1, BLsc1, BLmosaicdc1, ch2, sk 1st] rep 3 times in total, *Corner, ch2, sk 1st, BLmosaicdc1, BLsc1, BLmosaicdc1, BLsc1, BLmosaicdc1, BLsc1, BLmosaicdc1, ch2, sk 1st, [BLsc1, ch2, sk 1st, BLmosaicdc1, BLsc1, BLmosaicdc1, BLsc1, BLmosaicdc1, BLsc1, BLmosaicdc1, ch2, sk 1st] rep 3 times in total* rep 3 times in total, Endslst2. Change to Yarn B in last BLslst.
Round 22 (with Yarn B): ch1, BORcorner, ch2, sk 1st, [BLmosaicdc1, BLsc2, ch2, sk 1st, BLsc1, ch2, sk 1st, BLsc2, BLmosaicdc1, ch2, sk 1st] rep 4 times in total, *Corner, ch2, sk 1st, [BLmosaicdc1, BLsc2, ch2, sk 1st, BLsc1, ch2, sk 1st, BLsc2, BLmosaicdc1, ch2, sk 1st] rep 4 times in total* rep 3 times in total, Endslst2. Change to Yarn A in last BLslst.
Round 23 (with Yarn A): ch1, BORcorner, BLsc1, BLmosaicdc1, [BLsc2, ch2, sk 1st, BLmosaicdc1, BLsc1, BLmosaicdc1, ch2, sk 1st, BLsc2, BLmosaicdc1] rep 4 times in total, BLsc1, *Corner, BLsc1, BLmosaicdc1, [BLsc2, ch2, sk 1st, BLmosaicdc1, BLsc1, BLmosaicdc1, ch2, sk 1st, BLsc2, BLmosaicdc1] rep 4 times in total, BLsc1* rep 3 times in total, Endslst2. Change to Yarn B in last BLslst.
Round 24 (with Yarn B): ch1, BORcorner, ch2, sk 1st, BLsc3, ch2, sk 1st, [BLmosaicdc1, BLsc3, BLmosaicdc1, ch2, sk 1st, BLsc3, ch2, sk 1st] rep 4 times in total, *Corner, ch2, sk 1st, BLsc3, ch2, sk 1st, [BLmosaicdc1, BLsc3, BLmosaicdc1, ch2, sk 1st, BLsc3, ch2, sk 1st] rep 4 times in total* rep 3 times in total, Endslst2. Change to Yarn A in last BLslst.
Round 25 (with Yarn A): ch1, BORcorner, BLsc1, BLmosaicdc1, ch2, sk 1st, BLsc1, ch2, sk 1st, BLmosaicdc1, BLsc1, [BLsc1, ch2, sk 1st, BLsc2, BLmosaicdc1, ch2, sk 1st, BLsc1, ch2, sk 1st, BLmosaicdc1, BLsc1] rep 4 times in total, *Corner, BLsc1, BLmosaicdc1, ch2, sk 1st, BLsc1, ch2, sk 1st, BLmosaicdc1, BLsc1, [BLsc1, ch2, sk 1st, BLsc2, BLmosaicdc1, ch2, sk 1st, BLsc1, ch2, sk 1st, BLmosaicdc1, BLsc1] rep 4 times in total* rep 3 times in total, Endslst2. Change to Yarn B in last BLslst.
Round 26 (with Yarn B): ch1, BORcorner, ch2, sk 1st, BLsc2, BLmosaicdc1, BLsc1, BLmosaicdc1, BLsc2, ch2, sk 1st, [BLmosaicdc1, ch2, sk 1st, BLsc2, BLmosaicdc1, BLsc1, BLmosaicdc1, BLsc2, ch2, sk 1st] rep 4 times in total, *Corner, ch2, sk 1st, BLsc2, BLmosaicdc1, BLsc1, BLmosaicdc1, BLsc2, ch2, sk 1st, [BLmosaicdc1, ch2, sk 1st, BLsc2, BLmosaicdc1, BLsc1, BLmosaicdc1, BLsc2, ch2, sk 1st] rep 4 times in total* rep 3 times in total, Endslst2. Change to Yarn A in last BLslst.
Round 27 (with Yarn A): ch1, BORcorner, BLsc1, [BLmosaicdc1, ch2, sk 1st, BLsc1, ch2, sk 1st, BLsc1, ch2, sk 1st, BLsc1, ch2, sk 1st, BLmosaicdc1, BLsc1] rep 5 times in total, *Corner, BLsc1, [BLmosaicdc1, ch2, sk 1st, BLsc1, ch2, sk 1st, BLsc1, ch2, sk 1st, BLsc1, ch2, sk 1st, BLmosaicdc1, BLsc1] rep 5 times in total* rep 3 times in total, Endslst2. Change to Yarn B in last BLslst.
Round 28 (with Yarn B): ch1, BORcorner, BLsc3, [BLmosaicdc1, BLsc1, BLmosaicdc1, BLsc1, BLmosaicdc1, BLsc1, BLmosaicdc1, BLsc3] rep 5 times in total, *Corner, BLsc3, [BLmosaicdc1, BLsc1, BLmosaicdc1, BLsc1, BLmosaicdc1, BLsc1, BLmosaicdc1, BLsc3] rep 5 times in total* rep 3 times in total, Endslst2. Change to Yarn A in last BLslst.
Round 29 (with Yarn A): ch1, BORcorner, BLsc across until next M, *Corner, BLsc across until next M * rep 3 times in total, Endslst2. Change to Yarn B in last BLslst.
Round 30 (with Yarn B): Rep Round 29
Round 31 (with Yarn A): Rep Round 29
Round 32 (with Yarn B): Rep Round 29
Fasten off yarn and weave in all ends.
BACK BOTTOM
Back bottom is worked in rows, back and forth.
Ch64
Row 1: sc in 2nd ch from hook and in each ch across. Turn. (63sc)
Row 2 – Row 47: ch1 (does not count as sc here and throughout), sc in each st across. Turn. (63sc)
Work one round of single crochet around entire BACK BOTTOM piece making 3sc in each corner.
Fasten off yarn and weave in ends.
BACK TOP
Back top is worked in rows, back and forth.
Ch64
Row 1: sc in 2nd ch from hook and in each ch across. Turn. (63sc)
Row 2 – Row 18: ch1 (does not count as sc here and throughout), sc in each st across. Turn. (63sc)
Row 19: ch1, sc7, ch3, sk 2st, sc14, ch3, sk 2st, sc13, ch3, sk 2st, sc14, ch3, sk 2st, sc7. Turn.
Row 20: ch1, sc in each st across working 2sc in each ch-3sp. Turn. (63sc)
Row 21: ch1, sc in each st across. Turn. (63sc)
Work one round of single crochet around entire BACK TOP piece making 3sc in each corner.
Fasten off yarn and weave in ends.
ASSEMBLY
- Block all the pieces.
- Sew all parts together. Place all three
pieces (FRONT, BACK BOTTOM, BACK TOP) on top of each other right sides facing.
The BACK TOP (with buttonholes) should be in the centre. Mark corners and using
a running stitch sew all pieces around. - Next, turn inside out and sew one button
beneath each buttonhole on BACK BOTTOM piece. - Insert pillow pad.


If you have any suggestions or have detected any mistakes, please feel free to email me at mycrochetory@gmail.com
MOSAIC CROCHET TUTORIAL
The photos below show Rounds 1 to 10 step by step, worked in blue and cream. Some of them have red notes that point out the trickiest moves, like closing a round and changing color.
Round 1:


Round 2:


Round 3:


![End of Round 3 with the corners marked]](https://i2.wp.com/mycrochetory.com/wp-content/uploads/2020/02/mosaicpillow14mc.jpg?fit=640%2C427&ssl=1)

Round 4:


Round 5:


Round 6:


Round 7:


Round 8:


Round 9:


Round 10:


More pillow patterns
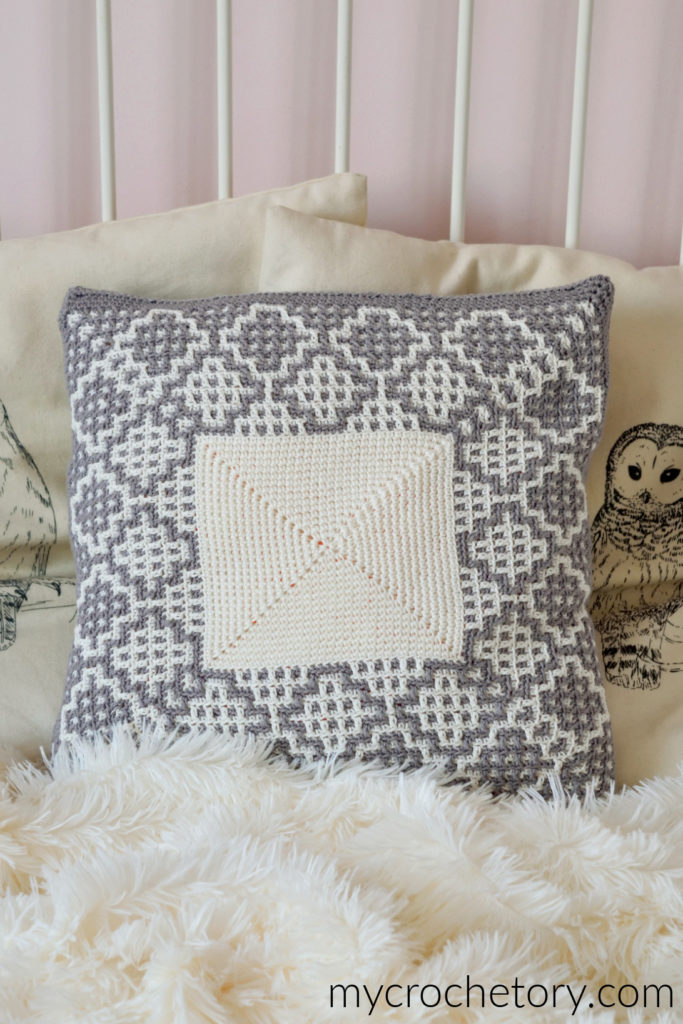
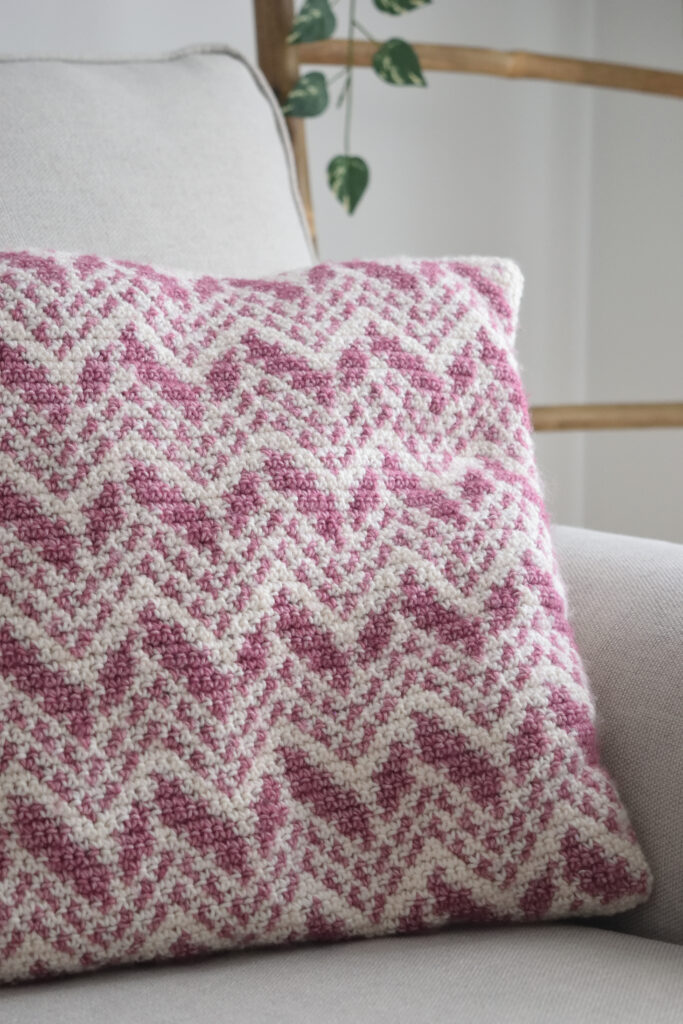

- Carina Square Pillow. If you liked making Dioon, this one is its closest cousin. It’s also worked in the round from the center out, with a mosaic design around a central square and a buttoned back. It’s made with Scheepjes Bamboo Soft, and it comes with a mosaic chart and a photo tutorial.
- Cevro Intarsia Pillow. Want to try a different colorwork technique? Cevro uses intarsia, but the pillow is built the same way as Dioon: three pieces and a buttoned opening on the back.
- Dahlia Pillow. Here’s another intarsia pillow, with a simple and modern flower design. It’s a good next step for intermediate crocheters.
- Cable Diamond Pillow. Prefer texture over color? This pillow is all about crochet cables in diamond shapes.
Looking for more? See my Top 10 free crochet pillow patterns, my 10 free mosaic crochet patterns or browse all my free crochet pillow patterns.
Want to hear about my new mosaic and home patterns first? Join my newsletter, and I’ll send them straight to your inbox.
Which two colors did you pick for your Dioon? Tell me in the comments, I love seeing new color pairs. And if a round doesn’t work out, ask me there too. Your question might help the next person who gets stuck on the same round.
So very elegant. Thank you for the pattern!
Warm regards,
Carol
Thanks very much it is perfect for my livingroom!
Kind regards
Very pretty cushion, it just I don`t think your pattern is representing that cushion. At least not when I try to make it.
I bought that pattern and I would like to obtain a refund because it is not written correctly. Pitty….
Pls, reply.
Hi, Pattern has been tested and it’s written correctly. Here https://www.ravelry.com/patterns/library/dioon-pillow/people you can find pillows made by my testers. If you are having trouble with the pattern please email me and I will do my best to help you through the difficulties.
didn’t see any photos of tha pattern made by your testers, pls send me more detailed link
thanks.
You have to be log in to Ravelry probably.
I don’t know.
I think if I pay for pattern it should be written cleary , I started it many times and simply is not working. I know how to read patterns. Photos are correct but description not so..
I would like to have a refund pls,
As I said before, I’m always glad to help you out. Contact me by email, send some photos with an explanation where the problems are and we will try to solve them. I don’t make refunds unless you point my mistakes out.
It would be useful to attach video as others do, to avoid complaints and frustration. especially for paid patterns.
Thank you for this lovely pattern! I put a zipper in the seam, and front and back are alike. But this type of crochet (mosaic) was new to me. I enjoyed making this!! Thanks again!