Updated: 26 January 2024 by Sylwia (MyCrochetory)
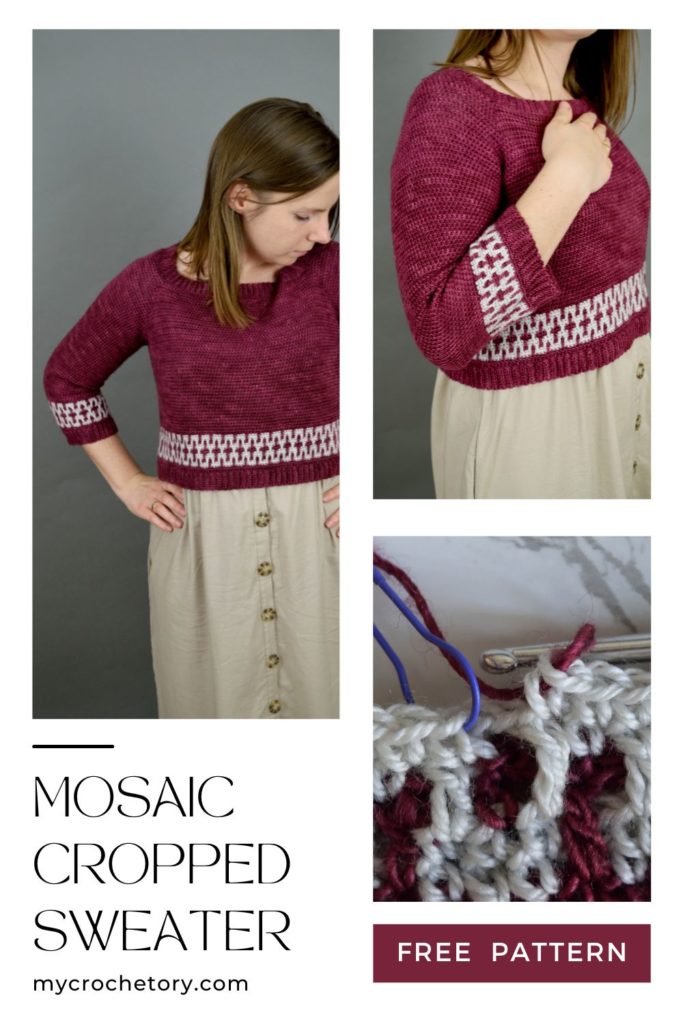
Experience the joy of creating the Mosaic Cropped Sweater with our easy-to-follow crochet sweater pattern. Learn how to crochet a sweater that fits perfectly and showcases the beauty of mosaic crochet colorwork. Get ready for a fun and rewarding crochet project!
Scroll down to see the Mosaic Cropped Sweater free crochet sweater pattern or you may choose to purchase the ad-free, printable PDF crochet pattern with short rows picture tutorial HERE on ETSY or HERE on Ravelry.
Join my Facebook Group and Official Ravelry Group where you can find necessary support, you can ask questions or share your finished projects.
You can also follow my Instagram, Facebook page and Pinterest.

Introducing the Mosaic Cropped Crochet Sweater Pattern
Get ready to meet your new favorite crochet sweater pattern! The Mosaic Cropped Sweater is here, and it’s all about style, comfort, and fun.
From the moment I designed the Pocket Raglan Sweater, I couldn’t resist the charm of top-down raglan sweaters.
And now, I’m thrilled to present this new creation that will make you proud to wear your handmade masterpiece.

The Joy of Creating the Mosaic Cropped Sweater
Prepare yourself for a crochet journey filled with joy and excitement as you dive into making the Mosaic Cropped Sweater.
With its simple construction and intriguing details, this sweater is not only quick to work up, but it also offers a delightful experience watching it come to life stitch by stitch.
Plus, the added benefit of trying it on as you crochet allows you to ensure a perfect fit.

Customize Your Style
Don’t let the term “cropped” limit your creativity!
The Mosaic Cropped Sweater pattern includes instructions on how to lengthen it if cropped styles aren’t your cup of tea.
Whether you prefer a longer length or want to embrace the cropped trend, this pattern has got you covered.

Mosaic Crochet Magic
Prepare to be amazed by the beauty of mosaic crochet!
In designing the Mosaic Cropped Sweater, I challenged myself to incorporate this technique for the first time.
Don’t worry if it looks intricate—mosaic crochet is surprisingly easy, allowing you to work with one color at a time.
The result? A stunning fabric with more flexibility and drape compared to other colorwork methods.

Choosing the Perfect Fiber
Let’s talk yarn!
For my Mosaic Cropped Sweater, I fell head over heels for the hand-dyed Slavicayarns Vesna in the mesmerizing “Berry Picking” shade.
However, feel free to explore different yarn options as long as you can achieve the required gauge and love the fabric it creates.
The choice is yours!

Frequently Asked Questions
Q: Is this pattern suitable for beginners?
A: The Mosaic Cropped Sweater pattern is designed for intermediate crocheters who have experience with basic stitches and techniques. However, with dedication and the willingness to learn, even beginners can give it a try!
Q: Can I adjust the length of the sweater?
A: Absolutely! The pattern includes instructions on how to customize the length of the Mosaic Cropped Sweater to suit your preferences. Whether you prefer a longer or shorter style, you have the flexibility to make it your own.
Q: What type of yarn can I use for this pattern?
A: While the pattern suggests using Slavicayarns Vesna, you can substitute it with any yarn that matches the gauge and gives you the desired fabric texture. Feel free to experiment and choose a yarn that speaks to you!
Q: Can I make this sweater in a larger size?
A: Absolutely! The Mosaic Cropped Sweater pattern comes in 8 sizes, ranging from 84 cm to 119.5 cm finished bust measurements. The pattern provides instructions on achieving a positive ease of 2 inches [5 cm] at the bust, ensuring a comfortable fit for various body sizes.
Remember, the Mosaic Cropped Sweater crochet pattern is all about expressing your personal style and enjoying the process.
So grab your yarn and hook, and let your creativity shine as you create a unique and beautiful sweater!
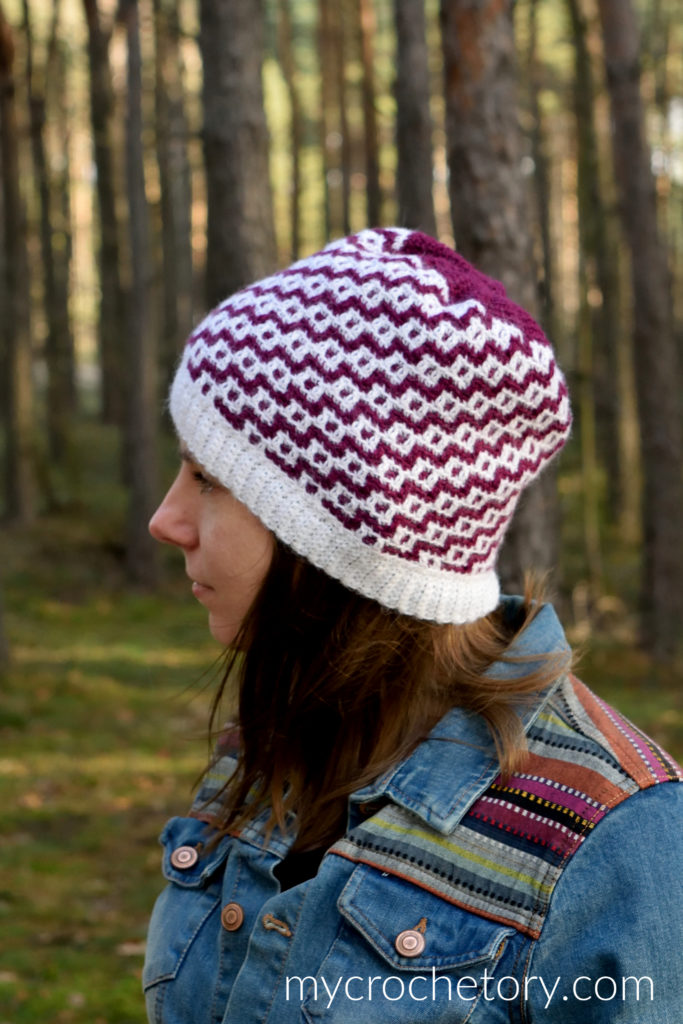
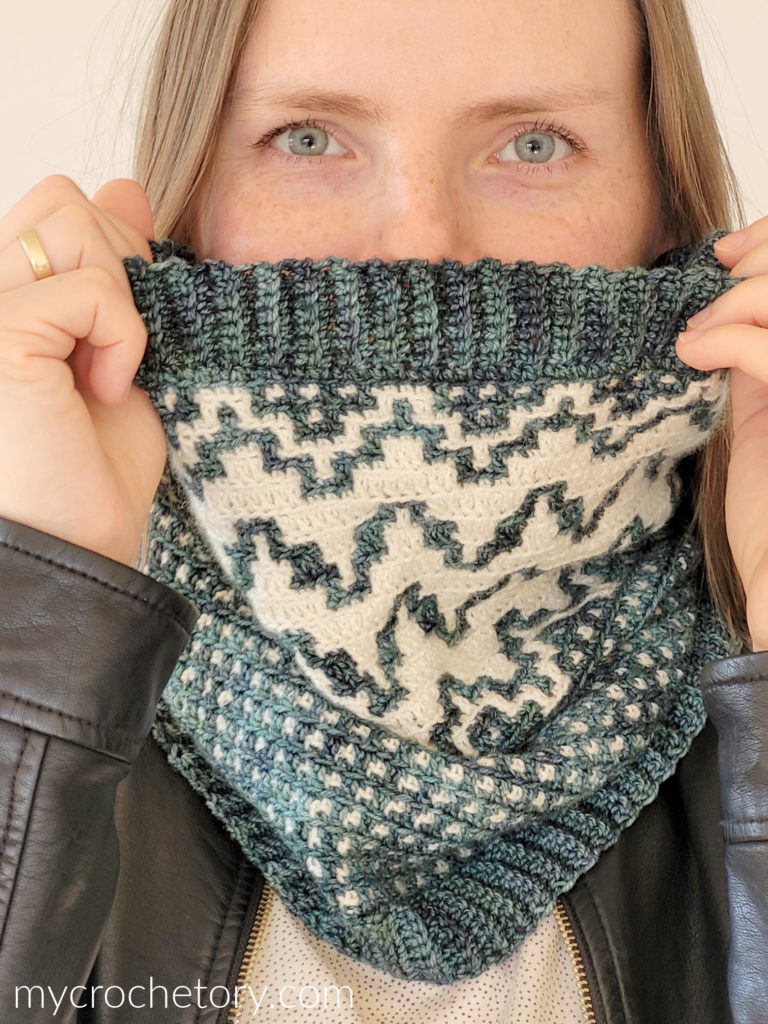
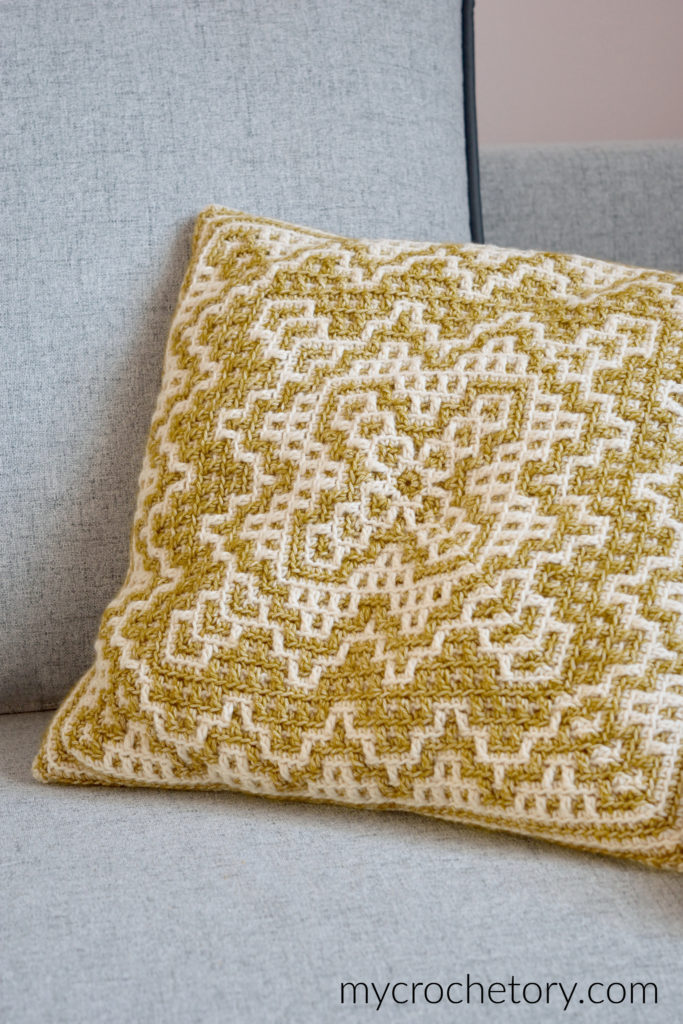
OTHER MOSAIC CROCHET PATTERNS YOU MIGHT LOVE

If you want to share your wips and finished shawl on social media, please, use hashtag #mycrochetory or #mosaiccroppedsweater. I love to see your finished project!
FREE MOSAIC CROPPED CROCHET SWEATER PATTERN
- Purchase the ad-free, printable PDF with SHORT ROWS PICTURE TUTORIAL here on ETSY or here on Ravelry.
- Add this pattern to your Ravelry Queue HERE.
- Pin it for later.
Copyright 2018-2024 MyCrochetory. All right reserved. This pattern is property of Sylwia Kawczyńska @MyCrochetory. Please DO NOT sell the pattern and claim this pattern as your own. The pattern is for personal use only and may not be translated or reproduced in another language. Please respect my rights, DO NOT share or publish this pattern anywhere without my permission.
The crochet sweater you make following this pattern is yours you are free to sell it, as long as you credit MyCrochetory as original designer. For more information, please, read Terms Page.

As a bonus in the ad-free, printable PDF, I’ve provided SHORT ROWS PICTURE TUTORIAL. If you’re a visual learner or if you just want to support my work you can purchase this crochet pattern HERE on ETSY or HERE on Ravelry. Thank you and I hope you find it useful!
Materials & Tools:
- Yarn Slavicayarns Vesna 115g = 460m (504yds), 60% SW Merino, 20% Baby Alpaca, 20% Silk.
Main yarn:
918 (978, 1107, 1140, 1245)(1351, 1429, 1582) m/ 1000 (1066, 1207, 1242, 1357)(1473, 1557, 1725) yds
Contrasting yarn:
92 (97, 103, 106, 113)(120, 125, 132) m / 101 (106, 112, 116, 123)(130, 136, 144) yds
Note that yardage may vary depending on yarn used, gauge variations or modifications.
- Hook size 2.5mm and 3mm. Adjust hook size if necessary to obtain correct gauge,
- Tapestry needle (to weave and hide yarn ends),
- Scissors,
- Stitch markers.
Level:
Intermediate/Advanced.
Sizes:
1 (2, 3, 4, 5)(6, 7, 8)
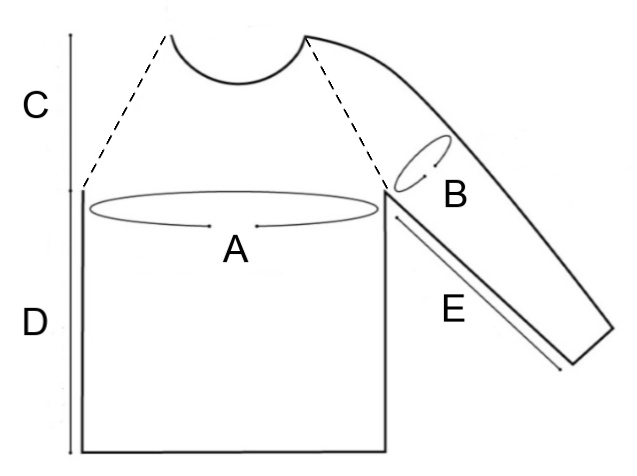
Finished measurements:
Measurements given are for the finished garment. This sweater is designed to fit with 2” [5cm] of positive ease at the bust.
To pick your best size, measure your full bust and add 2” [5cm] ease, then pick the finished bust circumference closest to that number.
A: Bust circumference
84 (89, 94, 99, 104)(109, 114, 119.5)cm
33 (35, 37, 39, 41)(43, 45, 47)”
B: Upper sleeve circumference
30.5 (31.5, 33, 34, 35)(38.5, 40, 42)cm
12 (12.4, 13, 13.4, 13.8)(15.2, 15.7, 16.5)”
C: Back neck to underarm
12.5 (13, 13.5, 14, 14)(15.5, 16, 17)cm
4.9 (5.1, 5.3, 5.5, 5.5)(6.1, 6.3, 6.7)”
D: Hem to underarm
22 (22, 23, 23, 24)(24, 24, 25)cm
8.7 (8.7, 9.1, 9.1, 9.4)(9.4, 9.4, 9.8)”
E: Sleeve length
27(27, 29, 29, 31)(31, 31, 33)cm
10.5(10.5, 11.5, 11.5, 12)(12, 12, 13) ”
Sample pictured is a size 5 on a model with a 39″[99 cm] bust, worn with 2″[5cm] of positive ease.
Gauge after blocking:
20 sts and 19 rows to 10 x 10cm (4 x 4”) using 3mm hook with hdc worked under three loops.
If necessary, adjust hook size to obtain the correct gauge.
Before you measure, please take the time to wash and block your swatch in the same manner that you will wash and block your sweater.
General Notes:
- The crochet sweater pattern uses US crochet terminology.
- Sweater is worked from the top down with raglan shaping.
- Stitch marker placement: When instructed to place your marker, place on the last st worked unless instructed. It should lie on a stitch, not between stitches.
- The yoke is worked in TURNED rounds.
- To make the beginning of new round in the yoke as less visible as possible the BOR marker is placed in the raglan point on back.
- The lower body and sleeves are worked top down in UNTURNED rounds. You will then add the hem and cuffs in rows, joining them to the body as you go.
- The length of the body and sleeves is easily adjustable.
- When only one number is given, it applies to all sizes.
- Instructions in square brackets […] are worked as many times as indicated.
- Mosaic pattern is the same for both lower body and sleeves.
Mosaic Pattern Notes:
- You can either follow the chart or written instructions.
- Color is changed after every 2 rounds.
- You can avoid weaving in all those ends by not cutting the yarn when you finish a round. Simply carry the other color along the inside and pick it back up with your hook when you need to use it again.
How to read the Mosaic Chart:
- Chart is read from bottom to top and each row of squares represents 2 rounds worked in same color.
- All odd rounds (1, 3, 5, etc.) are read from right to left.
- All even rounds (2, 4, 6, etc.) are read from left to right.
- Each square of the chart represents 1 stitch or 1 skipped stitch.
- Whenever you see a square of color dedicated to that round, work single crochet.
- Whenever you see a square of different color in that round, skip that stitch (make chain). To prevent puckering, make the same number of chain as the number of skipped sts plus ch1. For example, for 1 skipped st – make ch2, for 2 skipped sts – make ch3, for 3 skipped sts – make ch4, etc.
- Pay special attention to number of skipped stitches when working odd rounds.
- When working even rounds make sure you work sc in every st without missing any.
- On next odd round (after color change), mosaicdc will be worked in these skipped sts from two rounds below. Remember, mosaicdc are always worked in front of chains of previous rounds.
Stitches & Abbreviations (US terms):
st(s) – stitch(es)
BOR – beginning of the row/round
BLsc – back loop only single crochet
yo – yarn over
hdc2tog (half double crochet 2 together) – yo, insert hook in next st, yo, draw up a loop, insert hook in next st, yo, draw up a loop, yo, pull through all 4 loops.
linked hdc – yo, insert hook in ch1-sp on the edge of prev short row, yo, draw up aloop, insert hook in same st where slst was made, yo, draw up a loop, yo, pull yarnthrough all four loops on the hook.
mosaicdc (mosaic double crochet) – work regular dc in unworked/skipped st of the same color two roundss below in front of chain space (in front of work). These chains will stay behind mosaicdc and will stay unworked.
M – marker
PM – place marker
sp – space
sk – skip
beg – beginning
prev – previous
RS – right ride
WS – wrong side
PATTERN
YOKE
Neckband
With 2.5mm hook and your main yarn, ch8.
Row 1: sc in second ch from hook, sc in each ch to end. Turn.
Row 2: ch1 (doesn’t count as a sc), sc in first st, BLsc across until last st remain, sc in last st. Turn.
You should have 7 sc stitches in each of neckband’s rows.
Repeat row2 108 (110, 124, 128, 136)(140, 150, 158) times for a total of 110 (112, 126, 130, 138)(142, 152, 160) rows.
Use slip stitches to join last and first row together. Don’t break the yarn.
How to start your crochet project with a crochet ribbing TUTORIAL HERE.
Marker set up (RS):
With 3mm hook make ch1 (does not count as a st) and sc in first neckband’s row, place BOR marker, sc in next 18(18,20,21,22)(23,25,26) neckband’s rows, sc in next neckband’s row, PM, sc in next 43(44,49,50,53)(54,57,60) neckband’s rows, sc in next neckband’s row, PM, sc in next 18(18,20,21,22)(23, 25,26) neckband’s rows, sc in next neckband’s row, PM, sc in next 27(28,33,34,37)(38,41,44) neckband’s rows. Slst to the first sc to close the round.
These raglan markers indicate divisions between right sleeve, front, left sleeve, and back sections.
SHORT ROWS (shaping back)
Short row 1: ch2 (doesn’t count as a st), 2 regular hdcs in the same st, mark the first made hdc as a BOR, regular hdc in next 2(2,2,3,3)(3,3,3)scs, sc in next 2(2,2,2,2)(2,3,3)scs, slst in next sc, ch1, turn, sk slst, sc in next 2(2,2,2,2)(2,3,3)scs, regular hdc in each st to BOR, 3hdcs in BOR (mark the second of these three hdcs as a new BOR), regular hdc in the same st as prev BOR, regular hdc in each st to next M, 3hdc in M (reposition M to the second st of these three hdcs), regular hdc in next 2(2,2,3,3)(3,3,3)scs, sc in next 2(2,2,2,2)(2,3,3)scs, slst in next sc, ch1, turn, sk slst, sc in next 2(2,2,2,2)(2,3,3)scs, regular hdc in each st to M, 3hdc in M (reposition M to the second st of these three hdcs), regular hdc in each st untilBOR, 3hdcs in BOR (mark the second of these three hdcs as a new BOR).
TIP: Mark ch1-sp on the edge of every short row for easy stitch count.
Short row 2: hdc in next 6(6,6,7,7)(7,8,8)sts, linked hdc (over ch-1sp and same st as slst), hdc in next 2(2,2,2,3)(3,3,3)scs, sc in next 2(2,2,2,2)(2,2,3)scs, slst in next sc, ch1, turn, sk slst, sc in next 2(2,2,2,2)(2,2,3)scs, hdc in each st to BOR, 3hdcs in BOR (mark the second of these three hdcs as a new BOR), hdc in each st until next M, 3hdc in M (reposition M to the second st of these three hdcs), hdc in next 6(6,6,7,7)(7,8,8)sts, linked hdc (over ch-1sp and same st as slst), hdc in next 2(2,2,2,3)(3,3,3)scs, sc in next 2(2,2,2,2)(2,2,3)scs, slst in next sc, ch1, turn, sk slst, sc in next 2(2,2,2,2)(2,2,3)scs, hdc in each st to M, 3hdcs in M (reposition M to the second st of these three hdcs), hdc in each st untilBOR, 3hdcs in BOR (mark the second of these three hdcs as a new BOR).
Short row 3: hdc in next 13(13,13,14,15)(15,16,17)sts, linked hdc (over ch-1sp and same st as slst), hdc in next 2(2,2,2,2)(3,3,3)scs, sc in next 1(1,2,2,2)(2,2,2)scs, slst in next sc, ch1, turn, sk slst, sc in next 1(1,2,2,2)(2,2,2)scs, hdc in each st to BOR, 3hdcs in BOR (mark the second of these three hdcs as a new BOR), hdc in each st until next M, 3hdc in M (reposition M to the second st of these three hdcs), hdc in next 13(13,13,14,15)(15,16,17)sts, linked hdc (over ch-1sp and same st as slst), hdc in next 2(2,2,2,2)(3,3,3)scs, sc in next 1(1,2,2,2)(2,2,2)scs, slst in next sc, ch1, turn, sk slst, sc in next 1(1,2,2,2)(2,2,2)scs, hdc in each st to M, 3hdcs in M (reposition M to the second st of these three hdcs), hdc in each st toBOR, 3hdcs in BOR (mark the second made hdc as a new BOR).
Short row 4: hdc in next 19(19,20,21,22)(23,24,25)sts, linked hdc (over ch-1sp and same st as slst), hdc in next 2(2,2,2,2)(2,3,3)scs, sc in next 1(1,2,2,2)(2,2,2)scs, slst in next sc, ch1, turn, sk slst, sc in next 1(1,2,2,2)(2,2,2)scs, hdc in each st to BOR, 3hdcs in BOR (mark the second of these three hdcs as a new BOR), hdc in each st until next M, 3hdc in M (reposition M to the second st of these three hdcs), hdc in next 19(19,20,21,22)(23,24,25)sts, linked hdc (over ch-1sp and same st as slst), hdc in next 2(2,2,2,2)(2,3,3)scs, sc in next 1(1,2,2,2)(2,2,2)scs, slst in next sc, ch1, turn, sk slst, sc in next 1(1,2,2,2)(2,2,2)scs, hdc in each st to M, 3hdcs in M (reposition M to the second st of these three hdcs), hdc in each st toBOR, 3hdcs in BOR (mark the second made hdc as a new BOR).
Don’t turn and continue.

Next round: hdc in each st to next M making linked hdc on edge of last short row, 3hdcs in M (reposition M to second made hdc), hdc in each st to next M, 3hdcs in M (reposition M to second made hdc), hdc in each st to next M making linked hdc on edge of last short row, 3hdcs in M (reposition M to second made hdc), hdc in each st to BOR, slst to BOR. Turn.
After this round you should have (excludes BOR and other 3Ms) 45(46, 51, 52, 55)(56,59,62)sts on back and front and 28(28, 30, 31, 32)(33, 35, 36) sts on each sleeve sections.
You will now continue by working in turned rounds.
Round 1: ch2, 2hdcs in same st, reposition BOR to first made hdc, hdc in each st to M, 3hdcs in M (reposition M to second made hdc), hdc in each st to next M, 3hdcs in M (reposition M to second made hdc), hdc in each st to next M, 3hdcs in M (reposition M to second made hdc), hdc in each st to BOR, hdc in the first st where first 2hdcs are placed, slst to BOR. Turn.
Repeat Round 1 13(14, 16, 14, 13)(16, 17, 19) more times
After the last repeat of Round 1, you should have on back and front 73(76, 85, 82, 83)(90, 95, 102)sts; on each sleeves: 56(58, 64, 61, 60)(67, 71, 76)sts; plus 4 raglan sts.
Next rounds:
Work below Round 1a and Round 2a according to your size!
Round 1a: ch2, 2hdcs in same st, reposition BOR to first made hdc, 2hdcs in next st, hdc in each st until one st left before next M, 2hdcs in next st, 3hdcs in M (reposition M to second made hdc), hdc in each st to next M, 3hdcs in M (reposition M to second made hdc), 2hdcs in next st, hdc in each st until one st left before next M, 2hdcs in next st, 3hdcs in M (reposition M to second made hdc), hdc in each st to BOR, hdc in the first st where first 2hdcs are placed, slst to BOR. Turn.
Round 2a: ch2, 2hdcs in same st, reposition BOR to first made hdc, hdc in each st to M, 3hdcs in M (reposition M to second made hdc), 2hdcs in next st, hdc in each st until on st left before next M, 2hdcs in next st, 3hdcs in M (reposition M to second made hdc), hdc in each st to next M, 3hdcs in M (reposition M to second made hdc), 2hdcs in next st, hdc in each st until one st left before BOR, 2hdcs in next st, hdc in the first st where first 2hdcs are placed, slst to BOR. Turn.
ONLY Size 1: Work Round 1a one time.
ONLY Size 2: Work Round 2a one time.
ONLY Size 3: Work Round 2a one time.
ONLY Size 4: Work Round 2a, Round 1a and Round 2a.
ONLY Size 5: Work Round 1a, Round 2a, Round 1a and Round 2a.
ONLY Size 6: Work Round 2a, Round 1a and Round 2a.
ONLY Size 7: Work Round 1a, Round 2a and Round 1a.
ONLY Size 8: Work Round 1a, Round 2a and Round 1a.
274(284, 314, 326, 338)(354, 372, 396) total sts; at back and front 77(80, 89, 94, 99)(102, 107, 114)sts; at sleeves: 58(60, 66, 67, 68)(73, 77, 82)sts; plus 4 raglan sts.
SEPARATE BODY AND SLEEVES
After the last repeat of round 1a or Round 2a turn your work. Next the body and sleeves are separated.
ONLY Size 1: ch2, hdc in same st (mark this st as a new BOR), ch3, sk all sts to next M, hdc in M (remove M), hdc in each st to next M, hdc in M (remove M), ch3, sk all sts to next M, hdc in M (remove M), hdc in each st to BOR, sls to BOR.
ONLY Size 2: ch2, hdc in same st (mark this st as a new BOR), hdc in each st to M, hdc in M (remove M), ch5, sk all sts to next M, hdc in M (remove M), hdc in each st to next M, hdc in M (remove M), ch5, sk all sts to BOR, sls to BOR.
ONLY Size 3: ch2, hdc in same st (mark this st as a new BOR), hdc in each st to M, hdc in M (remove M), ch1, sk all sts to next M, hdc in M (remove M), hdc in each st to next M, hdc in M (remove M), ch1, sk all sts to BOR, sls to BOR.
ONLY Size 4: ch2, hdc in same st (mark this st as a new BOR), hdc in each st to M, hdc in M (remove M), ch1, sk all sts to next M, hdc in M (remove M), hdc in each st to next M, hdc in M (remove M), ch1, sk all sts to BOR, sls to BOR.
ONLY Size 5: ch2, hdc in same st (mark this st as a new BOR), hdc in each st to M, hdc in M (remove M), ch2, sk all sts to next M, hdc in M (remove M), hdc in each st to next M, hdc in M (remove M), ch2, sk all sts to BOR, sls to BOR.
ONLY Size 6: ch2, hdc in same st (mark this st as a new BOR), hdc in each st to M, hdc in M (remove M), ch4, sk all sts to next M, hdc in M (remove M), hdc in each st to next M, hdc in M (remove M), ch4, sk all sts to BOR, sls to BOR.
ONLY Size 7: ch2, hdc in same st (mark this st as a new BOR), ch3, sk all sts to next M, hdc in M (remove M), hdc in each st to next M, hdc in M (remove M), ch3, sk all sts to next M, hdc in M (remove M), hdc in each st to BOR, sls to BOR.
ONLY Size 8: ch2, hdc in same st (mark this st as a new BOR), ch2, sk all sts to next M, hdc in M (remove M), hdc in each st to next M, hdc in M (remove M), ch2, sk all sts to next M, hdc in M (remove M), hdc in each st to BOR, sls to BOR.
LOWER BODY
Lower body is worked in one continuous spiral of hdcs till work measures 13(13, 14, 14, 15)(15, 15, 16)cm/ 5(5, 5.5, 5.5, 6)(6, 6, 6.5)” from underarm (or 9cm/3.5” short of desired length of the sweater).
When you come to underarm chains, work regular hdc in each chain until end of the underarm.
Round 1: ch1, sc in same ch as join, place BOR marker, hdc in each ch and st around (don’t join the round).
!! ONLY SIZES 2, 4 and 5: make two decreases (hdc2tog two times) evenly in your final round.
End your final round with three sc stitches (instead of hdcs) before BOR. Change to contrasting Yarn in third sc.
If the stitch count after your final round is multiple of 4, start working colorwork.
COLORWORK
Colorwork is worked in one continuous spiral.
With RS facing you.
Round 1 (contrasting yarn): sc in BOR (mark this st as a new BOR), [ch2, sk next st, sc in next 3sts] rep around until 3sts remain before BOR, ch2, sk next st, sc in next 2sts (don’t join the round – here and throughout).
Round 2 (contrasting yarn): sc in BOR (mark this st as a new BOR), [ch2, sk ch-2 sp, sc in next 3sts] rep around until last ch-2 sp and 2sts remain before BOR, ch2, sk last ch-2 sp, sc in next 2sts. Change to main Yarn in second sc.
Round 3 (main yarn): ch2 (mark this ch-2 sp as a new BOR), sk next st, mosaicdc in next st (in unworked st of same color two rounds below, in front of chains – here and throughout), [ch2, sk next st, sc in next st, ch2, sk next st, mosaicdc in next st] rep around until 2sts remain before ch-2sp with BOR, ch2, sk next st, sc in next st.
Round 4 (main yarn): ch2 (mark this ch-2 sp as a new BOR), sk ch-2 sp, sc in next mosaicdc, ch2, sk next ch-2 sp, sc in next sc, [ch2, sk next ch-2 sp, sc in next mosaicdc, ch2, sk next ch-2 sp, sc in next sc] rep around until BOR. Change to contrasting Yarn in last sc.
Round 5 (contrasting yarn): mosaicdc in next st (mark this st as a new BOR), sc in next st, mosaicdc in next st, [ch2, sk next st, mosaicdc in next st, sc in next st, mosaicdc in next st] rep around until one st remain before BOR, ch2, sk next st.
Round 6 (contrasting yarn): sc in next mosaicdc (mark this st as a new BOR), sc in next 2sts, [ch2, sk next ch-2 sp, sc in next 3sts] rep around until ch-2 sp remain before BOR, ch2, sk next ch-2 sp, change to main yarn.
Round 7 (main yarn): sc in next st (mark this st as a new BOR), ch2, sk next st, sc in next st, mosaicdc in next st, [sc in next st, ch2, sk next st, sc in next st, mosaicdc in next st] rep around until BOR.
Round 8 (main yarn): sc in next sc (mark this st as a new BOR), [ch2, sk next ch-2 sp, sc in next 3sts] rep around until 2sts remain before BOR, ch2, sk next ch-2 sp, sc in next 2sts. Change to contrasting Yarn in last sc.
Round 9 (contrasting yarn): sc in next st (mark this st as a new BOR), mosaicdc in next st, sc in next st, ch2, sk next st, [sc in next st, mosaicdc in next st, sc in next st, ch2, sk next st] rep around until BOR.
Round 10 (contrasting yarn): sc in next st (mark this st as a new BOR), sc in next 2sts, [ch2, sk next ch-2 sp, sc in next 3sts] rep around until ch-2 sp remain before BOR. Change to main Yarn in last sc.
Round 11 (main yarn): mosaicdc in next st (mark this st as a new BOR), ch2, sk next st, sc in next st, ch2, sk next st, [mosaicdc in next st, ch2, sk next st, sc in next st, ch2, sk next st] rep around until BOR.
Round 12 (main yarn): sc in next st (mark this st as a new BOR), [ch2, sk next ch-2 sp, sc in next st] rep around until last ch-2 sp remain before BOR. Change to contrasting Yarn in last sc.
Round 13 (contrasting yarn): mosaicdc in next st (mark this st as a new BOR), sc in next st, mosaicdc in next st, ch2, sk next st, [mosaicdc in next st, sc in next st, mosaicdc in next st, ch2, sk next st] rep around until BOR.
Round 14 (contrasting yarn): sc in next st (mark this st as a new BOR), sc in next 2sts, [ch2, sk next ch-2 sp, sc in next 3sts] rep around until ch-2 sp remain before BOR. Change to main Yarn in last sc.
Round 15 (main yarn): mosaicdc in next st (mark this st as a new BOR), sc in next 3sts, [mosaicdc in next st, sc in next 3sts] rep around until BOR.
Round 16 (main yarn): sc in next st (mark this st as a new BOR), sc in each st around until BOR, slst to BOR.
DON’T fasten and DON’T cut the yarn. The chain 8 that begins the hem originates from BOR point.
HEM
The hem is worked in rows and attached to the body as you go. Continue with 3mm hook.
With RS facing you.
Row 1: ch8, starting with 2nd ch from hook, work 1 sc in each ch back to edge of main body. Join to the next st of the edge of main body using slst and work one more slst in the next st of main body (2 slst(s) in total for joining) plus make ch1. Turn.
Row 2: Starting from 4 st from hook, work BLsc in each st across. Turn.
Row 3: ch1 (does not count as a st), BLsc in each st across [7sts]. Join to the next st of the edge of main body using slst and work one more slst in the next st of main body (2 slst(s) in total for joining) plus make ch1. Turn.
Repeat Rows 2-3 until your hem is joined to the entire lower edge. Then join your last row with the first row using the slip stitches.
How to add a crochet ribbing at the end TUTORIAL HERE.
SLEEVES (Both worked the same):
Sleeves are worked in one continuous spiral of hdcs.
With RS facing you, attach main Yarn with slst in a central space in the underarm to begin working around.
Round 1: ch1, sc in same ch as join, place BOR marker, hdc in each ch and st around (don’t join the round).
Continue with Round 1making one hdc2tog decrease on every 4th round 8(8, 9, 9, 10)(10, 10, 11) times. Reposition BOR as you go.
Work rounds of hdc and decreases till work measures 18(18, 20, 20, 22)(22, 22, 24)cm/ 7(7, 8, 8, 8.7)(8.7, 8.7, 9.5)” from underarm (or 9cm/3.5” short of desired length of the sleeve).
After the last round with decrease, make:
ONLY SIZE 1: one round of hdcs without decrease and one round with 1 decrease.
ONLY SIZE 2: one round of hdcs without decrease and one round with 1 decrease.
ONLY SIZE 3: two rounds of hdcs without decrease and one round with 2 decreases evenly.
ONLY SIZE 4: one round of hdcs without decrease and one round with 3 decreases evenly.
ONLY SIZE 5: two rounds of hdcs without decrease.
ONLY SIZE 6: one round of hdcs without decrease and one round with 3 decreases evenly.
ONLY SIZE 7: one round of hdcs without decrease and one round with 2 decreases evenly.
ONLY SIZE 8: one round of hdcs without decrease and one round with 1 decrease.
End your final round with three sc stitches (instead of hdcs) before BOR. Change to contrasting Yarn in third sc.
If the stitch count after your final round is multiple of 4, start working colorwork.
!! COLORWORK PATTERN IS THE SAME AS FOR THE LOWER BODY (refer to page 8).
DON’T fasten and DON’T cut the yarn. The chain 8 that begins the cuff originates from attached yarn point.
CUFF
The cuffs are worked in rows and attached to the sleeve as you go. Continue with 2.5mm hook.
With RS facing you.
Row 1: ch8, starting with 2nd ch from hook, work 1 sc in each ch back to edge of main body. Join to the next st of the edge of main body using slst and work one more slst in the next st of main body (2 slst(s) in total for joining) plus make ch1. Turn.
Row 2: Starting from 4 st from hook, work BLsc in each st across. Turn.
Row 3: ch1 (does not count as a st), BLsc in each st across [7sts]. Join to the next st of the edge of main body using slst and work one more slst in the next st of main body (2 slst(s) in total for joining) plus make ch1. Turn.
Repeat Rows 2-3 until your hem is joined to the entire lower edge. Then join your last row with the first row using the slip stitches.
How to add a crochet ribbing at the end TUTORIAL HERE.
Fasten off yarn, weave in all ends and block your sweater to measurements. Sew up underarm holes if necessary.
If you have any suggestions or have detected any mistakes, please feel free to email me at mycrochetory@gmail.com
PIN IN FOR LATER

COLORWORK TUTORIAL (the same for lower body and both sleeves)

Round 1:


Round 2:


Round 3:


Round 4:


Round 5:


Round 6:


Round 7:


Round 8:


Round 9:

Round 10:


Round 11:


Round 12:


Round 13:


Round 14:


Round 15:


Round 16:


Subscribe to my Newsletter and be the first to know about new patterns and design, tutorials and more!
Join my Facebook Group and Official Ravelry Group where you can find necessary support, you can ask questions or share your finished projects.
You can also follow my Instagram, Facebook page and Pinterest.
BEAUTIFUL sweater. I’ve been crocheting most of my life but have never made clothing because I don’t sew and don’t want to join a bunch of pieces. But this raglan technique may be a pattern I can handle, and I sure love the results. Thank you for posting the pattern and for all your beautiful designs.
Thank you! Love the “color work” and your directions are the best ever for that. Have got to try that ..today!
Love your cropped sweater! How would I go about converting this pattern into a cropped cardigan?
Converting this pattern into a cardigan would require writing the separate pattern and maybe some day I will do that, but not now.
I need to thank you, due to the fact that it’s very difficult to discover excellent info like your blog.