Updated: 7 May 2026 by Sylwia (MyCrochetory)
Ribbing is what brings crochet to life. It can turn a simple project into something that fits well, feels great, and looks fantastic. If your brim is stiff or your cuff feels off, check the ribbing instead of blaming your stitches.
I love ribbing because it really makes a difference. It changes how your project stretches and how it fits when you wear it.
Sometimes, ribbing even makes crochet look almost like knitting!
Not all ribbing is the same.
Some types stay firm and don’t stretch much. Others are soft and flexible, and they bounce right back. Picking the right ribbing for your project makes a huge difference.
Yarn matters too!
Wool makes ribbing springy and stretchy, while cotton gives a firm, steady edge. I always think about the feel I want: slip stitch for a snug fit, or back loop single crochet for strong edges.
It’s a small detail, but it’s the secret to a perfect finish.
Even if you’re just starting out, you can do this. Let’s dive in and learn three simple but effective ribbing methods together.
- which one stretches the least and why
- which ones behave almost the same, but feel different when working
- and how to choose the right ribbing for your project without guessing
Have you ever finished a project and thought, “Something just feels off”?
I’ve been there too. Most of the time, it’s the ribbing that makes the difference. Let’s discover why together.

What Is Crochet Ribbing (And Why It Matters More Than You Think)
Crochet ribbing is more than just a border. It’s what gives your project its character.
It adds texture, stretch, and structure in a simple way. With the right ribbing, your hat or sweater feels custom-made.
Ribbing can turn a plain edge into something with personality and style.
You’ll find ribbing on hat brims, sweater cuffs, necklines, and all kinds of garment edges.
But ribbing isn’t just for looks. The style you choose changes how your project moves, feels, and even how long it lasts.
It’s what takes a project from just okay to truly impressive.
Ribbing affects how much your fabric stretches, how it sits on your body, and how clean and finished the edge looks.
You could use the same yarn and stitches, but changing the ribbing completely transforms the outcome.
One edge might be crisp and sturdy. Another could be soft and flexible.
If you ever finish a project and something just feels off, ribbing is often the reason why.
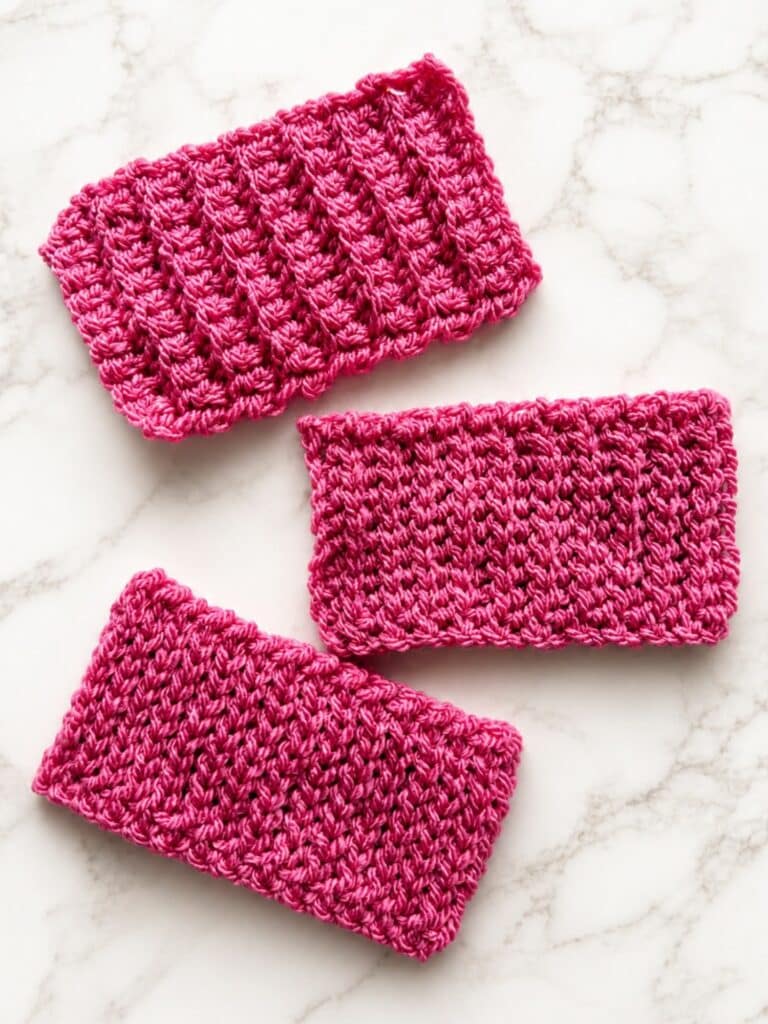
Types of Crochet Ribbing (What Actually Changes Between Them)
Crochet ribbing might look complicated with all its names and styles.
But here’s something helpful: almost every ribbing type is either structured or flexible.
Structured ribbing stands tall and holds its place. Think of hat brims that don’t flop or sweater hems that never sag.
Flexible ribbing is all about comfort. It stretches, hugs your body, and moves with you. That’s why cuffs and necklines feel so good when you get the ribbing right.
Once you know which group your ribbing fits into, choosing the right one becomes much easier.
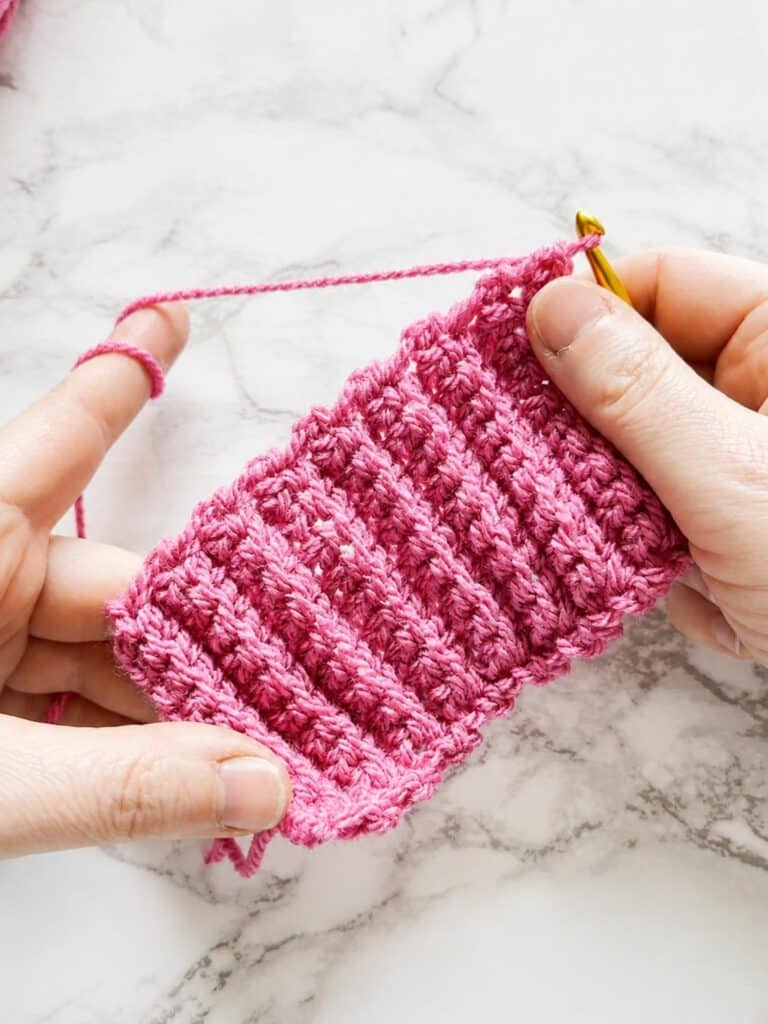
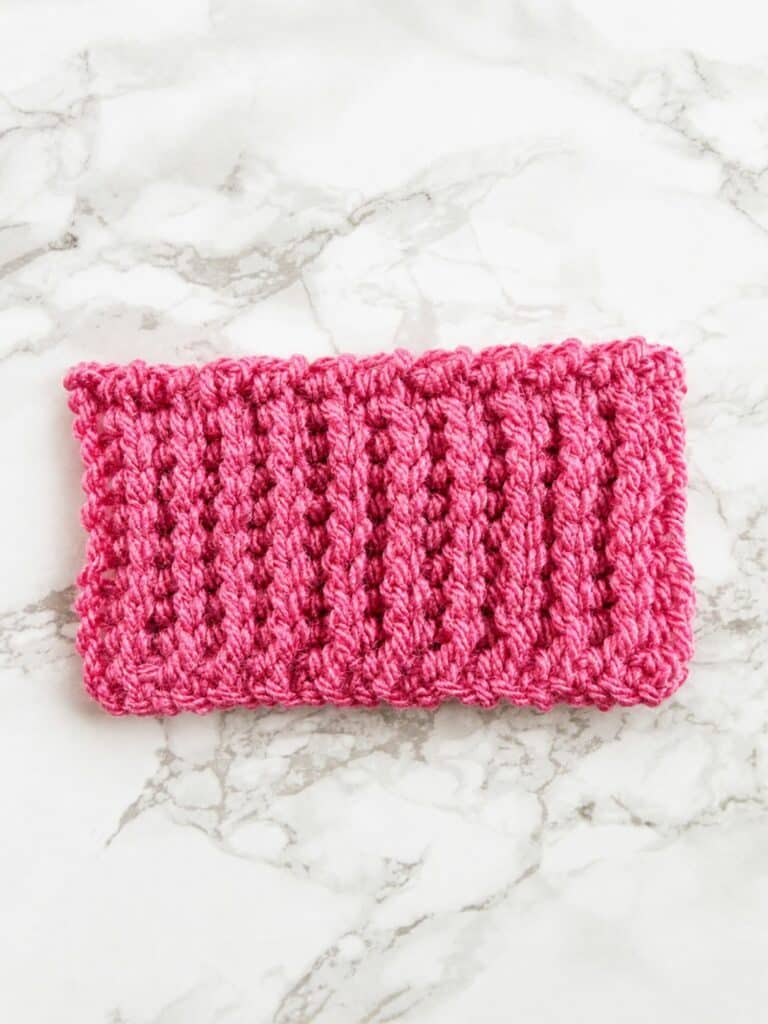
Back Loop Single Crochet Ribbing (Structured, Low Stretch)
Back loop single crochet ribbing is often where people begin.
You’ll see those classic ridges appear quickly, and it’s easy to keep track of your stitches. The steady rhythm makes it great for relaxing and enjoying the process.
But don’t let it fool you! This kind of ribbing acts very differently from the others.
Back loop single crochet ribbing:
- stretches the least
- feels more structured than flexible
- holds its shape instead of hugging the body
So, it doesn’t cling to the head or wrist like other ribbing. It’s the best choice when you want:
- a stable edge
- bold, clear texture
- something that keeps its form over time
It’s also the quickest and simplest option. If you want neat results without overthinking each stitch, you’ll love this style.
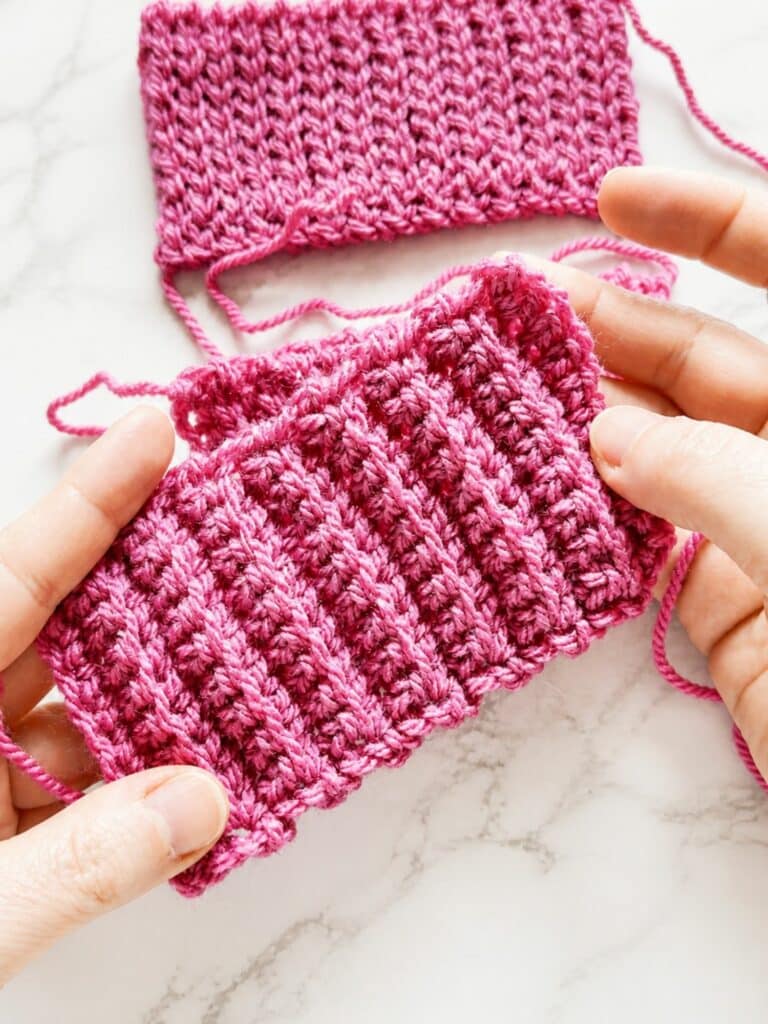
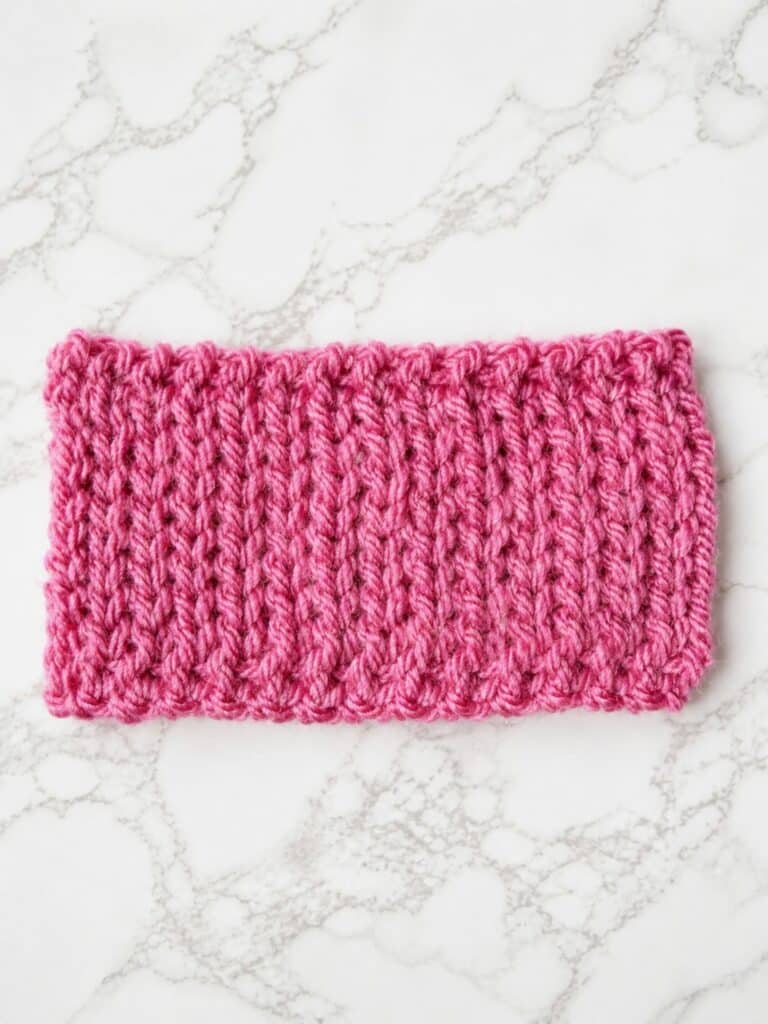
Slip Stitch Ribbing (Close Fit, Flexible)
Now things start to get really interesting.
Slip stitch ribbing feels totally different from back loop single crochet. Instead of being stiff, it moves and stretches with your body.
This group includes:
- classic slip stitch ribbing
- yarn over slip stitch ribbing
Even though these techniques sound different, they work in similar ways. Both are stretchy and fit close to the body.
- They feel more flexible.
- They sit right against your skin.
- They adapt instead of holding a fixed shape.
The real difference is how each one feels as you crochet. Classic slip stitch ribbing makes a dense, tight fabric, but it can be slow if you like to work fast. Yarn over slip stitch ribbing has a little more height, so it’s easier on your hands, but you still get that stretchy, knit-like finish.

Quick Way to Think About It
Forget memorizing a bunch of techniques! Just focus on how the ribbing acts:
- Want structure? Go with back loop single crochet.
- Want a close, comfy fit? Choose slip stitch ribbing.
When you choose ribbing based on how it works, the process feels less overwhelming and a lot more enjoyable.
Which Crochet Ribbing Is the Stretchiest?
If stretch is what you’re after, here’s the easy answer: the most flexible crochet ribbing comes from slip stitch-based methods.
This includes:
- classic slip stitch ribbing
- yarn over slip stitch ribbing
Both create fabric that adapts to your body rather than holding a fixed shape. That’s why they’re perfect for:
- sweater cuffs
- neck openings
- hat brims that need to feel comfortable and snug
Back loop single crochet ribbing is different. It has a little bit of give, but it won’t stretch and bounce back much. This style is all about holding its shape.
If your ribbing feels stiff or doesn’t sit right, the stitch is probably the reason, not you.
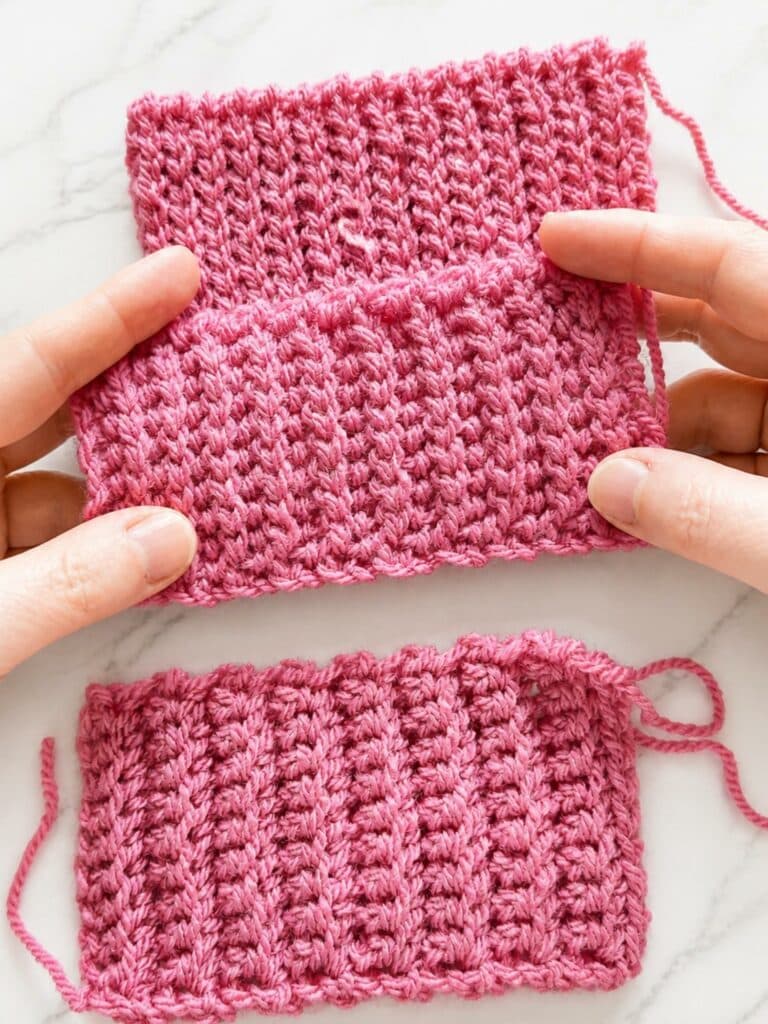
Slip Stitch vs Yarn Over Slip Stitch Ribbing (What’s the Real Difference?)
These two techniques are often talked about like they’re totally different. But honestly, when your project is finished, they act almost the same.
Both create ribbing that:
- fits closely to your body
- feels flexible
- adjusts instead of staying stiff
The real difference shows up while you’re crocheting, not in how the ribbing works at the end.
Classic slip stitch ribbing:
- makes a compact, dense fabric
- can feel slower to work through
- makes it easy to accidentally tighten your tension
Yarn over slip stitch ribbing:
- adds a little height to each stitch
- feels more open as you work
- is usually easier to handle, especially on longer rows
That small change doesn’t affect the stretch or fit much, but it can make crocheting easier and less stressful.
If you tend to crochet tightly or have trouble with slip stitches, the yarn over version is usually the way to go. All you do is yarn over before inserting your hook, then finish the stitch as usual. This makes each stitch a bit taller and easier to pull through.
It feels less tight and less fiddly than the classic version, which is great for beginners or anyone who struggles with tension.
Try it out: yarn over, put your hook in, yarn over again, pull up a loop (three loops on your hook), then pull the last loop through the first two.
That’s all there is to it!
If you like a dense, neat finish and don’t mind working slowly, classic slip stitch is still a solid choice.
When to Use Each Crochet Ribbing Type
Now that you know the techniques, let’s talk about when to use each one. Instead of guessing, match your ribbing to how you want your finished piece to behave.
Use Back Loop Single Crochet Ribbing When You Want Structure
Go for this style when you want your edge to stay in place instead of stretching out.
It’s perfect for:
- hat brims that need to hold their shape
- edges that need extra stability
- projects where you want bold, visible texture
You’ll get a relaxed edge that doesn’t cling. This is great if you want your work to keep its shape without feeling tight. It’s also the easiest and most reliable way to get a clean finish.
Use Slip Stitch Ribbing When You Want a Close Fit
Pick slip stitch ribbing if you want your edge to sit snug and adjust to your body.
It’s ideal for:
- sweater cuffs
- necklines
- hat brims that should feel comfy and fitted
This ribbing moves with you and never feels stiff.
Choose Yarn Over Slip Stitch If You Want the Same Effect, but Easier
This version isn’t about changing the look, but about making crocheting smoother.
Try it if:
- you crochet tightly
- slip stitches frustrate you
- you want a gentler rhythm
You’ll still get that stretchy look, but it’s easier on your hands.
Choose Classic Slip Stitch If You Want a Clean, Compact Look
If you love a dense, neat edge, this is the way to go.
It’s best when:
- you want a sharp, polished edge
- you prefer a tighter texture
- you don’t mind taking your time
Quick Decision Guide
- Want structure? → back loop single crochet
- Want a snug fit? → slip stitch ribbing
- Want easier stitching? → yarn over slip stitch
- Want a tighter look? → classic slip stitch
Watch the Video Tutorial
If you’d rather see these ribbings in action first, you can watch the full video tutorial below.
Some of the differences, especially the stretch and texture, are just much easier to notice when you see the stitches moving instead of only looking at photos.
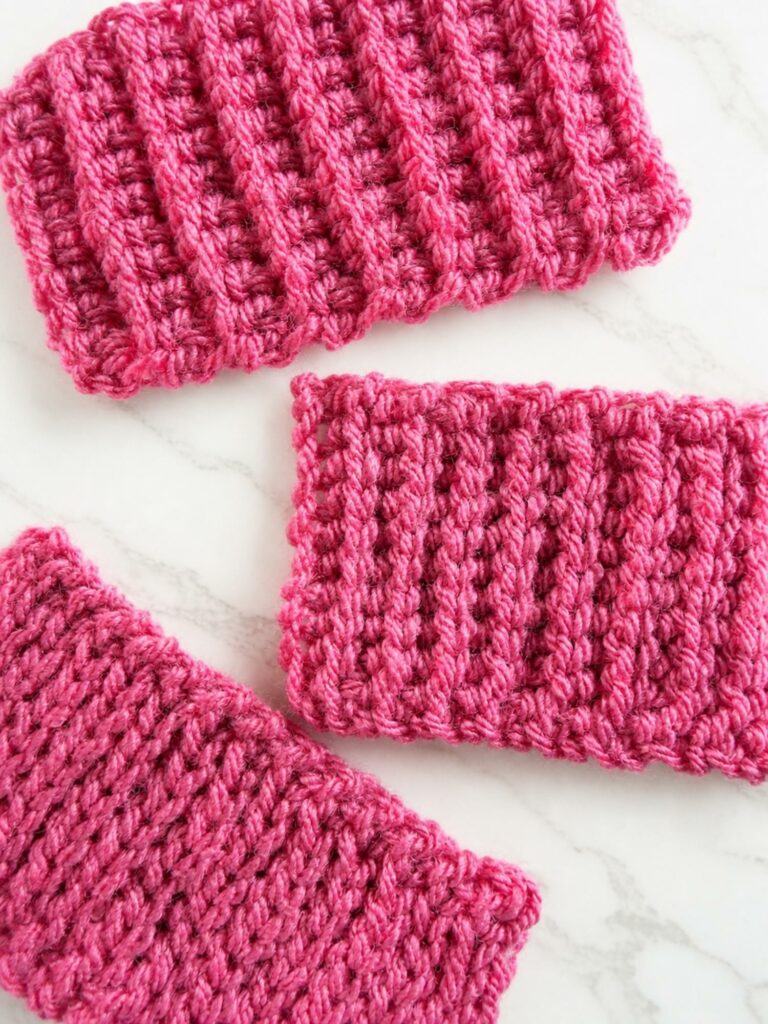
In the video, I’ll show you all three methods step by step:
- back loop single crochet ribbing
- yarn over slip stitch ribbing
- slip stitch ribbing
I’m also using the same yarn and hook size for all three swatches, so you can really compare how differently they look and behave, even with the same setup.
TIP: To view this crochet ribbing video tutorial properly, please disable any ad-blocker you have running.
How to Crochet Ribbing With Back Loop Single Crochet (Step by Step)
This is the easiest ribbing to try. If you’re new or want something quick, this is a good place to start.
You’ll see those classic ridges appear right away, and the edge will stay crisp and neat.
What You’ll Notice Right Away
Right from the first row, you’ll notice:
- This ribbing works up fast.
- It’s easy to control.
- It creates a firm, structured edge.
It won’t stretch as much as other styles, but you’ll get a clean, consistent finish every time.
Step 1: Chain the Width of Your Ribbing
Start by deciding how wide you want your ribbing to be.
This part can feel a little backwards at first, because the starting chain creates the width of the ribbing, not the length.
Make your chain as long as you want the ribbing to be wide, plus one extra chain for turning.
Try not to make the chain too tight here. If the foundation chain feels stiff, the ribbing usually will too.
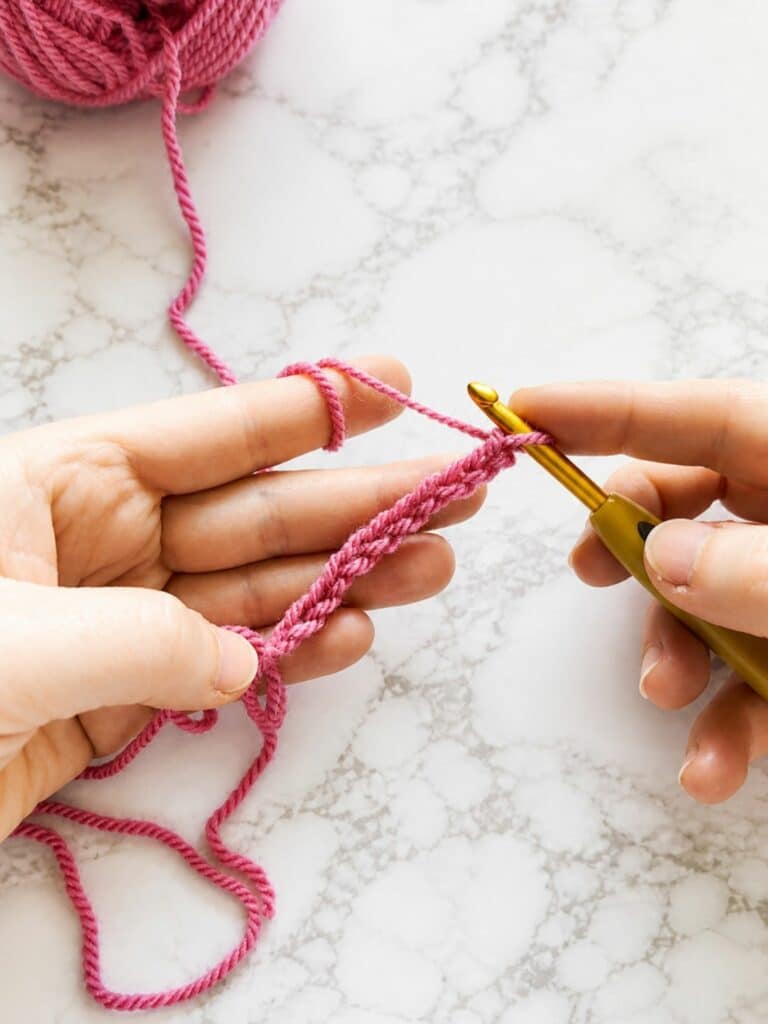
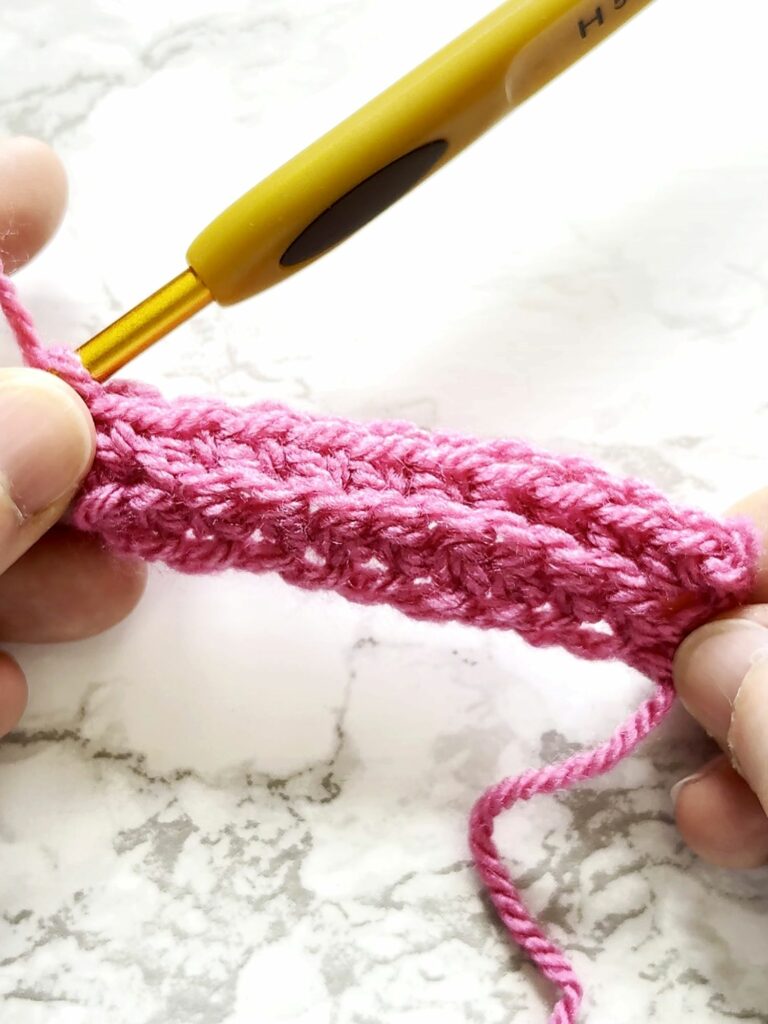
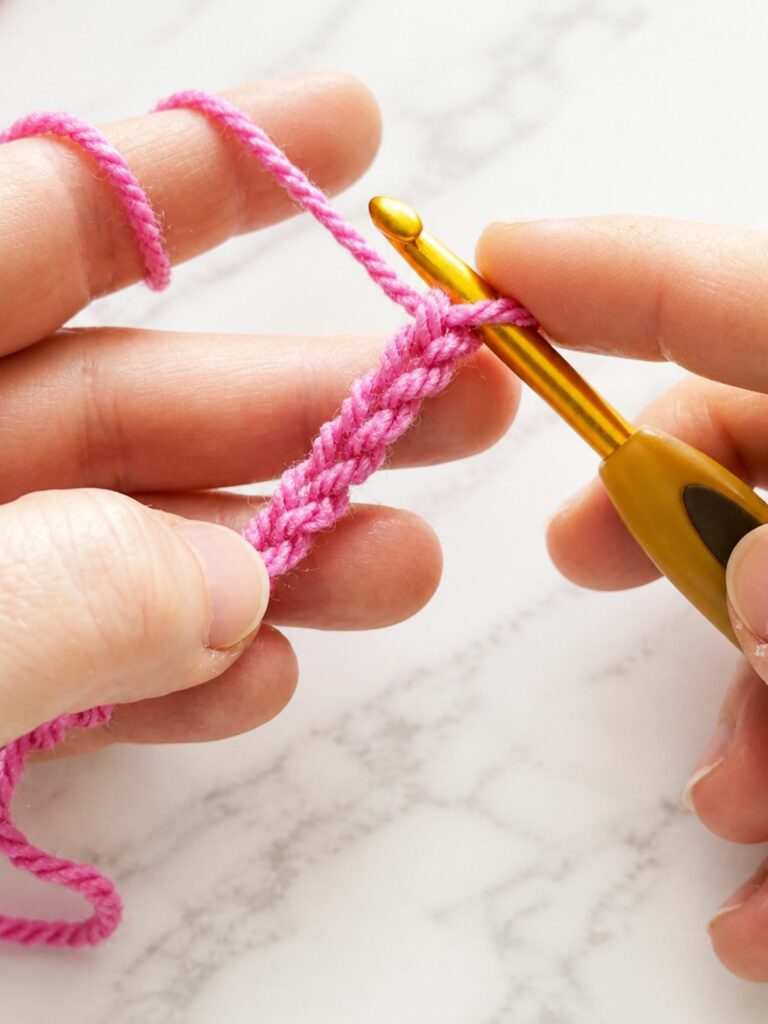
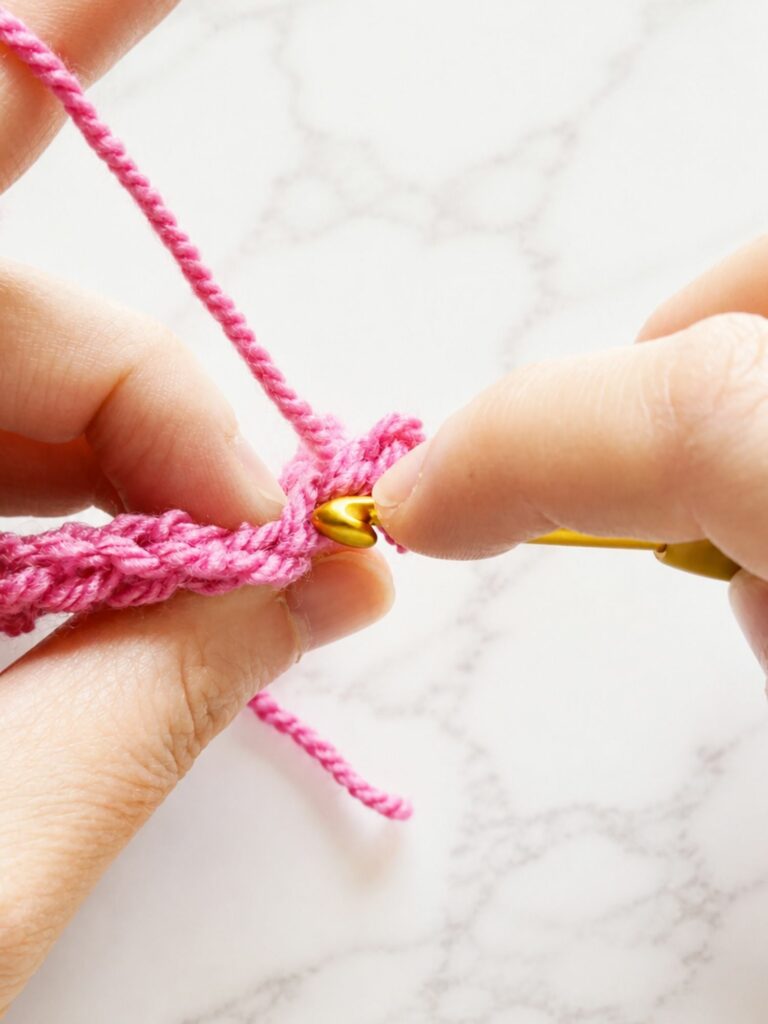
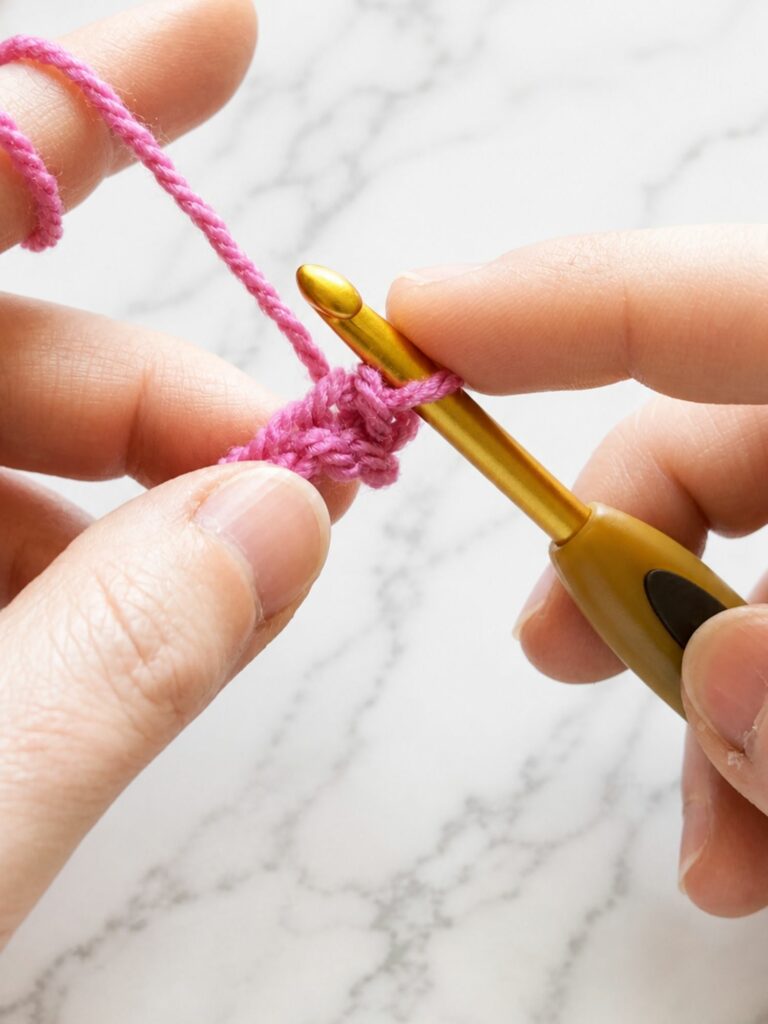
Step 2: Work the First Row in Single Crochet
Now go into the second chain from your hook and work one single crochet.
Continue with one single crochet in each chain across the row.
Once you reach the end, turn your work.
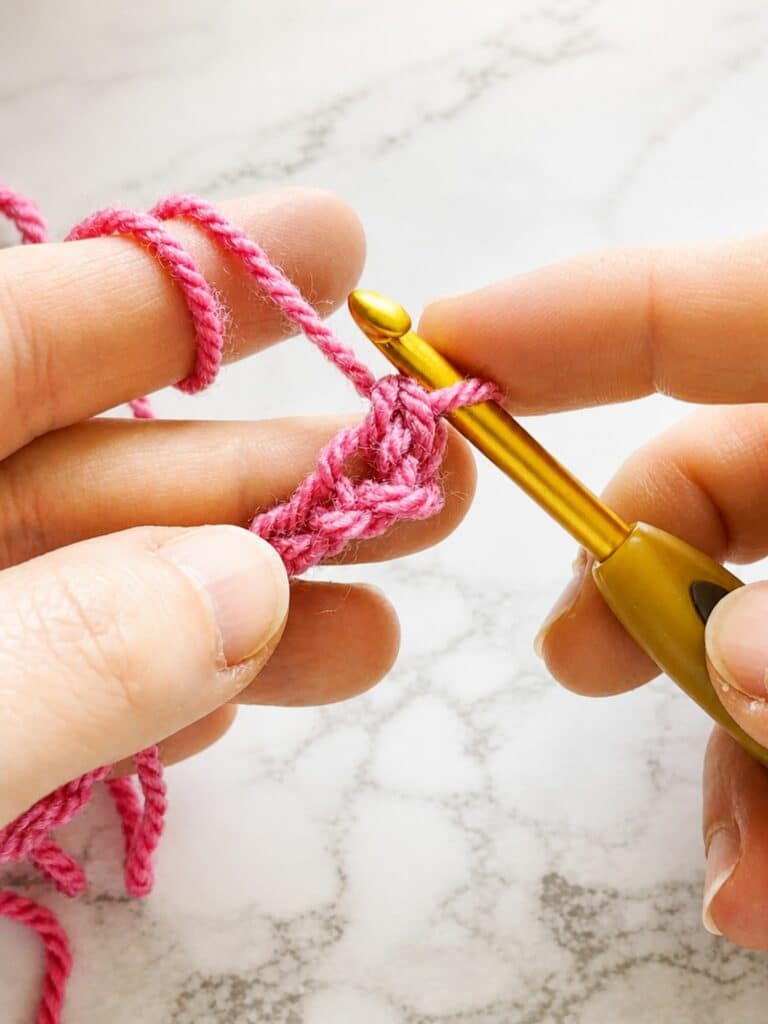
Step 3: Start the Ribbing Texture
Make a turning chain.
Then work your first single crochet under both loops of the stitch, just like a regular single crochet.
I always do this for the first stitch because it helps keep the edge looking cleaner and more even.

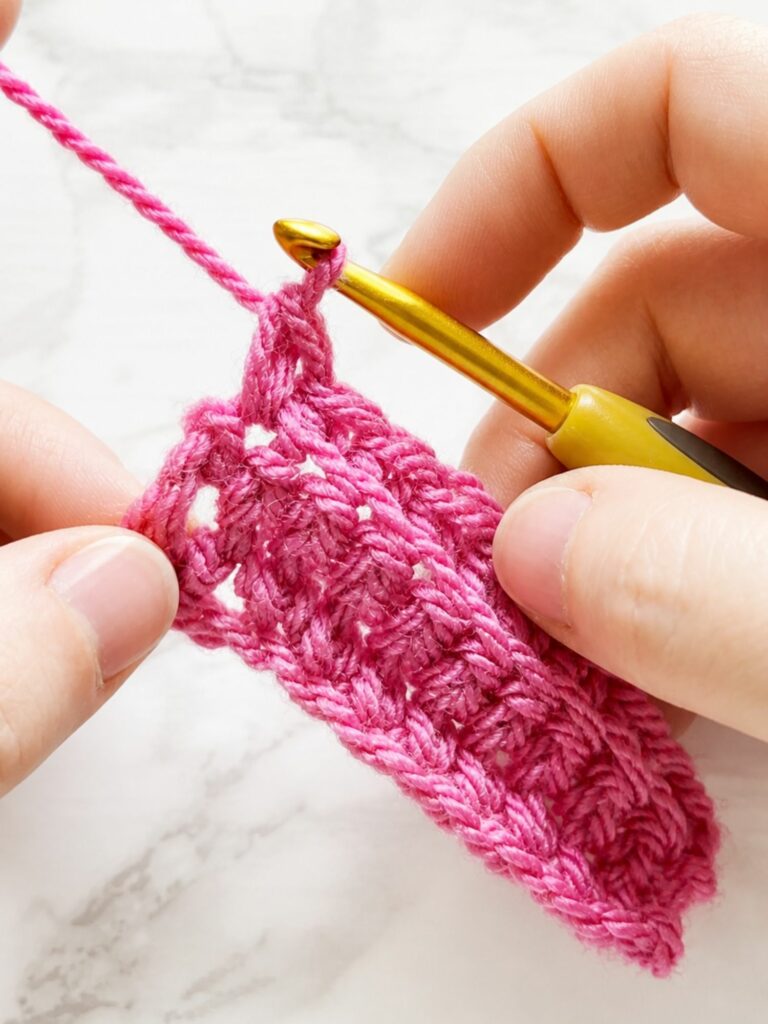
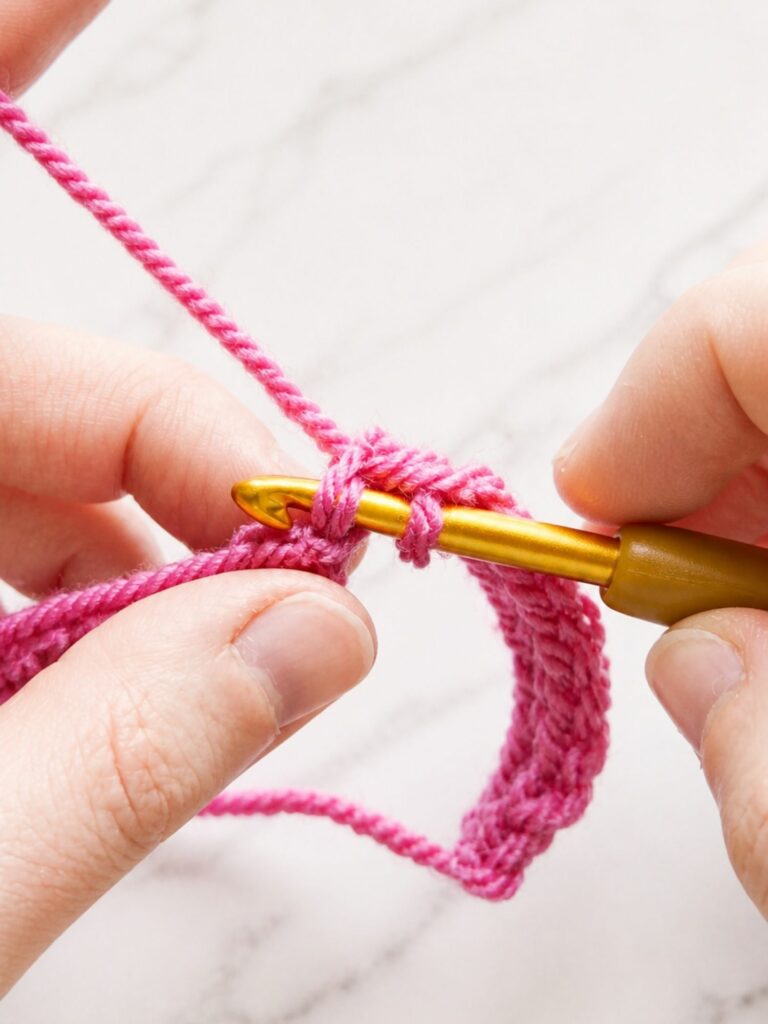
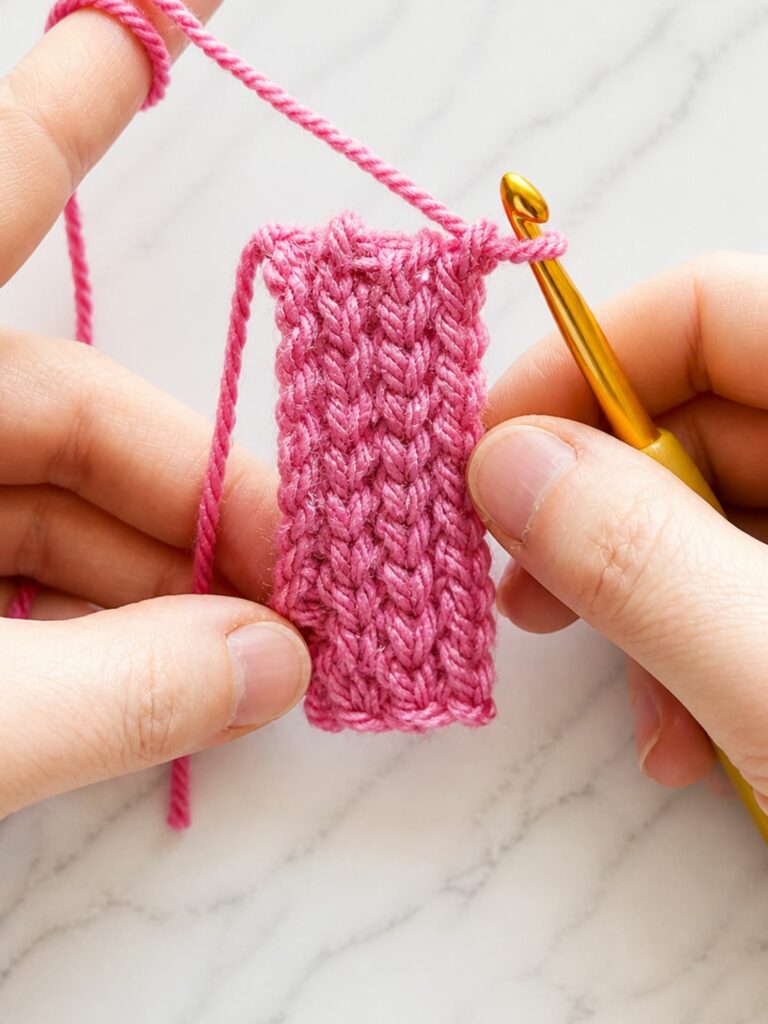
Step 4: Work Into the Back Loops Only
Now move to the next stitch.
You’ll notice each stitch has two loops, a front loop and a back loop.
For this ribbing, we’re working into the back loop only.
Work one single crochet in each back loop across the row until you reach the stitch right before the last one.
After a few stitches, you’ll start to see those front ridges forming across the fabric, and that’s what creates the ribbed look.
Step 5: Finish the Row
Once you reach the last stitch, work one regular single crochet under both loops again.
Doing this for the first and last stitch of every row helps the edges stay nice and straight.
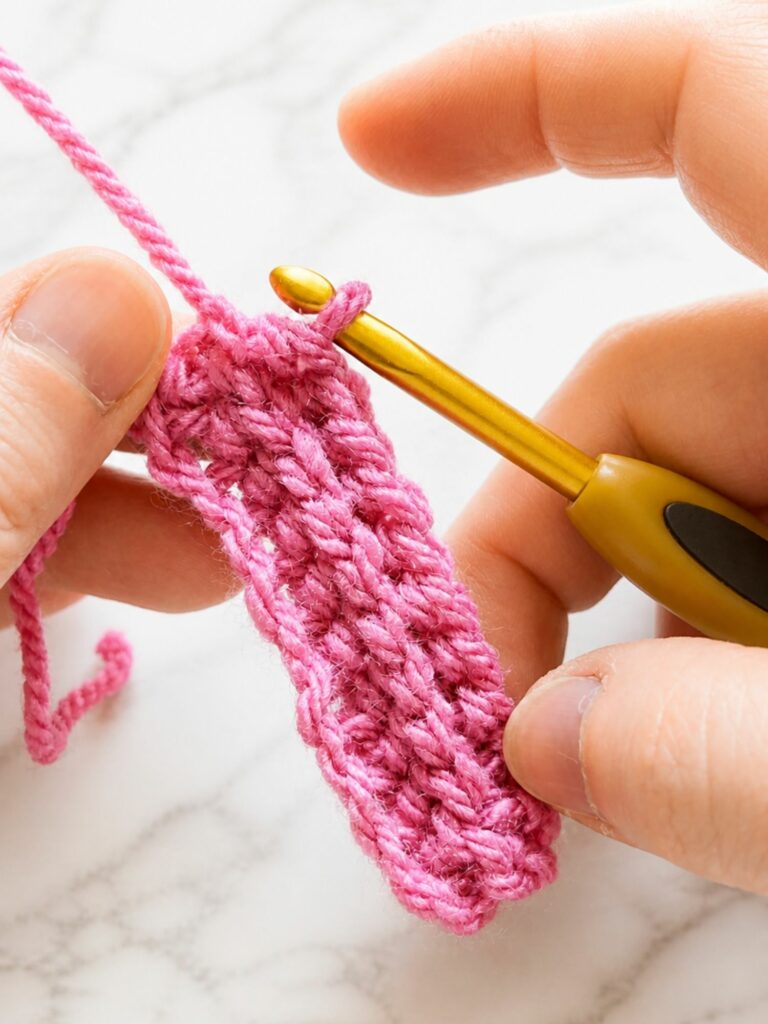
Step 6: Repeat the Same Row
From here, it’s really just the same process repeated over and over.
- first stitch under both loops
- middle stitches in the back loops only
- last stitch under both loops
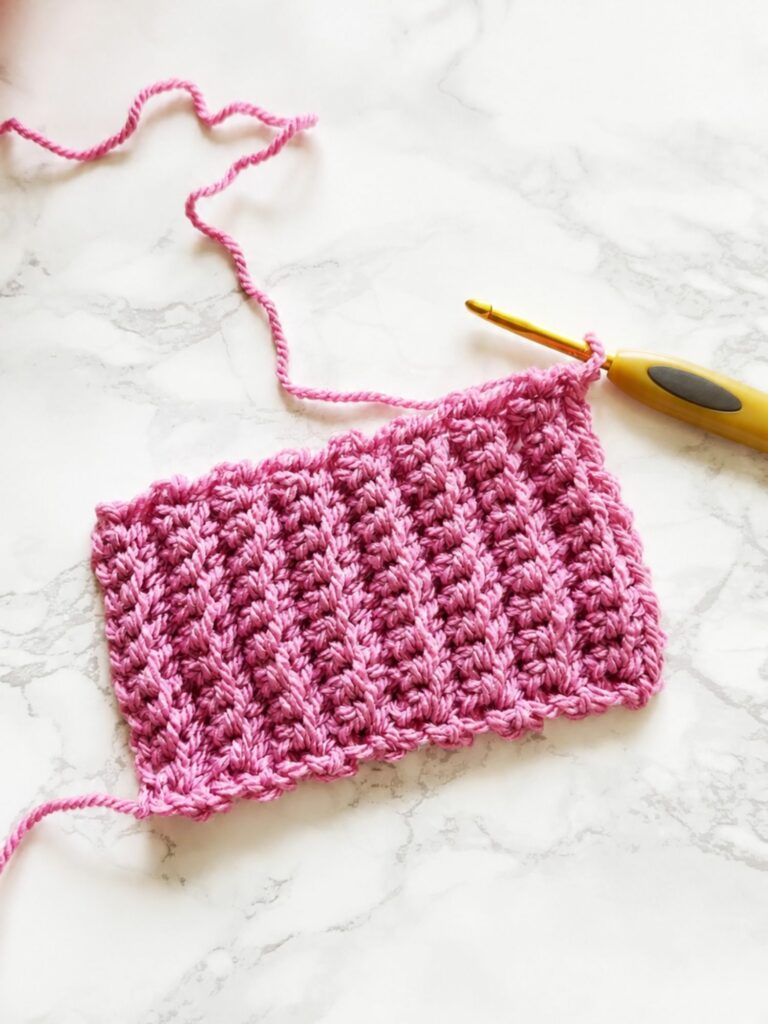
As the rows build up, the ribbing texture becomes much more visible.
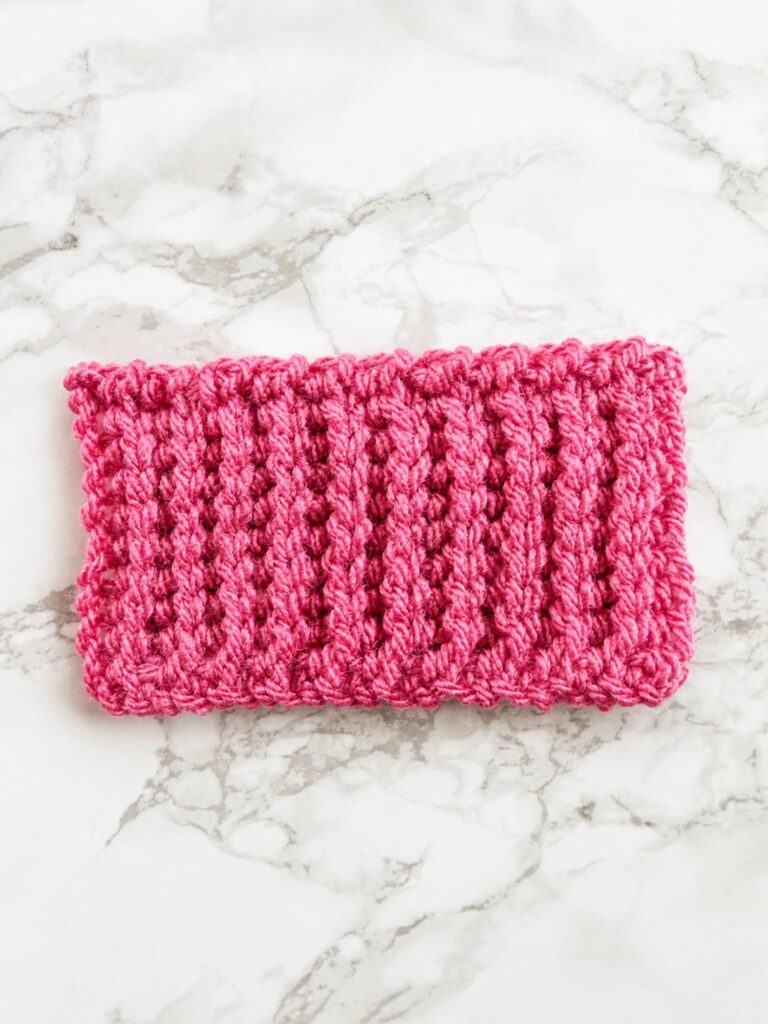
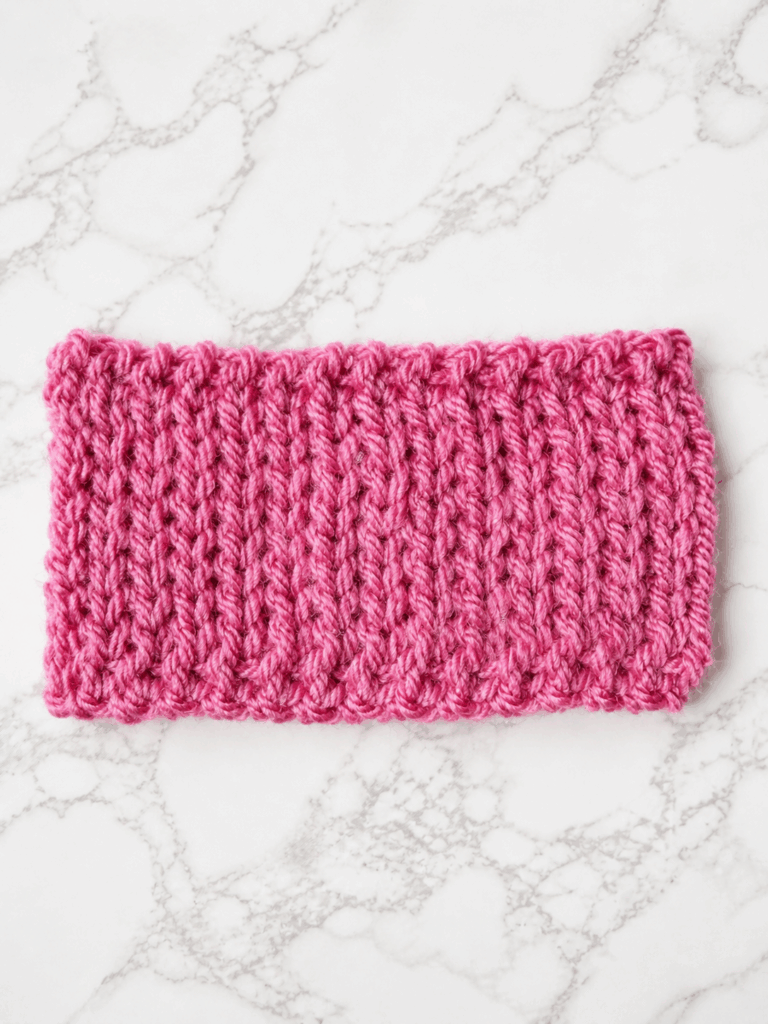
Step 7: Keep Going Until the Ribbing Is Long Enough
Continue repeating the rows until your ribbing reaches the length you need for your project.
And just remember:
- the starting chain creates the width
- the rows create the length
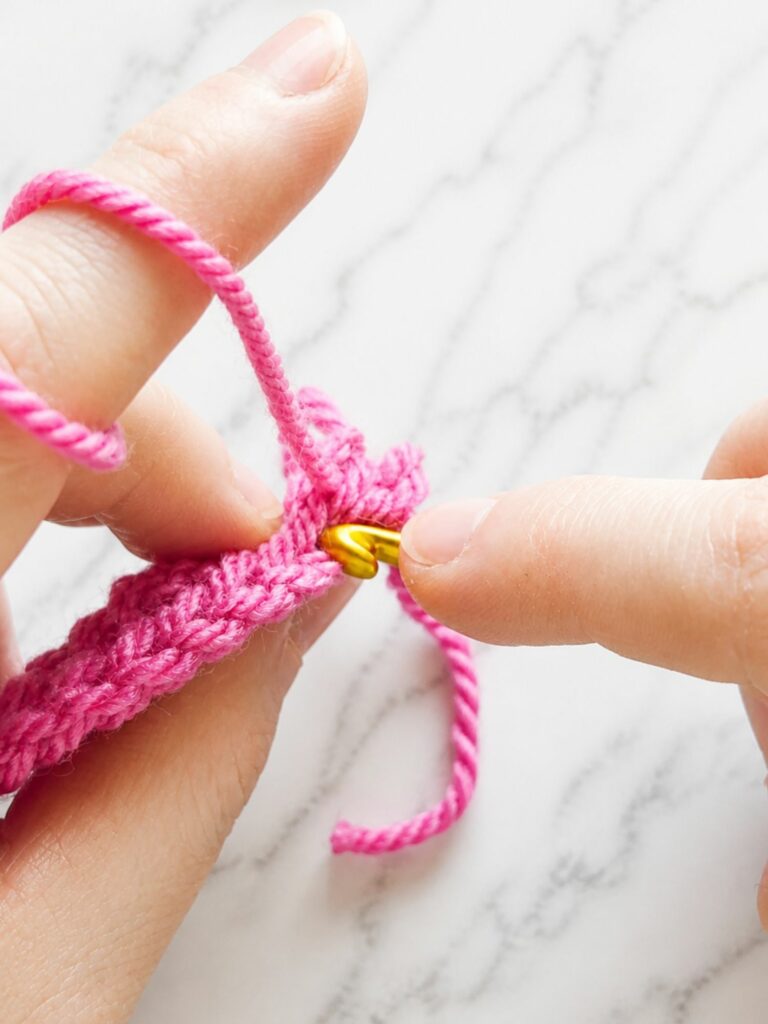
Step 8: Join the Ribbing
Once your ribbing is long enough, bring the short edges together and join them with slip stitches.
Take a second to line the rows up evenly before joining. It makes the finish look much cleaner.
Step 9: Continue With Your Project
Now your ribbing is ready.
At this point, you can either start building the rest of your project directly from the ribbing, or attach it later to an already finished edge.
Where I Use This Ribbing in My Projects
I use this ribbing when I want structure and a clean, predictable edge. It’s perfect for projects where the edge should keep its shape and not stretch out too much.
👉 Free Infant Hat Crochet Patterns
Great for a snug brim that stays put without feeling too tight.
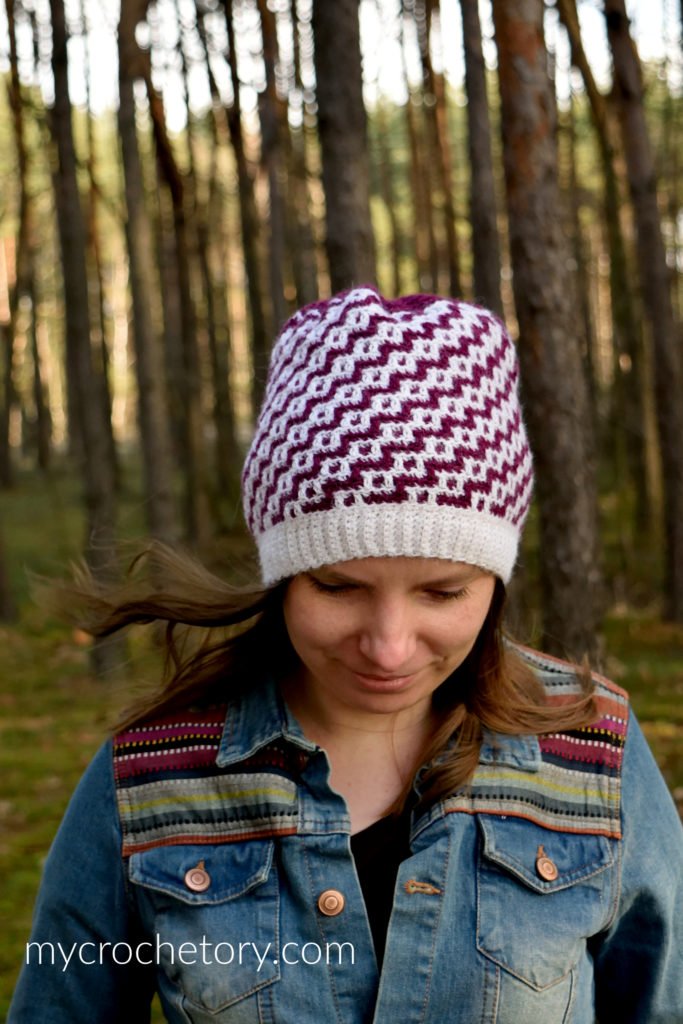
👉 Duende Mosaic Crochet Hat
Here, the ribbing adds stability and balances out the main pattern’s texture.
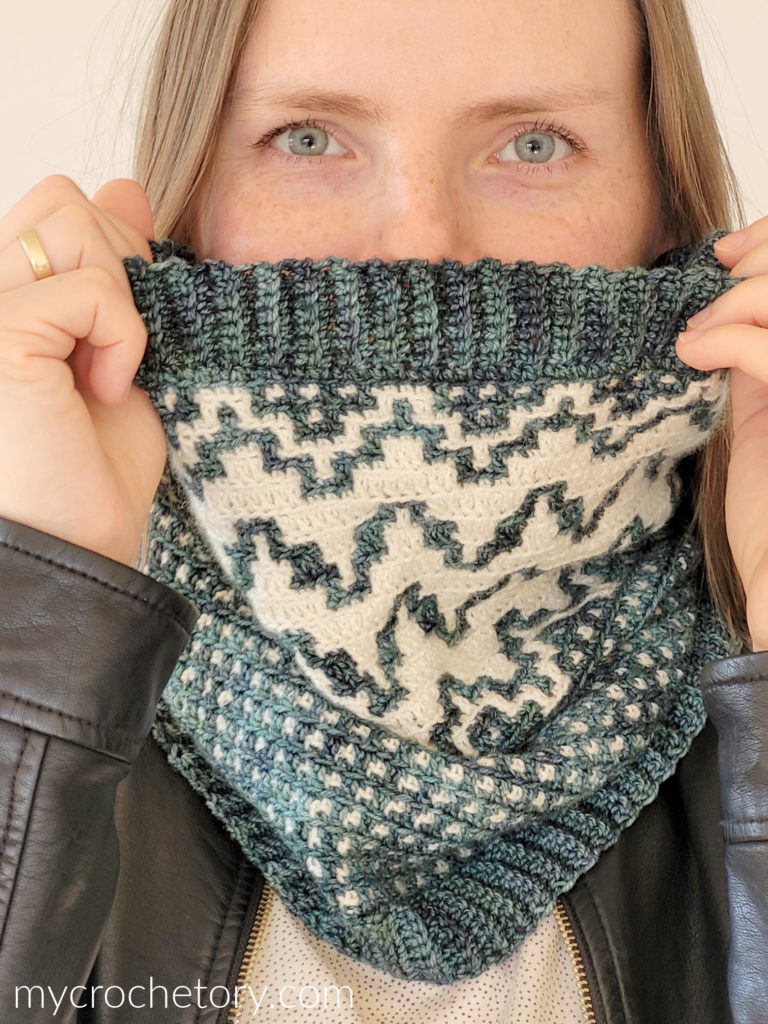
👉 Namari Mosaic Crochet Cowl
Great for ribbing that sits close without feeling tight.
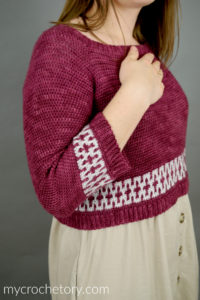
👉 Mosaic Cropped Sweater
The ribbing helps shape the garment and improves the fit.
What to Watch For
- If your ribbing feels stiff, your stitches may be too tight. Try loosening your grip or using a bigger hook. This helps your fabric relax and makes the ribbing softer and stretchier. Switching to a springy wool or stretch-blend yarn can also help. Sometimes, the yarn is the real reason ribbing feels stiff.
- If the edges look uneven, check the first and last stitch in each row.
- If the ridges aren’t visible, make sure you’re working only into the back loop.
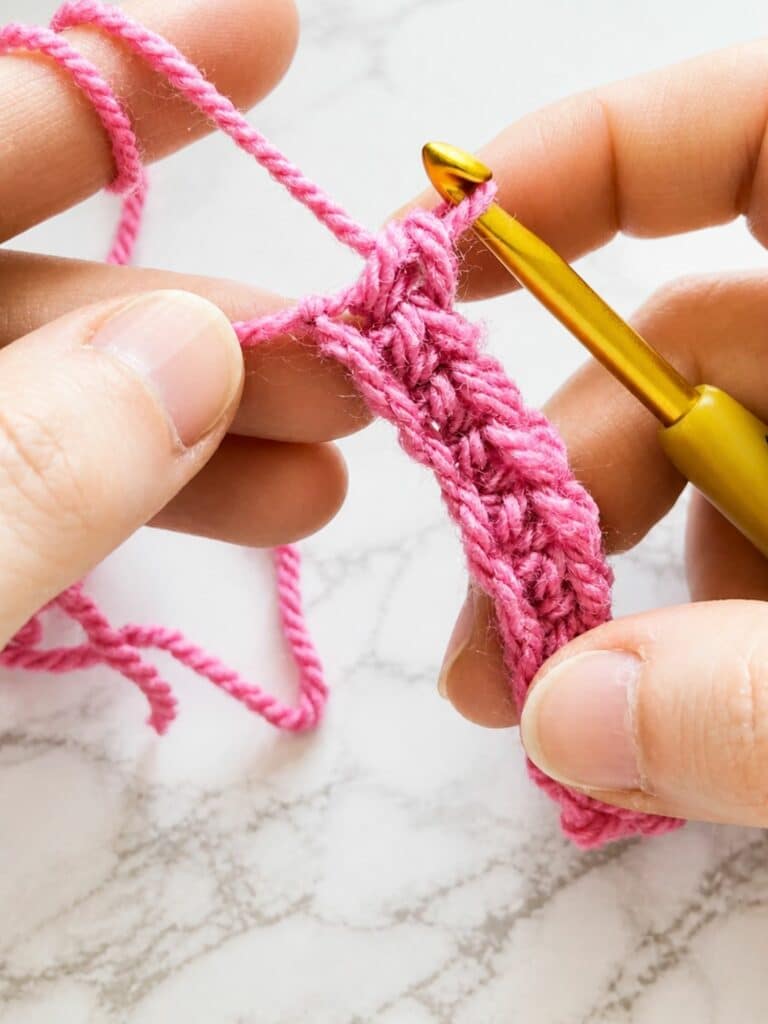
How to Crochet Ribbing With Yarn Over Slip Stitch (Step by Step)
This ribbing feels different from the others. The stitches are easy, and the fabric is softer, moves more, and bends with you.
If the back loop single crochet felt stiff, this method will feel much lighter and more flexible.
What Makes This Method Feel Different
That little yarn over before pulling through adds just enough height to change everything.
You’ll notice:
- Rows are slightly taller.
- Stitches are easier to work into.
- The fabric doesn’t tighten. You still get ribbing that hugs the body, but it feels smoother and easier. less stressful.
Step 1: Chain the Width of Your Ribbing
Start with a foundation chain as wide as you want your ribbing to be.
Keep your tension relaxed.
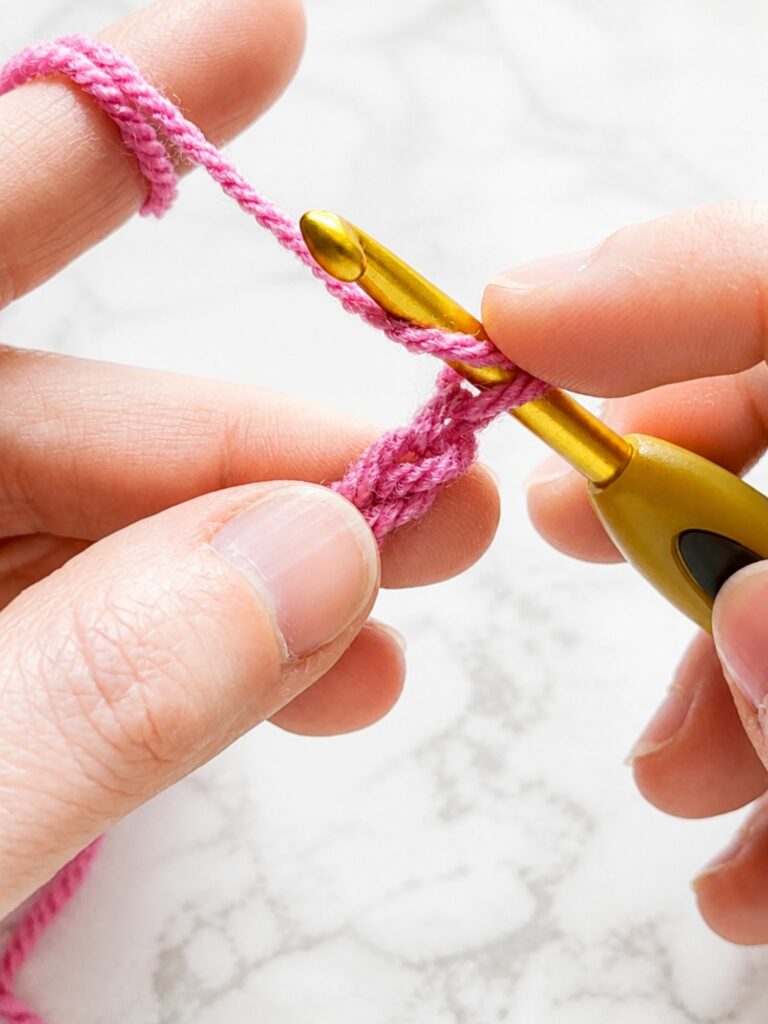
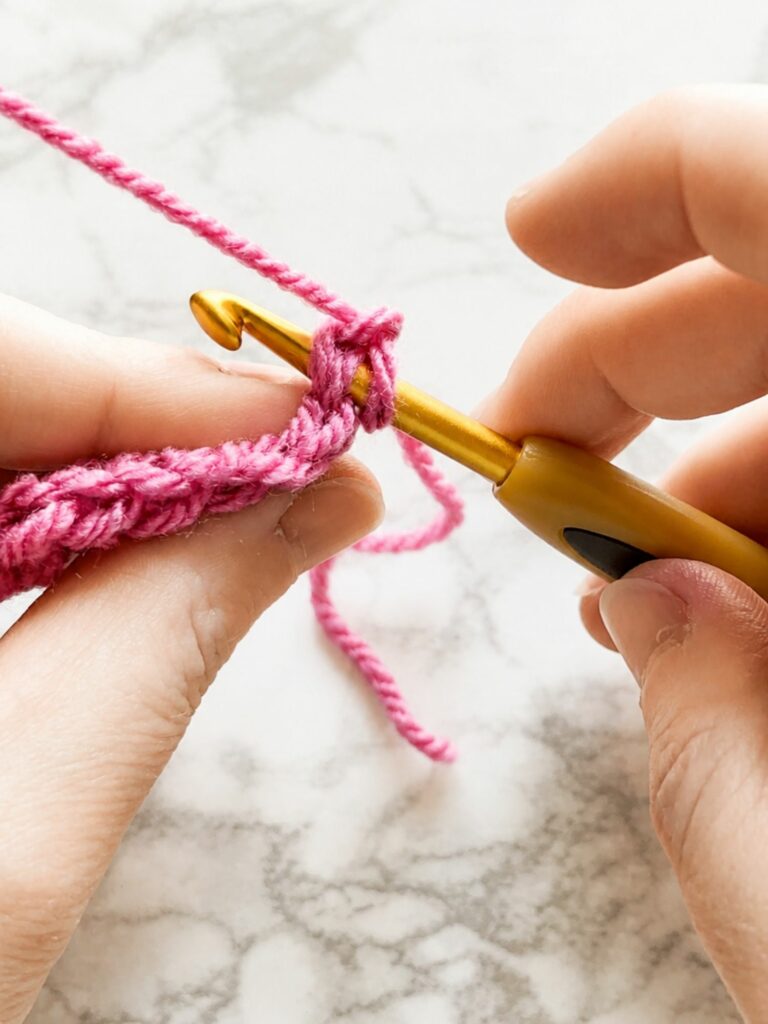
Step 2: Work the Foundation Row (Yarn Over Slip Stitch)
Yarn over.
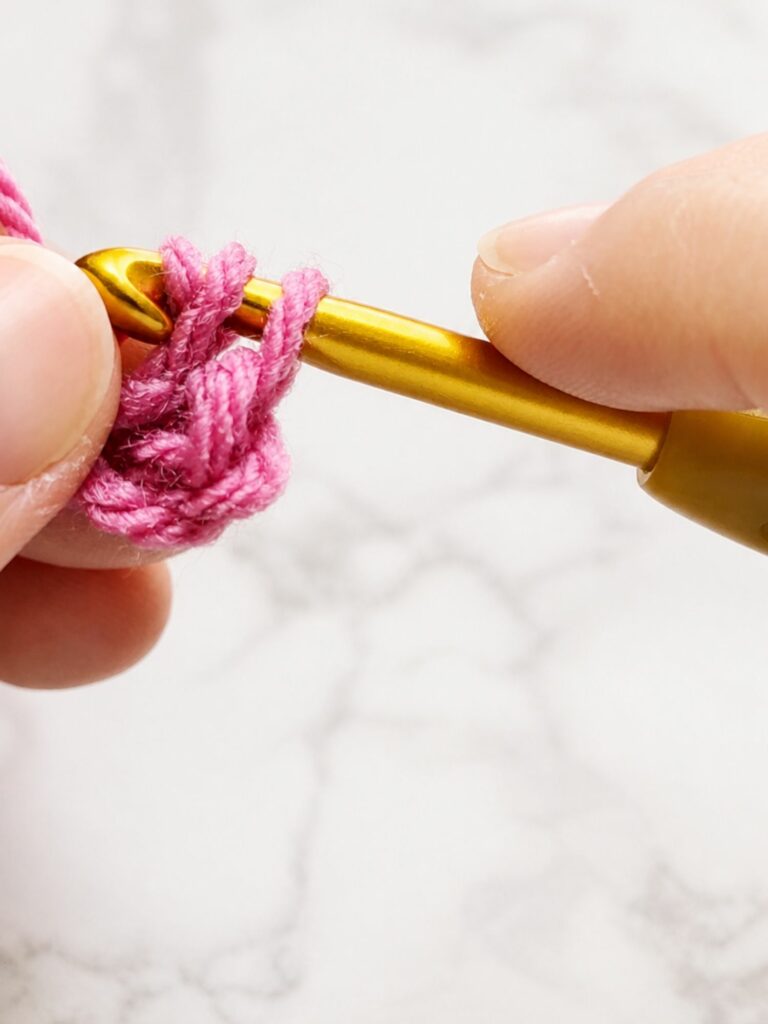
Insert your hook into the second chain from the hook, yarn over again, and pull up a loop.
Now you have three loops on your hook.
Pull the last loop through the other two.

Continue across and turn.
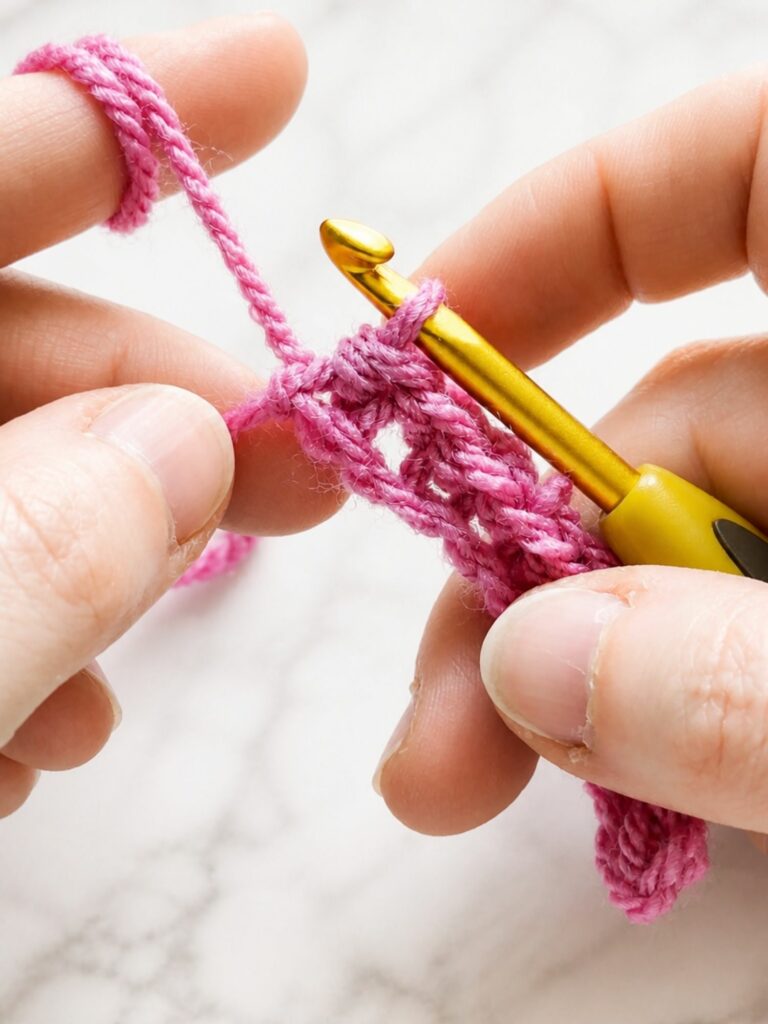
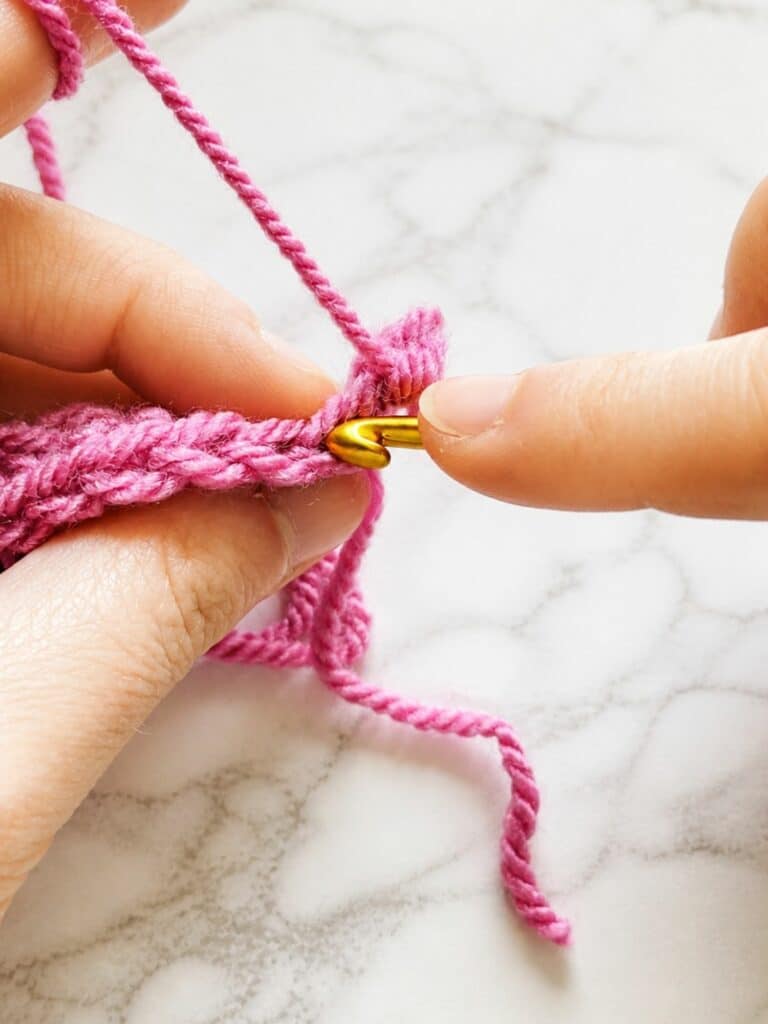
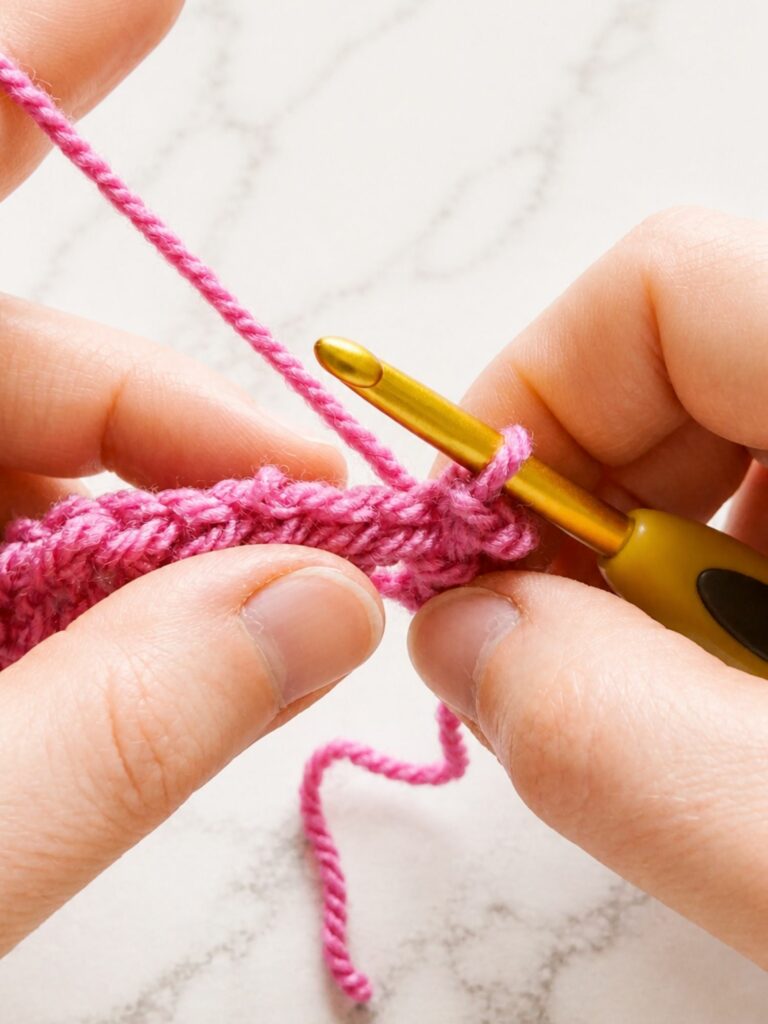
Step 3: Start the Slip Stitch Row
Make a turning chain and turn your work.
Just like with the previous ribbing, I like to start the row with the first stitch worked under both loops. It keeps the edge looking much cleaner and more even.
Insert your hook into the first stitch under both loops, yarn over, and pull the yarn through the stitch and the loop on your hook to complete the slip stitch.
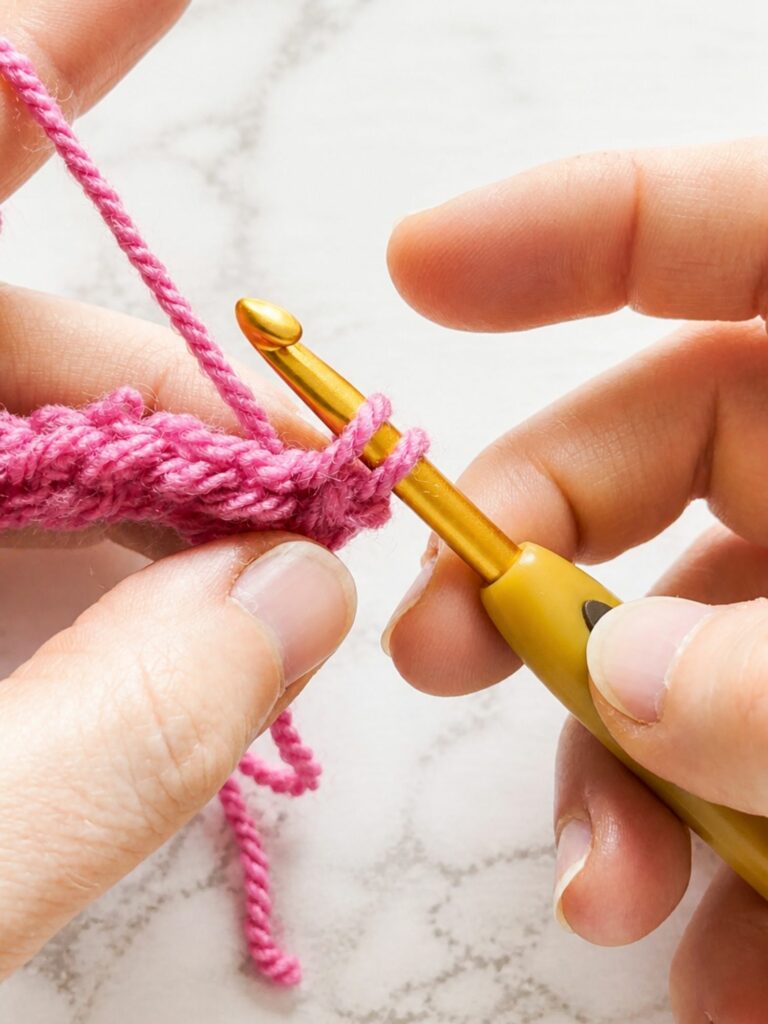
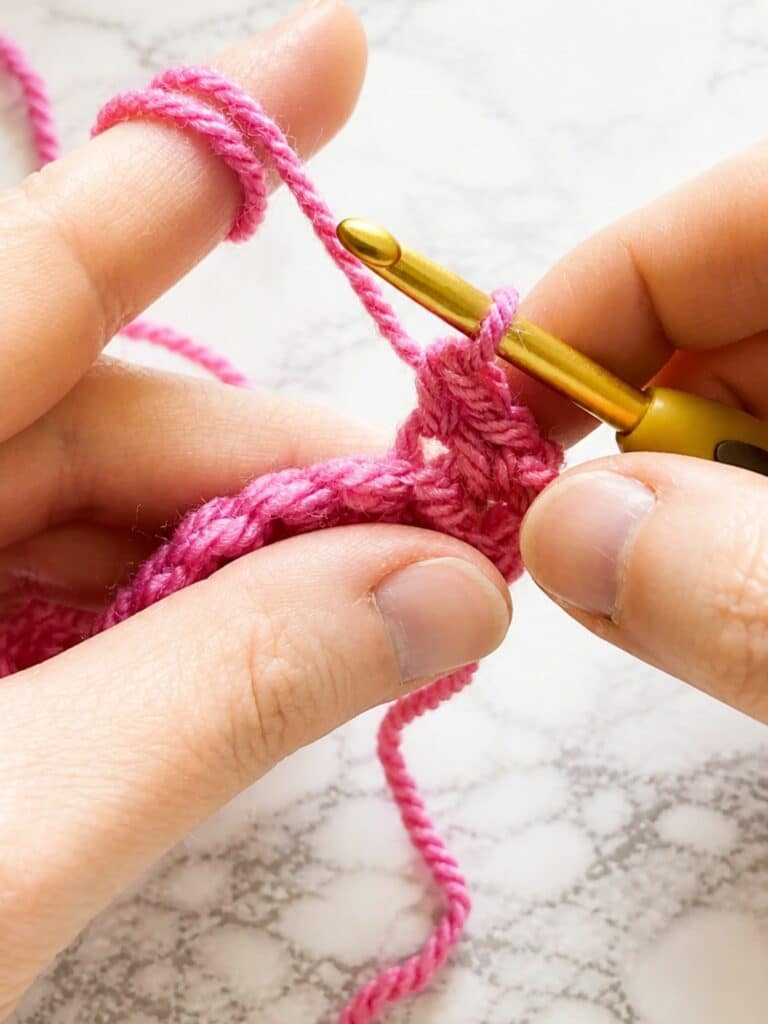
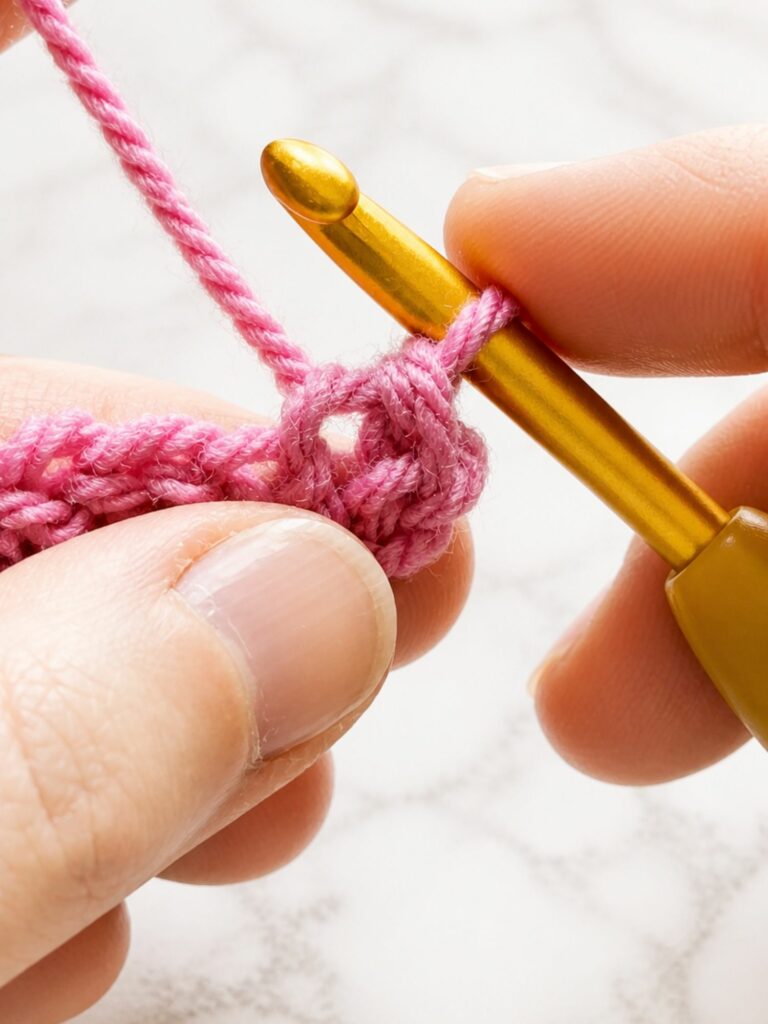
Step 4: Work Into the Back Loops Only
Now move to the next stitch.
You’ll again see the front and back loop of the stitch. For this ribbing, we’re working into the back loop only.
Insert your hook into the back loop, yarn over, and pull the yarn through both the stitch and the loop on your hook.
Continue working slip stitches into the back loops only across the row.
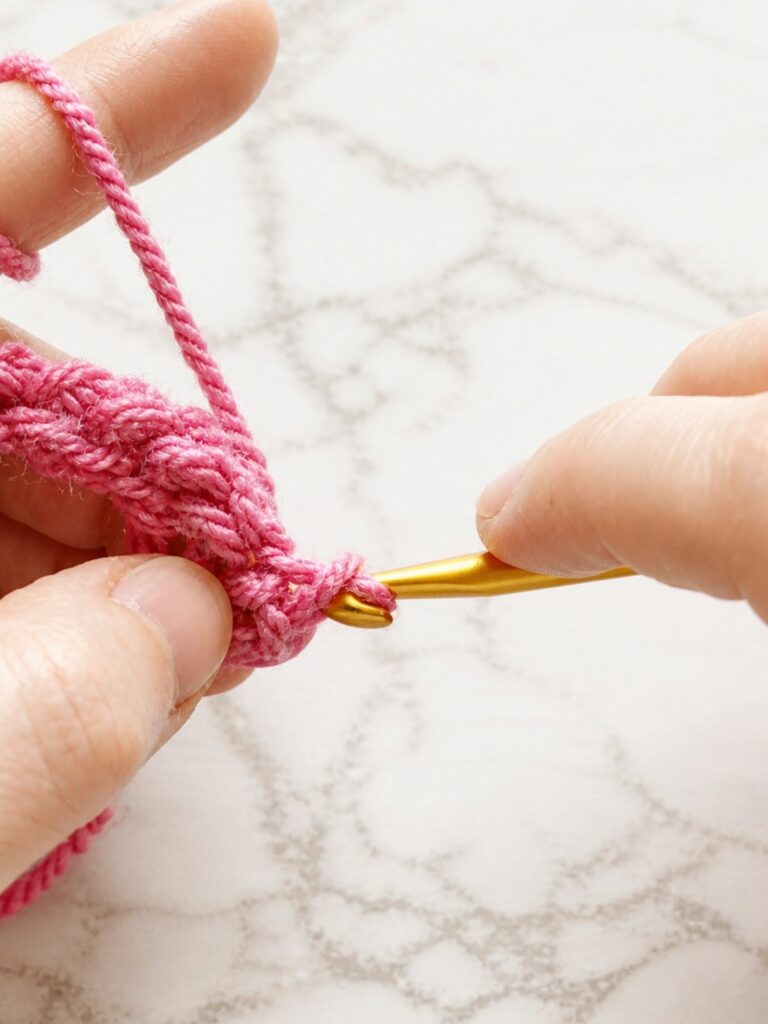
Step 5: Finish the Slip Stitch Row
Once you reach the last stitch, work the final slip stitch under both loops again.
This small detail helps keep both edges straight instead of slightly uneven or stretched out.
Then make a turning chain and turn your work.
Step 5: Repeat the Two-Row Sequence
Alternate:
- One row of slip stitches
- One row of yarn over slip stitches
Keep:
- First and last stitch under both loops
- Middle stitches in the back loop only
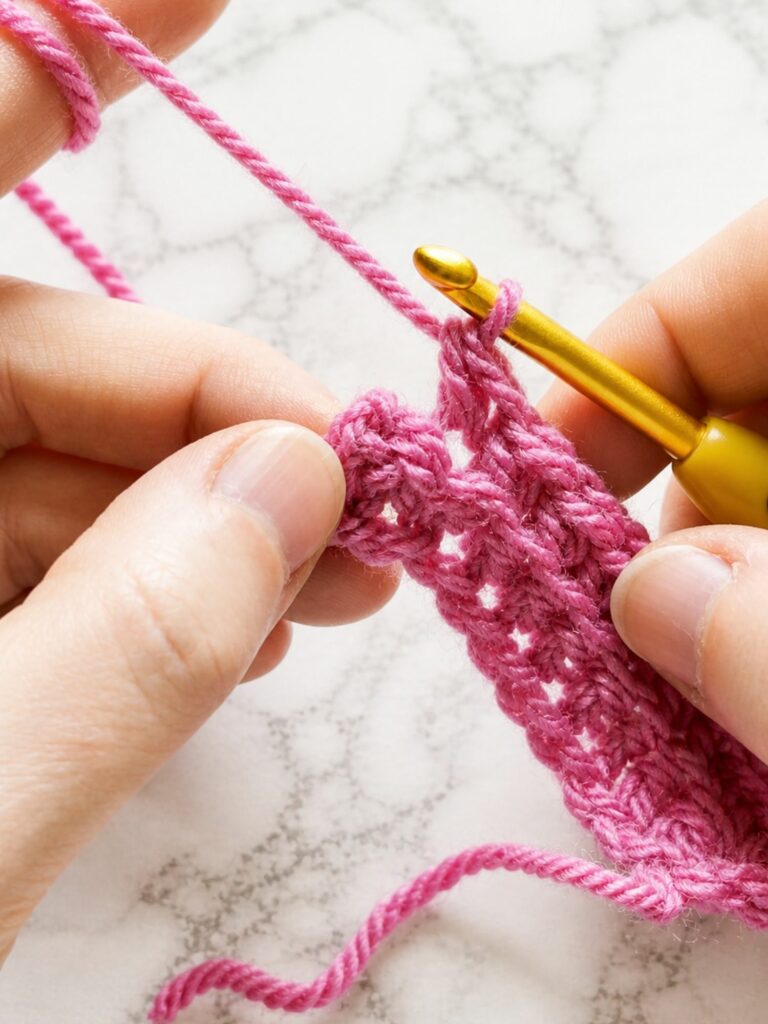
Step 6: Continue Until the Ribbing Is Long Enough
Repeat these steps until your ribbing is the length you want.
You’ll see the texture form, staying soft and flexible.
Step 7: Join or Attach the Ribbing
Join the short edges together or attach your ribbing to your project.
What You’ll Notice as You Work
- Stitches are easier to pull through than classic slip stitch.
- The fabric stays flexible and doesn’t tighten too quickly.
- The ribbing feels more forgiving overall.
How to Crochet Ribbing With Slip Stitch (Clean, Dense, Knit-Like Finish)
If you want a clean, simple, almost knit-like edge, this method is for you.
The texture is tighter, the lines are clear, and the finish looks polished. It takes a little longer, but the result is worth it.
What Makes This Ribbing Feel More Refined
Slip stitch ribbing creates a tight, dense fabric.
You get:
- A smooth, even surface
- Defined rib texture
- A clean edge that isn’t bulky
It still hugs the body, but looks crisp and minimal.
Step 1: Chain the Width of Your Ribbing
Start with a relaxed foundation chain that sets the width.
Step 2: Work the Foundation Row (Slip Stitch)
Insert your hook into the second chain from the hook.
Work slip stitches across, under both loops.
Turn.
Step 3: Work Into the Back Loop Only
Chain for your turn.
First stitch: under both loops.
Then:
- Work slip stitches into the back loops only across the row.
- Last stitch: under both loops.
Turn.
Step 4: Repeat the Row
For every row:
- First stitch under both loops
- Middle stitches in the back loop only
- Last stitch under both loops
Turn at the end.
Step 5: Continue Until You Reach the Desired Length
Repeat until your ribbing is long enough.
Work slowly to keep the texture even.
Step 6: Join or Attach the Ribbing
Join the short edges or attach the ribbing to your project. Since the fabric is dense, joining it neatly makes a big difference.
What to Watch For
- Stitches can get tight if your tension builds up.
- Pulling through loops may get hard if you rush.
- Edges can pull in if the first or last stitch is too tight.
If needed, use a bigger hook or relax your tension.
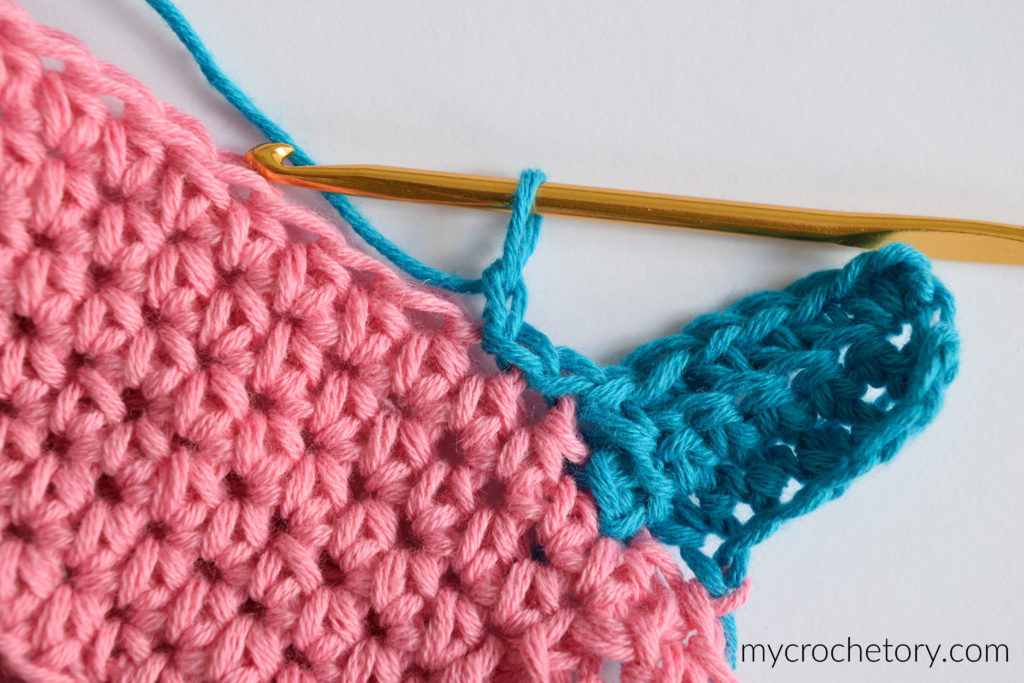
Can You Add Crochet Ribbing After the Main Piece Is Finished?
Absolutely! Adding ribbing later is one of the best things in crochet.
You can add ribbing to the bottom of a sweater, a cuff, a neckline, or a cowl. Work short rows directly onto the edge. Join each row to the main piece with a slip stitch, then turn and work back across.
It might feel strange at first, but once you find your rhythm, it’s super satisfying.
Quick steps:
- Join your yarn to the edge.
- Chain for the ribbing’s width.
- Work your chosen ribbing stitch back toward the edge.
- Attach each short row to the main piece with a slip stitch.
- Turn and work back across.
- Repeat until the ribbing covers the edge.
Ribbing is made of small rows that grow out from your project’s edge. As you continue, the ribbing builds up and gives your project a clean, custom finish.
Why Your Crochet Ribbing Looks Wrong (And How to Fix It)
If your ribbing doesn’t look or feel right, it usually comes down to small details. Ribbing shows every little mistake, so even small changes in tightness or stitch placement can make a big difference.
Your Ribbing Feels Too Tight
This happens most with slip stitch methods.
Why?
- Stitches are too tight.
- Tension builds as you go.
- The starting chain is too tight.
How to fix:
- Loosen your grip.
- Use a bigger hook.
- Keep your starting chain relaxed.
Your Ribbing Feels Too Loose or Floppy
This shows up when the edge won’t hold its shape.
Why?
- Stitches are too loose or uneven.
- The method doesn’t match the project.
How to fix:
- Switch to a smaller hook.
- Tighten your tension.
- Use back loop single crochet for more structure.
The Ribbing Doesn’t Stretch as Expected
This is usually a mismatch between the stitch and your goal.
Why?
- You picked a ribbing that holds its shape when you want to stretch.
How to fix:
- Use slip stitch ribbing for greater flexibility.
- Use back loop single crochet when you want structure.
Your Edges Are Pulling In
If your ribbing curves inward or narrows, this is probably why.
Why?
- The first or last stitch is too tight.
- Edge stitches are inconsistent.
How to fix:
- Slow down on the first and last stitch.
- Keep your tension even.
- Use stitch markers if needed.
Your Ribbing Looks Flat
If you don’t see ridges, something’s off.
Why?
- Not evenly working into the back loop.
- Tension is too loose.
- Stitches aren’t aligned.
How to fix:
- Check that you’re using the back loop where needed.
- Place your stitches consistently.
- Adjust your tension.
Your Ribbing Is Hard to Work
This is common with dense methods.
Why?
- Stitches are pulled too tight.
- Tension builds up.
How to fix:
- Relax your grip.
- Use a bigger hook.
- Switch to yarn over slip stitch if needed.
Your Ribbing Looks Uneven
If the texture is inconsistent, here’s what’s usually wrong.
Why?
- Skipping or adding stitches
- Uneven tension
- Inconsistent stitch height
How to fix:
- Count stitches at the end of each row.
- Don’t skip the first or last stitch.
- Keep your rhythm steady as you work.
Quick Ribbing Troubleshooting Checklist
- Edges pulling in? Loosen the first and last stitch.
- Ribbing too tight? Use a bigger hook or loosen stitches.
- Ribbing too loose? Use a smaller hook or tighten stitches.
- No visible ridges? Check back loop placement.
- Hard to work? Switch to yarn over slip stitch.
Most problems are caused by tension and consistency.
Crochet Ribbing FAQ
Why is my crochet ribbing not stretchy?
Usually, it’s the stitch you picked, or your stitches are too tight. Back loop single crochet isn’t very stretchy, no matter what. Slip stitch and yarn over slip stitch ribbing stretches more, but they lose stretch if your stitches are too tight.
Try using a larger hook, loosening your tension, or switching to slip stitch ribbing.
Which crochet ribbing looks the most like knitting?
Slip stitch ribbing looks most like knitting. The stitches sit close together, making a smooth, even surface. Yarn over slip stitch ribbing is similar, but with a slightly more open texture.
What is the stretchiest crochet ribbing?
Slip stitch and yarn over slip stitch ribbing stretches the most. They adapt to your body instead of holding a fixed shape. Back loop single crochet holds its shape and is less stretchy.
How do you crochet ribbing for a hat brim?
Work ribbing in rows, then join them into a circle for the brim. Start by chaining the width, then work back and forth in rows until it’s long enough to fit around the head. Join the ends, then continue the hat.
- Use back loop single crochet for structure.
- Use slip stitch ribbing for a snug, flexible fit.
Can beginners crochet ribbing?
Yes! Back loop single crochet ribbing is the easiest for beginners because it has a simple rhythm and clear stitches. Slip stitch ribbing can be tricky if your stitches get tight, but it gets easier with practice. Yarn over slip stitch is even easier on your hands.
Why does my ribbing curl or twist?
Usually, it’s uneven tension or tight edges. Other causes:
- Tight starting chain
- Inconsistent stitches
- Pulling the first or last stitch too tight
Fix it by keeping tension even, checking your edge stitches, and making sure your chain isn’t tight.
How many stitches should I chain for ribbing?
It depends on how wide you want your ribbing. A shorter chain makes narrow ribbing; a longer chain makes a wider edge. There’s no fixed number—choose what looks and feels right for your project.
Can I add ribbing after finishing a project?
Yes! You can attach ribbing directly to the edge using short rows, joining each with slip stitches as you go. This gives you more control over the final fit and lets you adjust the edge without redoing everything.
Why does my ribbing look uneven?
Usually, it’s inconsistent tension or missed stitches.
Common reasons:
- Skipping the first or last stitch
- Adding extra stitches
- Uneven stitch height
Count your stitches and keep your tension steady to fix it.
Want Your Ribbing to Look More Finished? Start Here
Ribbing makes a big difference, but it doesn’t work alone. If something still feels off, the problem usually starts before the ribbing.
Most often, it’s about how the edge is built before adding ribbing.
If Your Ribbing Doesn’t Stretch the Way You Expected
Sometimes the ribbing is fine, but the edge underneath is too tight. Even flexible ribbing won’t stretch right if the base is stiff. Try using the foundation single crochet technique for a stretchier base.
If Your Edges Look Uneven or Pulled In
Ribbing follows the shape of your edge. If the edge isn’t straight, the ribbing won’t look clean either. Learn how to create straight edges in crochet with this straight edge tutorial.
If You’re Not Sure About Stitch Placement
Ribbing shows every small mistake. If something looks off and you’re not sure why, this single crochet stitch guide for beginners will help reset your basics.
If Your Finish Looks Slightly Messy
Even good ribbing can look unfinished if the joins aren’t clean. Improve your finishing by learning how to join yarn ends neatly.
If You’re Still Learning the Basics
If you want your ribbing to feel easier and more predictable, keep practicing and be patient with yourself. Every try makes you better. Even experienced crocheters redo ribbing sometimes.
- How to foundation single crochet
- How to double crochet 2 row at once
- How to make a slip knot – 3 Easy Ways
- How to crochet standing stitches
- How to crochet an I-cord
- Mattress stitch join tutorial
Save This for Later (You’ll Want to Come Back to It)
Ribbing might seem like a small detail, but it makes a big difference. When you focus on it, your whole project improves. The difference between a stiff edge and a perfect fit often comes down to the ribbing. You’ve learned:
- When ribbing should hold shape
- When should it stretch
- Why do some methods behave almost the same
You don’t need to memorize every detail. Just remember how each ribbing type works. If something feels off, return to this guide and adjust your project. A small change in ribbing can make your whole piece stand out.p
- Back loop single crochet → structured, easy, low stretch
- Slip stitch ribbing → close fit, flexible.
- Yarn over slip stitch → same behavior, easier to work
Save It Before You Forget
If you like trying different finishes, save this guide so you can:
- Compare ribbing types quickly.
- Choose the right one without guessing.
- Avoid redoing edges later.
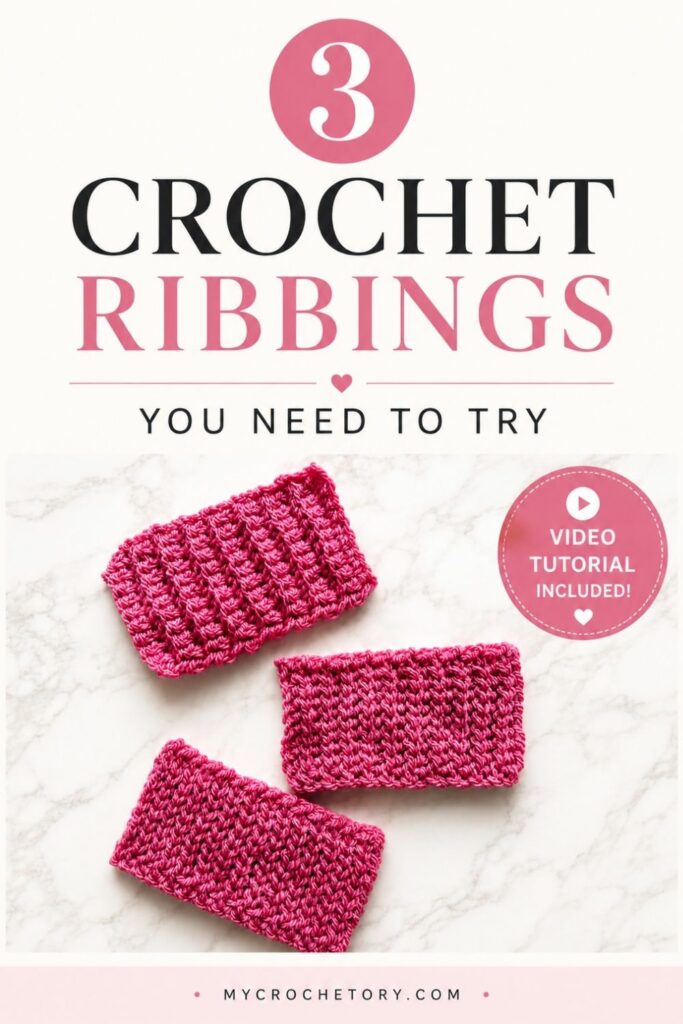
Don’t forget to save this Pin for easy reference: 📌
We’d love to hear about your crochet adventures and see your beautiful creations. Drop a comment below sharing your thoughts, questions, or even your favorite crochet tips! Your voice adds a vibrant thread to our forum community.
Sharing is caring! If you found this guide helpful, consider spreading the love. Click the share button and inspire other crocheters.
Stay in the loop with our latest crochet guides, tips, and inspiration. Subscribe to our newsletter for exclusive content straight to your inbox. Never miss a stitch—subscribe today!
Happy crocheting, and may your yarn always be tangle-free!
Join my Facebook Group and Official Ravelry Group where you can find necessary support, you can ask questions or share your finished projects.
You can also follow my Instagram, Facebook page and Pinterest.
I am crocheting a ribbed brim for a hat. Unfortunately, I have frogged many times as The ribbing rows start to slant (instead of standing straight up and down) after about the third or fourth row. What am I doing wrong?
It’s hard to say not seeing your project. Please send me some pics at mycrochetory@gmail.com and I will look at this.
Thank you. I have been trying to figure out how to do this on my own for a baby sweater bottom and sleeve.
Now I get it!! Thanks.
Hi, Silvia. Thanks for the great tutorial on adding ribbed crochet at the end of a project. Very glad I found your site. Please, what does BLsc mean? Thanks in advance.
Hi! BLsc means back loop single crochet.
Thank you very much for this great tutorial. I can’t follow videos so the pictures have been very helpful.I have just crocheted my first rib at the end of a sleeve and I am feeling so proud of myself. I am 86 years of age and have been crocheting most of my life. Thank you again.
This tutorial seems amazing and easy to follow, I can’t wait to add it to my next project! I have a question though, if I wanted my cuffs to be tighter how would I go about that? I’ll be adding them at the end of my project. Thanks!
Te felicito por tus tutoriales. Son muy claros y me ayudaron mucho en mi tejido. Gracias por compartir tanto!!
Hello! Love the instruction for the ribbj g, I’m using it as a border for a cardigan, any tips for using it on corners?
Thanks!!