
Updated: 14 August 2026 by Sylwia (MyCrochetory)
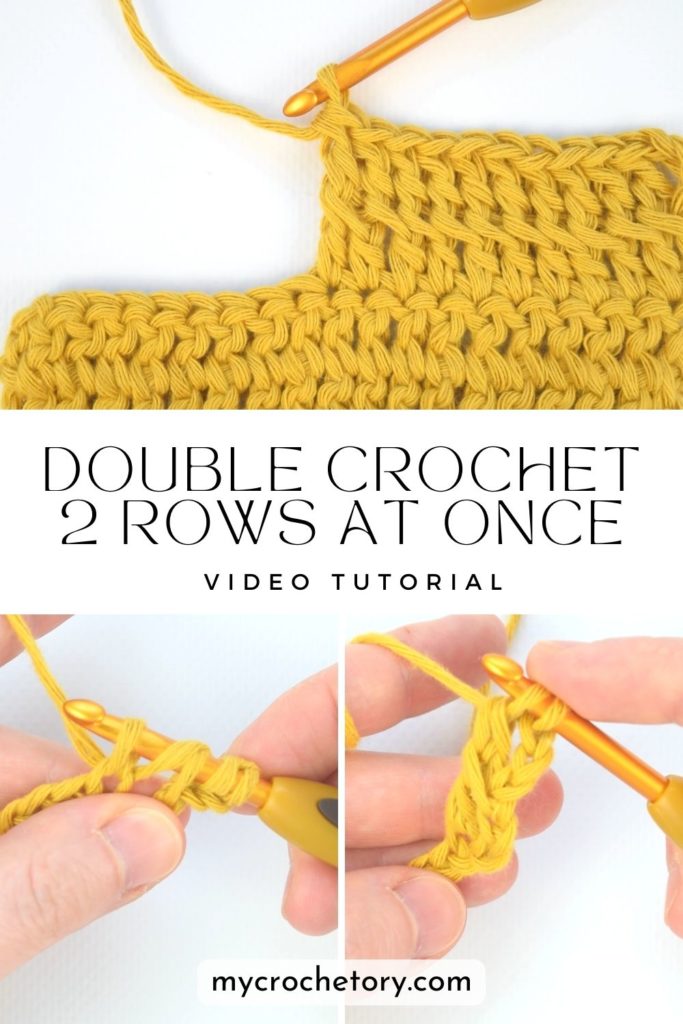
Crochet has so many little tricks hiding in it, and this one’s a fun surprise if you haven’t come across it yet. You can double crochet 2 rows at once, using the exact stitch you already know how to make.
Nothing new to learn here, just a different way to use what you’ve got, and it gets you twice as far, twice as fast.
The rows even come out neater, without the gaps that sometimes creep in between them. So if you’ve got a big project sitting around (a blanket, a scarf, anything with tons of plain rows), this trick is going to save you real time.
Here’s exactly how it works, step by step, with pictures and a video if you’d rather watch than read.
Why Bother Double Crocheting Two Rows at Once?
Here’s the honest answer: it just makes crocheting less of a chore. You already know the stitch, so there’s nothing new to figure out, only more mileage out of every move you make.
And that shows up first as time saved, since less turning and stopping means a project that used to eat your whole evening might only take half of one.
There’s a bonus most people don’t expect, too. Because you’re working both rows together, your tension naturally stays more consistent, which means your stitches come out more even and the whole thing looks tidier once it’s done.
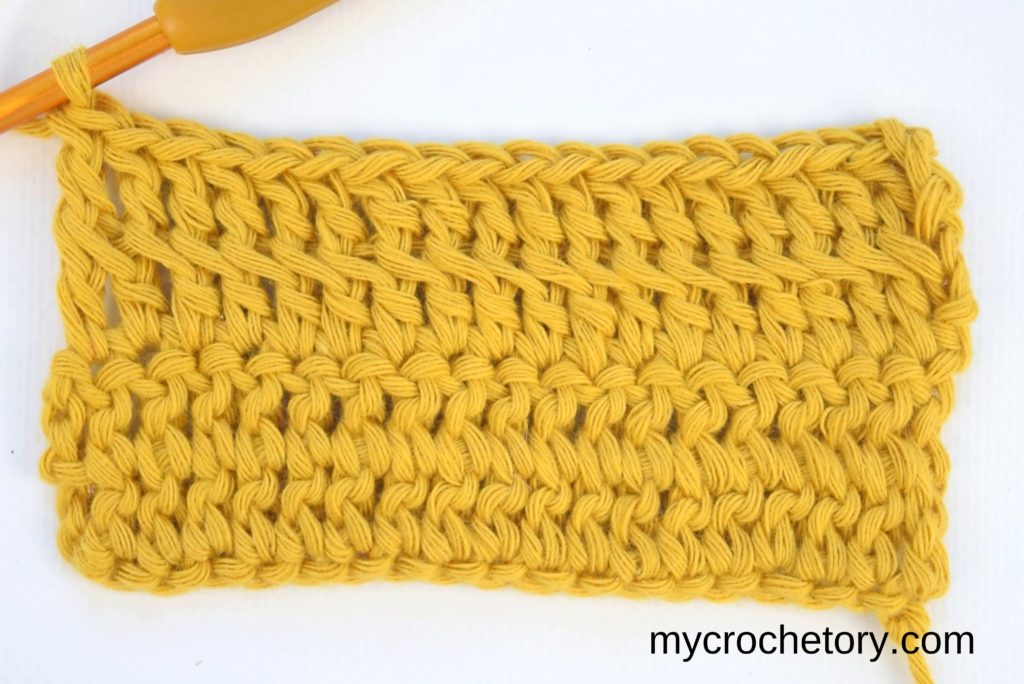
That same steady rhythm also cuts down on mistakes, since you’re not constantly flipping back and forth between rows and losing your place.
The bigger the project, the more this trick pays off. On something like a blanket, the fabric ends up a little sturdier, so it holds its shape instead of stretching out weird over time.
Curious about doing this with other stitches? I’ve also got tutorials for single crochet 2 rows at once and half double crochet 2 rows at once.

Watch It in Action
Reading steps is great, but sometimes watching just clicks faster, so here’s the video walkthrough.
Quick tip: switch off any ad blocker first, or the video might not load right.
Picture Tutorial, Step by Step
Alright, let’s get into it. This is where you’ll actually see how the whole thing comes together, row by row, photo by photo.
ROW 1 & ROW 2
Step 1: Make a slip knot and chain any length you want, plus 6.

Step 2: Yarn over, then insert your hook into the 4th chain from the hook.

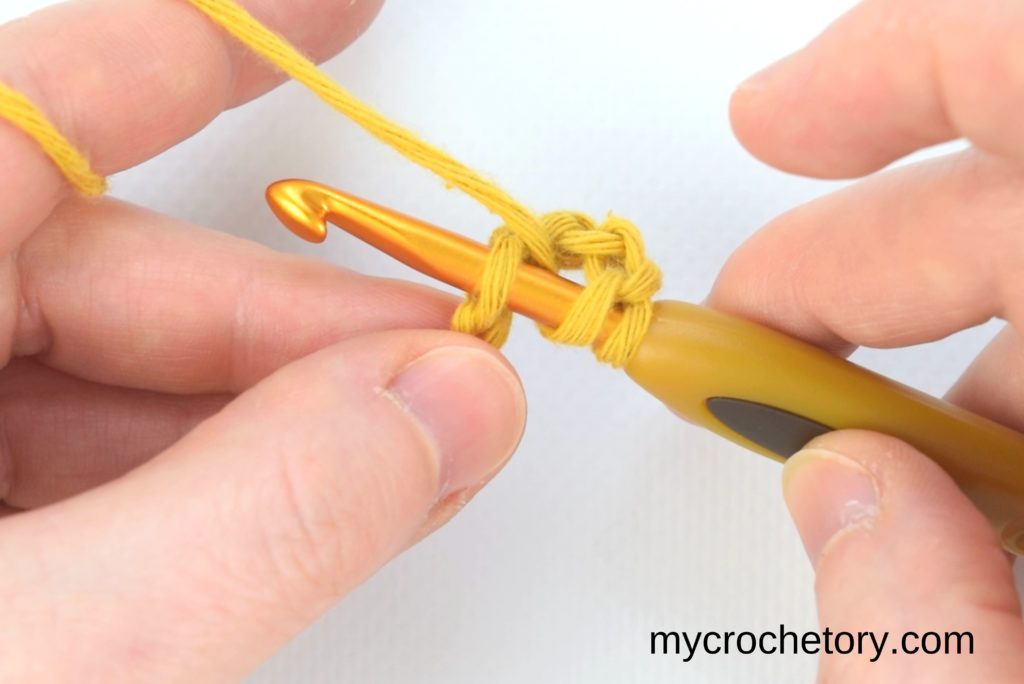
Step 3: Yarn over again, skip 2 chains, and insert the hook into the next chain.
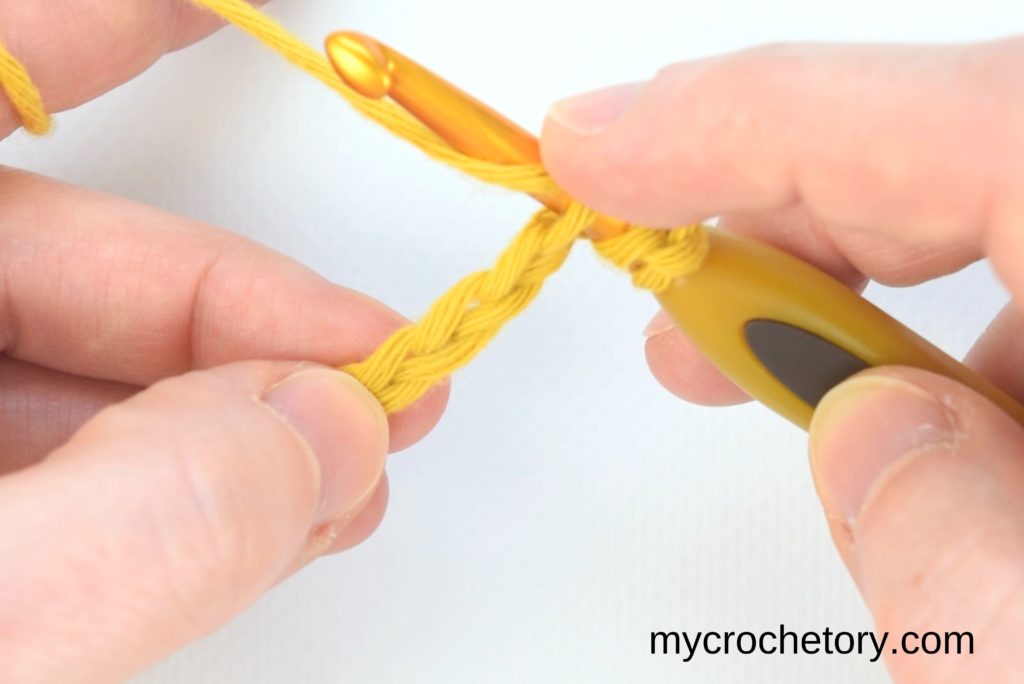
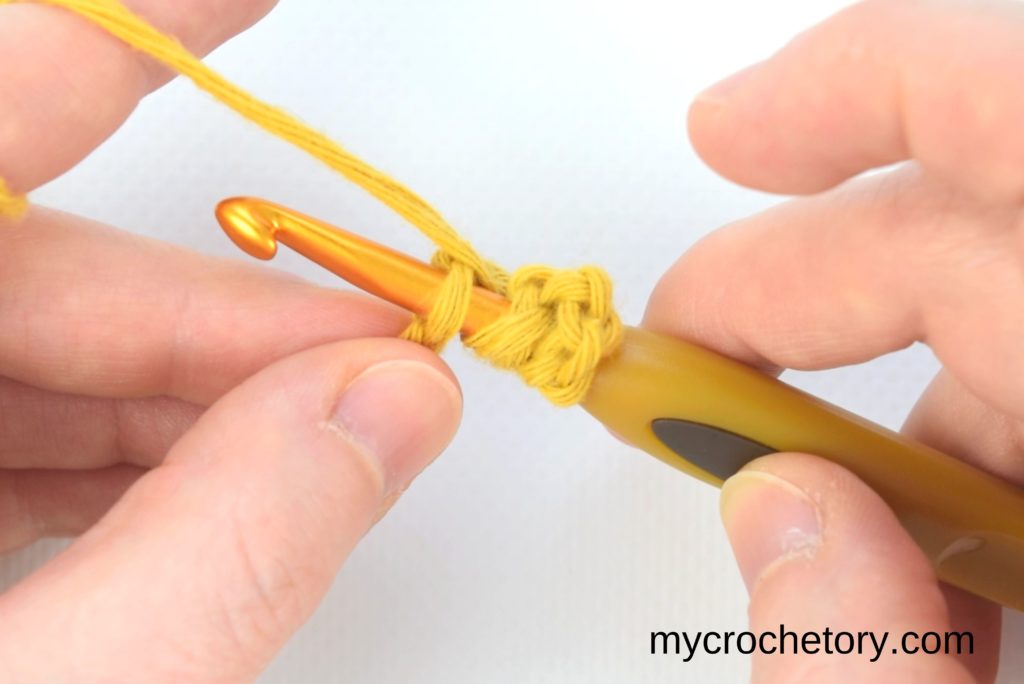
Step 4: Yarn over and pull up a loop, which should leave you with five loops on your hook.

Step 5: Yarn over again and pull through the first two loops.

Step 6: Yarn over one more time and pull through the next two loops. That’s row one done.

Step 7: Now yarn over and pull through the next two loops.

Step 8: Yarn over one last time and pull through the remaining two loops, which finishes row two as well.
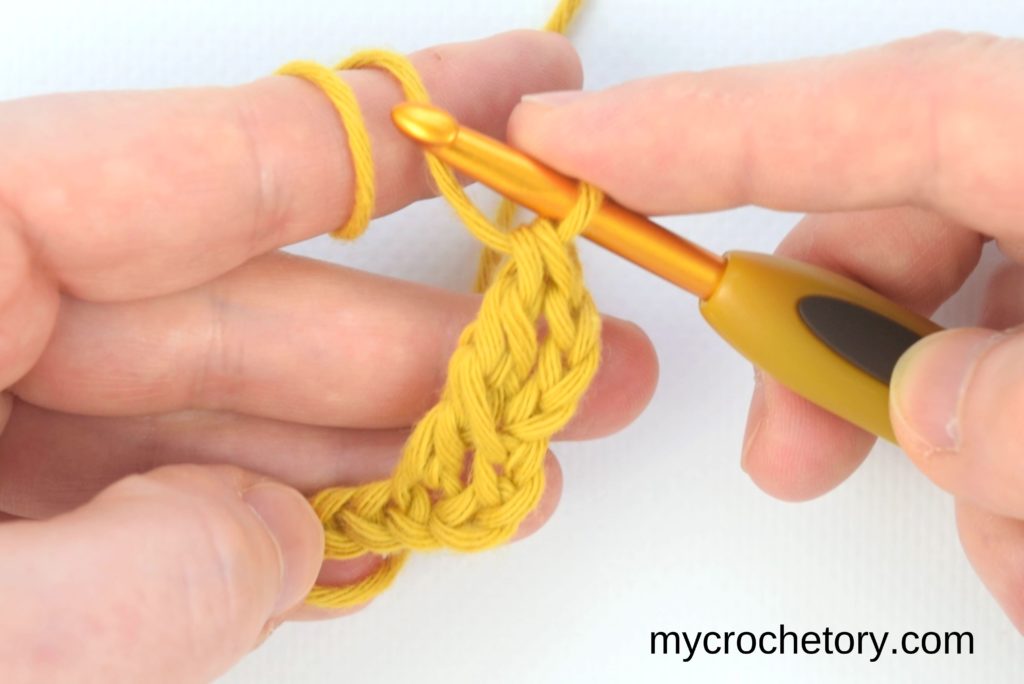
Step 9: For your next stitch, yarn over and insert your hook into the small slanted loop at the bottom of the double crochet you just made.


Step 10: Yarn over and insert the hook into the next chain.


Step 11: Yarn over and pull up a loop.

Step 12: Yarn over again and pull through the first two loops.

Step 13: Yarn over and pull through the next two loops.
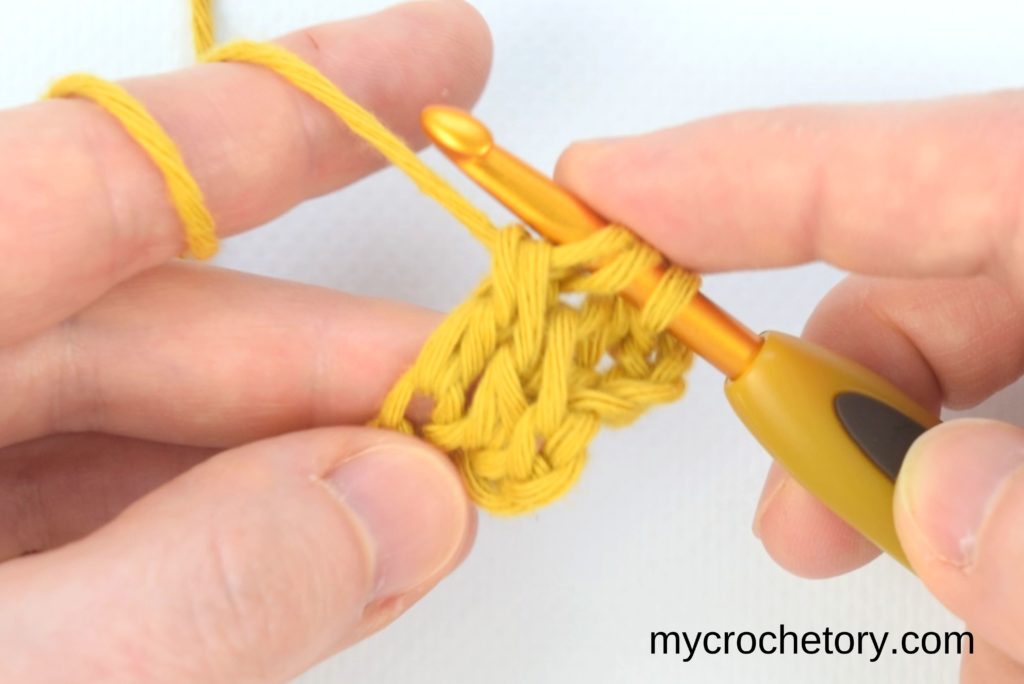
Step 14: Yarn over again and pull through the next two loops.
Step 15: Yarn over one last time and pull through the remaining two loops.
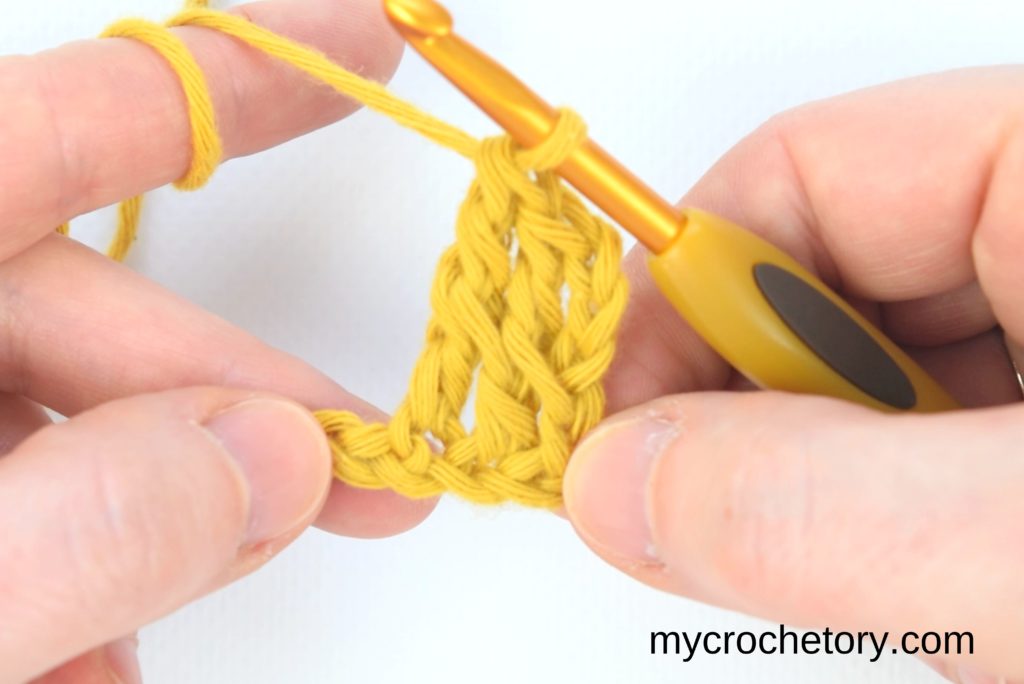
Step 16: Keep going like this across the row, and that’s it, you’ve just double crocheted two rows at once.

ROW 3 & ROW 4
Step 1: Turn your work and chain 6.
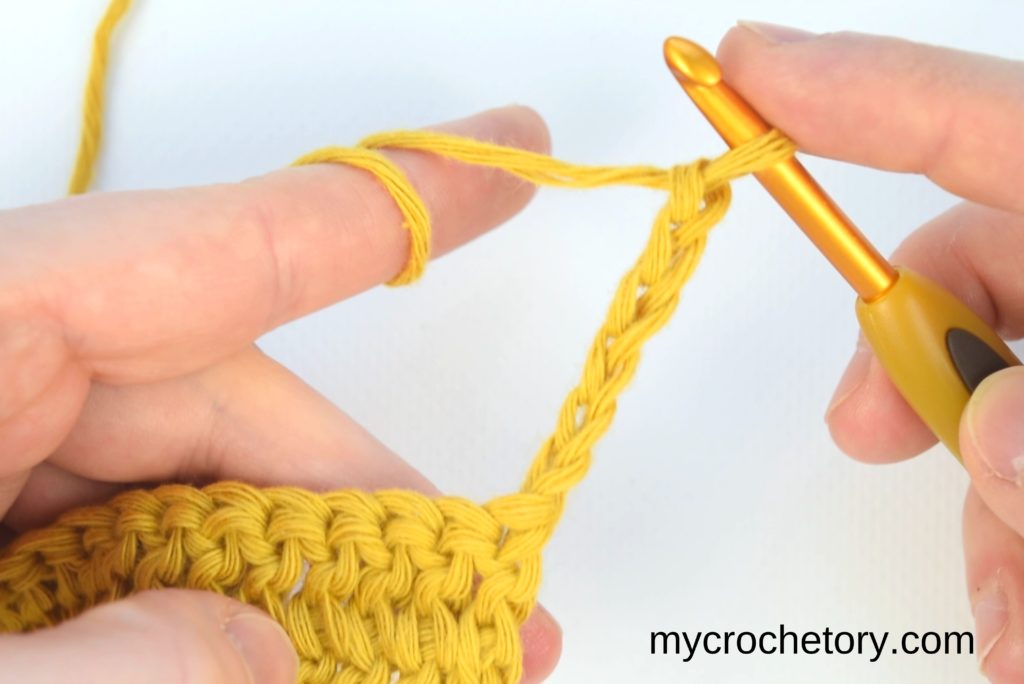
Step 2: Yarn over, then insert your hook into the 4th chain from the hook.
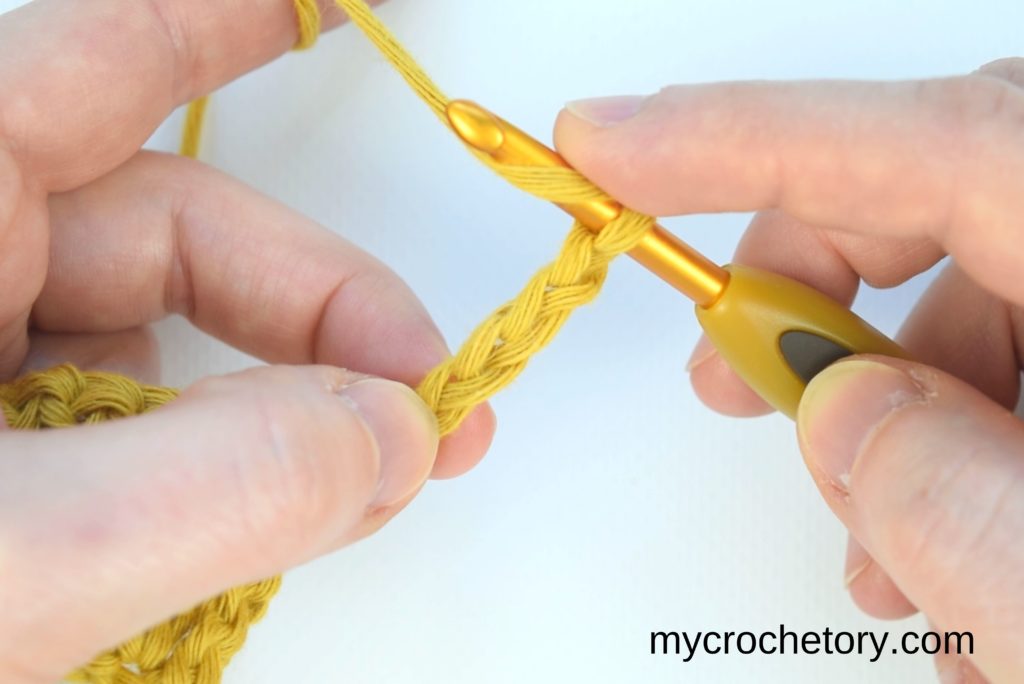

Step 3: Yarn over and insert the hook into the first stitch, going under both top loops.

Step 4: Yarn over and pull up a loop.

Step 5: Yarn over again and pull through the first two loops.
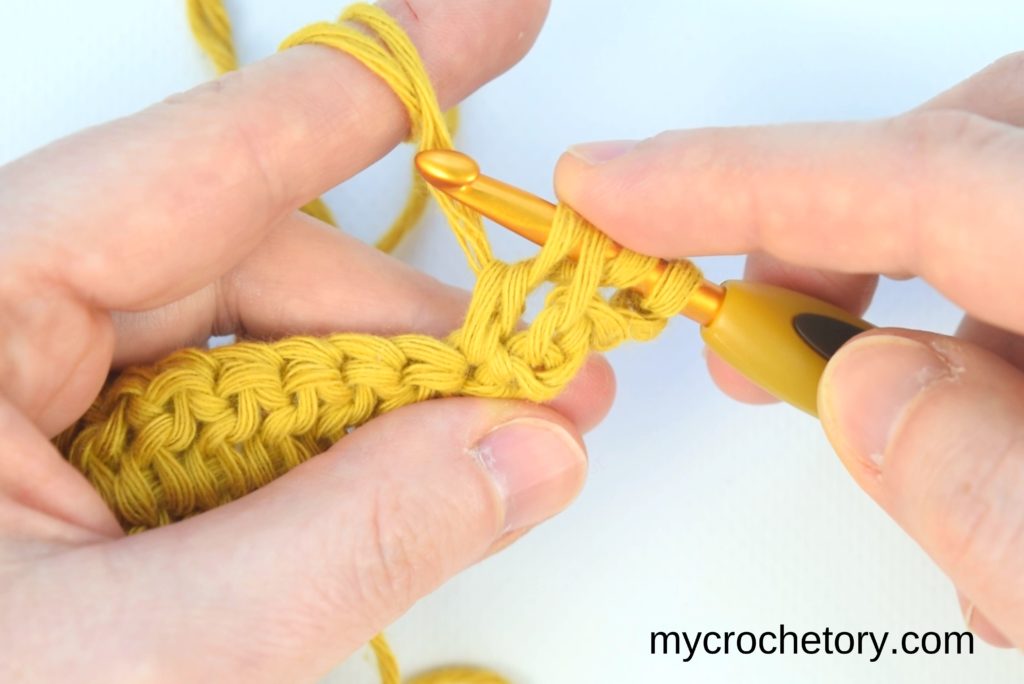
Step 6: Yarn over and pull through the next two loops. That’s row three done.

Step 7: Now yarn over and pull through the next two loops.

Step 8: Yarn over one last time and pull through the remaining two loops, finishing row four too.
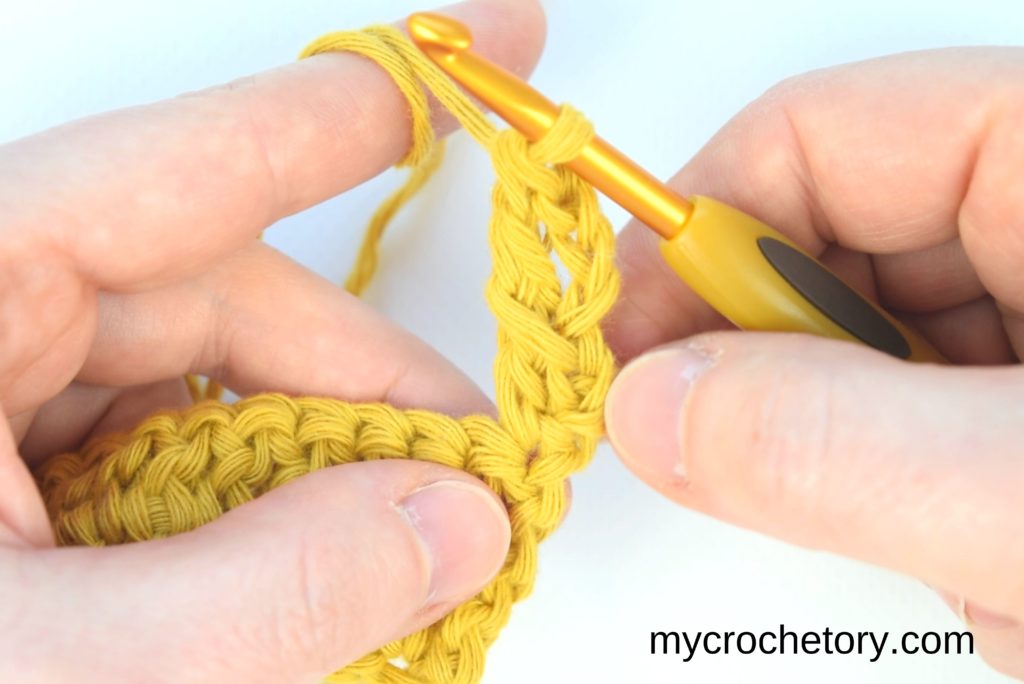
Step 9: For the next stitch, yarn over and insert your hook into the small slanted loop at the bottom of the row 3 double crochet.

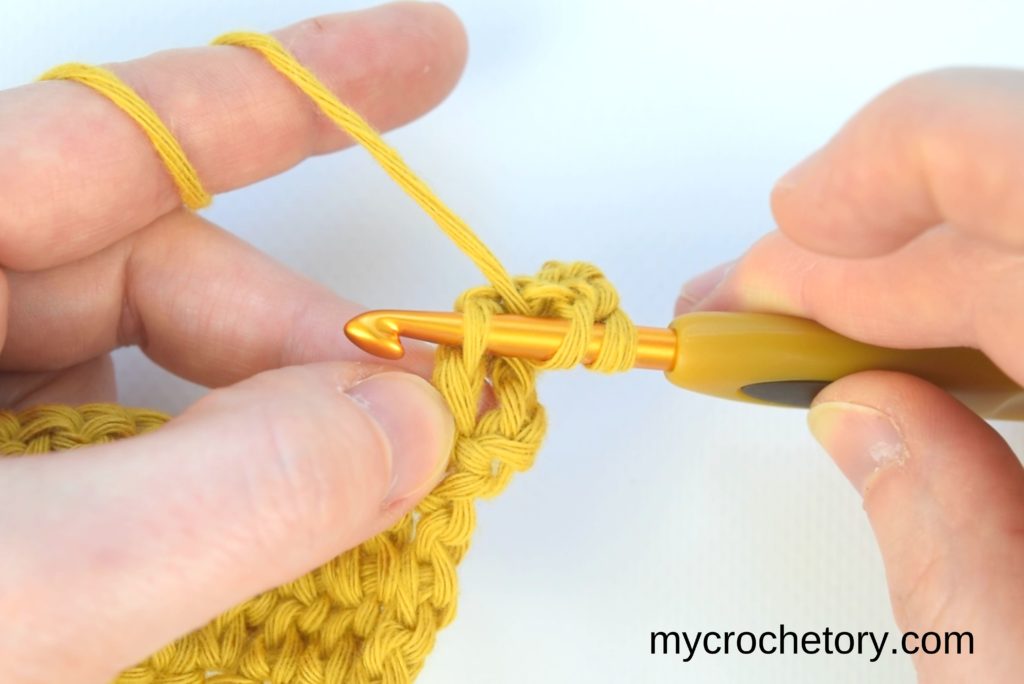
Step 10: Yarn over and insert the hook into the next stitch.
Step 11: Yarn over and pull up a loop.
Step 12: Yarn over again and pull through the first two loops.
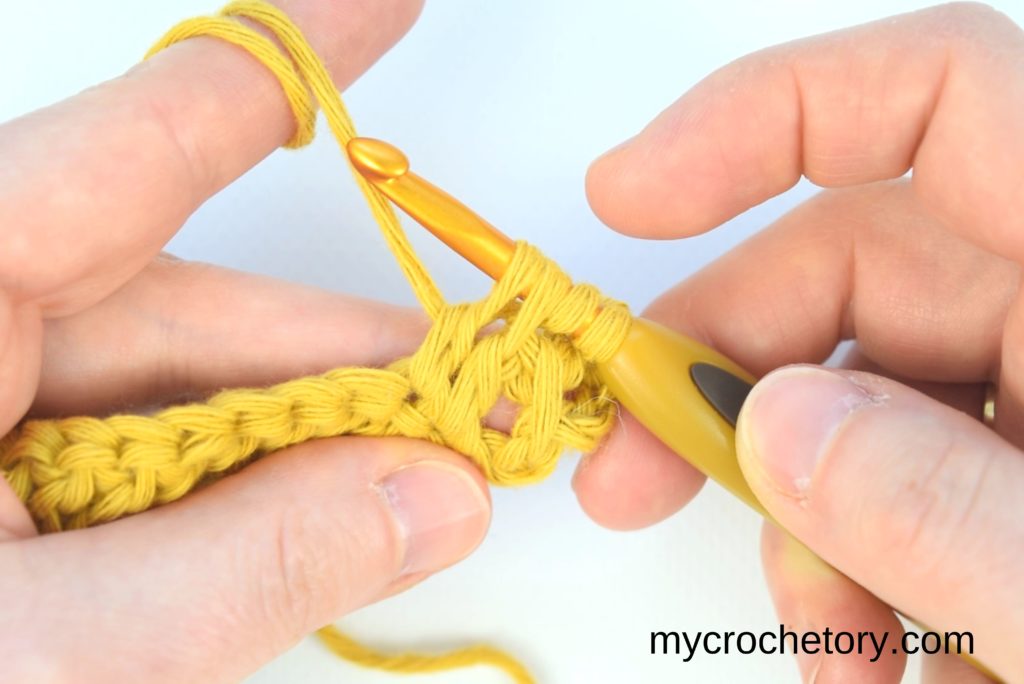
Step 13: Yarn over and pull through the next two loops.

Step 14: Yarn over again and pull through the next two loops.

Step 15: Yarn over one last time and pull through the remaining two loops.
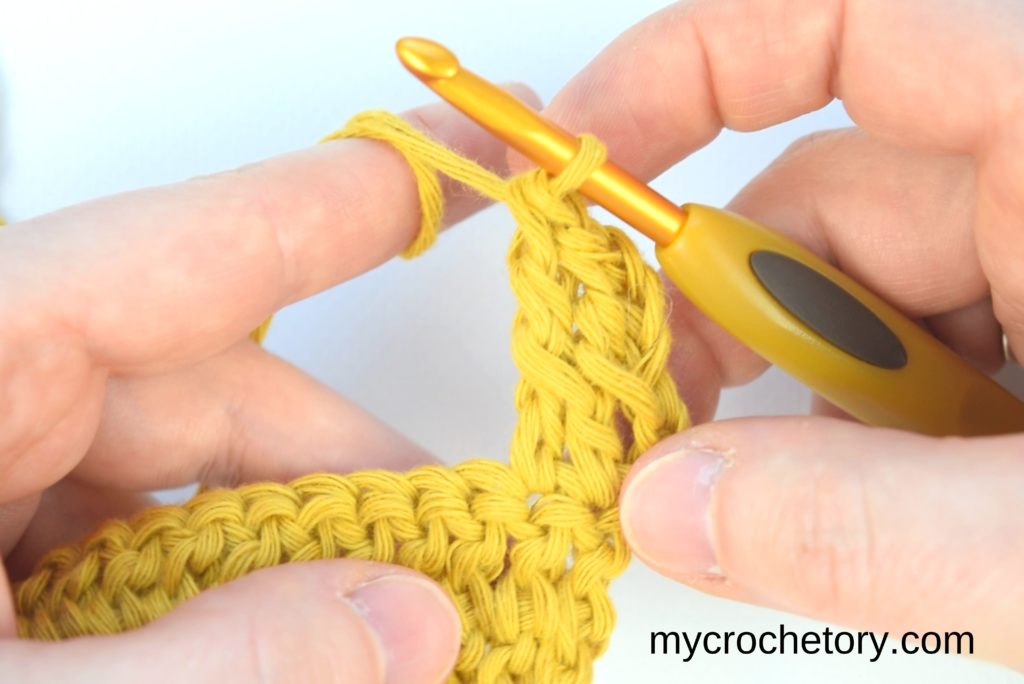
Step 16: Keep going like this across the row, and just like that, four rows are done and you barely stopped moving.

From here, just repeat the pattern for as many rows as you need. Once you’re finished, cut the yarn (leave a little tail), pull your hook up, draw the tail through, and tighten it.
Then weave in your ends, and you’re set.
Double Crochet 2 Rows at Once vs. One Row at a Time
So which way should you actually work? That depends on what you’re making and how much patience you’ve got that day, so here’s the real breakdown.
Double Crochet One Row at a Time
Going one row at a time lets you slow down and pay real attention to each stitch, which makes it a solid choice for tricky patterns where you need to focus row by row. The tradeoff is time: you’re constantly turning and going back, so it takes longer, especially on bigger projects. And because you’re switching between rows so often, mistakes tend to sneak in more easily.
Want the full tutorial for working this way? Here’s how to double crochet.
Double Crochet Two Rows Together
This method is faster, plain and simple, which makes it the better pick when you just want to finish quicker. It works best for simple patterns, or for any stretch of a pattern where you’re only working plain double crochet rows in multiples of two, and since both rows form together, your stitches end up looking more consistent too.
It does take a little getting used to at first, though it clicks after a few rows. It’s also not the best fit for complicated patterns that need close attention to each row on its own, or for row counts that don’t divide evenly into pairs.
Honestly, you don’t have to pick just one. Try both and see what feels right for whatever you’re making.
FAQ
Can I use this technique to join in the round?
Yes, but each of the two rows you’re joining is technically its own round, so you need increases in both the bottom and top part of the stitch, same as you would with two separate rounds. Skip the increases in either one and the piece pulls in and stops lying flat.
How do I decrease with this technique?
You work a decrease (dc2tog) separately in each of the two rows you’re joining, the same way you’d do a regular dc2tog, just keeping track of which loops belong to which row as you go.
Does this work with stitches other than double crochet?
Yes, you can join single crochet or half double crochet rows the same way, though denser, simpler stitches tend to join more cleanly than open or textured ones.
Why do my two rows look uneven?
Usually it comes down to tension, so watch that you’re not pulling the yarn tighter on the second row than you did on the first.
MORE CROCHET TUTORIALS
Since this technique starts the same way as any project, here are a couple more basics worth having in your back pocket:
- How to foundation single crochet
- How to make a slip knot – 3 Easy Ways
- How to Intarsia Crochet
- How to crochet a magic ring – 3 easy ways
- How to crochet ribbing
- Mattress stitch join tutorial
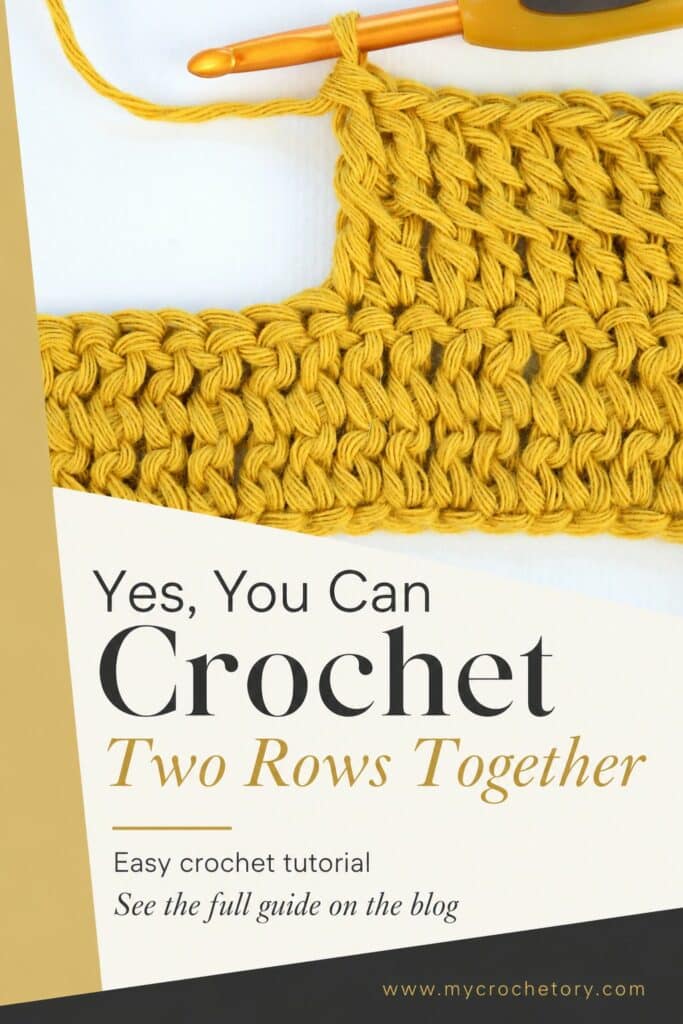
Don’t forget to save this Pin for easy reference: 📌
We’d love to hear about your crochet adventures and see your beautiful creations. Drop a comment below sharing your thoughts, questions, or even your favorite crochet tips! Your voice adds a vibrant thread to our crafting community.
Sharing is caring! If you found this guide helpful, consider spreading the love. Click the share button and inspire other crocheters.
Stay in the loop with our latest crochet guides, tips, and inspiration. Subscribe to our newsletter for exclusive content straight to your inbox. Never miss a stitch—subscribe today!
Happy crocheting, and may your yarn always be tangle-free!
Join my Facebook Group and Official Ravelry Group where you can find necessary support, you can ask questions or share your finished projects.
You can also follow my Instagram, Facebook page and Pinterest.
Very interesting. I’d love to give this a try. Do you have a pattern you suggest using for the crochet to rows at once technique?
How to join to make a round, and 2 together for a decrease. Is my questions 🙂