
Updated: 4 September 2026 by Sylwia (MyCrochetory)
Invisible decrease crochet just felt like the natural next step, after all the tips and tricks I’d already shared for making finished projects look better.
Here’s the thing though, I couldn’t just cover one stitch and call it done. So this post ended up covering all four basic stitches, single crochet, half double, double, and treble.
You’ll probably reach for the single crochet version the most, honestly, and the treble one the least, but I wanted you to have all four in one place instead of hunting around for each.
Below, you’ll find step-by-step photos for every stitch, a video walking through all four back to back, and a few common mistakes to watch for so your decreases actually end up invisible, not just smaller.

Regular Decrease vs. Invisible Decrease
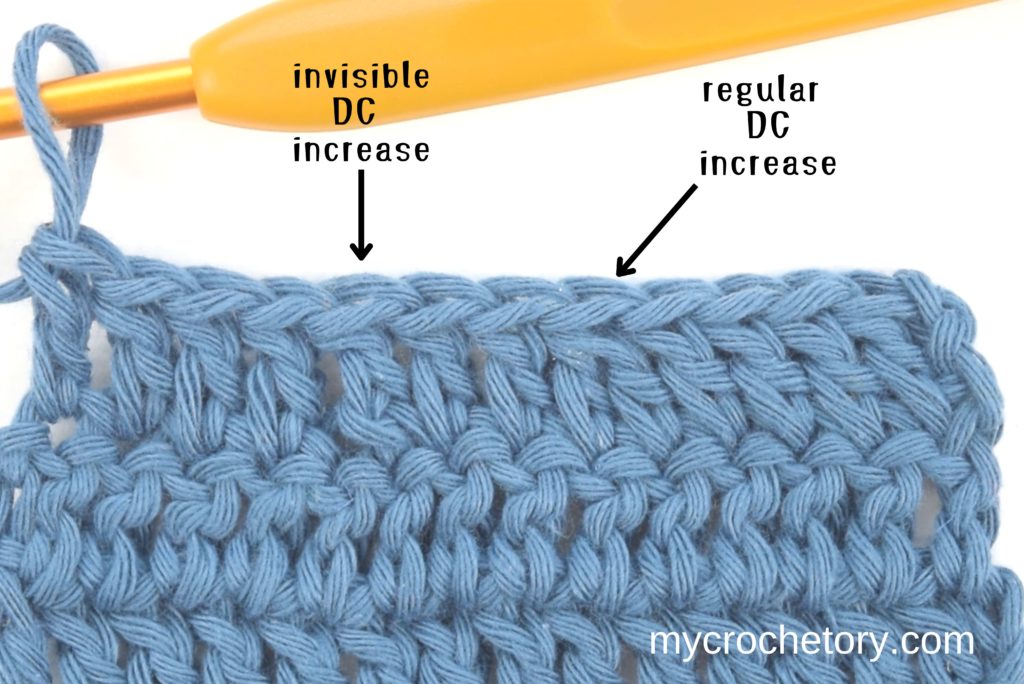
A regular decrease works two stitches together through both loops. Quick and easy, but it usually leaves a little bump or gap you can spot pretty easily, especially in single crochet.
An invisible decrease works a bit differently. Instead of finishing one stitch before starting the next, you insert your hook into the front loop of the first stitch, then the front loop of the second stitch, without pulling anything through in between. Only once your hook is sitting in both stitches do you yarn over and pull everything through together.
That small change is what makes the decrease sink into the fabric instead of sitting on top like a little lump.
Honestly, for most projects either one works fine. But if you’re making something where every single stitch shows, amigurumi, a fitted garment, anything in one solid color, the invisible version is worth that extra second it takes.
Video Tutorial for Invisible Decrease
The video below walks through invisible decreases in all four stitches, one after another, so you can watch exactly where the hook goes for each.
Quick tip: if the video won’t load right, try turning off your ad blocker.
Crochet an Invisible Decrease in Single Crochet
Let’s make crocheting even simpler by learning how to crochet an invisible decrease in the single crochet stitch.
Step 1: Begin your single crochet row.
Step 2: Choose the two stitches you want to decrease. Insert your hook into the front loop of the first stitch and then into the front loop of the second stitch.
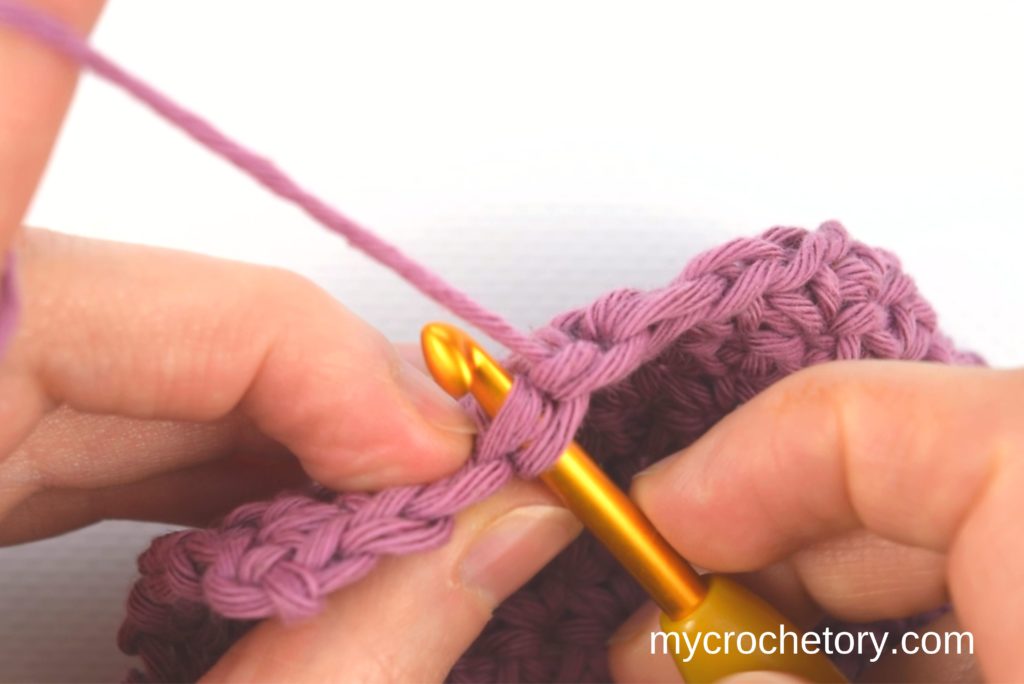
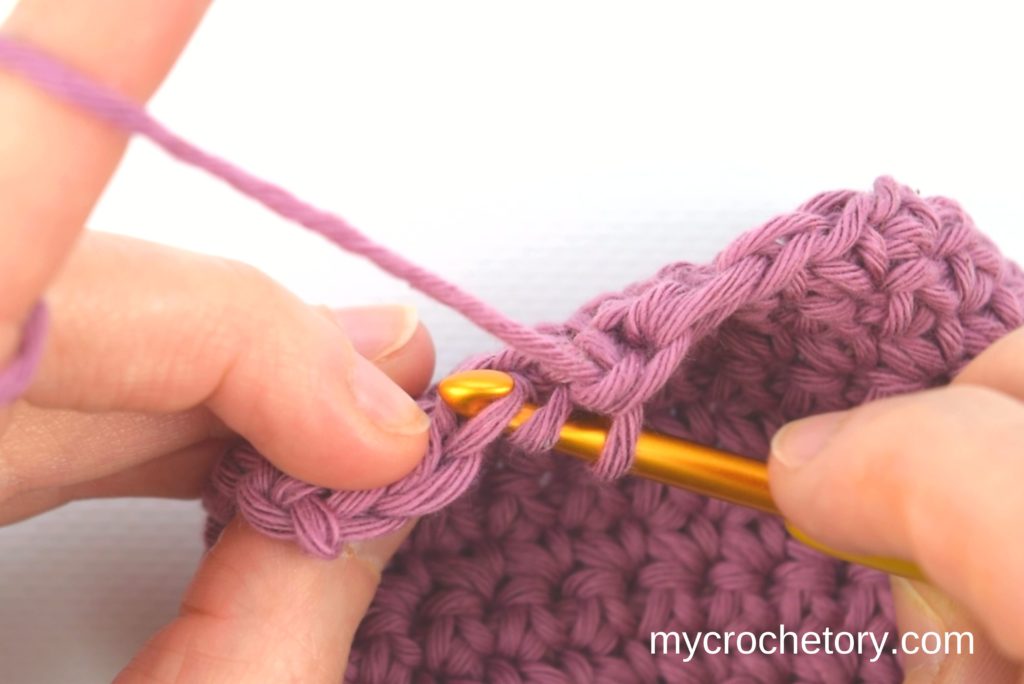
Step 3: Yarn over and pull up a loop through both front loops of the identified stitches. This gives you two loops on your hook.
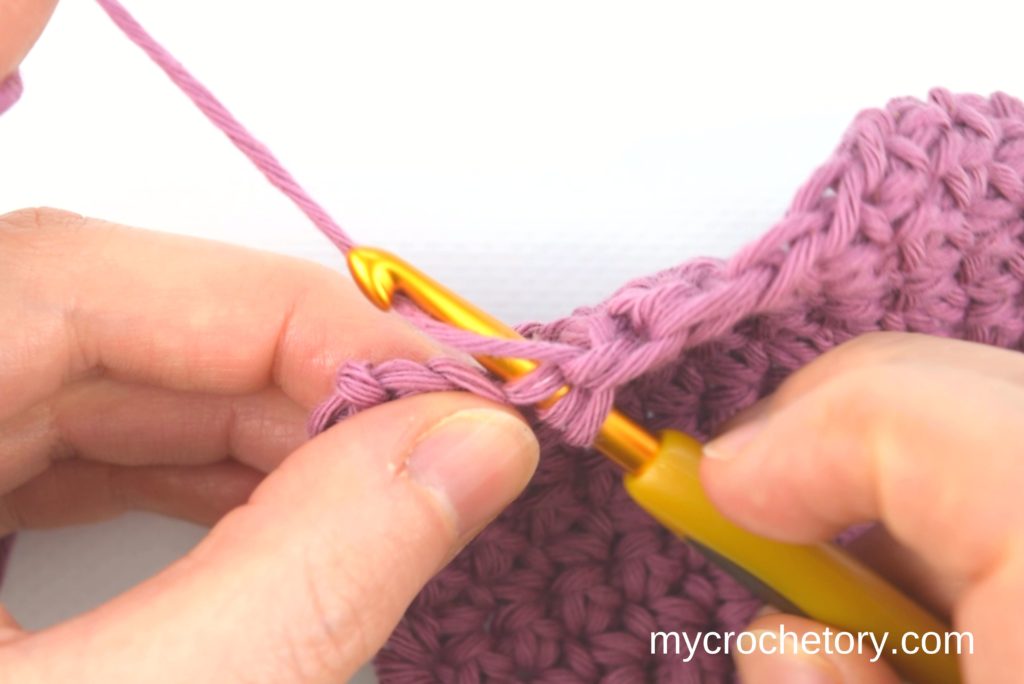
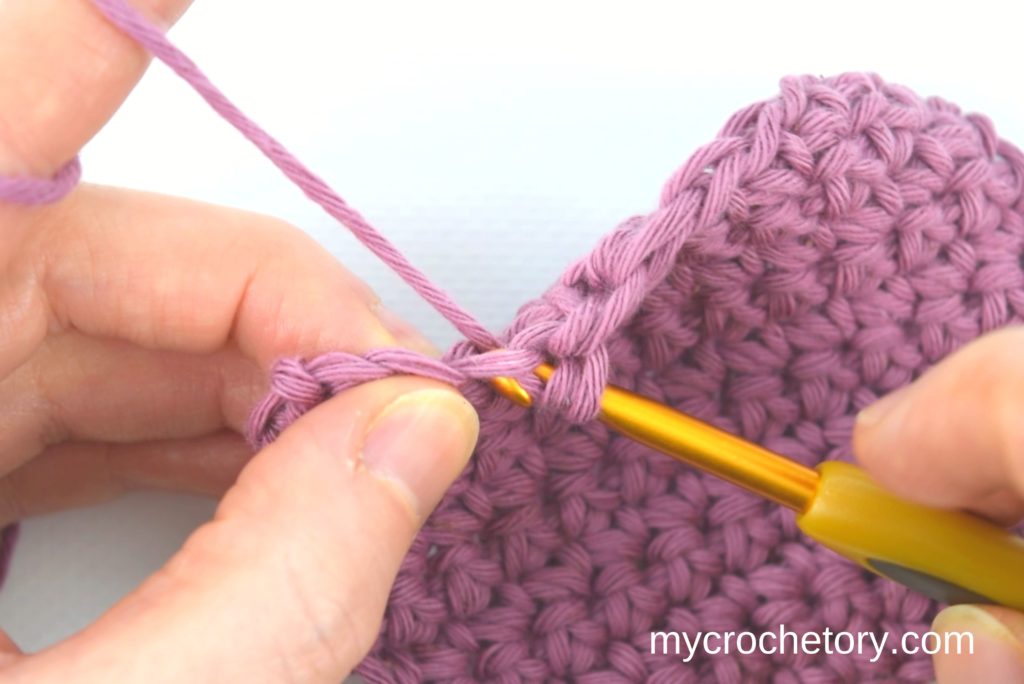
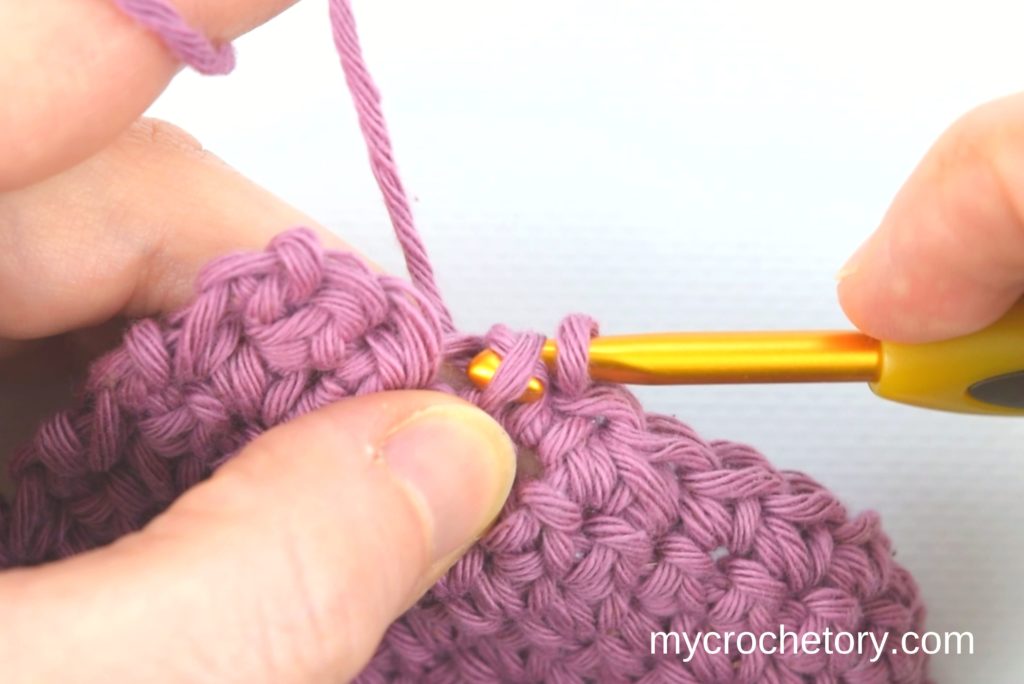
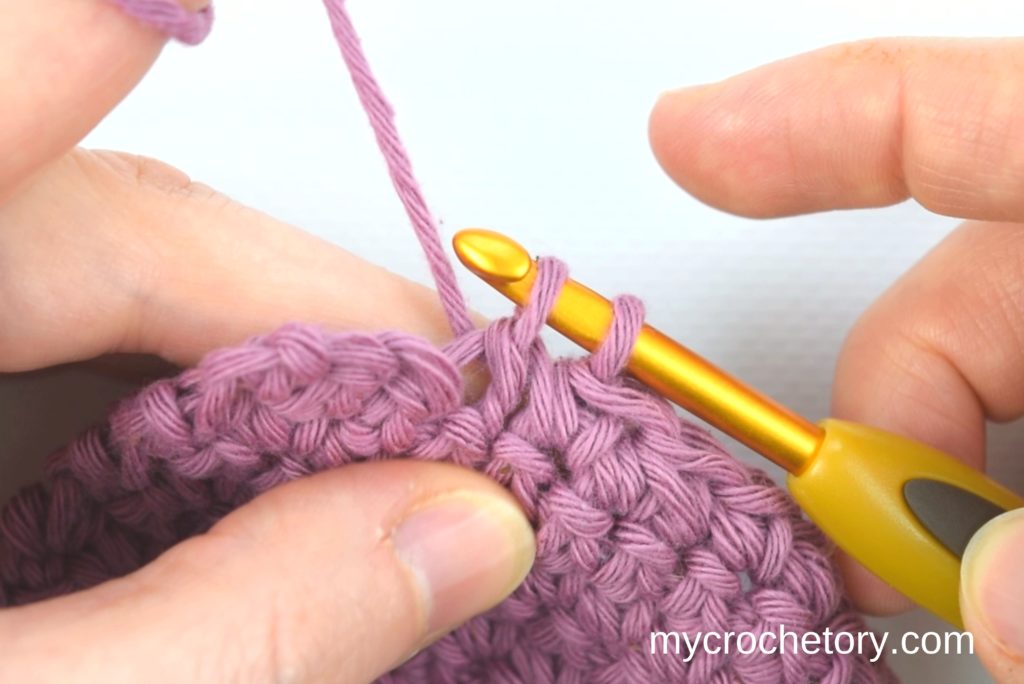
Step 4: Finish by yarning over again and pulling through both loops on the hook. You’ve successfully crocheted an invisible decrease in single crochet!
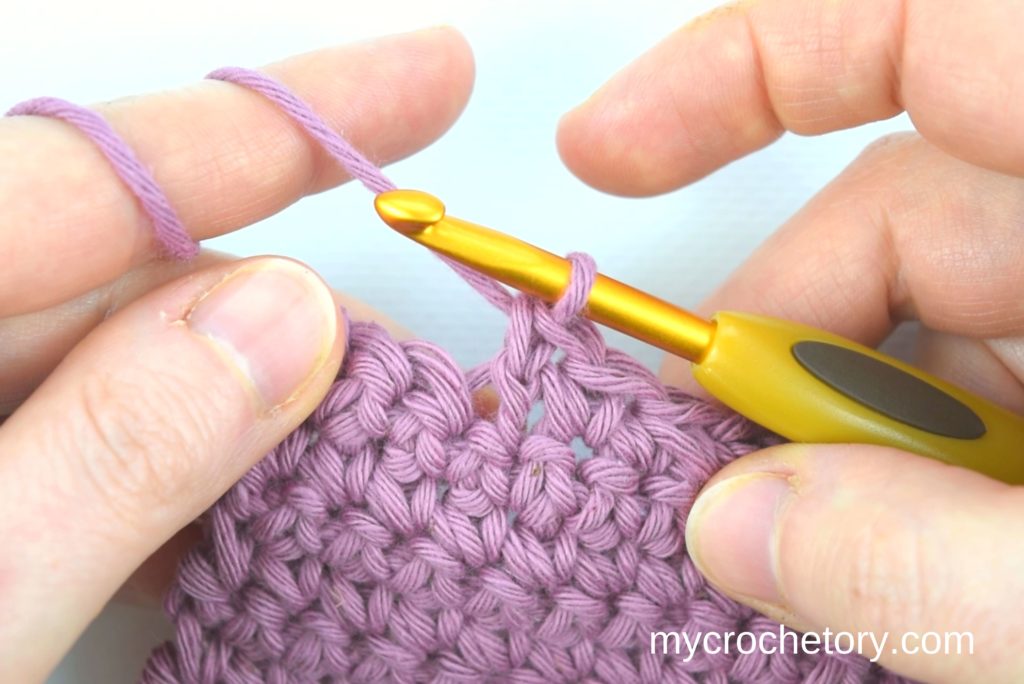
Step 5: Now, continue with the rest of your single crochet row. You’ll notice a tidy decrease without any visible gaps.
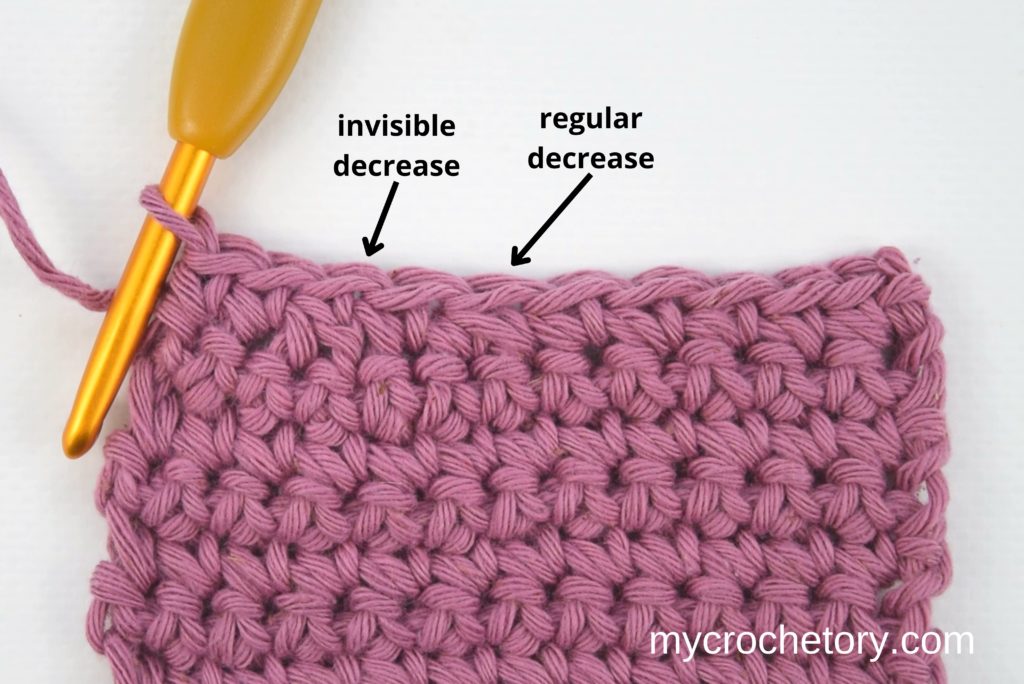
For more details on the single crochet stitch, check out my detailed TUTORIAL. This will provide additional insights and tips to enhance your crochet skills.
Cochet an Invisible Decrease in Half Double Crochet
Follow these easy steps, and you’ll be an expert at the half double crochet invisible decrease in no time.
Step 1: Begin with a row of half double crochet stitches.
Step 2: Choose the two stitches you want to decrease.
Step 3: Yarn over and insert your hook into the front loop of the stitch (no loop pulled up).
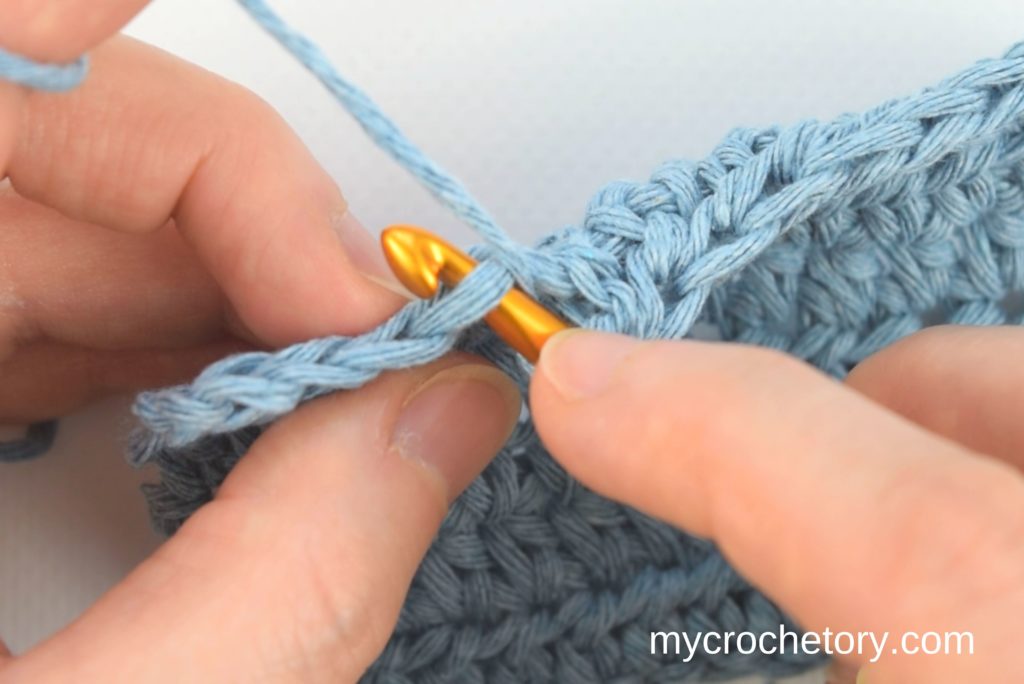
Step 4: Without yarning over, insert your hook through the front loop of the next stitch (4 loops on the hook).
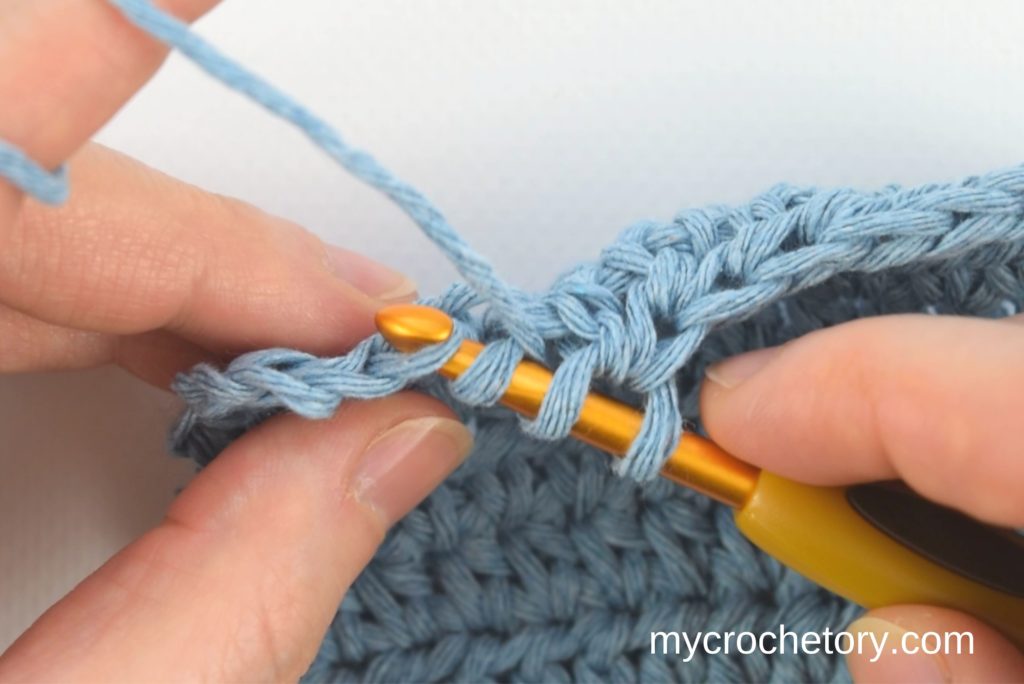
Step 5: Yarn over and pull through the first 2 loops on the hook (3 loops remaining).
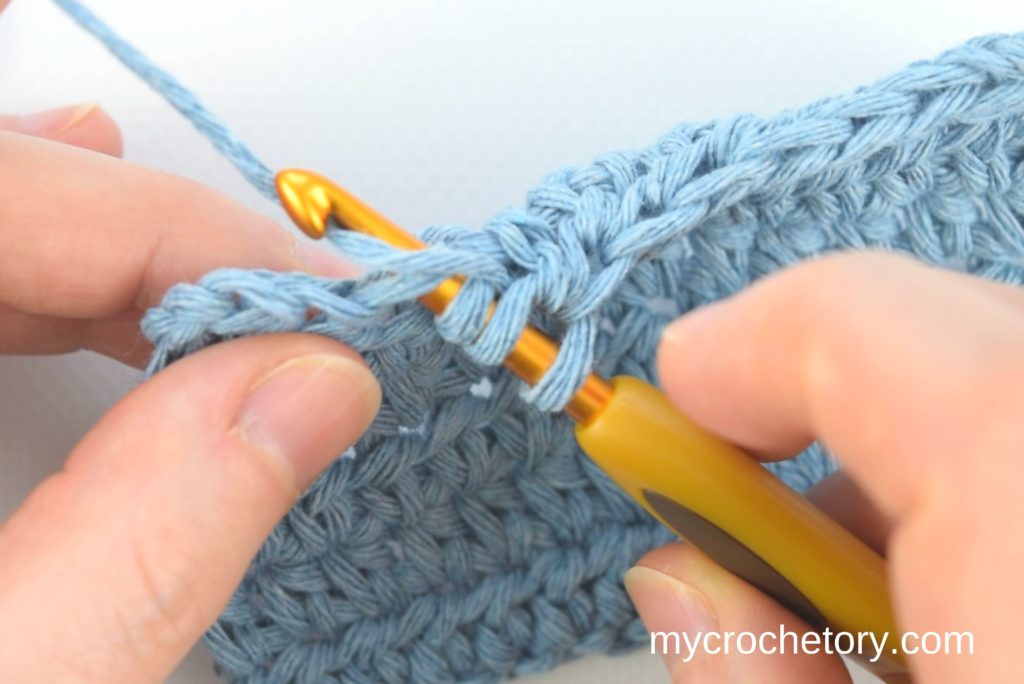
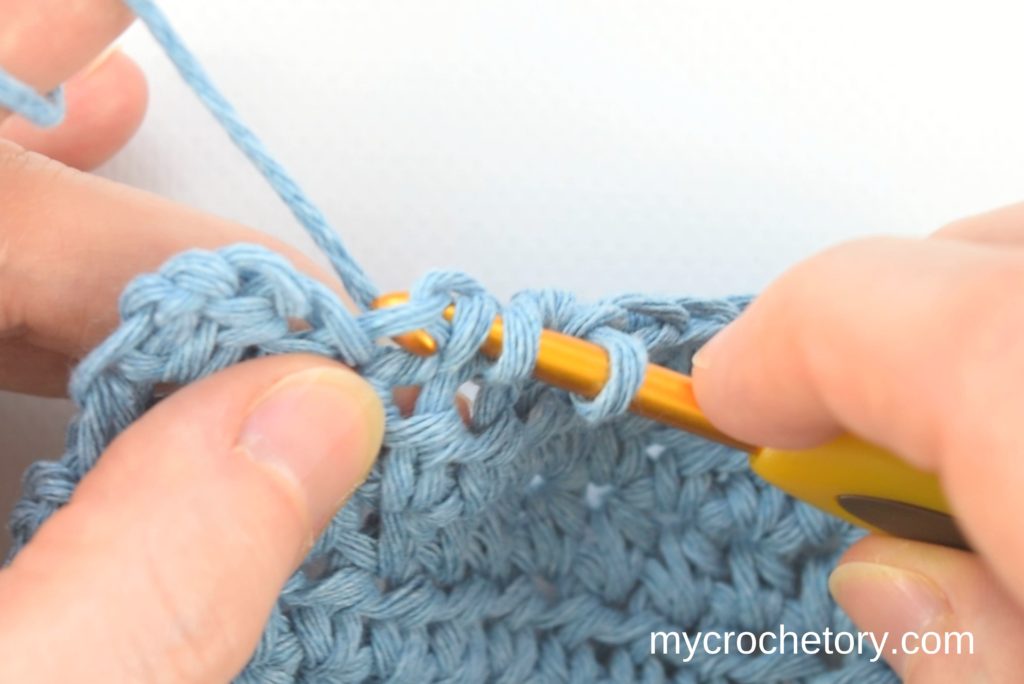
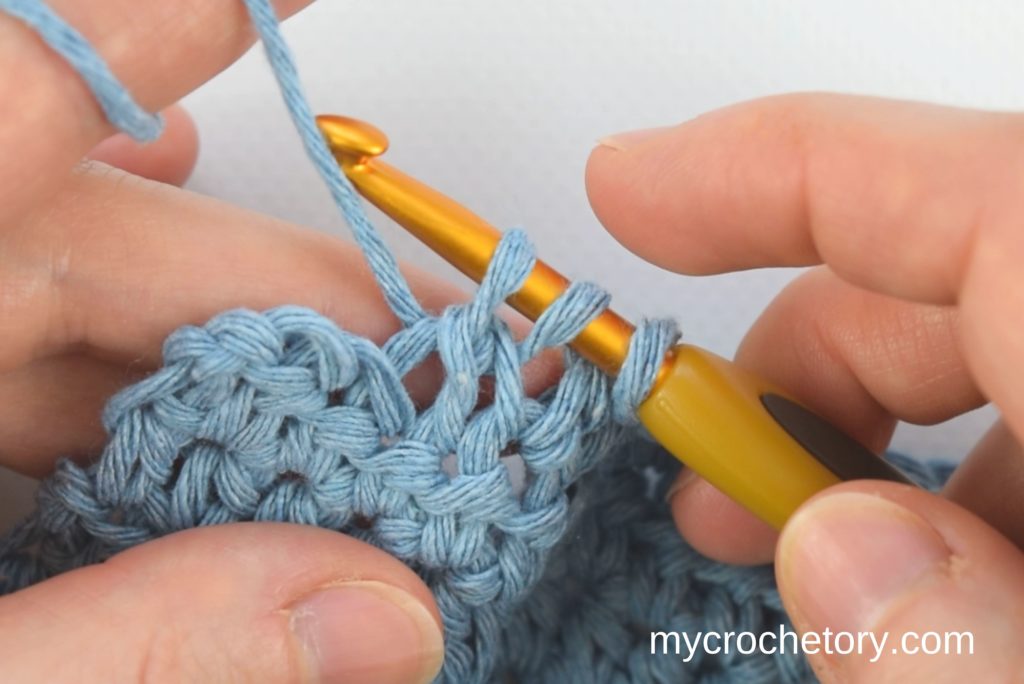
Step 6: Finally, yarn over and pull through all three loops. This combines the two stitches into one, making an invisible decrease.
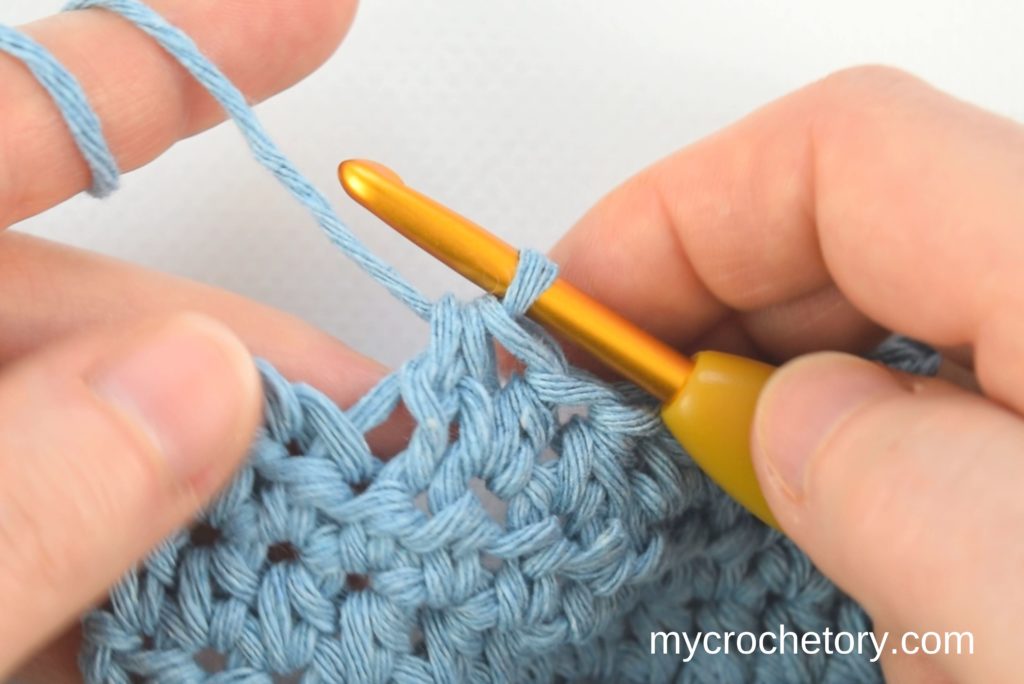
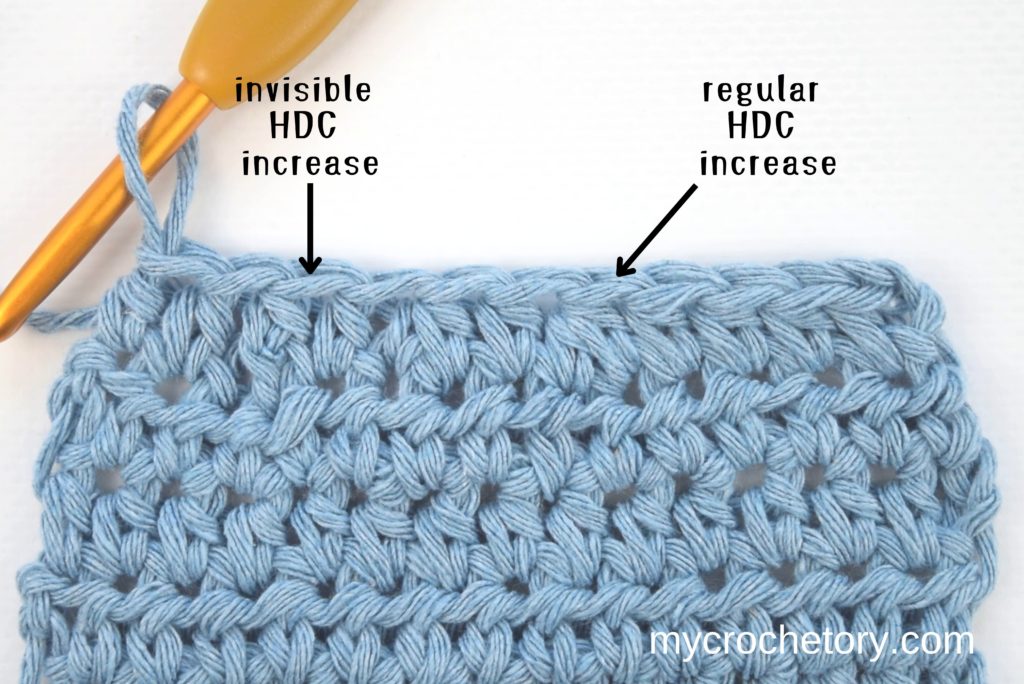
Ready to learn more about half double crochet? Check out our detailed tutorial, packed with tips, applications, and variations.
Mastering this versatile stitch opens up possibilities for creating beautiful garments, accessories, and home decor.
Crochet an Invisible Decrease in Double Crochet
Let’s make crochet even easier by learning how to crochet an invisible decrease in double crochet.
It might sound a bit tricky, but with this simple guide, you’ll get the hang of it in no time.
Before we begin, make sure you’re familiar with the basics of double crochet, as it lays the groundwork for this invisible decrease.
Step 1: Begin with a row of double crochet stitches.
Step 2: Choose the two stitches you want to decrease.
Step 3: Yarn over, insert the hook into the front loop of the first stitch.
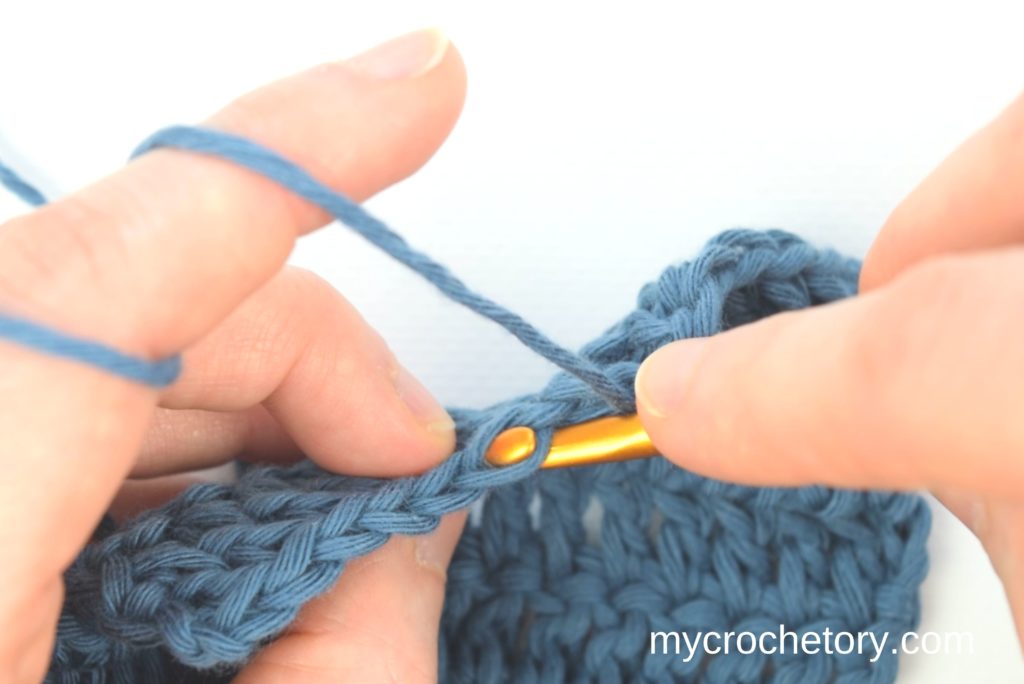
Step 4: Without yarning over, quickly insert the hook into the front loop of the next stitch.
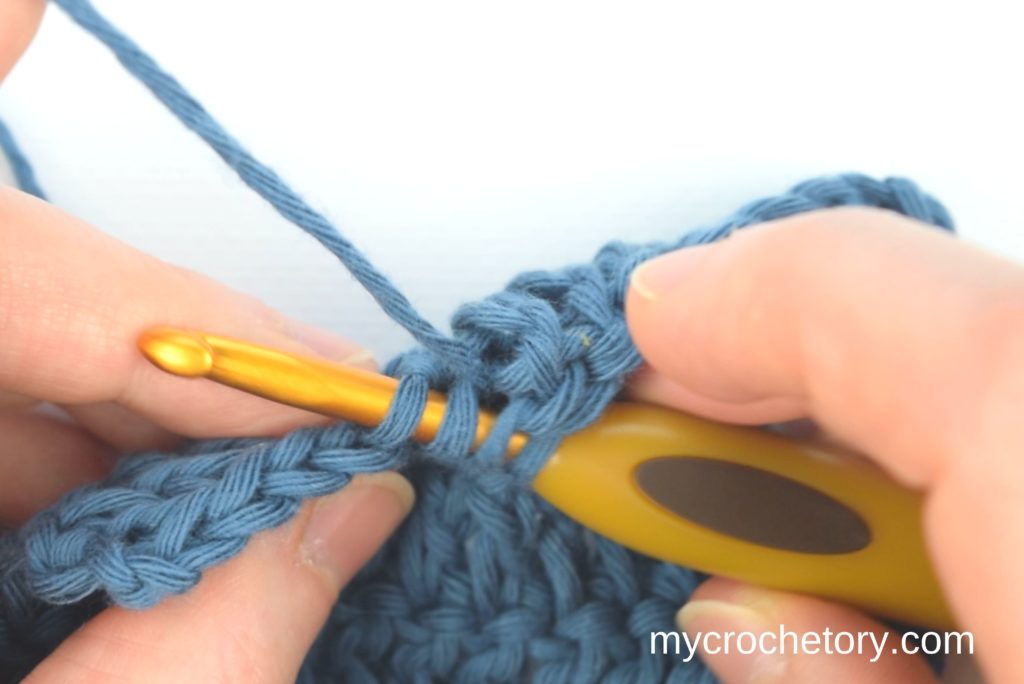
Step 5: Yarn over and pull up through two loops.
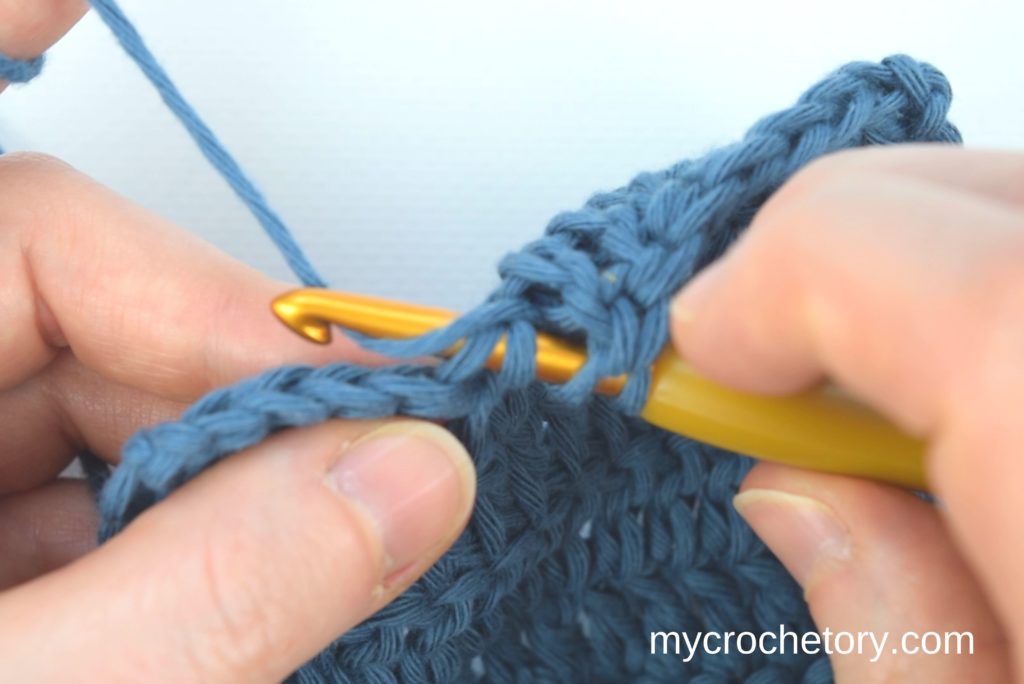
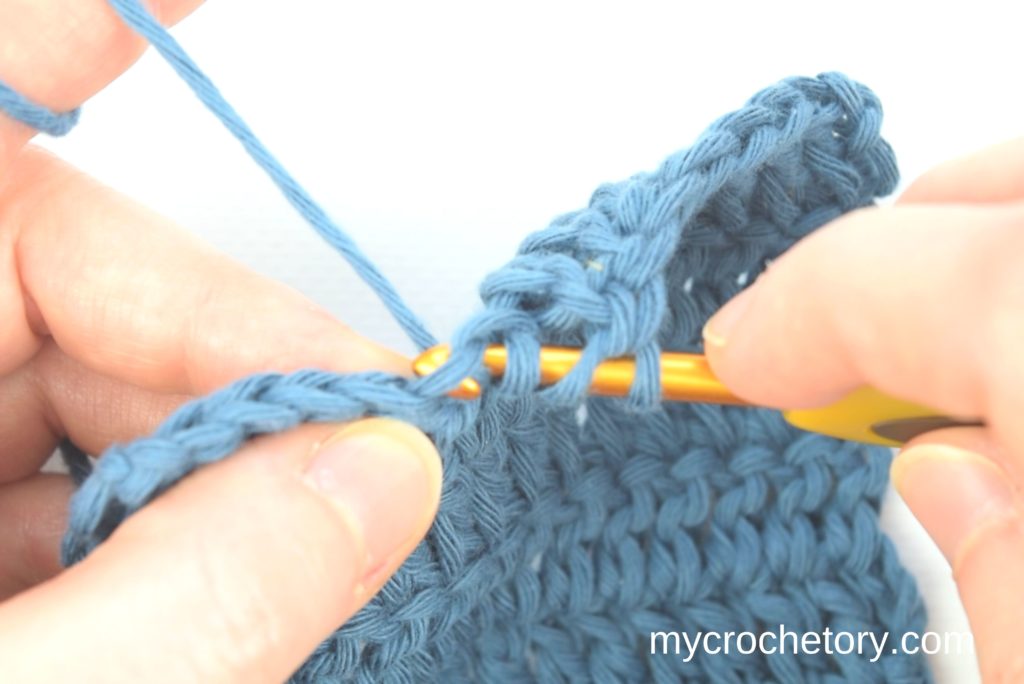
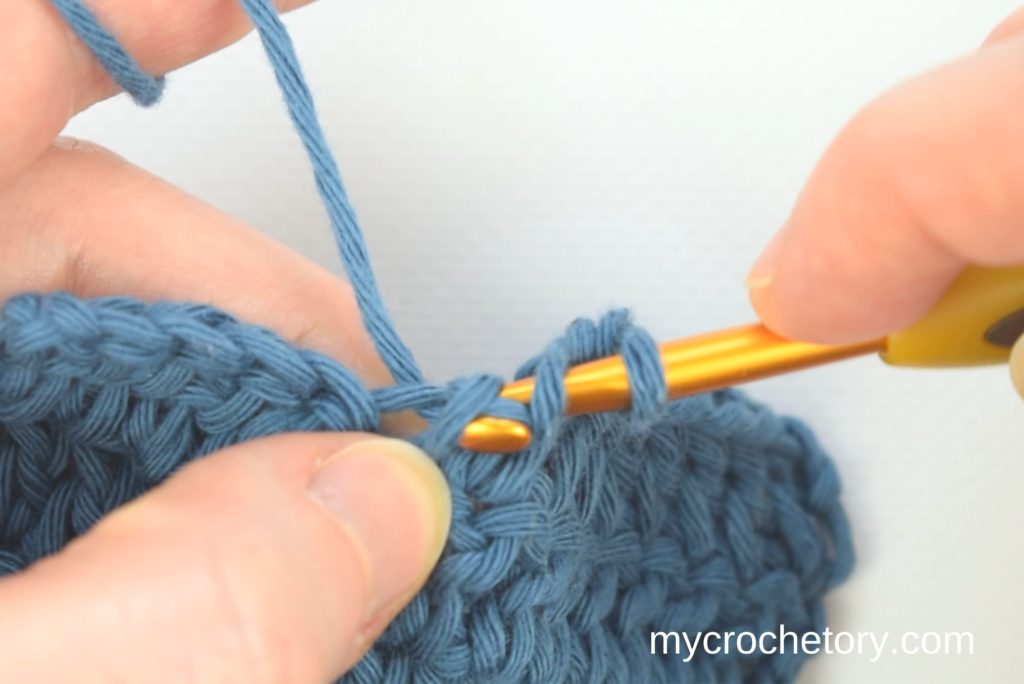
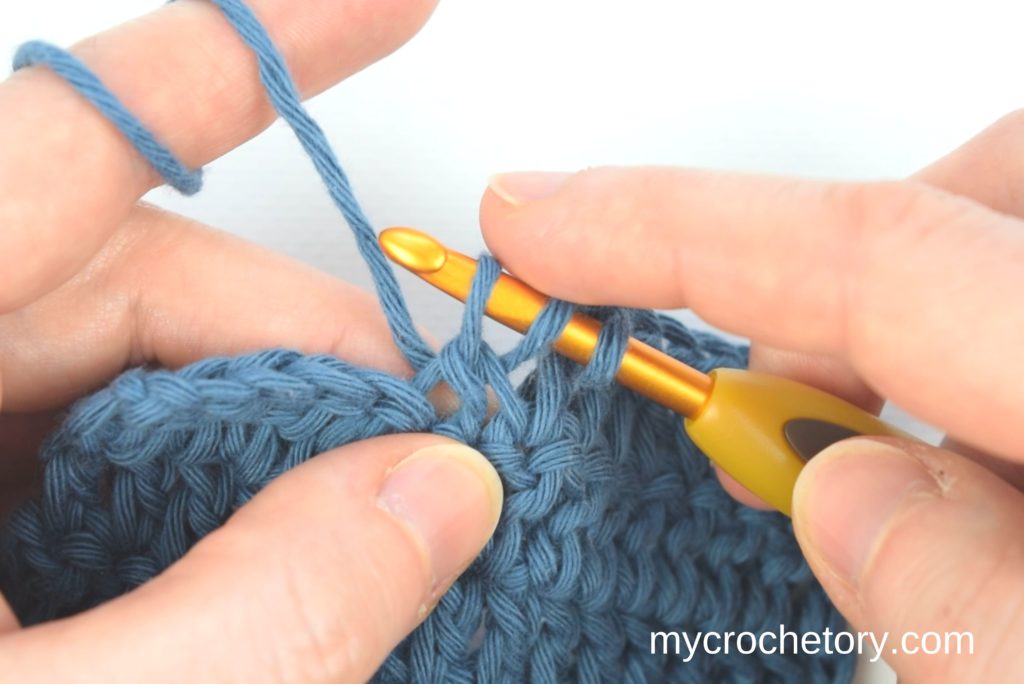
Step 6: Next, yarn over, pull through the first two loops.
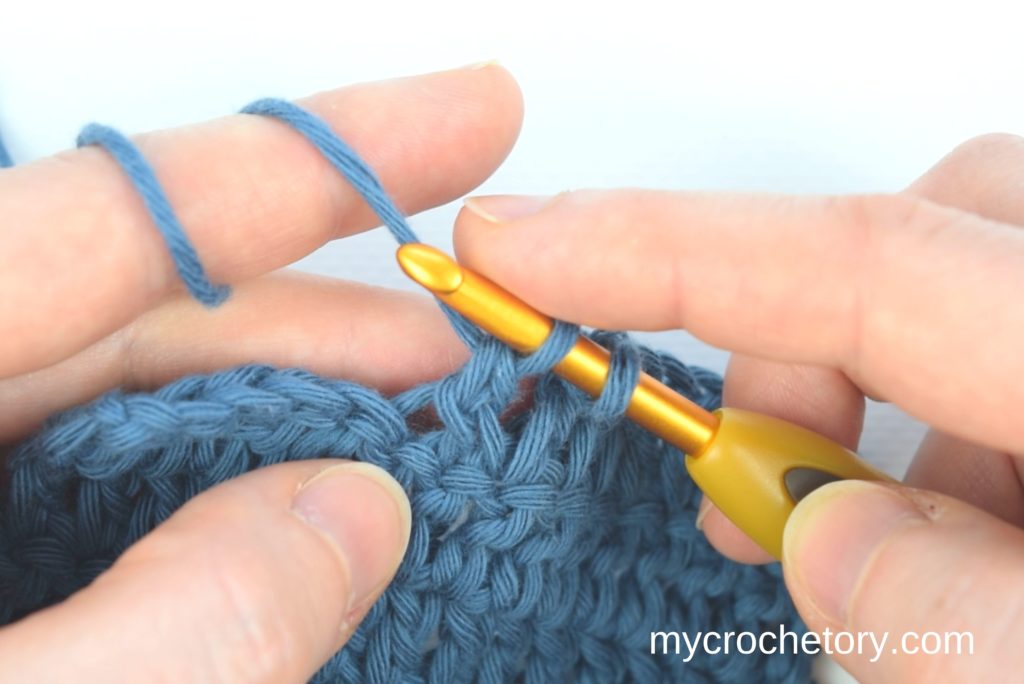
Step 7: Then, yarn over again and pull through the last two loops.
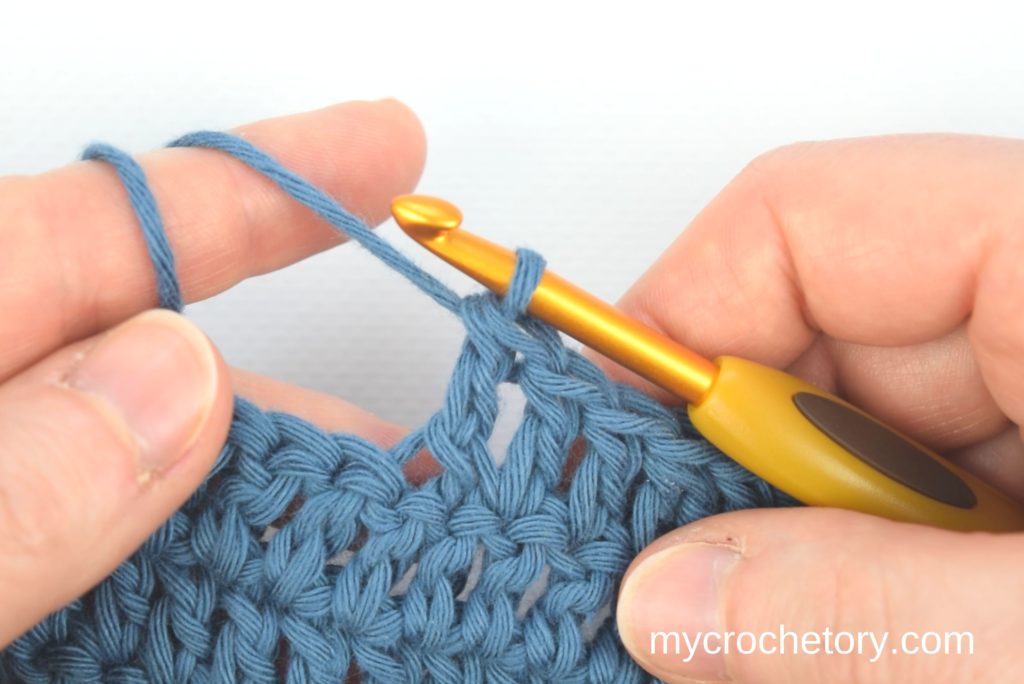
That’s your invisible double crochet decrease, done.
Crochet an Invisible Decrease in Treble Crochet
We’ll go through the steps, keeping it straightforward and easy to follow.
But before we begin, let’s quickly refresh on treble crochet basics. Check out our detailed tutorial on Treble Crochet for essential tips, applications, and variations.
Step 1: Begin with a row of half double crochet stitches.
Step 2: Choose the two stitches you want to decrease.
Step 3: Yarn over twice, insert the hook into the front loop of the first stitch.
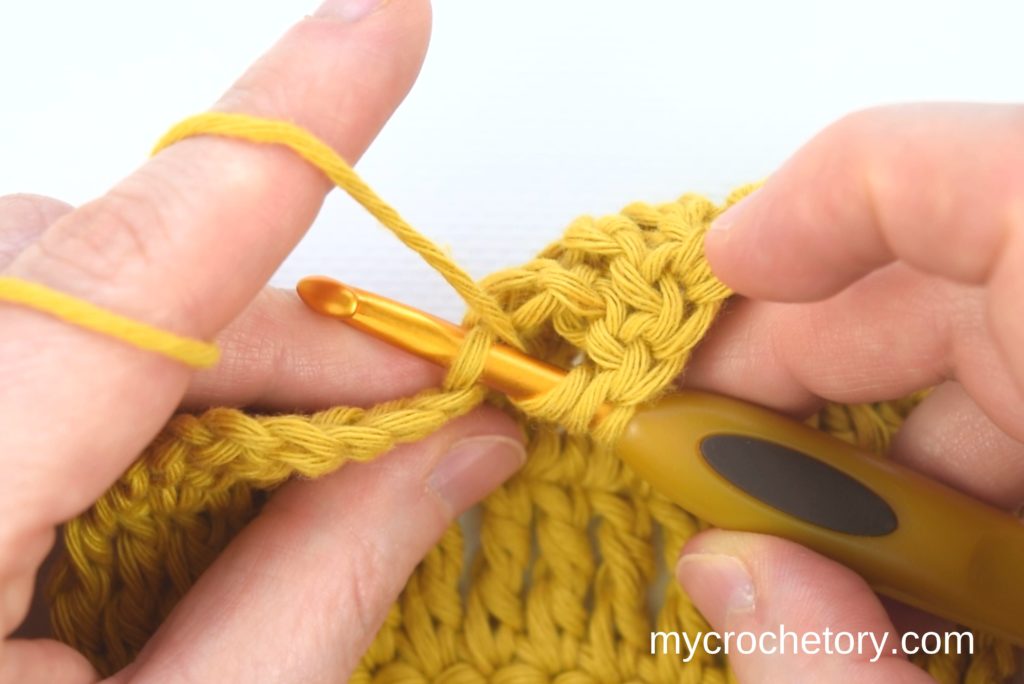
Step 4: Without yarning over, quickly insert the hook into the front loop of the next stitch.
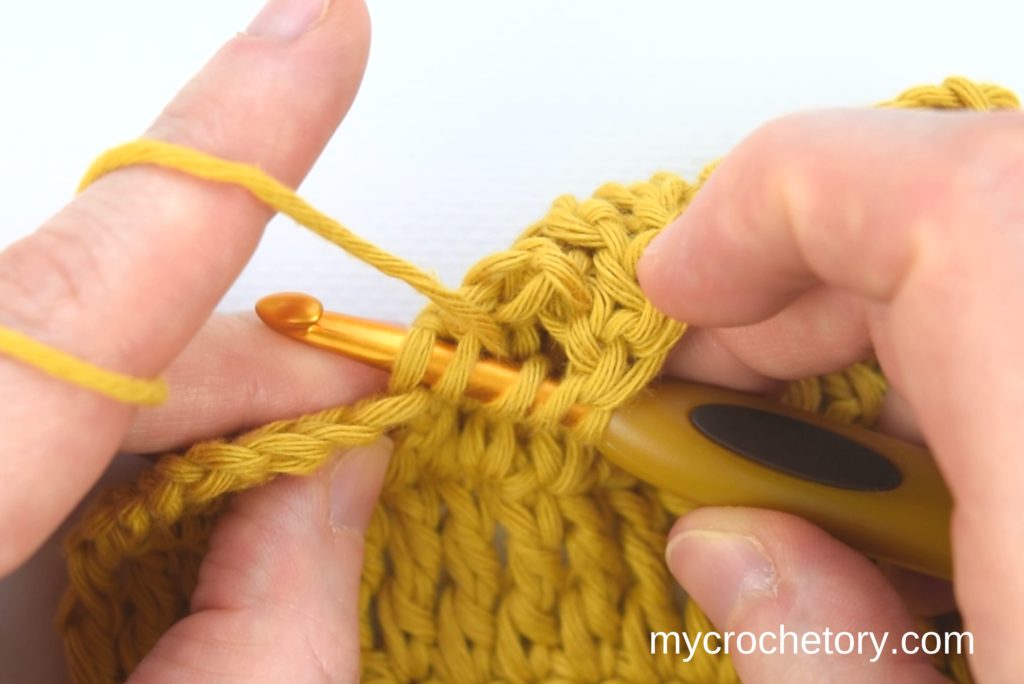
Step 5: Yarn over and and pull through two loops.
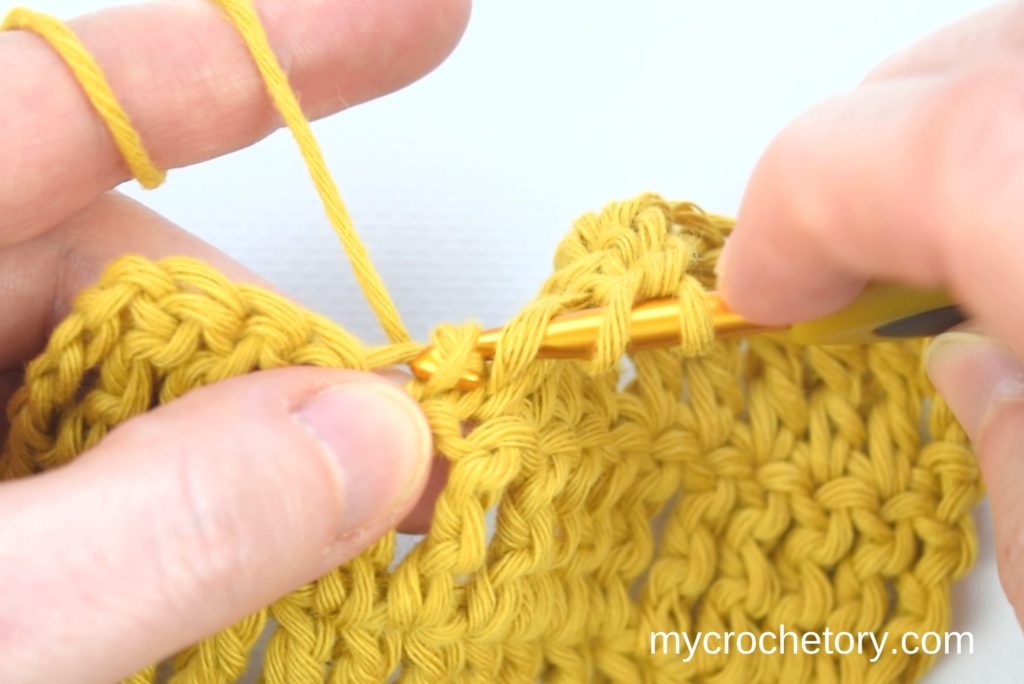
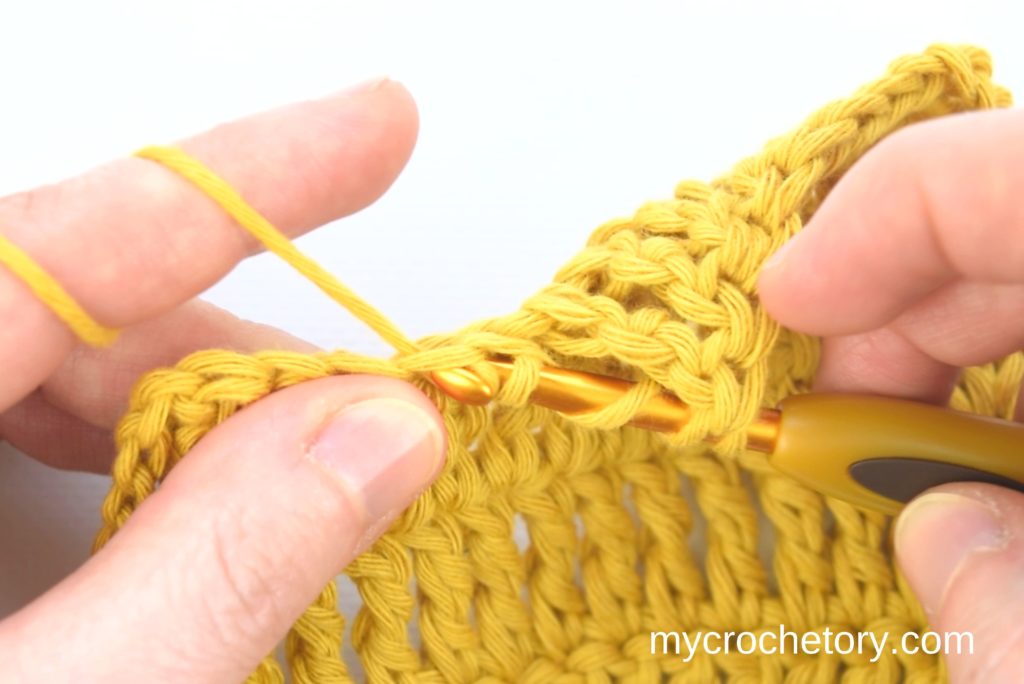
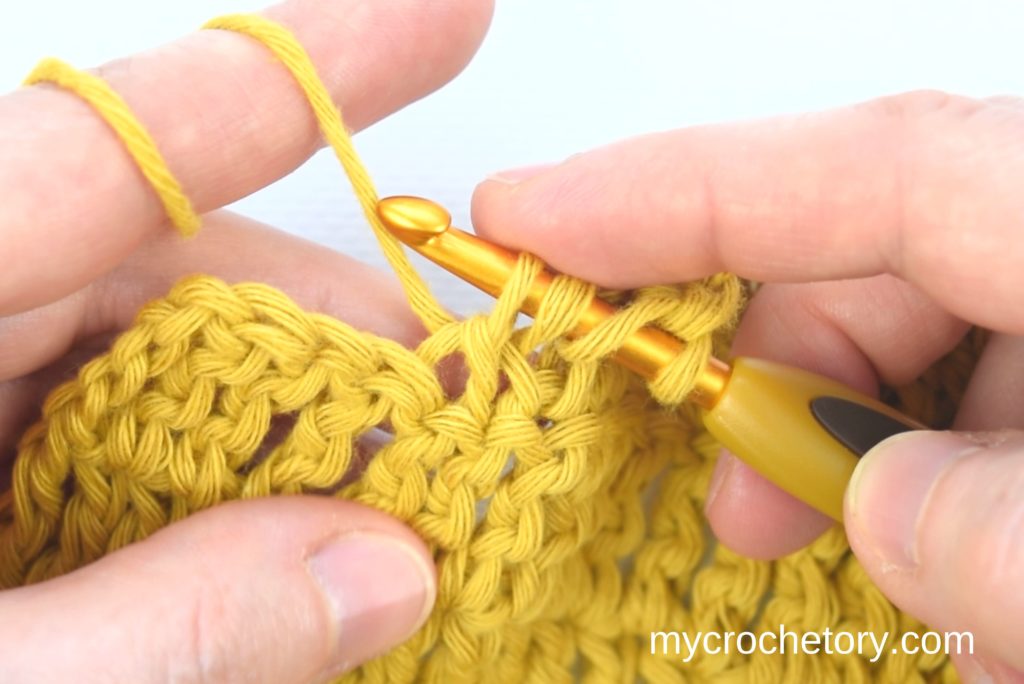
Step 6: Yarn over again, pull through the first two loops again.

Step 7: Again, yarn over and pull through the next two loops.
Step 8: Yarn over one last time and pull through the remaining two loops.
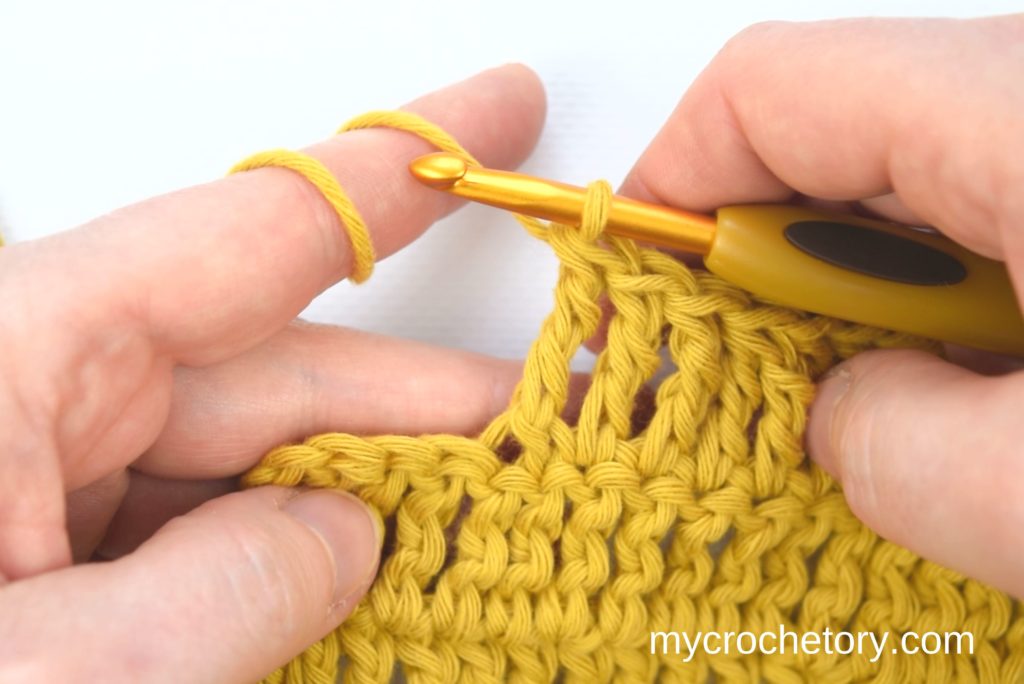
By mastering how to crochet an invisible decrease in treble crochet, you add a handy skill to your crochet toolkit.
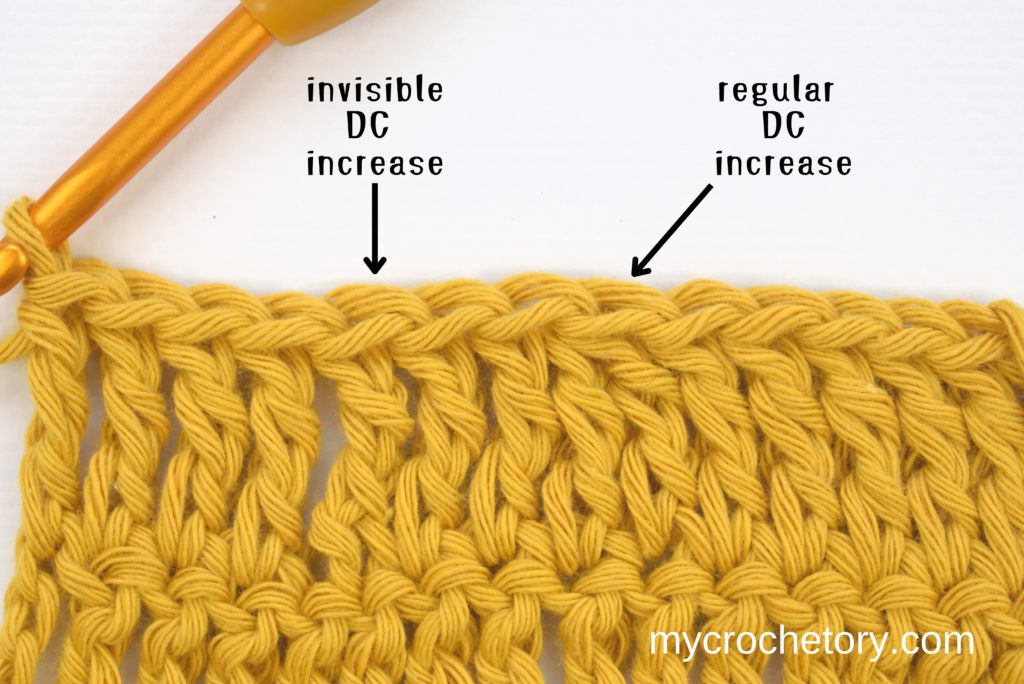
Keep your tension steady, and practice regularly for a neat and professional finish in your treble crochet projects. Enjoy your crochet time!
Common Mistakes and How to Fix Them
Even experienced crocheters run into these. Here’s what usually goes wrong and how to fix it.
Finishing the first stitch too early. It’s tempting to yarn over and pull through right after that first front loop, out of habit. But that turns it into a regular stitch, not a decrease. Insert your hook into both front loops first, then yarn over once and pull through everything together.
Uneven tension. Your tightness isn’t consistent, so some decreases look different from others. The trick is keeping your tension exactly the same as the stitches around it, not tighter to “hide” it, not looser to make it easier to work into. Just consistent.
Pulling too tight. This makes the decrease pucker instead of blend in. Loosen your grip slightly and let the yarn move naturally, the same way it does in the stitches next to it.transforms your crochet pieces.
Where This Technique Really Pays Off
Some projects benefit from invisible decreases way more than others, honestly.
Amigurumi is the big one for me. Every single stitch shows on a stuffed toy, so a bumpy decrease sticks out like a sore thumb. Check out my animal amigurumi roundup if you want to see what I mean, decreases show up constantly on those rounded shapes.
Fitted garments and hats benefit too, especially anywhere the fabric curves, think a hat crown or a raglan seam, places where your eye naturally goes. The Rhea Cardigan is a good example, I used invisible decreases throughout it, and on a solid color like that, they really disappear into the fabric.
For blankets, home décor, or looser accessories, it matters way less, honestly. A regular decrease blends in just fine when the fabric isn’t stretched tight or getting stared at up close. So don’t stress over it everywhere, just save the extra effort for where it counts.
FAQ
What’s the difference between a regular decrease and an invisible decrease?
A regular decrease works through both loops and usually leaves a small bump. An invisible decrease works through the front loops of two stitches, without pulling a loop through after the first one, so everything gets pulled together at once. That’s what lets it tuck into the fabric instead of sitting on top.
Does invisible decrease work the same way for every stitch?
The idea stays the same across single crochet, half double crochet, double crochet invisible decrease, and treble invisible decrease, but the exact steps shift a bit depending on how many loops that stitch normally has. Check the section for your specific stitch above.
Can I use invisible decrease with any yarn?
Yes, but it shows up best with smoother yarns. Really fuzzy or textured yarn hides stitch definition anyway, so the extra effort matters less there.
Why does my invisible decrease still look bumpy?
Usually it’s tension, either too tight or too loose right at the decrease. Keep it consistent with the stitches around it and it should blend in.
MORE CROCHET TUTORIALS
If you found this helpful, you might also like posts:
- How to foundation single crochet
- How to make a slip knot – 3 Easy Ways
- How to Intarsia Crochet
- How to crochet a magic ring – 3 easy ways
- How to crochet ribbing
- Mattress stitch join tutorial
Don’t forget to save this Pin for easy reference: 📌
Made something using an invisible decrease? I’d love to see it, drop a photo in the comments or tag me on Pinterest.
Got a question about any of the four stitches? Ask away, I read every comment.
If this helped, sharing it helps other crocheters find it too. There’s a share button right below.
Leave a Reply