Updated: 3 September 2026 by Sylwia (MyCrochetory)
I always knew this mosaic crochet shawl would happen eventually, shawls are just my favorite thing to make.
After the sweater, the hat, the pillow, and the shrug, I finally got to my favorite accessory in this mosaic series. Out of everything I design, shawls are the ones I reach for first. There’s just something about wrapping a big piece of fabric around yourself that a sweater or a hat can’t really give you.
I still don’t know exactly why mustard yellow and this pink-purple ombre ended up together, but somehow it just works. The mosaic sections build up like a border around a plain triangle center, getting bolder as you go, and three tassels swing at the points for a little extra movement.
Here’s what you’re getting below: the full pattern, a stitch chart, written instructions, and a photo tutorial that walks you through the mosaic sections step by step, so you’re never guessing what comes next.
I also linked my testers’ finished shawls further down, so you can see how different color choices change the whole look before you pick your own.
The full free pattern is right below, so scroll down whenever you’re ready.
Want an ad-free, printable PDF with the stitch charts instead? Grab that on Etsy or Ravelry, totally optional though.

Why Mosaic Crochet Works So Well Here
Mosaic crochet is honestly one of my favorite ways to get into colorwork without things getting complicated. You only work with one color at a time, so there’s no juggling yarn or trying to keep track of color changes mid-row.
It’s exactly why I keep coming back to it for shawls like this. Carina actually mixes two rhythms. The plain sections turn after every single row, like you’d expect. But once you hit a mosaic section, you switch to turning after every two rows instead, two rows on the right side, two rows on the wrong side, then back again. Your hands catch on fast once you’re a few rows in.
With this many color changes, you’ll want a solid way to join each new yarn. I’ve got a few easy methods here if you need one.
Lose track while working on this mosaic crochet shawl? Check the pictures in the pattern below and you’ll see exactly where you are. And since you’re only ever holding one strand of yarn at a time, this stays a lot simpler than other colorwork techniques out there.

Choosing Yarn for This Mosaic Crochet Shawl
I used Scheepjes Our Tribe for my version, it’s soft, holds the mosaic pattern nicely, and doesn’t feel stiff once it’s blocked. Old Bewick and Ubuntu Molly ended up being the yarns I reached for.
The gradient yarn is doing a lot of the work here, actually. Since Ubuntu Molly shifts through different shades as you crochet, the mosaic sections pick up subtle color changes without you doing anything special, it just happens naturally as you work through the skein.
You don’t need to copy my exact colors though. This mosaic crochet shawl is pretty forgiving when it comes to yarn choice, so go with whatever pulls you in, bold contrast or something softer and tone-in-tone. A solid paired with a gradient tends to make the mosaic sections stand out the most, but two solids in contrasting colors work just as well if you want something bolder and more graphic.


CARINA MOSAIC CROCHET SHAWL FREE PATTERN
- Purchase the ad-free, printable PDF here on ETSY or here on Ravelry.
- Grab the MyCrochetory Shawl Pattern BUNDLE that includes 14 patterns for one low price HERE.
- Add this pattern to your Ravelry Queue HERE.
- Pin it for later.
Copyright 2020 – 2026 MyCrochetory. All right reserved. This pattern is property of Sylwia Kawczyńska @MyCrochetory. Please DO NOT sell the pattern and claim this pattern as your own. The pattern is for personal use only and may not be translated or reproduced in another language. Please respect my rights, DO NOT share or publish this pattern anywhere without my permission.
The mosaic crochet shawl you make following this pattern is yours you are free to sell it, as long as you credit MyCrochetory as original designer. For more information, please, read Terms Page.

Materials & Tools:
- Yarn SCHEEPJES
Our Tribe 100g = 420m (450yds), 70% Merino Superwash and 30% Polyamide.
Yarn A: 984 Old Bewick – 2 skeins – 520m (568yds) + for tassels,
Yarn B: 985 Ubuntu Molly – 820m (896yds),
Note that yardage may vary depending on yarn used, gauge variations or modifications.
- Hook size 3.5mm.
Adjust hook size if necessary to obtain
correct gauge, - Tapestry needle (to weave and hide
yarn ends), - Scissors,
- Stitch marker.
Level:
Intermediate
Size:
Approx. 182cm/71.7” wide and 80cm/31.5” long at center.
Gauge after blocking:
After row 14: 23.8cm/9.4” wide and 10.5cm/4.1” long at center.
Gauge is not crucial for this project. However, changes might result in different yardage requirements and finished size.
General Notes:
- The pattern uses US crochet terminology.
- Shawl is worked top-down in rows, back and forth, with one color used for each row.
- Sections without mosaic colorwork are turned after every row. Sections with mosaic colorwork use a different rhythm, see Mosaic Section Notes below for exactly how that works.
- STITCHES: When in the instructions you have a stitch followed by a number, eg sc14, this means you have to work 1sc stitch into each of the next 14 sts. When in the instructions you have a number followed by a stitch, eg 2sc, this this means you have to work 2 sc stitches into the next (same) stitch.
- Instructions in square brackets […] are worked as many times as indicated.

Mosaic Section Notes:
- You can either follow the chart or written instructions.
- Mosaic sections use a two-row rhythm: two rows on the RS, then two rows on the WS, repeating. The first mosaic section starts with a single RS row to sync up with the plain section before it, then settles into the WS,WS/RS,RS rhythm from there. You can either follow the chart or written instructions
How to read the Mosaic Chart:
- Chart is read from bottom to top and each row of squares represents a half of the row.
- First half of row is read from right to left. After ch-2sp corner the second half is identical and is read from left to right.
- Each square of the chart represents 1 stitch or 1 skipped stitch.
- Two yellow squares represent 2 single crochet worked in one stitch.
- Red square represents ch-2sp corner.
- Whenever you see a square of color dedicated to that round, work single crochet.
- Whenever you see a square of different color in that round, skip that stitch (make chain). To prevent puckering, make the same number of chain as the number of skipped sts plus ch1. For example, for 1 skipped st – make ch2, for 2 skipped sts – make ch3, for 3 skipped sts – make ch4, etc.
- Pay special attention to number of skipped stitches.
- BLmosaicdc and FLmosaicdc will be worked in these skipped sts from two rows below.
- BLmosaicdc and BLsc are worked on RS of your work and FLmosaicdc and FLsc are worked on WS of your work.
- Remember, BLmosaicdc are always worked in front of chains of previous row and FLmosaicdc are always worked behind the chains of previous row.
Stitches & Abbreviations (US terms):
st(s) – stitch(es)
BLsc – back loop only single crochet
FLsc – front loop only single crochet
BLdc – back loop only double crochet
FLdc – front loop only double crochet
yo – yarn over
BLmosaicdc (back loop only mosaic double crochet) – work regular BLdc in unworked/skipped st of the same color two rows below in front of chain space (in front of work). These chains will stay behind BLmosaicdc and will stay unworked.
FLmosaicdc (front loop only mosaic double crochet) – work regular FLdc in unworked/skipped st of the same color two rows below behind chain space (behind the work). These chains will stay in front of FLmosaicdc and will stay unworked.
BLcorner – (BLsc1 in first ch, ch2, RPM, BLsc1 in next ch) in ch-2sp
FLcorner – (FLsc1 in first ch, ch2, RPM, FLsc1 in next ch) in ch-2sp
M – marker
PM – place marker
RPM – reposition marker
sp – space
sk – skip
RS – right ride
WS – wrong side

PATTERN
With 3.5mm hook make a magic ring or 5ch and slst in the first st to close the round.
With Yarn A
Setup row (RS): ch1 (doesn’t count as a st here and throughout), sc3 into ring, ch2, PM, sc3 into ring. Turn. (6sc, 1 ch-2sp)
Row 1 (WS): ch1, 2sc in first st, sc in each st until M, (sc1, ch2, RPM, sc1) in ch-2sp, sc in each until last st remain, 2sc in last st. Turn. (10sc.1 ch-2sp)
Repeat Row 1 until row 36 or until you have multiple of 28 plus 19 sts on each side of the shawl.
For example:
28×0 + 19 = 19sts on each side,
28×1 + 19 = 47sts on each side,
28×2 + 19 = 75sts on each side,
And so on.
Your last row should be worked on RS.
DON’T CUT the yarn, drop loop off the hook and DON’T TURN your work after your last repeat of row 1 (see tutorial).
MOSAIC CROCHET SECTION

Row 1 (RS): Insert your hookin the first st of the same row, attach Yarn B and pull it through first st.
Ch1 (doesn’t count as a st here and throughout), 2sc in first st, BLsc4, [ch2, sk 1st, BLsc1, ch2, sk 1st, BLsc1, ch2, sk 1st, BLsc1, ch2, sk 1st, BLsc1, ch2, sk 1st, BLsc5] rep until M, BLcorner, BLsc4, [BLsc1, ch2, sk 1st, BLsc1, ch2, sk 1st, BLsc1, ch2, sk 1st, BLsc1, ch2, sk 1st, BLsc1, ch2, sk 1st, BLsc4] rep until last st remain, 2sc in last st. Change to Yarn A in final st by grabbing the loop in the end of the row and pulling it through two loops on the hook. Turn.
Row 2 (WS): ch1, 2sc in first st, ch2, sk 1st, FLsc3, ch2, sk 1st, [FLmosaicdc1 (in unworked st of same color two rows below, behind chains – here and throughout), FLsc1, FLmosaicdc1, FLsc1, FLmosaicdc1, FLsc1, FLmosaicdc1, FLsc1, FLmosaicdc1, ch2, sk 1st, FLsc3, ch2, sk 1st] rep until one st remain before M, FLsc1, FLcorner, FLsc1, ch2, sk 1st, FLsc3, ch2, sk 1st,
[FLmosaicdc1, FLsc1, FLmosaicdc1, FLsc1, FLmosaicdc1, FLsc1, FLmosaicdc1, FLsc1, FLmosaicdc1, ch2, sk 1st, FLsc3, ch2, sk 1st] rep until last st remain, 2sc in last st. Drop loop off the hook and don’t turn.
Row 3 (WS): Insert your hookin the first st of the same row, grab Yarn B and pull it through first st.
Ch1, 2sc in first st, FLsc1, FLmosaicdc1, ch2, sk 1st, FLsc1, ch2, sk 1st, FLmosaicdc1, FLsc2, [ch2, sk 1st, FLsc1, ch2, sk 1st, FLsc1, ch2, sk 1st, FLsc2, FLmosaicdc1, ch2, sk 1st, FLsc1, ch2, sk 1st, FLmosaicdc1, FLsc2] rep until M, FLcorner, FLsc2, FLmosaicdc1, ch2, sk 1st, FLsc1, ch2, sk 1st, FLmosaicdc1, FLsc1, [FLsc1, ch2, sk 1st, FLsc1, ch2, sk 1st, FLsc1, ch2, sk 1st, FLsc2, FLmosaicdc1, ch2, sk 1st, FLsc1, ch2, sk 1st, FLmosaicdc1, FLsc1] rep until last st remain, 2sc in last st. Change to Yarn A in final st by grabbing the loop in the end of the row and pulling it through two loops on the hook. Turn.
Row 4 (RS): ch1, 2sc in first st, ch2, sk 1st, BLsc2, BLmosaicdc1 (in unworked st of same color two rows below, in front of chains – here and throughout), BLsc1, BLmosaicdc1, BLsc2, ch2, sk 1st, [BLmosaicdc1, BLsc1, BLmosaicdc1, BLsc1, BLmosaicdc1, ch2, sk 1st, BLsc2, BLmosaicdc1, BLsc1, BLmosaicdc1, BLsc2, ch2, sk 1st] rep until one st remain before M, BLsc1, BLcorner, BLsc1, ch2, sk 1st, BLsc2, BLmosaicdc1, BLsc1, BLmosaicdc1, BLsc2, ch2, sk 1st, [BLmosaicdc1, BLsc1, BLmosaicdc1, BLsc1, BLmosaicdc1, ch2, sk 1st, BLsc2, BLmosaicdc1, BLsc1, BLmosaicdc1, BLsc2, ch2, sk 1st] rep until last st remain, 2sc in last st. Drop loop off the hook and don’t turn.
Row 5 (RS): Insert your hookin the first st of the same row, grab Yarn B and pull it through first st.
Ch1, 2sc in first st, BLsc1, BLmosaicdc1, ch2, sk 1st, BLsc1, ch2, sk 1st, BLsc1, ch2, sk 1st, BLsc1, ch2, sk 1st, BLmosaicdc1, BLsc2, [ch2, sk 1st, BLsc2, BLmosaicdc1, ch2, sk 1st, BLsc1, ch2, sk 1st, BLsc1, ch2, sk 1st, BLsc1, ch2, sk 1st, BLmosaicdc1, BLsc2] rep until M, BLcorner, BLsc2, BLmosaicdc1, ch2, sk 1st, BLsc1, ch2, sk 1st, BLsc1, ch2, sk 1st, BLsc1, ch2, sk 1st, BLmosaicdc1, BLsc1, [BLsc1, ch2, sk 1st, BLsc2, BLmosaicdc1, ch2, sk 1st, BLsc1, ch2, sk 1st, BLsc1, ch2, sk 1st, BLsc1, ch2, sk 1st, BLmosaicdc1, BLsc1] rep until last st remain, 2sc in last st. Change to Yarn A in final st by grabbing the loop in the end of the row and pulling it through two loops on the hook. Turn.
Row 6 (WS): ch1, 2sc in first st, ch2, sk 1st, FLsc2, FLmosaicdc1, FLsc1, FLmosaicdc1, FLsc1, FLmosaicdc1, FLsc1, FLmosaicdc1, FLsc2, ch2, sk 1st, [FLmosaicdc1, ch2, sk 1st, FLsc2, FLmosaicdc1, FLsc1, FLmosaicdc1, FLsc1, FLmosaicdc1, FLsc1, FLmosaicdc1, FLsc2, ch2, sk 1st] rep until one st remain before M, FLsc1, FLcorner, FLsc1, ch2, sk 1st, FLsc2, FLmosaicdc1, FLsc1, FLmosaicdc1, FLsc1, FLmosaicdc1, FLsc1, FLmosaicdc1, FLsc2, ch2, sk 1st, [FLmosaicdc1, ch2, sk 1st, FLsc2, FLmosaicdc1, FLsc1, FLmosaicdc1, FLsc1, FLmosaicdc1, FLsc1, FLmosaicdc1, FLsc2, ch2, sk 1st] rep until last st remain, 2sc in last st. Drop loop off the hook and don’t turn.
Row 7 (WS): Insert your hookin the first st of the same row, grab Yarn B and pull it through first st.
Ch1, 2sc in first st, ch2, sk 1st, [FLmosaicdc1, FLsc2, ch2, sk 1st, FLsc1, ch2, sk 1st, FLsc1, ch2 sk 1st, FLsc1, ch2, sk 1st, FLsc2, FLmosaicdc1, ch2, sk 1st] rep until one st remain before M, FLsc1, FLcorner, FLsc1, ch2, sk 1st, [FLmosaicdc1, FLsc2, ch2, sk 1st, FLsc1, ch2, sk 1st, FLsc1, ch2, sk 1st, FLsc1, ch2, sk 1st, FLsc2, FLmosaicdc1, ch2, sk 1st] rep until last st remain, 2sc in last st. Change to Yarn A in final st by grabbing the loop in the end of the row and pulling it through two loops on the hook. Turn.
Row 8 (RS): ch1, 2sc in first st, BLsc1, BLmosaicdc1, BLsc2, [ch2, sk 1st, BLmosaicdc1, BLsc1, BLmosaicdc1, BLsc1, BLmosaicdc1, BLsc1, BLmosaicdc1, ch2, sk 1st, BLsc2, BLmosaicdc1, BLsc2] rep until M, BLcorner, BLsc2, BLmosaicdc1, BLsc1, [BLsc1 ch2, sk 1st, BLmosaicdc1, BLsc1, BLmosaicdc1, BLsc1, BLmosaicdc1, BLsc1, BLmosaicdc1, ch2, sk 1st, BLsc2, BLmosaicdc1, BLsc1] rep until last st remain, 2sc in last st. Drop loop off the hook and don’t turn.
Row 9 (RS): Insert your hookin the first st of the same row, grab Yarn B and pull it through first st.
Ch1, 2sc in first st, ch2, sk 1st, BLsc3, ch2, sk 1st, [BLmosaicdc1, BLsc2, ch2, sk 1st, BLsc1, ch2, sk 1st, BLsc2, BLmosaicdc1, ch2, sk 1st, BLsc3, ch2, sk 1st] rep until one st remain before M, BLsc1, BLcorner, BLsc1, ch2, sk 1st, BLsc3, ch2, sk 1st, [BLmosaicdc1, BLsc2, ch2, sk 1st, BLsc1, ch2, sk 1st, BLsc2, BLmosaicdc1, ch2, sk 1st, BLsc3, ch2, sk 1st] rep until last st remain, 2sc in last st. Change to Yarn A in final st by grabbing the loop in the end of the row and pulling it through two loops on the hook. Turn.
Row 10 (WS): ch1, 2sc in first st, FLsc1, FLmosaicdc1, ch2, sk 1st, FLsc1, ch2, sk 1st, FLmosaicdc1, FLsc2, [ch2, sk 1st, FLmosaicdc1, FLsc1, FLmosaicdc1, ch2, sk 1st, FLsc2, FLmosaicdc1, ch2, sk 1st, FLsc1, ch2, sk 1st, FLmosaicdc1, FLsc2] rep until M, FLcorner, FLsc2, FLmosaicdc1, ch2, sk 1st, FLsc1, ch2, sk 1st, FLmosaicdc1, FLsc1, [FLsc1, ch2, sk 1st, FLmosaicdc1, FLsc1, FLmosaicdc1, ch2, sk 1st, FLsc2, FLmosaicdc1, ch2, sk 1st, FLsc1, ch2, sk 1st, FLmosaicdc1, FLsc1] rep until last st remain, 2sc in last st. Drop loop off the hook and don’t turn.
Row 11 (WS): Insert your hookin the first st of the same row, grab Yarn B and pull it through first st.
Ch1, 2sc in first st, ch2, sk 1st, FLsc2, FLmosaicdc1, FLsc1, FLmosaicdc1, FLsc2, ch2, sk 1st, [FLmosaicdc1, FLsc3, FLmosaicdc1, ch2, sk 1st, FLsc2, FLmosaicdc1, FLsc1, FLmosaicdc1, FLsc2, ch2, sk 1st] rep until one st remain before M, FLsc1, FLcorner, FLsc1, ch2, sk 1st, FLsc2, FLmosaicdc1, FLsc1, FLmosaicdc1, FLsc2, ch2, sk 1st, [FLmosaicdc1, FLsc3, FLmosaicdc1, ch2, sk 1st, FLsc2, FLmosaicdc1, FLsc1, FLmosaicdc1, FLsc2, ch2, sk 1st] rep until last st remain, 2sc in last st. Change to Yarn A in final st by grabbing the loop in the end of the row and pulling it through two loops on the hook. Turn.
Row 12 (RS): ch1, 2sc in first st, BLsc1, BLmosaicdc1, ch2, sk 1st, BLsc1, ch2, sk 1st, BLsc1, ch2, sk 1st, BLsc1, ch2, sk 1st, BLmosaicdc1, BLsc2, [ch2, sk 1st, BLsc2, BLmosaicdc1, ch2, sk 1st, BLsc1, ch2, sk 1st, BLsc1, ch2, sk 1st, BLsc1, ch2, sk 1st, BLmosaicdc1, BLsc2] rep until M, BLcorner, BLsc2, BLmosaicdc1, ch2, sk 1st, BLsc1, ch2, sk 1st, BLsc1, ch2, sk 1st, BLsc1, ch2, sk 1st, BLmosaicdc1, BLsc1, [BLsc1, ch2, sk 1st, BLsc2, BLmosaicdc1, ch2, sk 1st, BLsc1, ch2, sk 1st, BLsc1, ch2, sk 1st, BLsc1, ch2, sk 1st, BLmosaicdc1, BLsc1] rep until last st remain, 2sc in last st. Drop loop off the hook and don’t turn.
Row 13 (RS): Insert your hookin the first st of the same row, grab Yarn B and pull it through first st.
Ch1, 2sc in first st, ch2, sk 1st, BLsc2, BLmosaicdc1, BLsc1, BLmosaicdc1, BLsc1, BLmosaicdc1, BLsc1, BLmosaicdc1, BLsc2, ch2, sk 1st, [BLmosaicdc1, ch2, sk 1st, BLsc2, BLmosaicdc1, BLsc1, BLmosaicdc1, BLsc1, BLmosaicdc1, BLsc1, BLmosaicdc1, BLsc2, ch2, sk 1st] rep until one st remain before M, BLsc1, BLcorner, BLsc1, ch2, sk 1st, BLsc2, BLmosaicdc1, BLsc1, BLmosaicdc1, BLsc1, BLmosaicdc1, BLsc1, BLmosaicdc1, BLsc2, ch2, sk 1st, [BLmosaicdc1, ch2, sk 1st, BLsc2, BLmosaicdc1, BLsc1, BLmosaicdc1, BLsc1, BLmosaicdc1, BLsc1, BLmosaicdc1, BLsc2, ch2, sk 1st] rep until last st remain, 2sc in last st. Change to Yarn A in final st by grabbing the loop in the end of the row and pulling it through two loops on the hook. Turn.
Row 14 (WS): ch1, 2sc in first st, ch2, sk 1st, [FLmosaicdc1, FLsc2, ch2, sk 1st, FLsc1, ch2, sk 1st, FLsc1, ch2, sk 1st, FLsc1, ch2, sk 1st, FLsc2, FLmosaicdc1, ch2, sk 1st] rep until one st remain before M, FLsc1, FLcorner, FLsc1, ch2, sk 1st, [FLmosaicdc1, FLsc2, ch2, sk 1st, FLsc1, ch2, sk 1st, FLsc1, ch2, sk 1st, FLsc1, ch2, sk 1st, FLsc2, FLmosaicdc1, ch2, sk 1st] rep until last st remain, 2sc in last st. Drop loop off the hook and don’t turn.
Row 15 (WS): Insert your hookin the first st of the same row, grab Yarn B and pull it through first st.
Ch1, 2sc in first st, FLsc1, FLmosaicdc1, FLsc2, [ch2, sk 1st, FLmosaicdc1, FLsc1, FLmosaicdc1 FLsc1, FLmosaicdc1, FLsc1, FLmosaicdc1, ch2, sk 1st, FLsc2, FLmosaicdc1, FLsc2] rep until M, FLcorner, FLsc2, FLmosaicdc1, FLsc1, [FLsc1, ch2, sk 1st, FLmosaicdc1, FLsc1, FLmosaicdc1 FLsc1, FLmosaicdc1, FLsc1, FLmosaicdc1, ch2, sk 1st, FLsc2, FLmosaicdc1, FLsc1] rep until last st remain, 2sc in last st. Change to Yarn A in final st by grabbing the loop in the end of the row and pulling it through two loops on the hook. Turn.
Row 16 (RS): ch1, 2sc in first st, ch2, sk 1st, BLsc1, ch2, sk 1st, BLsc1, ch2, sk 1st, [BLmosaicdc1, BLsc2, ch2, sk 1st, BLsc1, ch2, sk 1st, BLsc2, BLmosaicdc1, ch2, sk 1st, BLsc1, ch2, sk 1st, BLsc1, ch2, sk 1st] rep until one st remain before M, BLsc1, BLcorner, BLsc1, ch2, sk 1st, BLsc1, ch2, sk 1st, BLsc1, ch2, sk 1st, [BLmosaicdc1, BLsc2, ch2, sk 1st, BLsc1, ch2, sk 1st, BLsc2, BLmosaicdc1, ch2, sk 1st, BLsc1, ch2, sk 1st, BLsc1, ch2, sk 1st] rep until last st remain, 2sc in last st. Drop loop off the hook and don’t turn.
Row 17 (RS): Insert your hookin the first st of the same row, grab Yarn B and pull it through first st.
Ch1, 2sc in first st, BLsc1, BLmosaicdc1, BLsc1, BLmosaicdc1, BLsc1, BLmosaicdc1, BLsc2, [ch2, sk 1st, BLmosaicdc1, BLsc1, BLmosaicdc1, ch2, sk 1st, BLsc2, BLmosaicdc1, BLsc1, BLmosaicdc1, BLsc1, BLmosaicdc1, BLsc2] rep until M, BLcorner, BLsc2, BLmosaicdc1, BLsc1, BLmosaicdc1, BLsc1, BLmosaicdc1, BLsc1, [BLsc1, ch2, sk 1st, BLmosaicdc1, BLsc1, BLmosaicdc1, ch2, sk 1st, BLsc2, BLmosaicdc1, BLsc1, BLmosaicdc1, BLsc1, BLmosaicdc1, BLsc1] rep until last st remain, 2sc in last st. Change to Yarn A in final st by grabbing the loop in the end of the row and pulling it through two loops on the hook. Turn.
Row 18 (WS): ch1, 2sc in first st, ch2, sk 1st, FLsc1, ch2, sk 1st, FLsc1, ch2, sk 1st, FLsc1, ch2, sk 1st, FLsc1, ch2, sk 1st, [FLmosaicdc1, FLsc3, FLmosaicdc1, ch2, sk 1st, FLsc1, ch2, sk 1st, FLsc1, ch2, sk 1st, FLsc1, ch2, sk 1st, FLsc1, ch2, sk 1st] rep until one st remain before M, FLsc1, FLcorner, FLsc1, ch2, sk 1st, FLsc1, ch2, sk 1st, FLsc1, ch2, sk 1st, FLsc1, ch2, sk 1st, FLsc1, ch2, sk 1st, [FLmosaicdc1, FLsc3, FLmosaicdc1, ch2, sk 1st, FLsc1, ch2, sk 1st, FLsc1, ch2, sk 1st, FLsc1, ch2, sk 1st, FLsc1, ch2, sk 1st] rep until last st remain, 2sc in last st. Fasten off Yarn A and don’t turn.
Row 19 (WS): Insert your hookin the first st of the same row, grab Yarn B and pull it through first st.
Ch1, 2sc in first st, FLsc1, FLmosaicdc1, FLsc1, FLmosaicdc1, FLsc1, FLmosaicdc1, FLsc1, FLmosaicdc1, FLsc1, FLmosaicdc1, FLsc2, [FLsc3, FLmosaicdc1, FLsc1, FLmosaicdc1, FLsc1, FLmosaicdc1, FLsc1, FLmosaicdc1, FLsc1, FLmosaicdc1, FLsc2] rep until M, FLcorner, FLsc2, FLmosaicdc1, FLsc1, FLmosaicdc1, FLsc1, FLmosaicdc1, FLsc1, FLmosaicdc1, FLsc1, FLmosaicdc1, FLsc1, [FLsc4, FLmosaicdc1, FLsc1, FLmosaicdc1, FLsc1, FLmosaicdc1, FLsc1, FLmosaicdc1, FLsc1, FLmosaicdc1, FLsc1] rep until last st remain, 2sc in last st. Turn.
Continue with Yarn B.
Next row: ch1, 2sc in first st, sc in each st until M, (sc, ch2, RPM, sc) in ch-2 sp, sc in each st until last st remain, 2sc in last st. Turn.
Repeat above Next row until row 86 or until you have multiple of 28 plus 5 sts on each side of the shawl.
Your last row should be worked on WS.
Then change to Yarn A in final st and TURN your work. Fasten off Yarn B.
You can also repeat Next row until you have multiple of 28 plus 19 sts on each side of the shawl but then the last row should be worked on RS. In this case repeat instructions for mosaic section as previous.
Next, repeat MOSAIC SECTION working
Row 1 using Yarn A,
Row 2 using Yarn B,
Row 3 using Yarn A,
Row 4 using Yarn B, and so on until Row 19.
After Row 19, continue with Yarn A and work 2 rows of single crochet (repeat of Next row).
Fasten off yarn, weave in all ends and block your shawl.
If you want, add tassels to your shawl.
If you have any suggestions or have detected any mistakes, please feel free to email me at mycrochetory@gmail.com
MOSAIC CROCHET SHAWL TUTORIAL
Before the mosaic section:


Row 1:


Row 2:


Row 3:


Row 4:


Row 5:


Row 6:


Row 7:


Row 8:


Row 9:


Row 10:


Row 19:


Curious how this looks in other colors? My testers made some gorgeous versions, you can see all of them here on Ravelry.
FAQ
Is the Carina Mosaic Shawl good for beginners?
It’s rated intermediate, mostly because of the mosaic sections. If you’re an adventurous beginner though, go for it, the step-by-step photo tutorial walks you through the trickier parts.
Can I adjust the size?
You can, but check your notes before changing row counts, the number of stitches in the last row of each solid section needs to match up for the next part of the pattern to start correctly. If you’re not sure, it’s safest to add or remove full repeats rather than random rows.
Can I use different yarn?
Sure, just try to match the gauge. Different fibers and weights will change the drape a bit, but that’s part of what makes this pattern fun to customize.

How do I make the tassels?
Wind yarn around a piece of cardboard about the length you want the tassel, then tie it off tightly at the top and cut through the loops at the bottom. Trim the ends even once it’s attached.
How do I block the shawl?
Pin it out on a flat surface in the triangle shape you want, spray it with water, and let it dry completely before you unpin it. Blocking is what really opens up the mosaic pattern and gives the edges that crisp point.
OTHER MOSAIC CROCHET PATTERNS YOU MIGHT LOVE
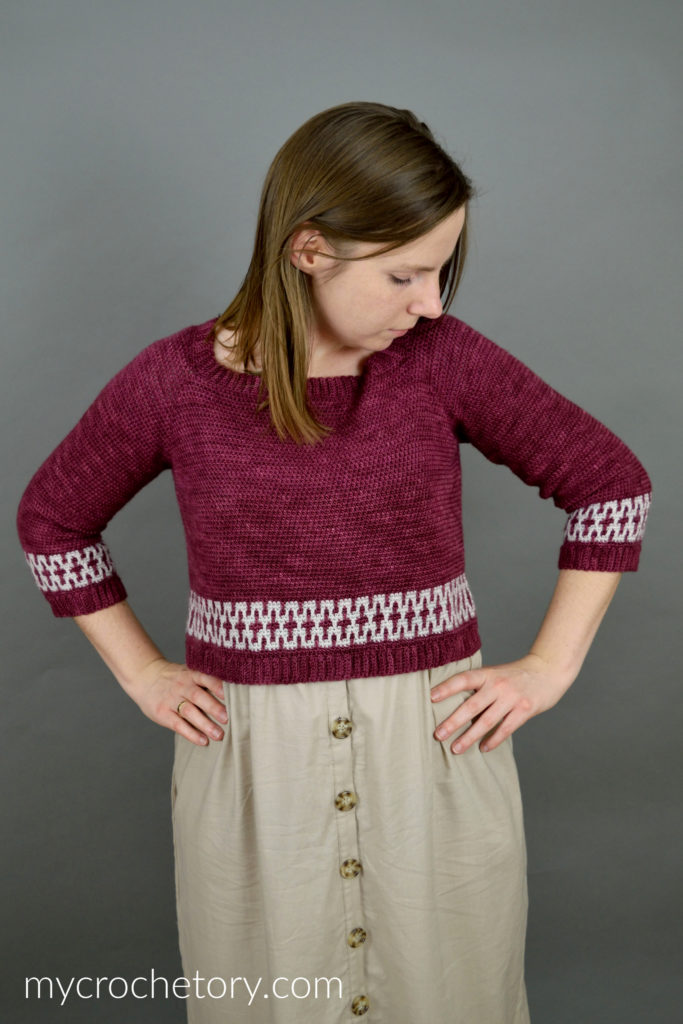

Made your own Carina Shawl? I’d genuinely love to see it. Tag me on social media with #mycrochetory, or just drop a photo in the comments.

Beautiful shawl! I would like to learn how to crochet in mosaic, like this.
Thank you! It looks complex but it is quite easy. Just give it a try!
It is amazing. I am a beginner and dont quite know how to croshet without video tutorial. Do you have a video for this shawl by any chance? I would absolutley love to crochet this. Thank you
Hi, there are only written instructions and picture tutorial for this pattern, no video – sorry!
How can I get a copy of the chart that is large enough to read? This says its a free tutorial… do I have to buy the chart?
The mosaic chart and the picture tutorial are in the post for free. If the picture of mosaic chart is too small for you, you can save it on your computer and zoom it when needed.
Thanks for responding. 🙂
Zooming makes it blurry, which is why I asked where to get a larger version.
Just beautiful! This is going on my bucket list.
I know this is ancient in internet terms, but Mosaic row 8 is wrong in the written part of the pattern. The pictures show, correctly, the mosaic stitches on the front of the right side, but the pattern says BLmosaicdc1 stitches. If you do it that way, the pattern ends up on the wrong side of the work.