
Updated: 4 November 2026 by Sylwia (MyCrochetory)
This crochet wrap pattern began with one stubborn thought. I missed the Kalinda waves, and I wanted them back on my hook right away.
The first Kalinda pattern, a triangle shawl, came out back in 2018. Since then the waves have grown into a wrap and, because you asked for a square, a blanket too.
This time I wanted something long. Something you throw over a coat in the morning and don’t think about again until evening.
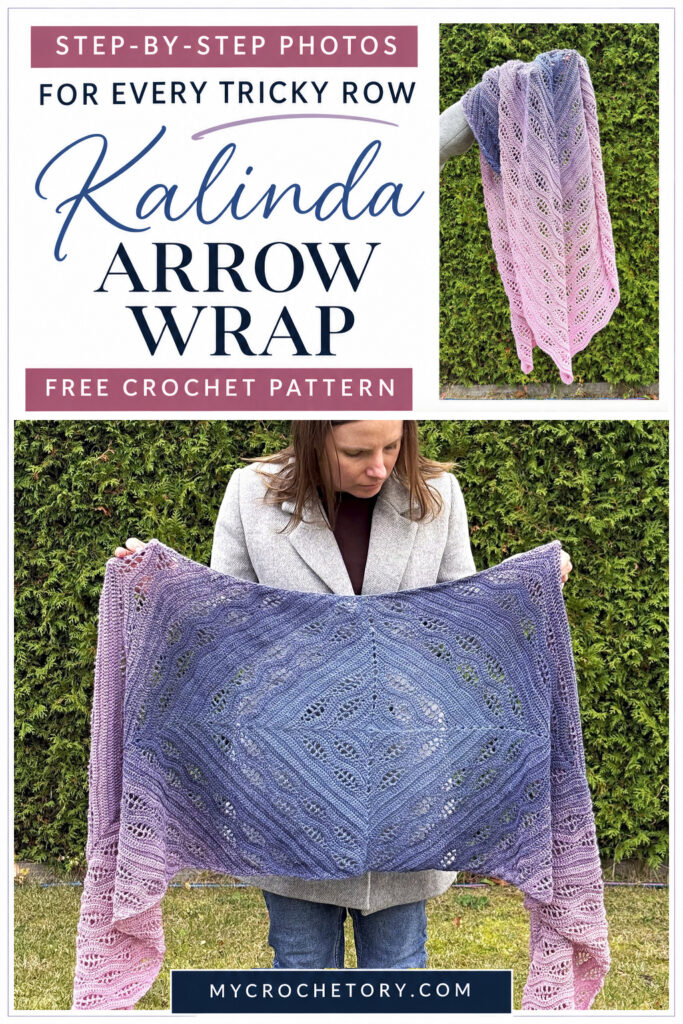
So the square from my Kalinda Blanket moved to the middle and tipped onto one corner, like a diamond. Two wings grew out of it with the waves from my Kalinda Wrap, and each one runs out to a sharp point.
You’ll find the whole pattern below, row by row, with step-by-step photos under the tricky rounds. Prefer paper or a tablet? The ad-free PDF has stitch charts, a photo tutorial and a stitch tracker, and it’s on Etsy and Ravelry.
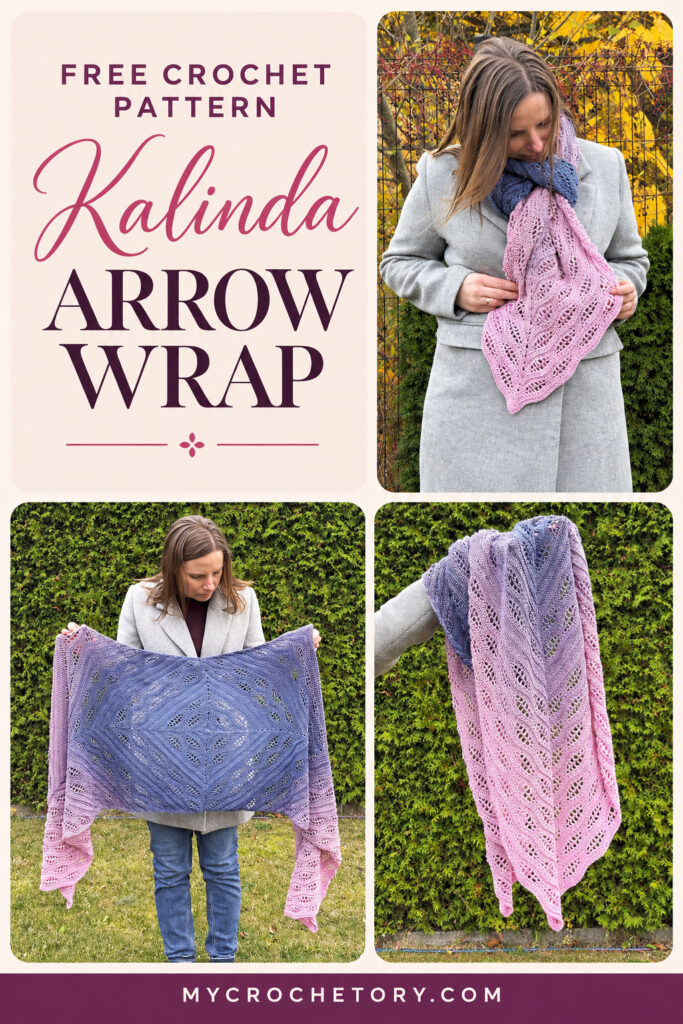
Jump to the Kalinda Arrow Wrap pattern
Why I Keep Coming Back to These Waves
This wrap is my fourth Kalinda design, and the idea arrived all at once. I knew the waves would stay, so the only open question was the shape.
I didn’t have to look far. My Arrow Crochet Wrap already had rows that bend into a V and ends that taper to a point.
Put the two together, and the waves on the wings stack like bricks, row after row, all the way out to the tips.
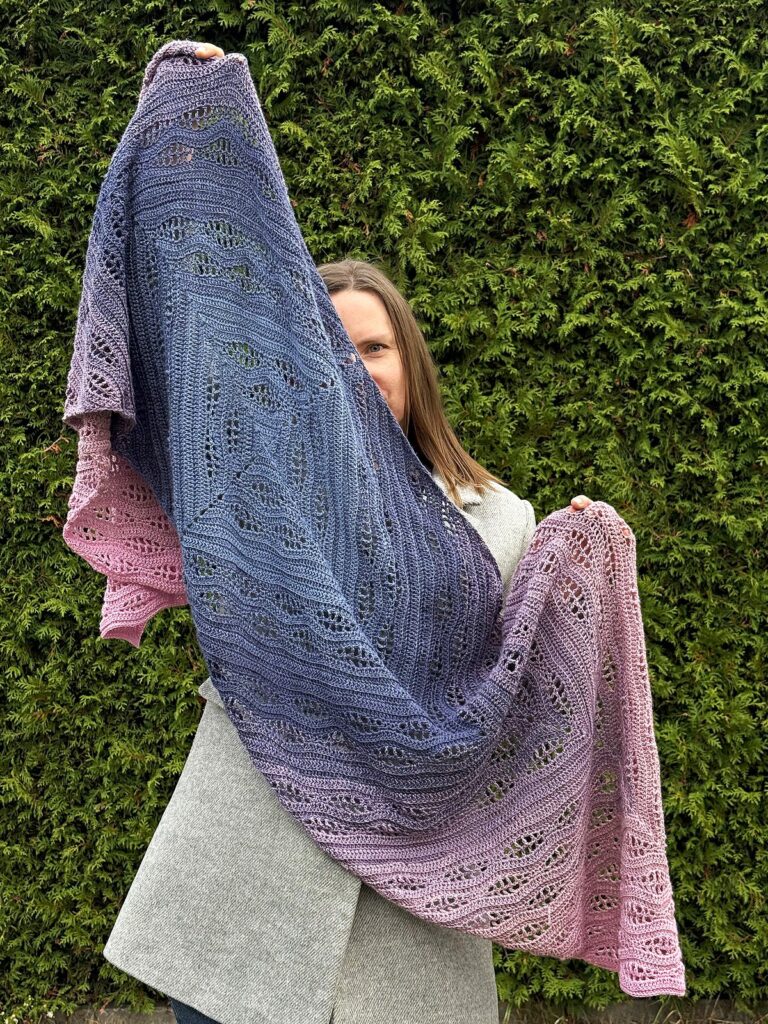
And why a wrap instead of one more shawl? A triangle looks great in photos, but in real life one end keeps sliding down your back while you’re busy with something else. A long body with two points stays where you put it, around your neck or loose over a jacket.
How This Crochet Wrap Pattern Comes Together
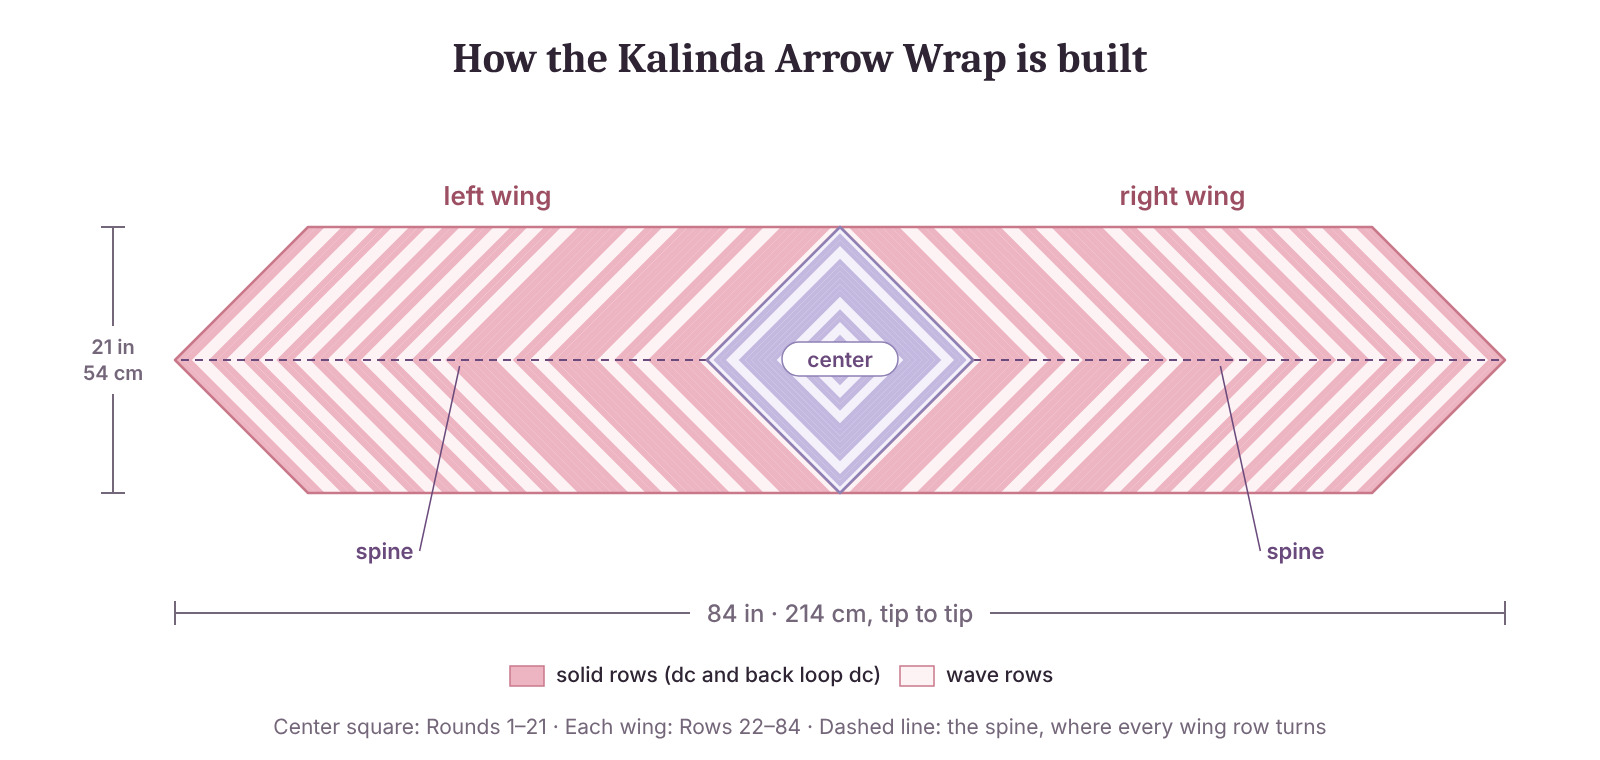
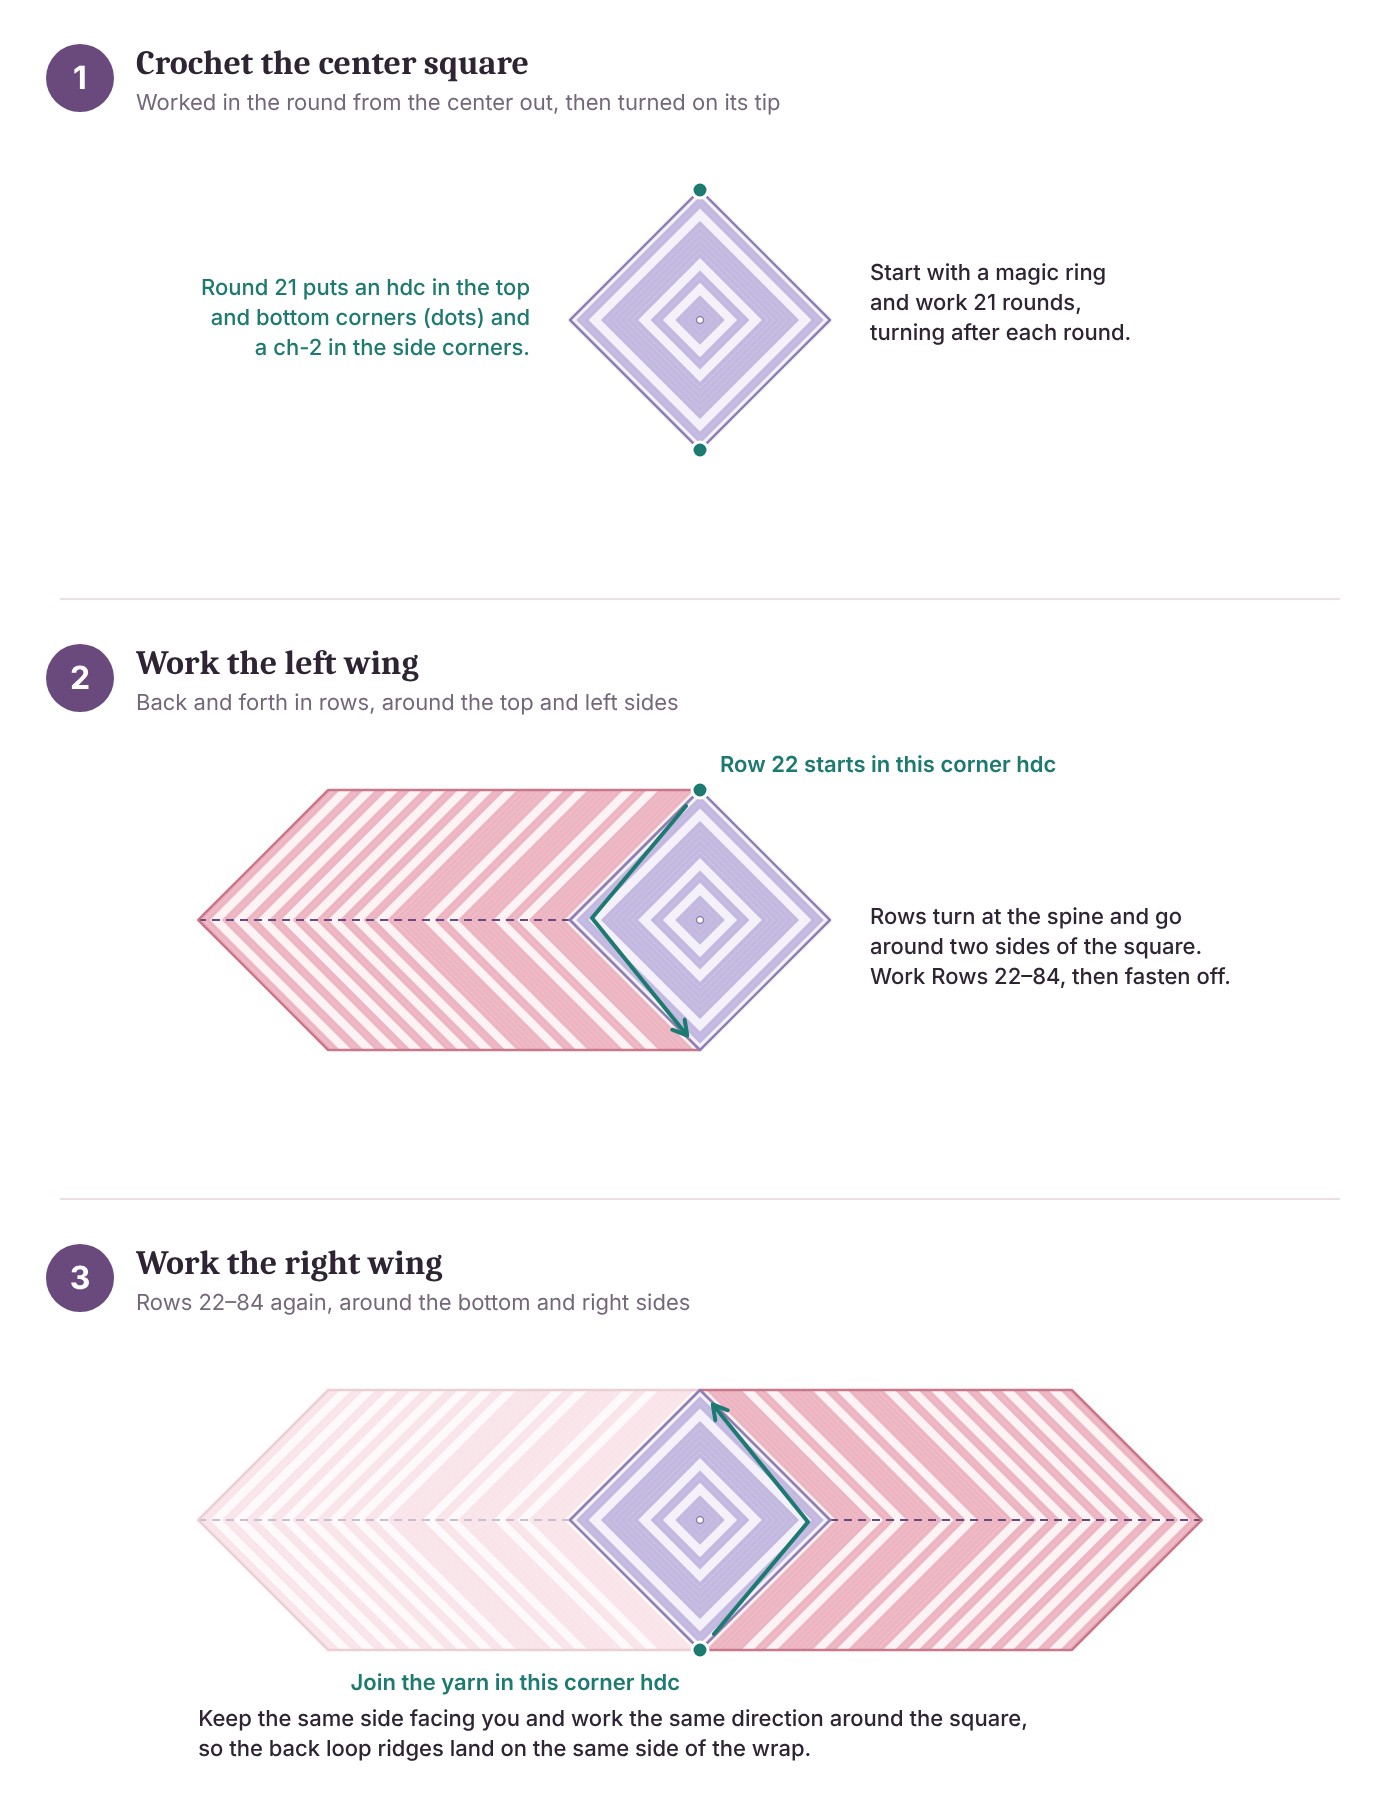
This crochet wrap pattern is one piece from start to finish, so there’s nothing to sew at the end. It grows in three parts.
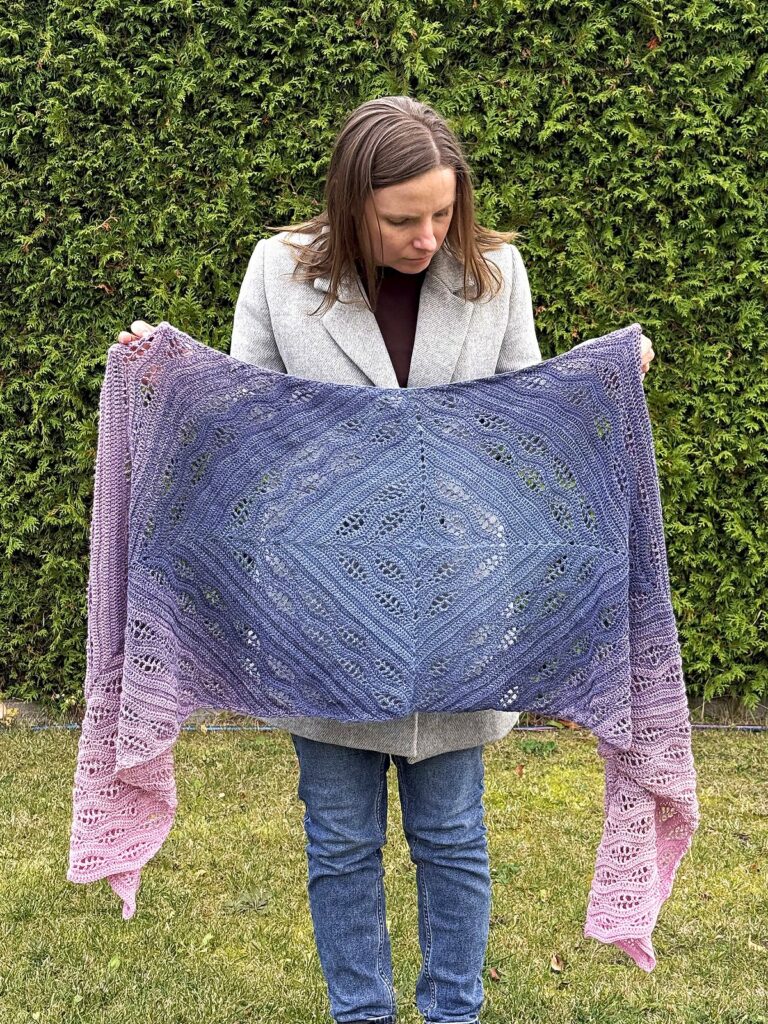
First comes the center square. You work 21 rounds from a magic ring, and in the last one two opposite corners get an hdc.
Those two hdc mark where the wings start and end. The other two corners keep a ch-2 space, and the spines grow out of them.
Next comes the left wing. The square tips onto a corner, and each row runs along two of its sides, folding into a V at the spine.
The right wing goes last. You join the yarn in the opposite corner and work around the other two sides, in the same direction.
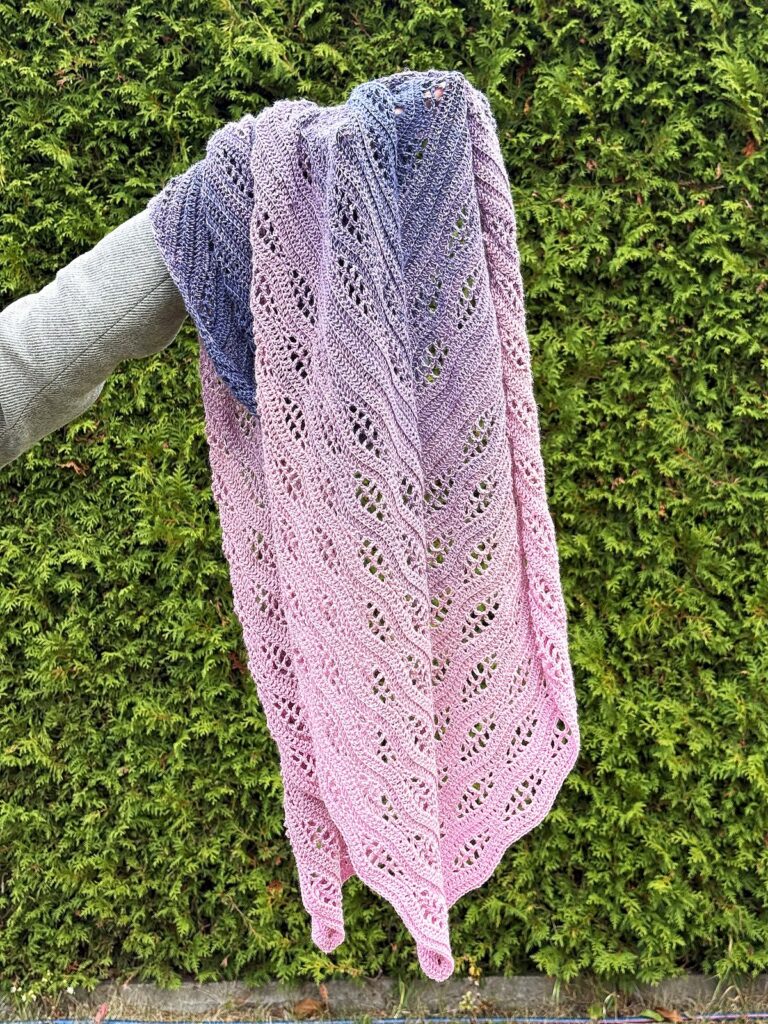
The points take care of themselves. Each row loses stitches at the long edges and gains them at the spine, so the wing keeps its width and narrows into a tip after 84 rows.
Here’s the whole map in one picture.
How a Wave Is Born
Lace that looks this busy should be hard to make. It isn’t, because each wave is just two rows of sc, hdc, dc and tr with a ch1 between them.
In the second row, every stitch lands right on top of its twin from the row below. Short over short, tall over tall, and the open spaces stack into a wave.
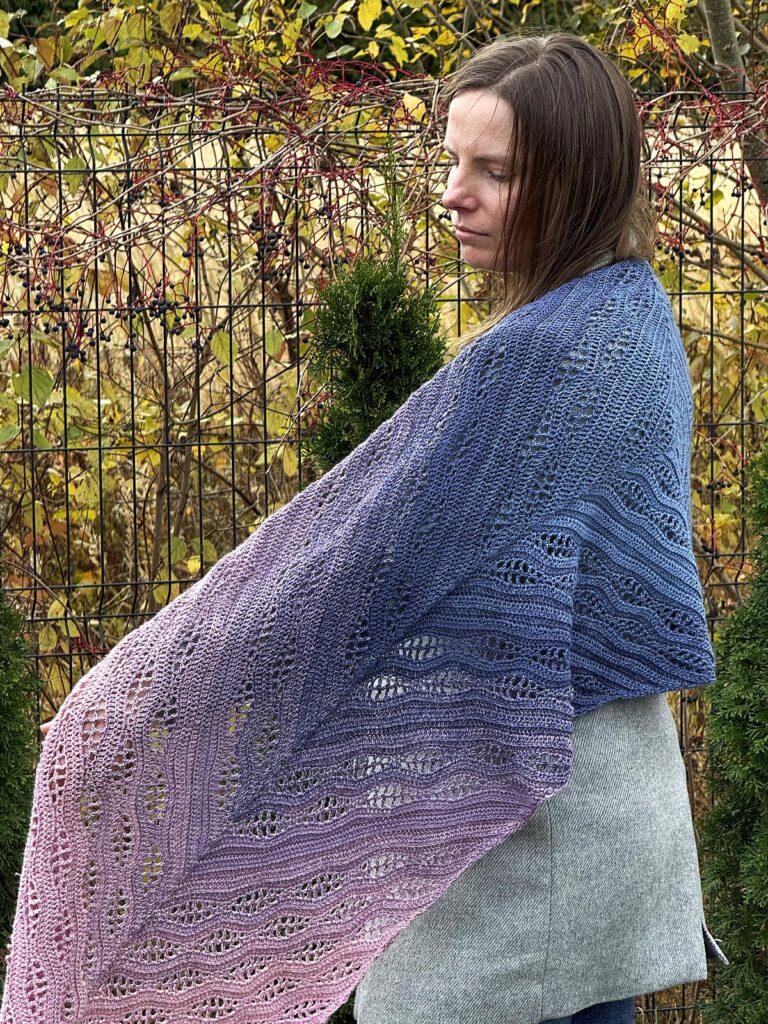
Between the waves sit solid stripes of dc and back loop dc. The back loop rows leave tiny ridges on one side of the fabric, which is why both wings travel in the same direction.
Then watch what happens near the tips. Close to the square, wide solid bands separate the waves, but at the ends only a thin stripe is left. The last 8 waves arrive almost back to back, and each point turns airy and light.
Choosing Yarn for Your Crochet Wrap
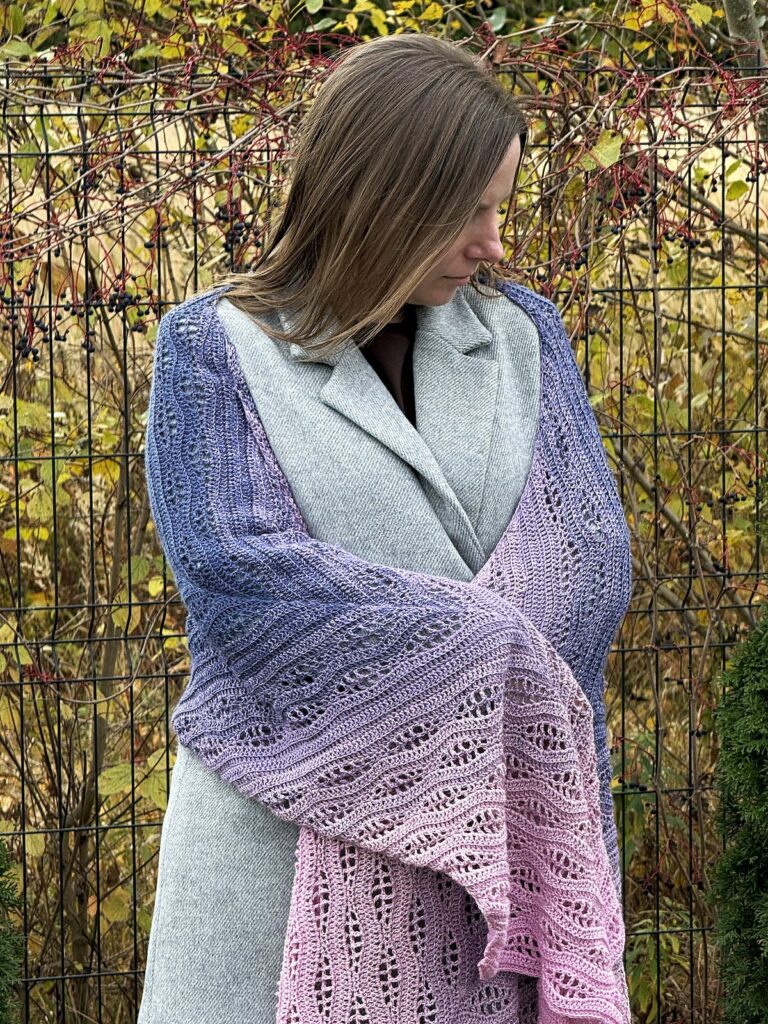
I made mine from a long gradient cake, about 1,750 yards (1600 m), and used nearly every yard of it. Many ready-made cakes in shops are shorter, so check the length before you buy.
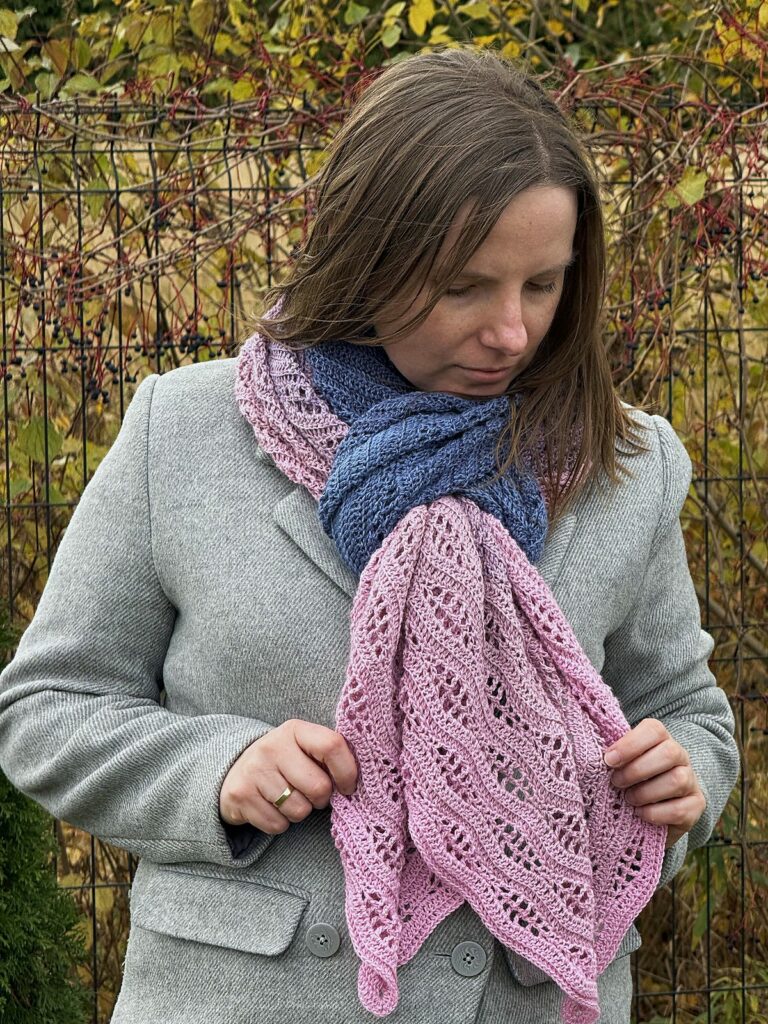
The cake starts gray-blue in the middle and turns soft pink on the outside. I began the square from the inside, so the diamond got the deepest shade.
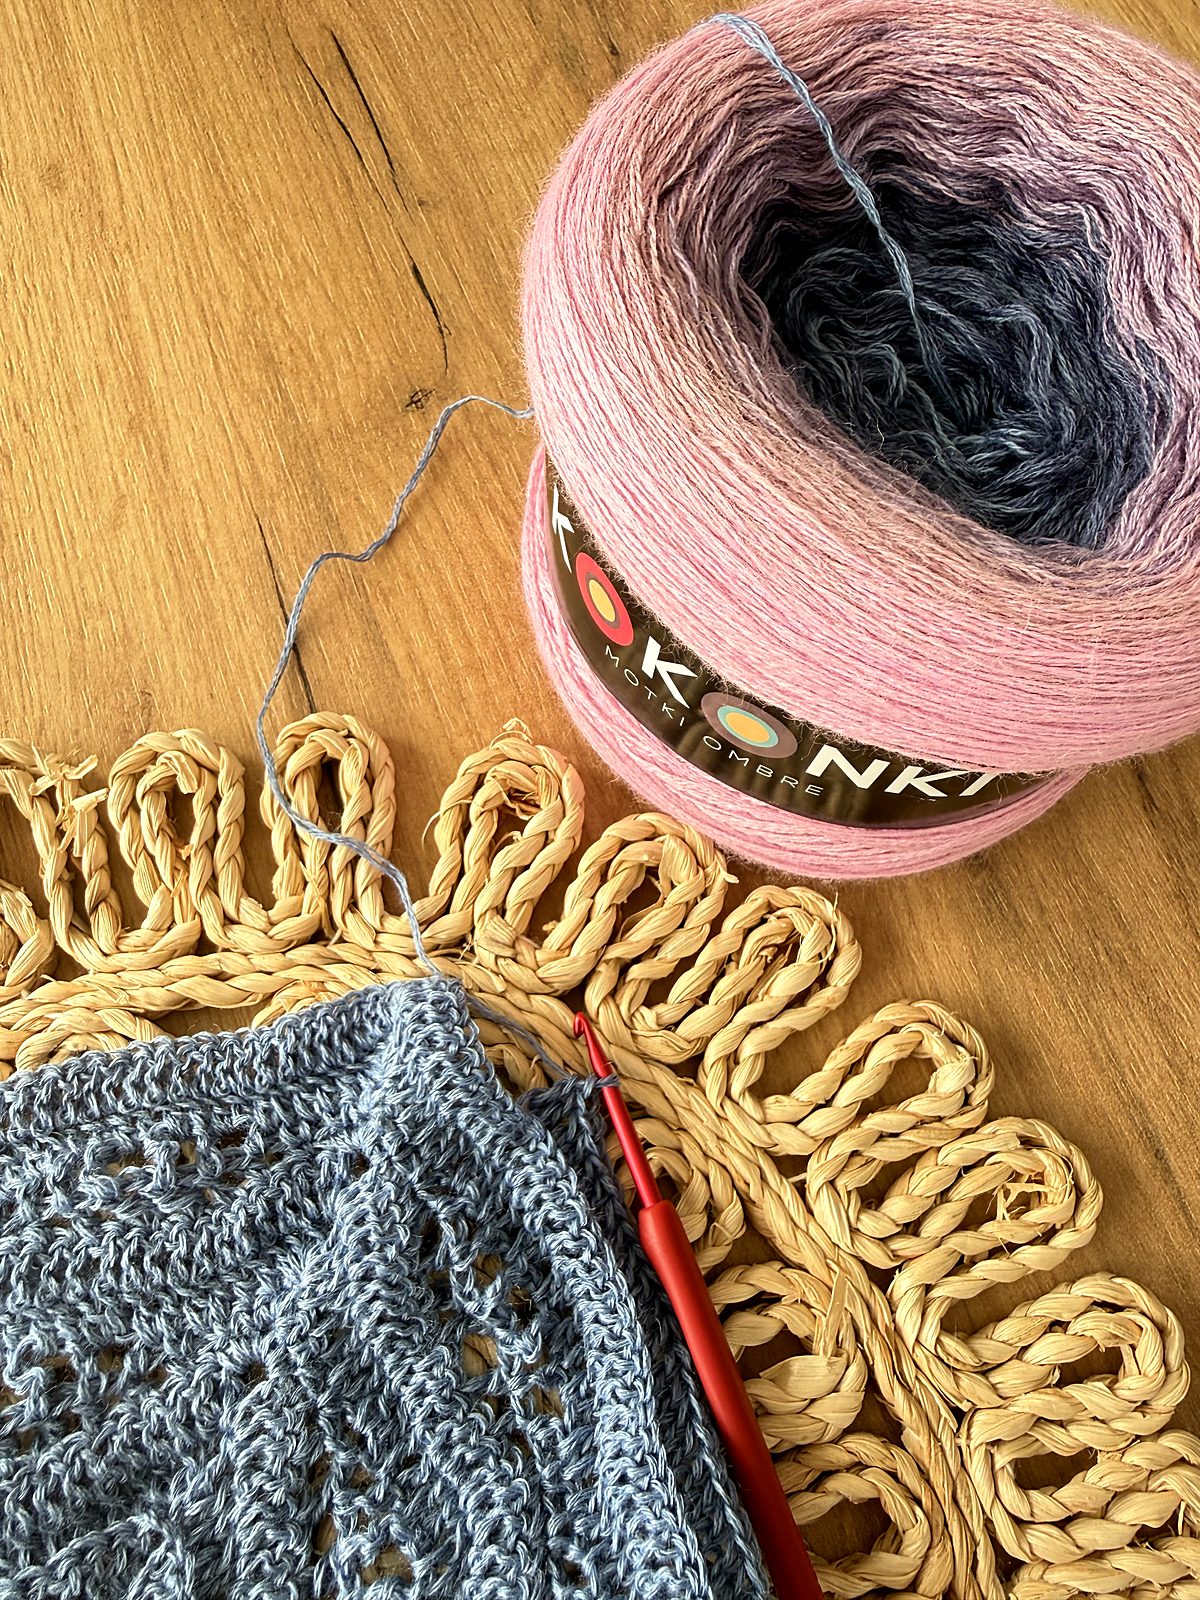
Then I hit a snag. A gradient cake only runs one way, and I needed two wings that match.
So I wound the rest of the cake into small balls, one per shade, and lined them up from dark to light.
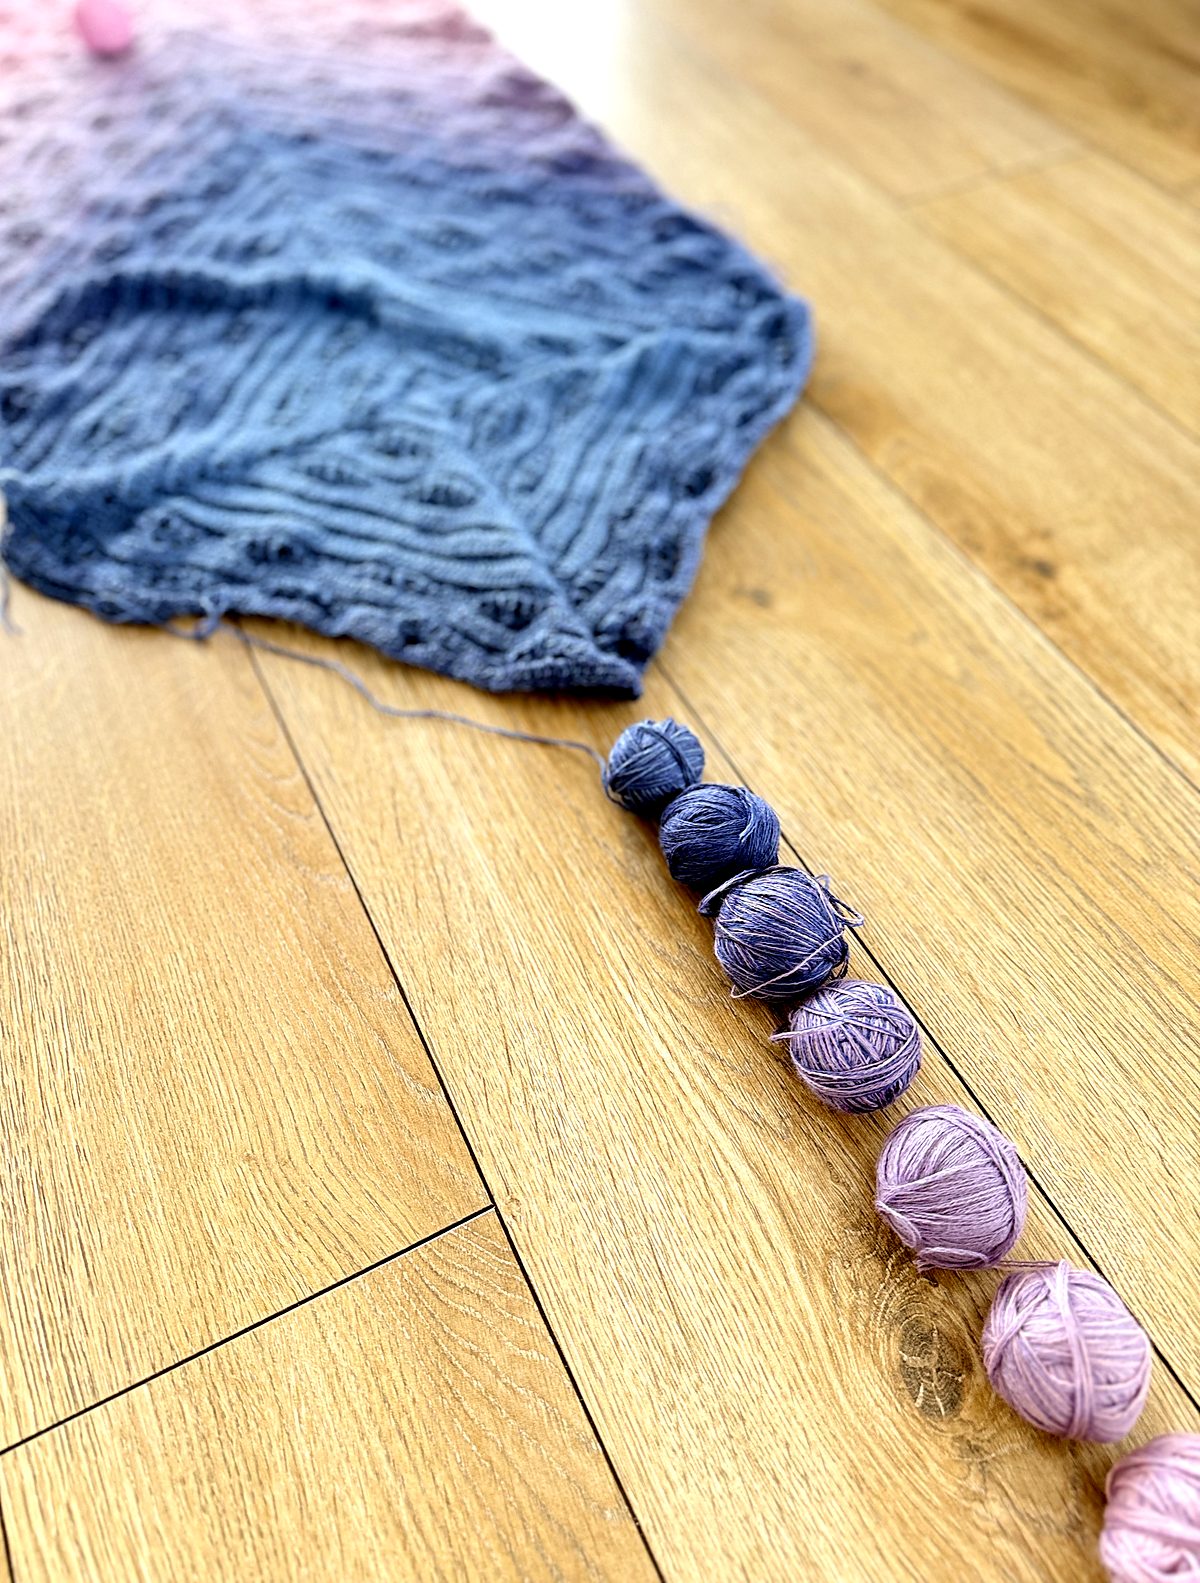
Each ball got split roughly in half, one half per wing. That small step is the reason both tips end in the same pink.
You can do the same with any gradient cake. Finish the square, wind the leftovers by shade, and halve every ball before the wings.
A gradient cake isn’t a must, though. You can make this crochet wrap in one solid color, or pick a few single skeins and join new colors wherever you like.
If you work with separate skeins, join each new one at the start of a solid row, where the ends hide best. My guide on how to join yarn ends shows 4 easy ways.
Don’t Skip Blocking Your Crochet Wrap
Straight off the hook, the wings ripple and curl a little. That’s normal, and blocking is what opens the waves and sharpens both points.
For cotton or acrylic, I pin the piece to a mat and pass a steam iron about 1/2 inch above it, then leave it pinned for at least 20 minutes. Wool and other animal fibers get wet blocked instead.
Is This Crochet Wrap Pattern for You?
If you can work a dc and a tr, you can make this crochet wrap pattern. I’d still call it intermediate, because the shaping asks for your attention on every row.
Every round and row ends with a stitch count. Check it, and a slipped stitch never gets the chance to travel three rows up.
The decreases are dc3tog and sc3tog, three stitches started one by one and closed together. The written rows tell you where each leg goes, and the photos show it.
If tall stitches are new to you, my treble crochet tutorial and half double crochet tutorial will help. For tidy edges at the start of each row, my guide to straight edges explains how turning chains work.
Save This Crochet Wrap Pattern for Later
Not starting today? Pin it to one of your boards, and follow me on Pinterest for more wraps and shawls.
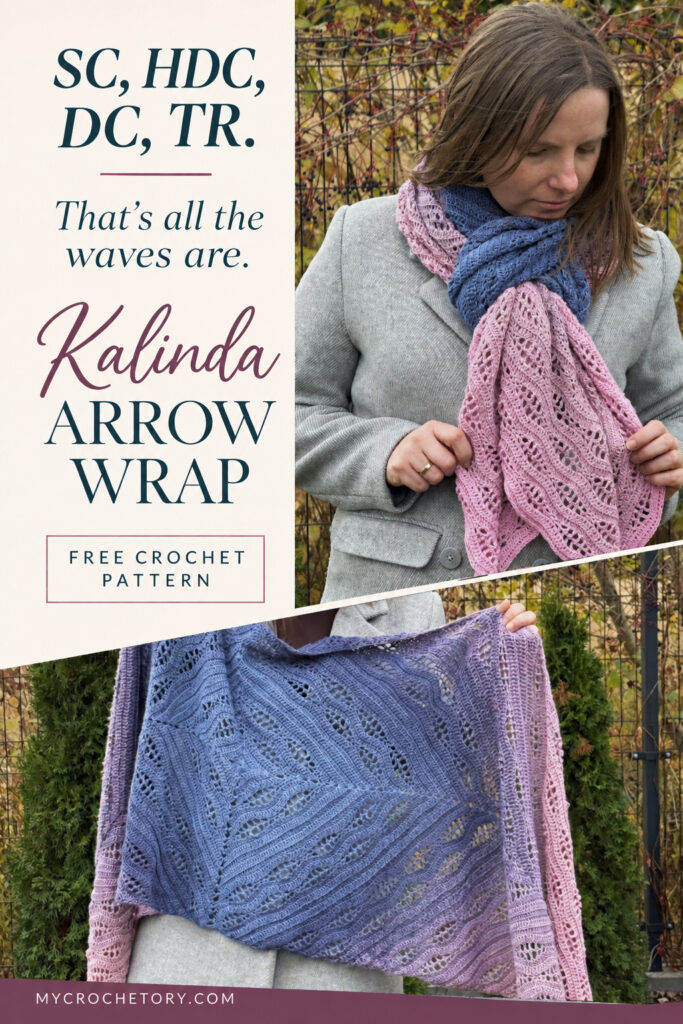
Kalinda Arrow Wrap Free Pattern
- Get the ad-free, printable PDF on Etsy or on Ravelry.
- Add this pattern to your Ravelry queue.
- Pin it for later.
Copyright 2026 MyCrochetory. All rights reserved. This pattern is property of Sylwia Kawczyńska @MyCrochetory. Please DO NOT sell the pattern and claim this pattern as your own. The pattern is for personal use only and may not be translated or reproduced in another language. Please respect my rights, DO NOT share or publish this pattern anywhere without my permission.
The wrap you make following this pattern is yours, and you are free to sell it, as long as you credit MyCrochetory as the original designer.
Materials & Tools
- Yarn: KOKONEK Merino (50% merino wool, 50% acrylic; 1600 m / 1750 yd per cake, 3 strands), 1 cake. Sample in colorway 689 Jagodowe Love 2. The wrap uses almost the whole cake.
- Hook: 3.5 mm (US E/4). Adjust the hook size if necessary to obtain the correct gauge.
- Tapestry needle, scissors, 4 stitch markers (optional).
Level
Intermediate.
Size After Blocking
One size: 214 × 54 cm (84 × 21 in), measured from tip to tip.
Gauge After Blocking
After Round 8 the square measures 22 cm (8.75 in) across the diagonal. Gauge is not important for this project, but a different gauge changes the yardage and the finished size.
Notes
- The pattern uses US terms.
- The wrap starts with a square worked in the round from the center out, turning after every round. Then the left wing and the right wing are worked back and forth in rows, around two sides of the square each.
- The spine is the corner where a wing row turns from one side of the square to the next. Each wing row starts at one long edge, goes around the spine and ends at the other long edge.
- Work the left wing first. Then work the right wing in the same direction around the square, with the same side facing you on Row 22. This keeps the BLdc ridges on the same side of the wrap.
- ch3 at the start of a row counts as a dc. ch1 at the start of a row doesn’t count as a st.
- Each ch-1 sp counts as a st. The corner ch sps are not counted.
- The numbers in (…) are the stitch counts at the end of the round on each side of the square, or at the end of the row on each side of the spine.
- Instructions in […] are worked as many times as indicated. Instructions in {…} are worked 3 times, once for each of the first 3 corners.
- If the long edges pucker, start dc and BLdc rows with ch4 instead of ch3 and work the last st of those rows as a tr. Start sc rows with ch2 instead of ch1 and work the last st as an hdc.
- The construction diagram below shows the order of work.
Abbreviations (US Terms)
- ch – chain
- st(s) – stitch(es)
- slst – slip stitch
- sc – single crochet
- hdc – half double crochet
- dc – double crochet
- tr – treble crochet
- BLdc – back loop only double crochet
- yo – yarn over
- sk – skip
- sp – space
- beg – beginning
- prev – previous
- rep – repeat
Special Stitches
sc3tog (single crochet 3 together): [insert hook in indicated st, yo, draw up a loop] three times, yo, pull through all 4 loops on hook.
dc3tog (double crochet 3 together): [yo, insert hook in indicated st, yo, draw up a loop, yo, pull through 2 loops] three times, yo, pull through all 4 loops on hook.
BLdc3tog (back loop double crochet 3 together): work as dc3tog, inserting the hook in the back loop of each st.
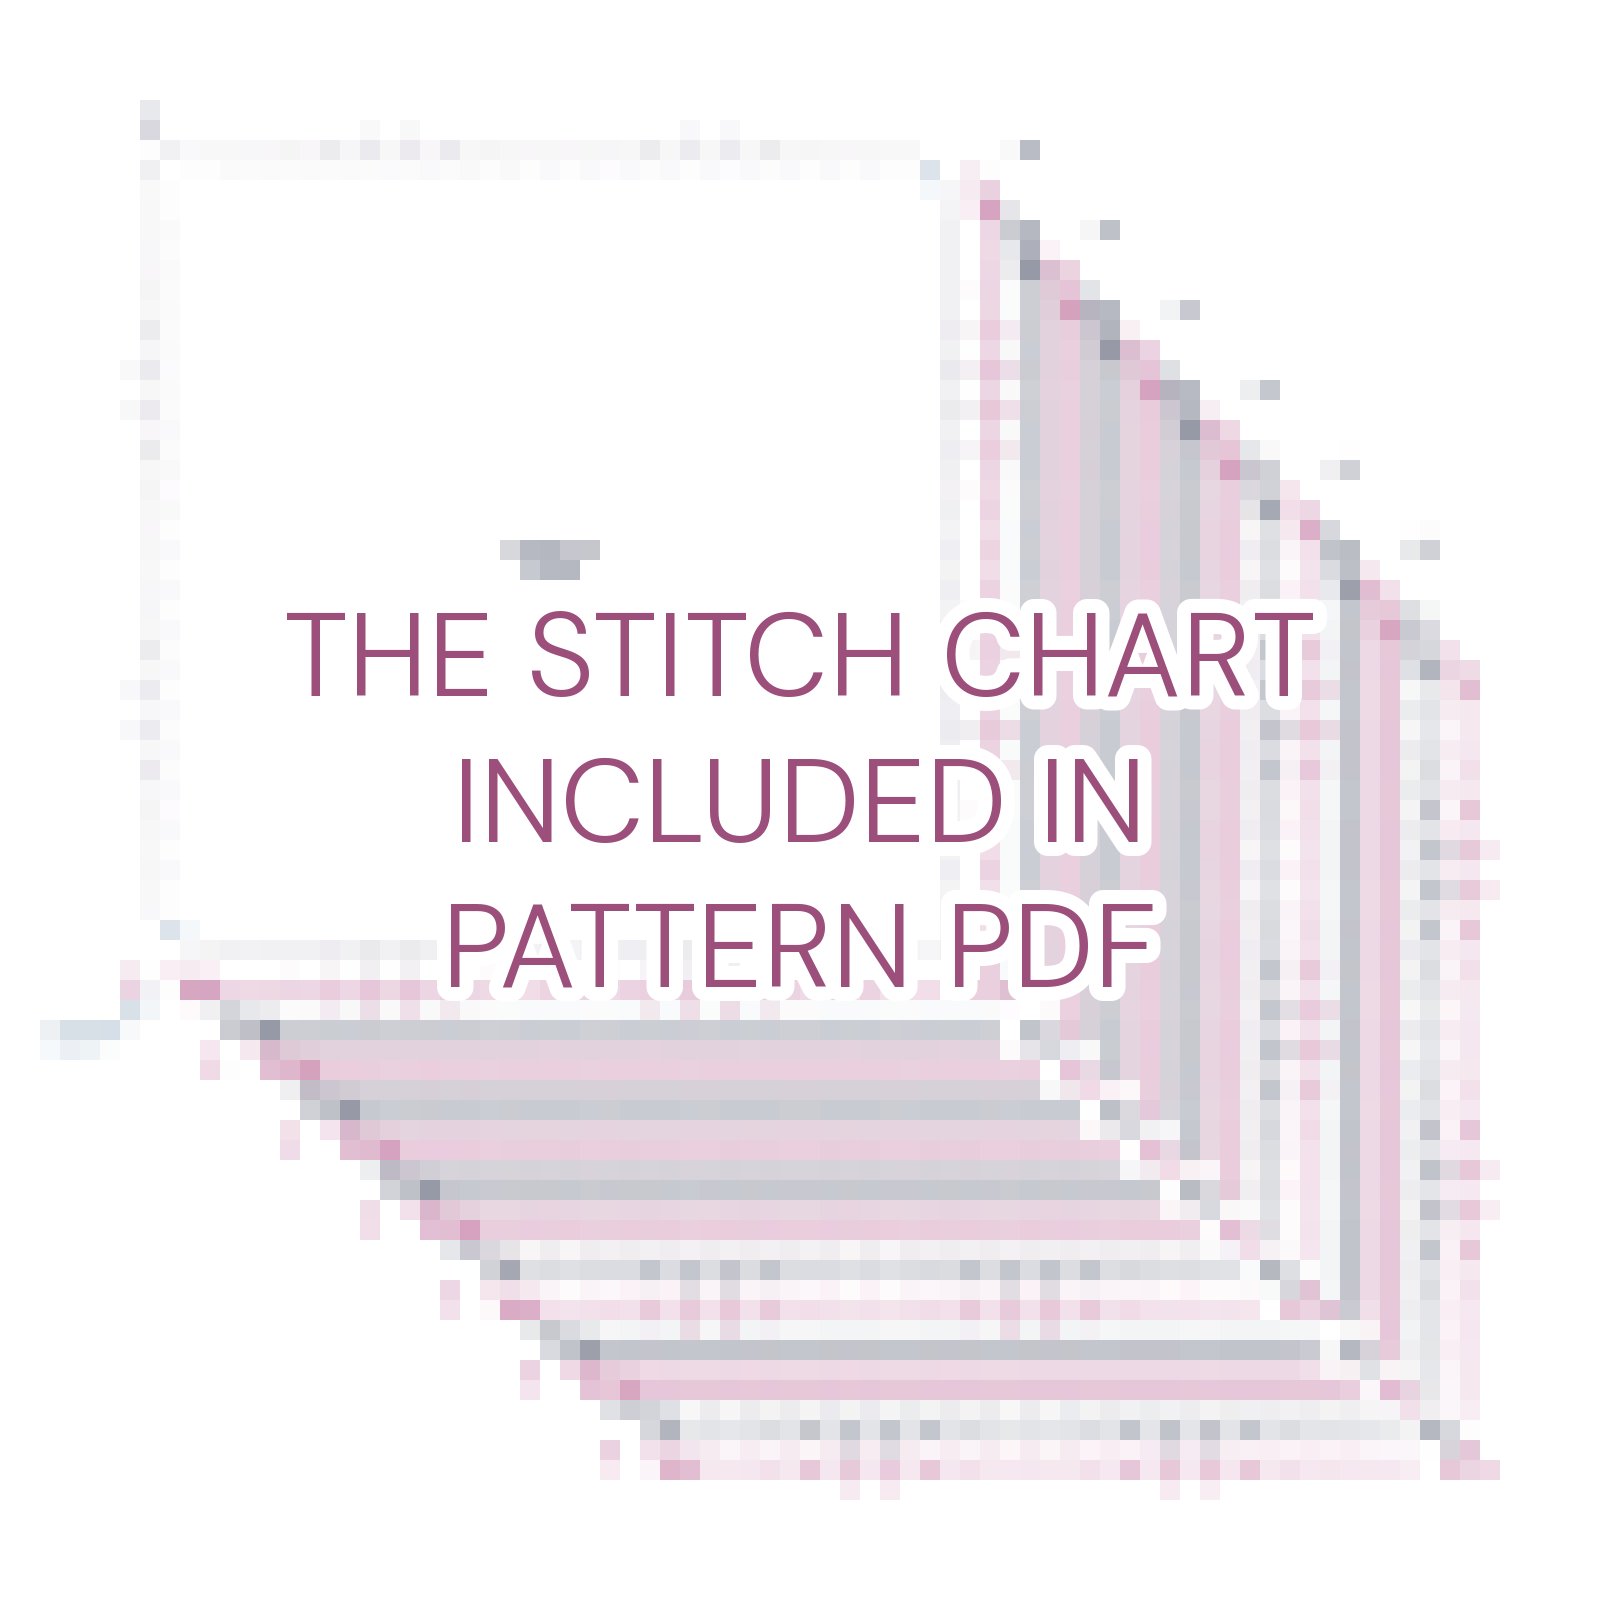
Stitch Charts
Here’s a peek at the three stitch charts, one for the center square and one for each wing. The full-size charts are in the printable PDF.
How to Read This Pattern
The Center Square
The square is worked in rounds from the center out, but you turn your work after every round. So each round goes in the opposite direction to the round before. Don’t work round and round in the same direction.
Every round starts and ends in the same corner. At the start, slip stitch into the corner space of the round before (in Round 7 work 2 slst, because that corner is a ch-3 sp). Then make the turning chain. ch3 counts as a dc, and ch1 doesn’t count as a stitch.
This first corner is made in two halves. You work the first half at the start of the round (for example ch3, dc) and the second half at the end, just before you join (2dc, ch2). Then join with a slst in the 3rd ch of the beg ch3, or in the first sc, and turn.
Repeats in […] and {…}
[…] Work the stitches inside the square brackets as many times as written. “rep until next ch-2 sp” means you keep repeating until you reach the next corner.
{…} The curly brackets hold one whole side and the corner after it. Work everything inside them 3 times, once for each of the first 3 corners. The […] repeat inside is the wave repeat along that side.
After the third {…}, work the last side on its own and finish the first corner, as written at the end of the round.
Example, Round 5: {ch1, sk next st, [16-st wave] rep until next ch-2 sp, (2sc, ch2, 2sc) in ch-2 sp} 3 times = side 1 + corner, side 2 + corner, side 3 + corner. Then side 4 and the first corner.
The Wings
The wings are worked in rows, back and forth. Each row starts at one long edge, goes around the spine corner and ends at the other long edge. The stitch counts in (…) are for one side of the spine.
Common Mistakes
- A missing dc. In the dc rounds and rows after a wave, you work a dc in every stitch and every ch-1 sp. Take extra care around each hdc. It’s short and sits low in the wave, so the hdc and the ch-1 sp next to it are easy to skip.
- The wrong corner after a wave. In Round 7 (and Rounds 11 and 19) and in Row 23 (and every row worked as Row 23), the corner is (3dc, ch2, 3dc), not (2dc, ch2, 2dc). You work it into the ch-3 corner sp of the wave below.
- Not turning. Turn after every round of the square, and after every row of the wings.
- hdc in every corner of Round 21. Only 2 opposite corners get (2sc, hdc, 2sc). The other 2 corners get (2sc, ch2, 2sc), and they become the spines.
- The right wing the wrong way. Hold the square with the same side facing you as for Row 22 of the left wing, and work in the same direction.
- Not counting. Count after every wave. You should have 85 sts on each side of the spine after the second wave row, and 86 after all other rows.
Pattern
Read all Notes before you start.
Center Square
Start with a magic ring, or ch5 and slst in the first ch to close the ring.
Round 1: ch3 (counts as dc here and throughout), 4dc in ring, ch2, [5dc in ring, ch2] 3 times, slst in 3rd ch of beg ch3. Turn. (5 sts on each side)
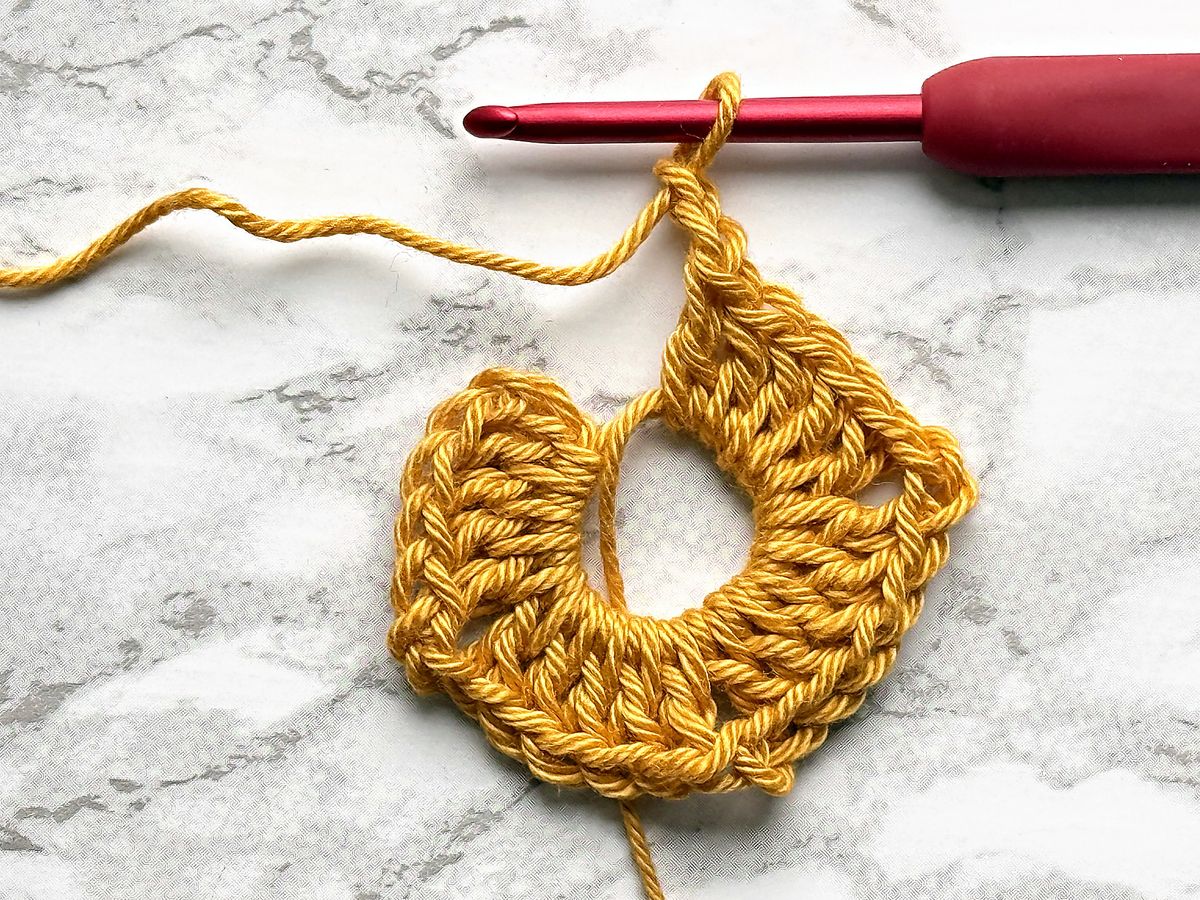
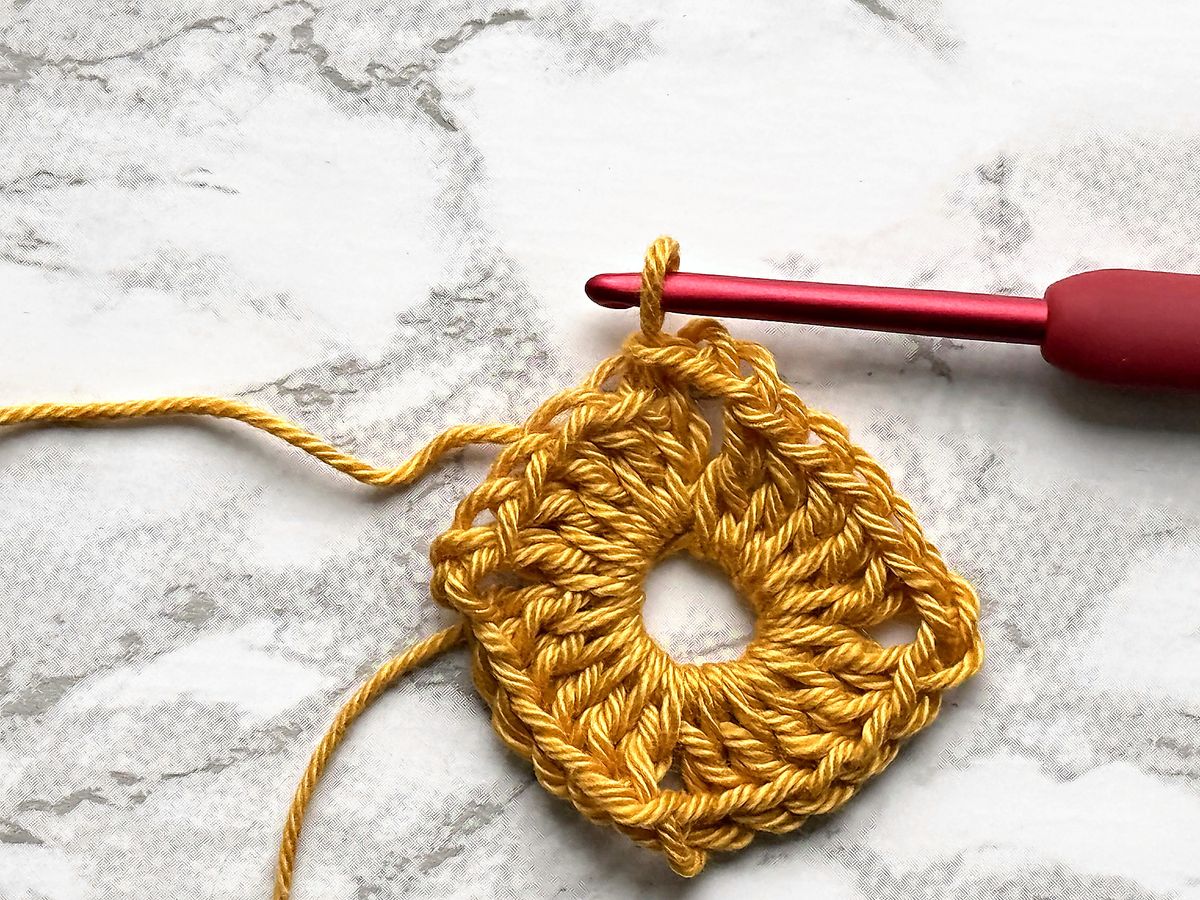
Round 2: slst in ch-2 sp, ch3, dc in same ch-2 sp, [BLdc in each st until next ch-2 sp, (2dc, ch2, 2dc) in ch-2 sp] 3 times, BLdc in each st until last ch-2 sp, 2dc in last ch-2 sp, ch2, slst in 3rd ch of beg ch3. Turn. (9 sts on each side)
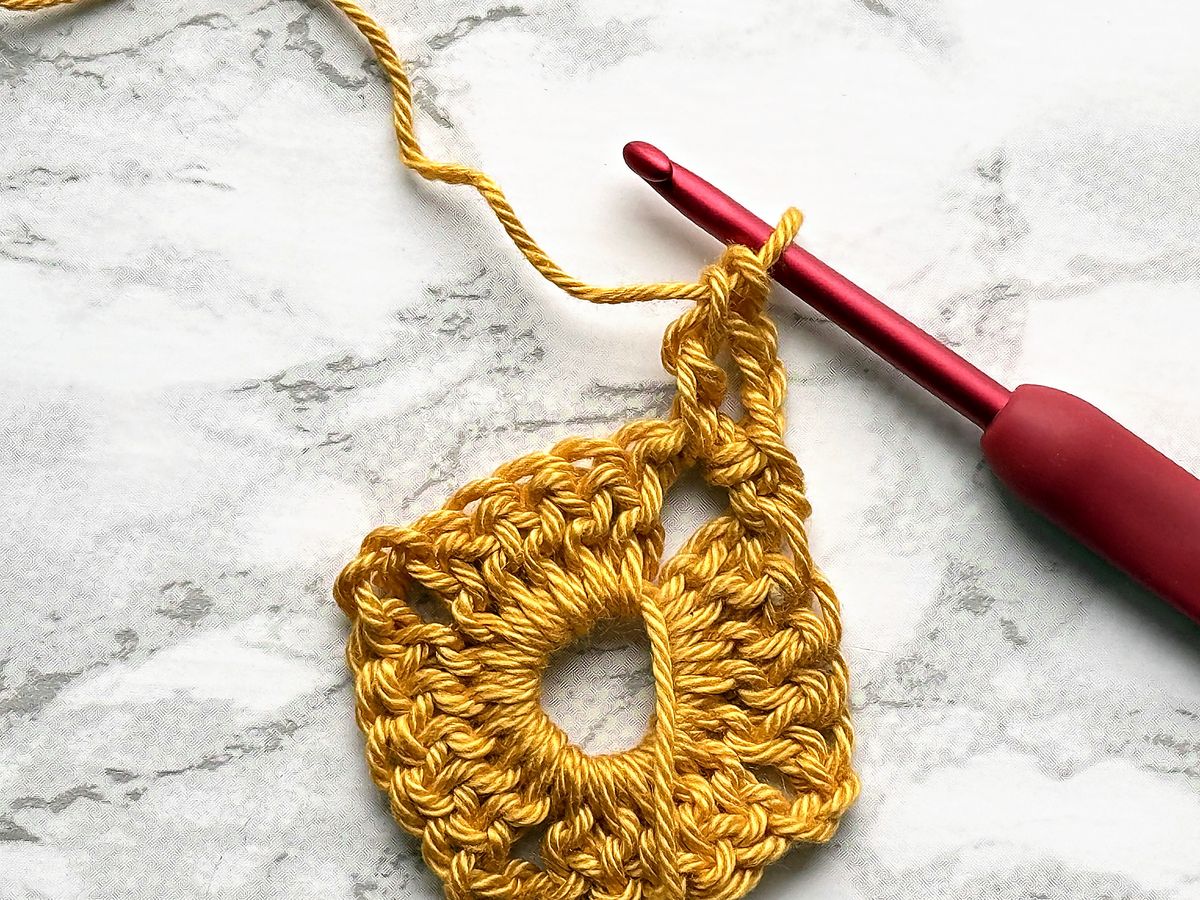
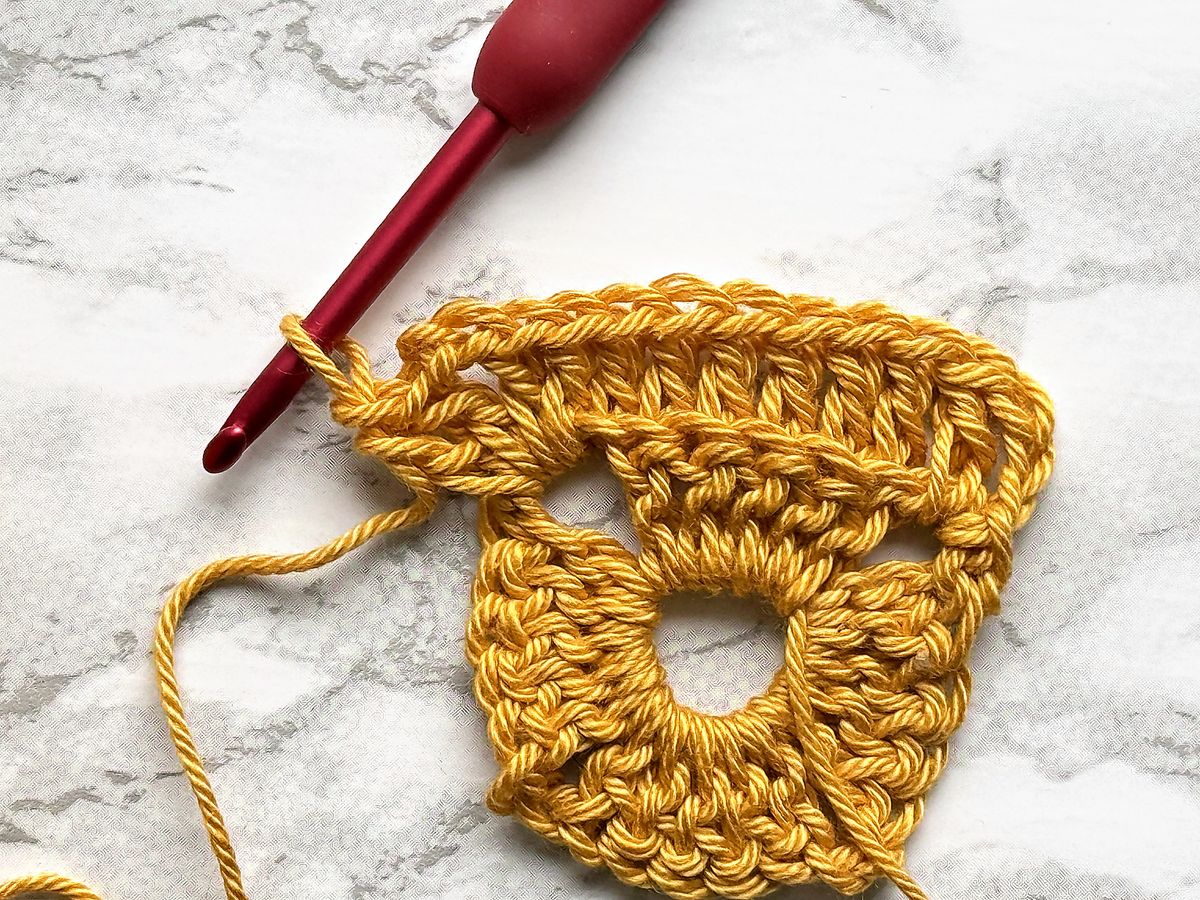
Rounds 3–4: Repeat Round 2. (Round 4: 17 sts on each side)
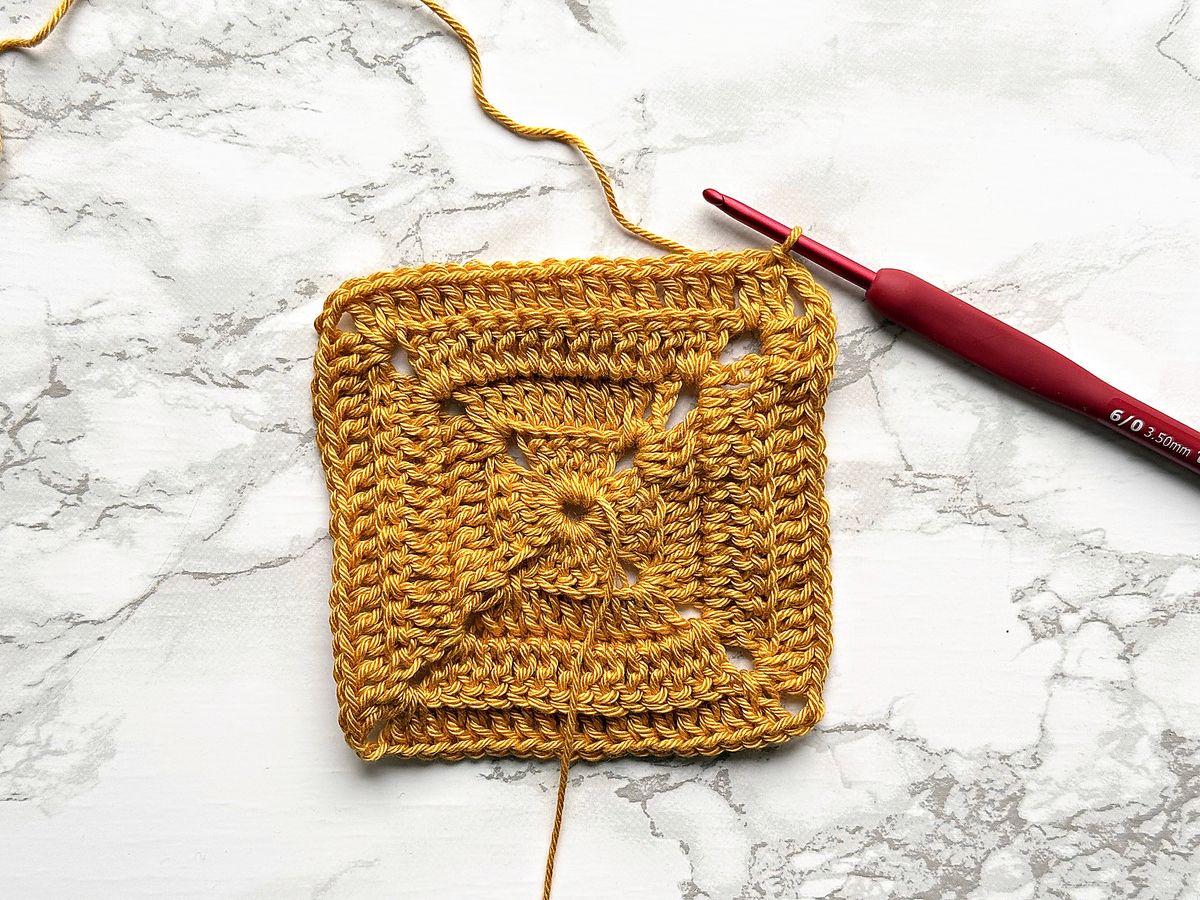
Round 5: slst in ch-2 sp, ch1 (doesn’t count as a st here and throughout), 2sc in same ch-2 sp, {ch1, sk next st, [sc in next st, ch1, sk next st, hdc in next st, ch1, sk next st, dc in next st, ch1, sk next st, tr in next st, ch1, sk next st, tr in next st, ch1, sk next st, dc in next st, ch1, sk next st, hdc in next st, ch1, sk next st, sc in next st, ch1, sk next st] rep until next ch-2 sp, (2sc, ch2, 2sc) in ch-2 sp} 3 times, ch1, sk next st, [sc in next st, ch1, sk next st, hdc in next st, ch1, sk next st, dc in next st, ch1, sk next st, tr in next st, ch1, sk next st, tr in next st, ch1, sk next st, dc in next st, ch1, sk next st, hdc in next st, ch1, sk next st, sc in next st, ch1, sk next st] rep until last ch-2 sp, 2sc in last ch-2 sp, ch2, slst in first sc. Turn. (21 sts on each side)
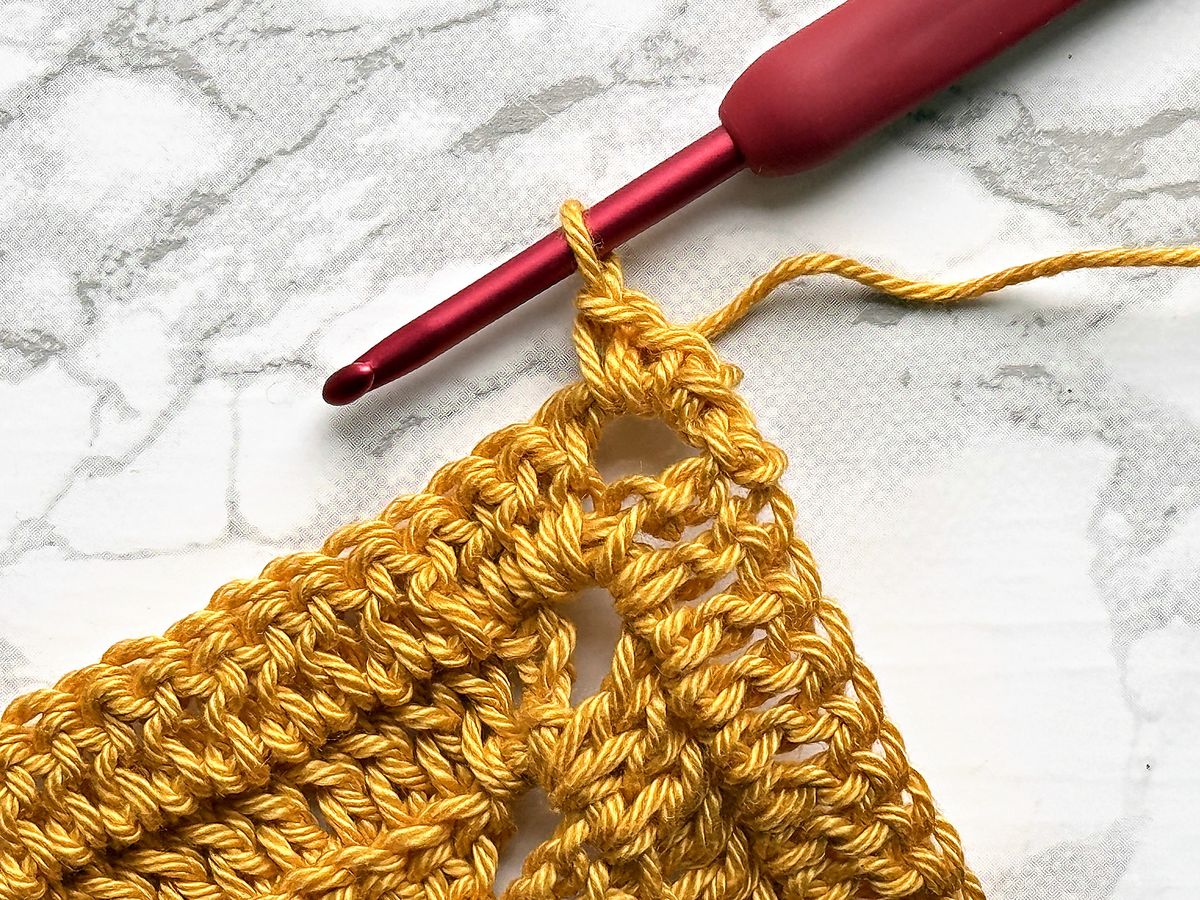
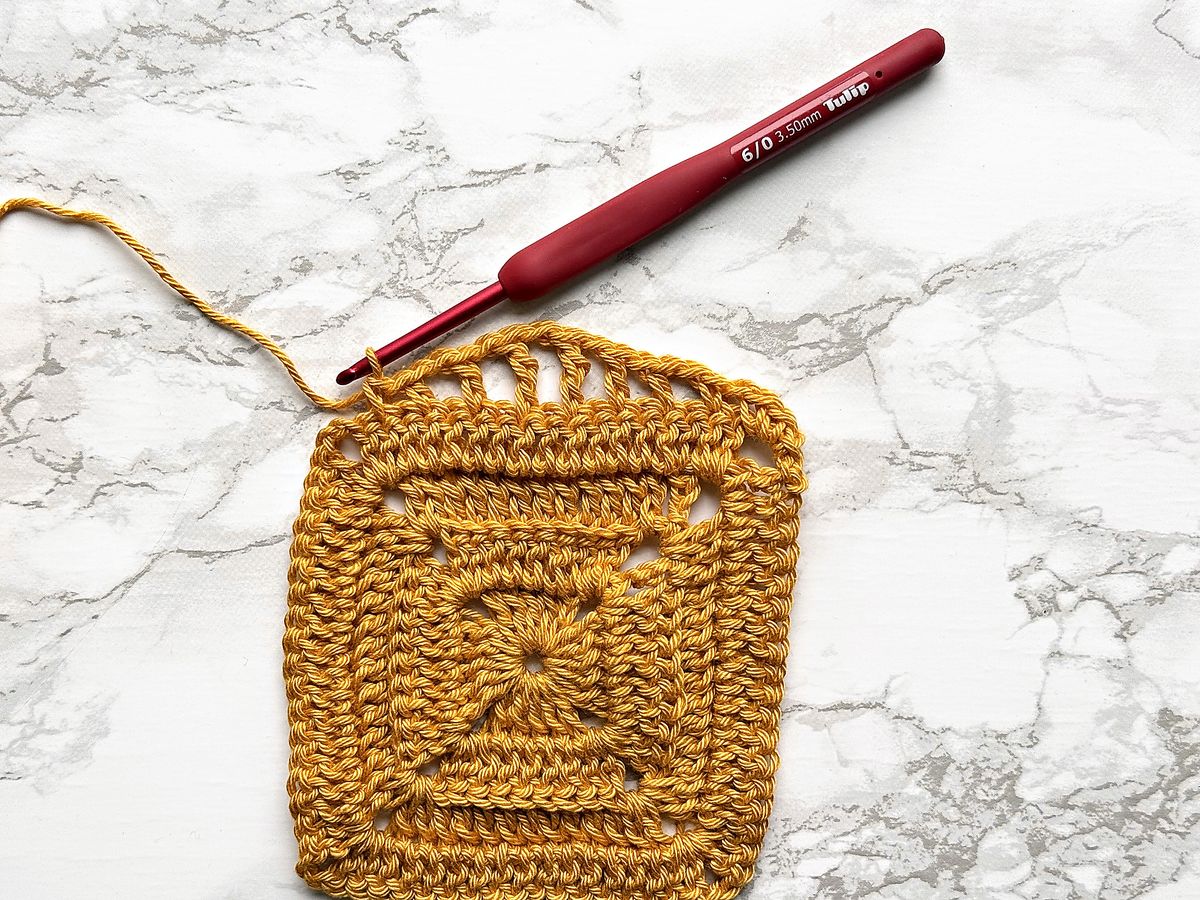
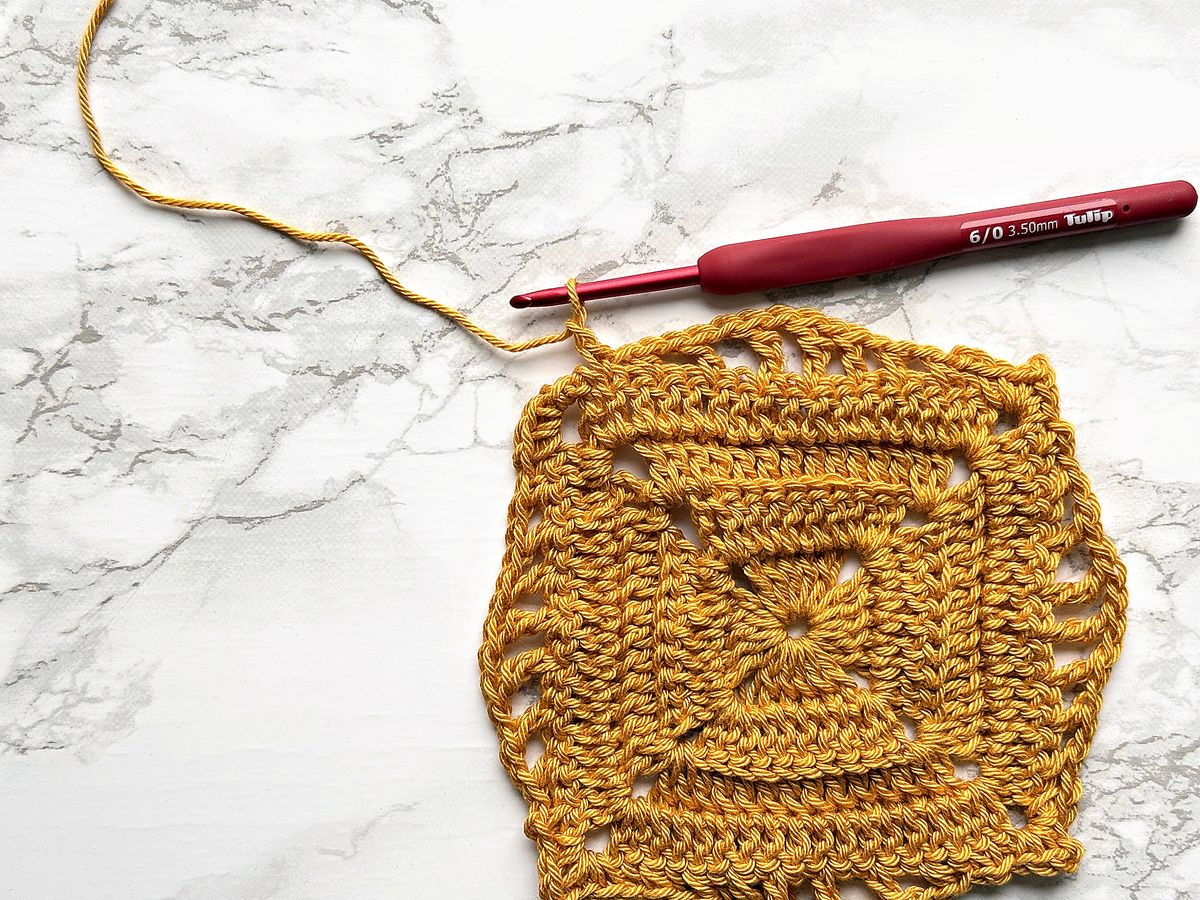
Round 6: slst in ch-2 sp, ch1, sc in same ch-2 sp, {sc in next 2 sc, ch1, sk next ch-1 sp, [sc in next sc, ch1, sk next ch-1 sp, hdc in next hdc, ch1, sk next ch-1 sp, dc in next dc, ch1, sk next ch-1 sp, tr in next tr, ch1, sk next ch-1 sp, tr in next tr, ch1, sk next ch-1 sp, dc in next dc, ch1, sk next ch-1 sp, hdc in next hdc, ch1, sk next ch-1 sp, sc in next sc, ch1, sk next ch-1 sp] rep until 2 sc remain before ch-2 sp, sc in next 2 sc, (sc, ch3, sc) in ch-2 sp} 3 times, sc in next 2 sc, ch1, sk next ch-1 sp, [sc in next sc, ch1, sk next ch-1 sp, hdc in next hdc, ch1, sk next ch-1 sp, dc in next dc, ch1, sk next ch-1 sp, tr in next tr, ch1, sk next ch-1 sp, tr in next tr, ch1, sk next ch-1 sp, dc in next dc, ch1, sk next ch-1 sp, hdc in next hdc, ch1, sk next ch-1 sp, sc in next sc, ch1, sk next ch-1 sp] rep until 2 sc remain before last ch-2 sp, sc in next 2 sc, sc in last ch-2 sp, ch3, slst in first sc. Turn. (23 sts on each side)
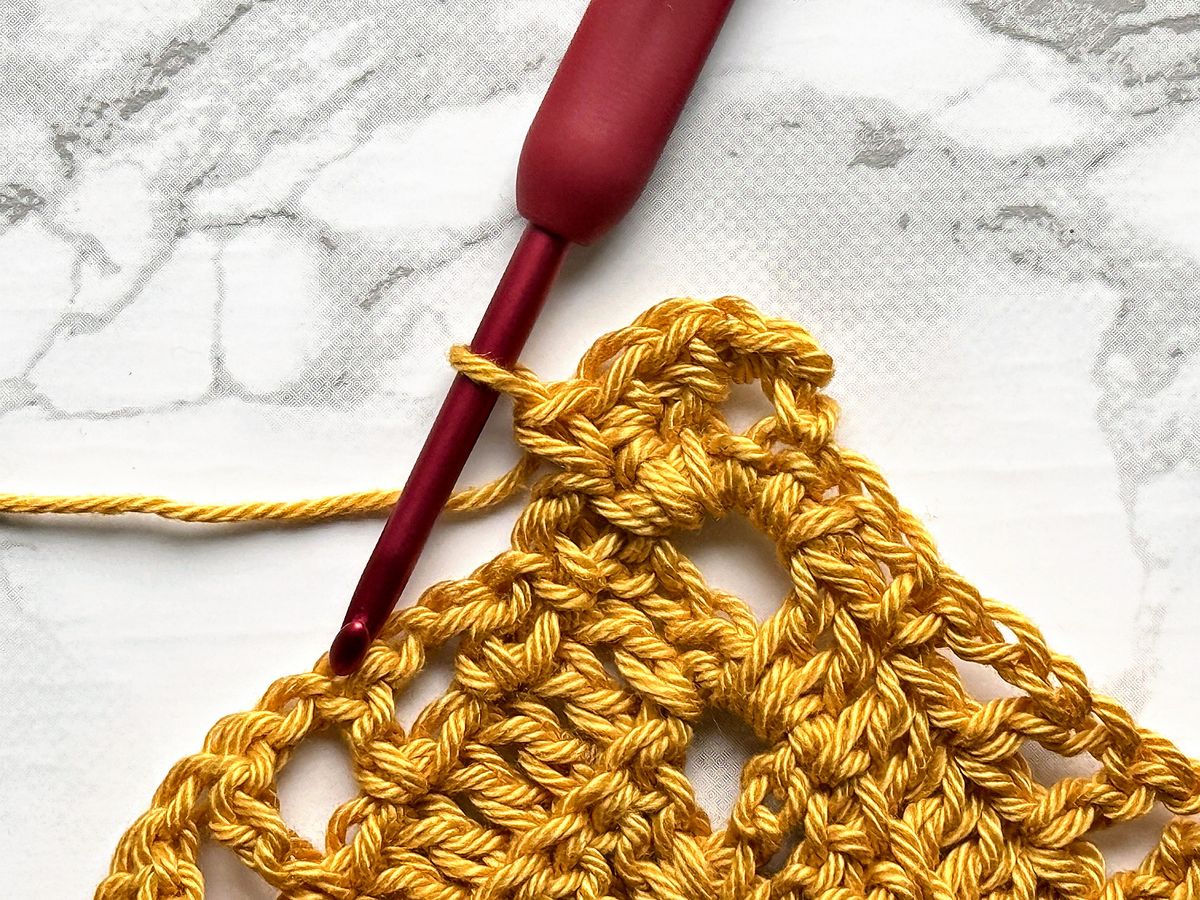
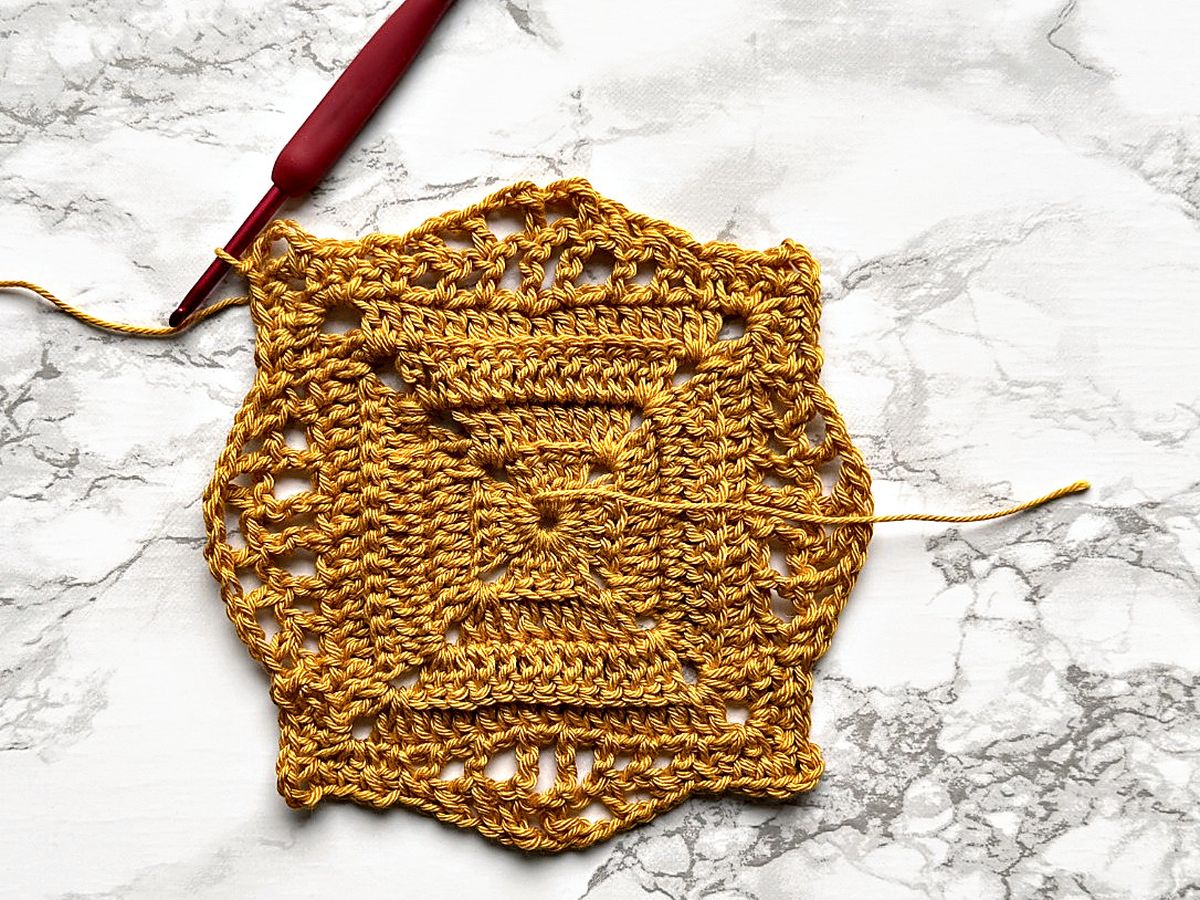
Round 7: 2slst into ch-3 sp, ch3, 2dc in same ch-3 sp, [dc in each st and ch-1 sp until next ch-3 sp, (3dc, ch2, 3dc) in ch-3 sp] 3 times, dc in each st and ch-1 sp until last ch-3 sp, 3dc in last ch-3 sp, ch2, slst in 3rd ch of beg ch3. Turn. (29 sts on each side)
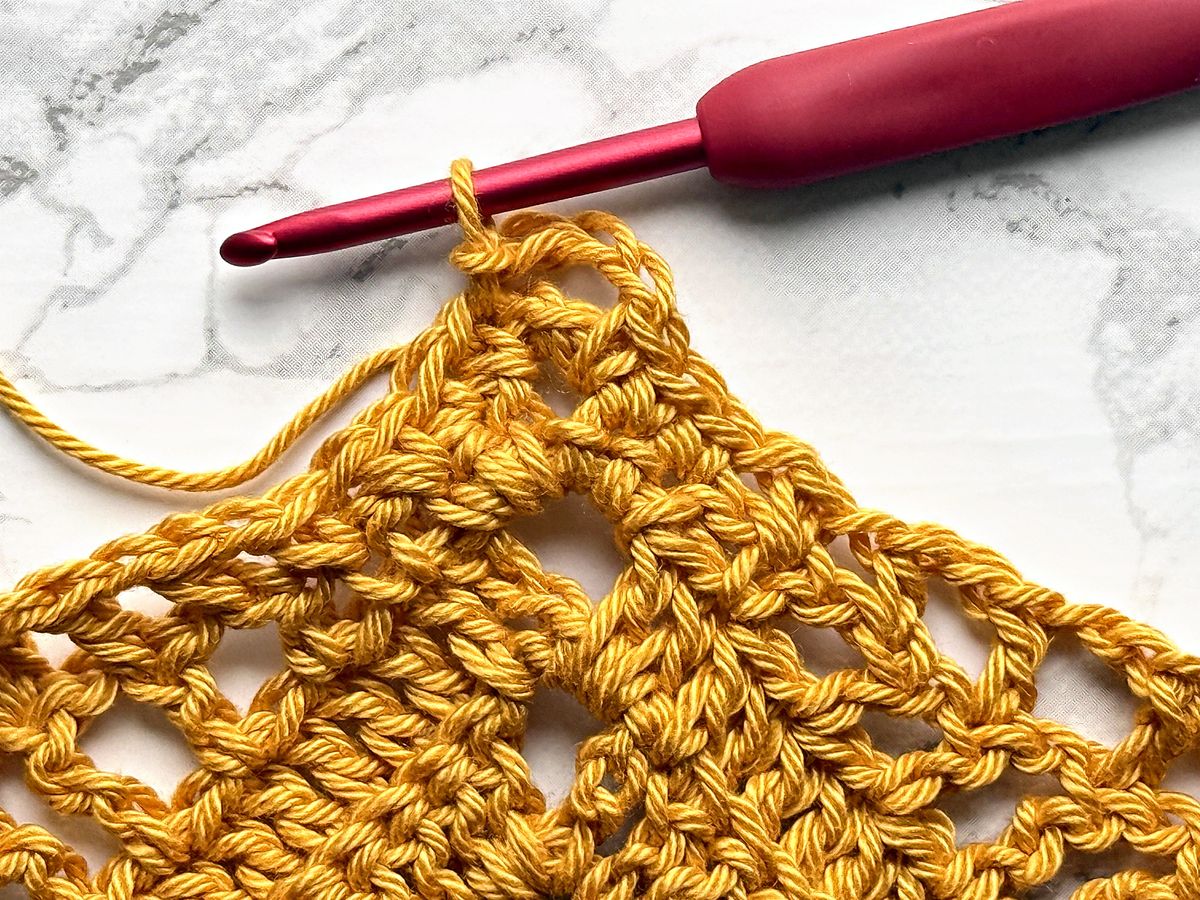
Round 8: Repeat Round 2. (33 sts on each side)
Rounds 9–12: Repeat Rounds 5–8. (Round 11: 45 sts, Round 12: 49 sts on each side)
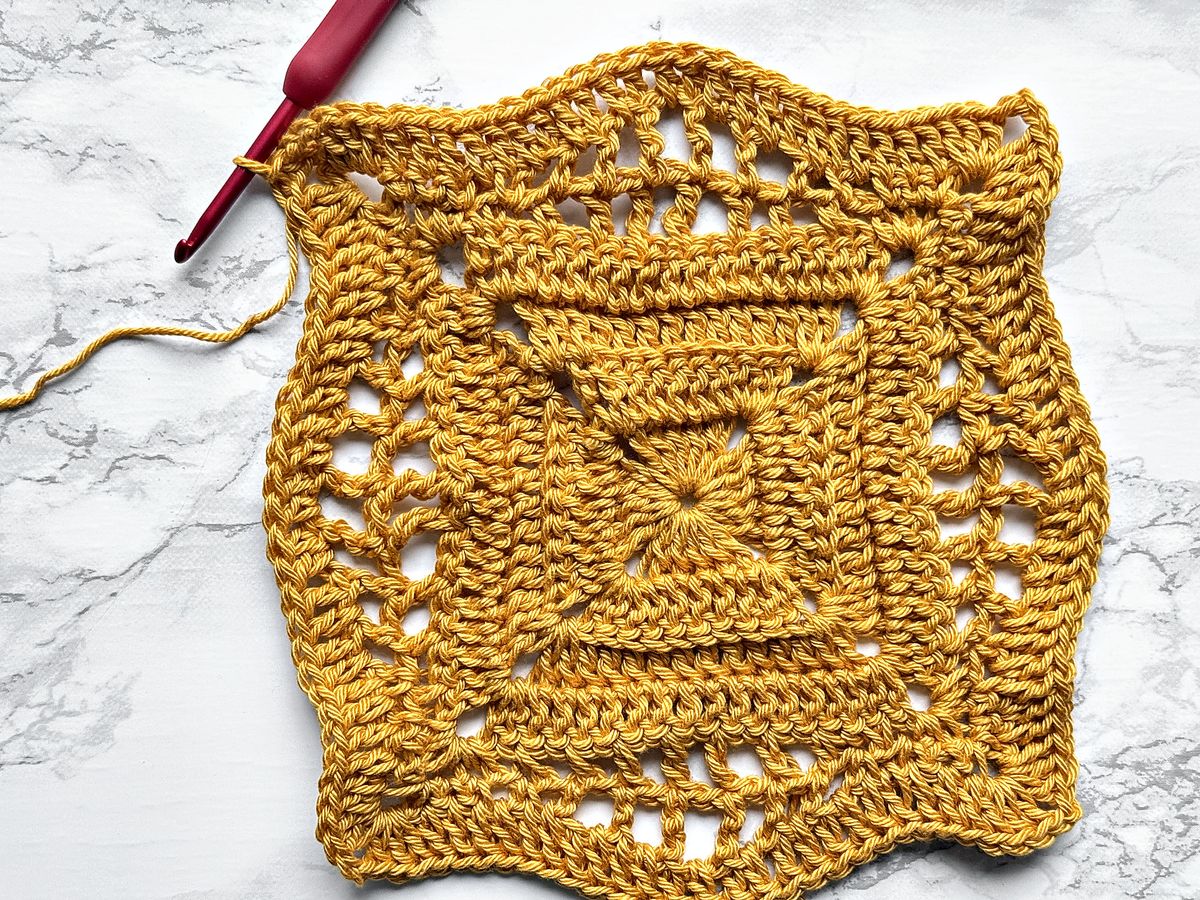
Rounds 13–16: Repeat Round 2. (Round 16: 65 sts on each side)
Rounds 17–20: Repeat Rounds 5–8. (Round 19: 77 sts, Round 20: 81 sts on each side)
Round 21: slst in ch-2 sp, ch1, 2sc in same ch-2 sp, ch1, sk next st, [sc in next st, ch1, sk next st, hdc in next st, ch1, sk next st, dc in next st, ch1, sk next st, tr in next st, ch1, sk next st, tr in next st, ch1, sk next st, dc in next st, ch1, sk next st, hdc in next st, ch1, sk next st, sc in next st, ch1, sk next st] rep until next ch-2 sp, (2sc, ch2, 2sc) in ch-2 sp, ch1, sk next st, [sc in next st, ch1, sk next st, hdc in next st, ch1, sk next st, dc in next st, ch1, sk next st, tr in next st, ch1, sk next st, tr in next st, ch1, sk next st, dc in next st, ch1, sk next st, hdc in next st, ch1, sk next st, sc in next st, ch1, sk next st] rep until next ch-2 sp, (2sc, hdc, 2sc) in ch-2 sp, ch1, sk next st, [sc in next st, ch1, sk next st, hdc in next st, ch1, sk next st, dc in next st, ch1, sk next st, tr in next st, ch1, sk next st, tr in next st, ch1, sk next st, dc in next st, ch1, sk next st, hdc in next st, ch1, sk next st, sc in next st, ch1, sk next st] rep until next ch-2 sp, (2sc, ch2, 2sc) in ch-2 sp, ch1, sk next st, [sc in next st, ch1, sk next st, hdc in next st, ch1, sk next st, dc in next st, ch1, sk next st, tr in next st, ch1, sk next st, tr in next st, ch1, sk next st, dc in next st, ch1, sk next st, hdc in next st, ch1, sk next st, sc in next st, ch1, sk next st] rep until last ch-2 sp, 2sc in last ch-2 sp, hdc in same ch-2 sp, slst in first sc. Turn. (85 sts on each side, 1 hdc in 2 opposite corners and a ch-2 sp in the other 2 corners)
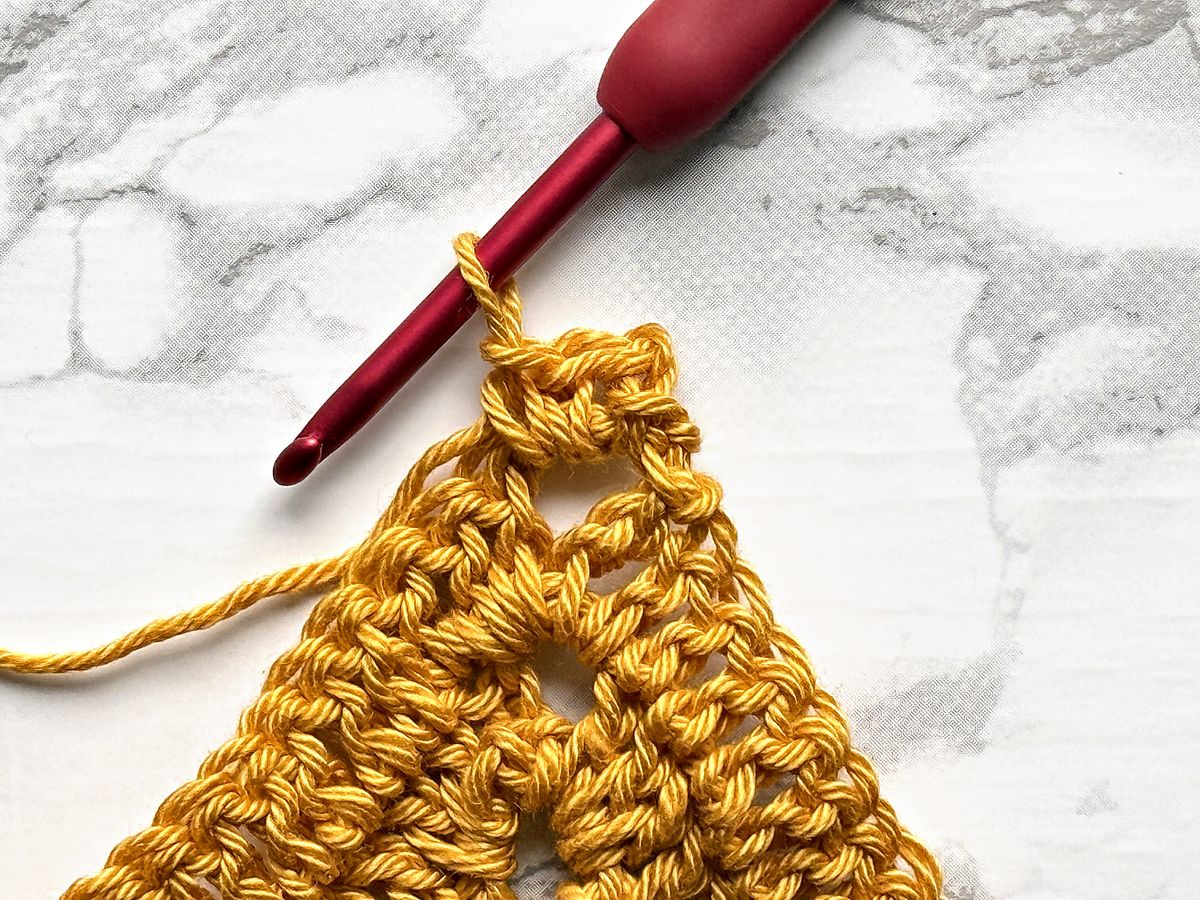
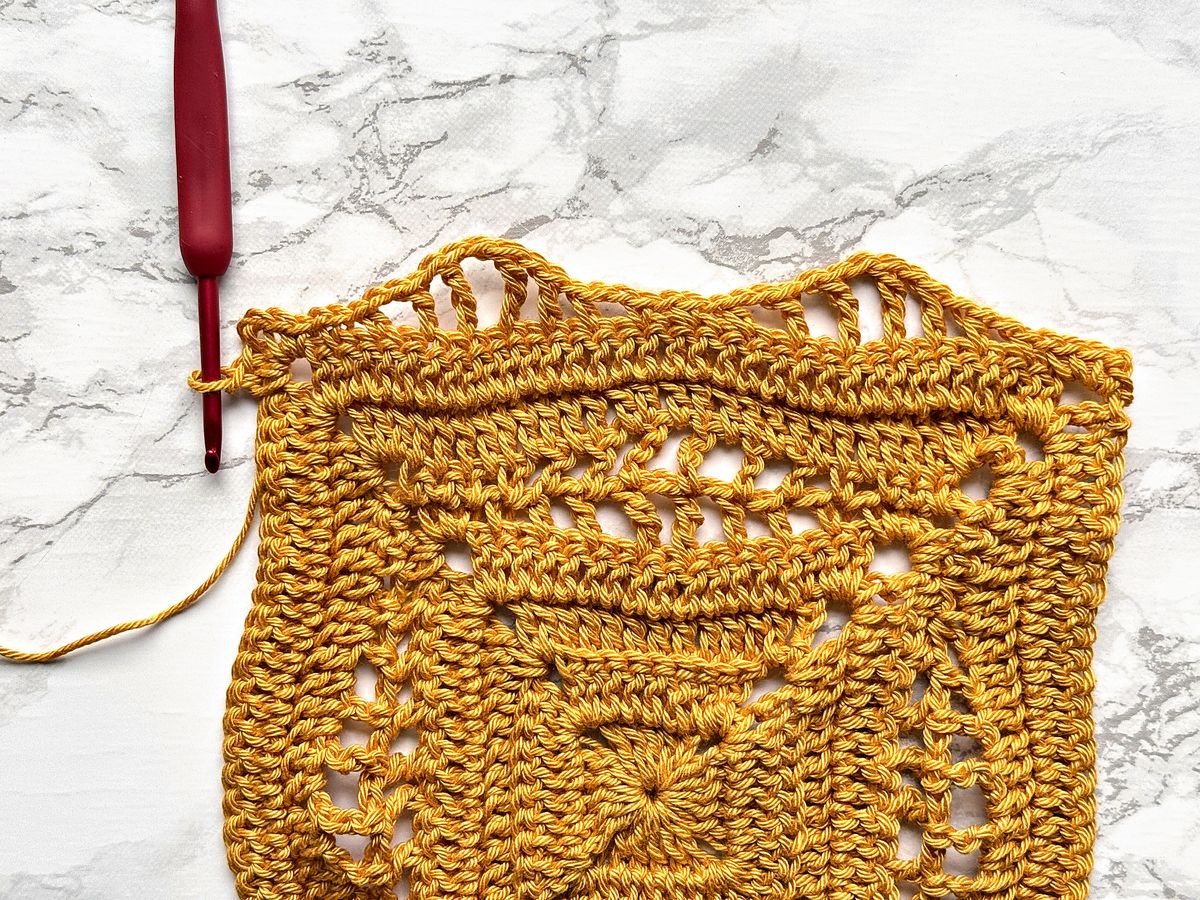
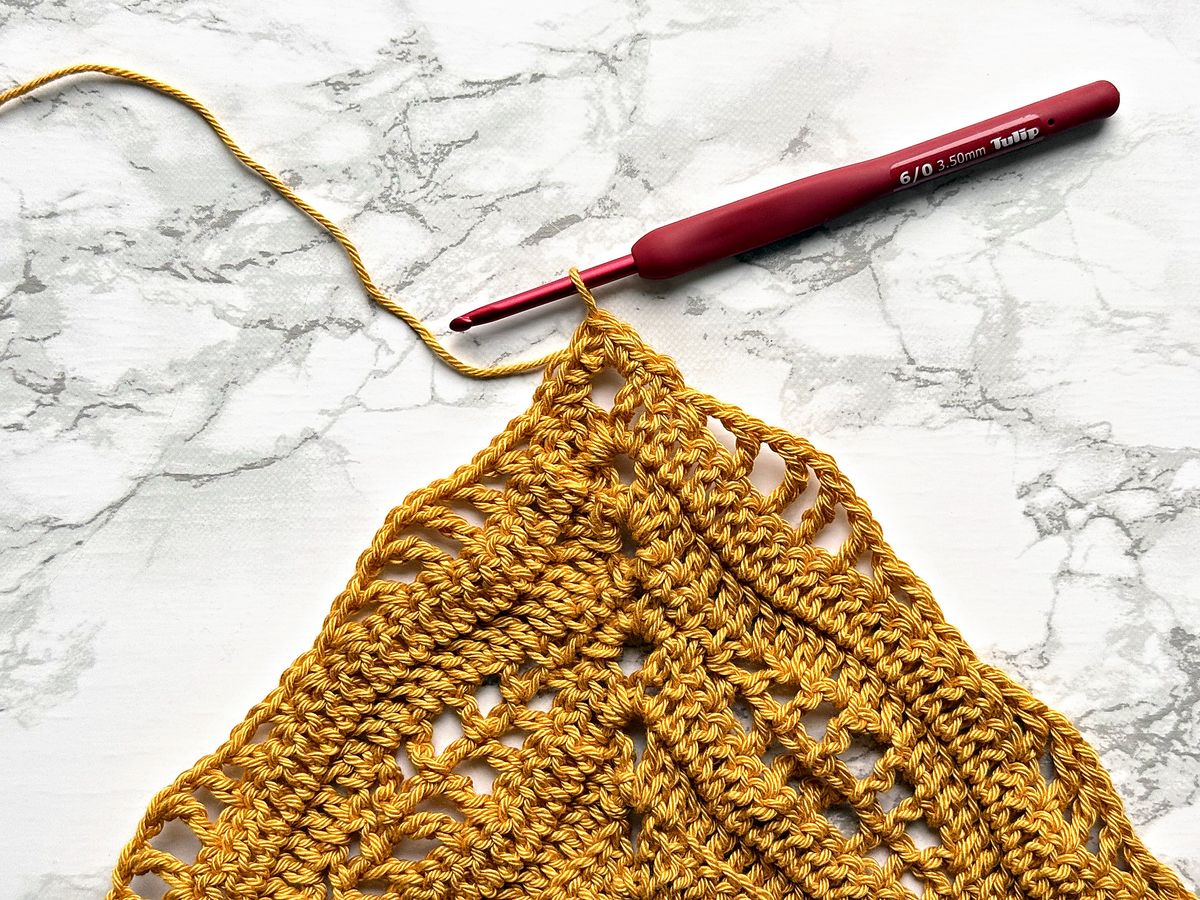
Do not fasten off. The corner where you joined Round 21 is the start of the left wing.
Left Wing
Row 22: ch1 (doesn’t count as a st here and throughout), sc3tog (working 1st leg in corner hdc, 2nd leg in next sc and 3rd leg in next sc), [ch1, sk next ch-1 sp, sc in next sc, ch1, sk next ch-1 sp, hdc in next hdc, ch1, sk next ch-1 sp, dc in next dc, ch1, sk next ch-1 sp, tr in next tr, ch1, sk next ch-1 sp, tr in next tr, ch1, sk next ch-1 sp, dc in next dc, ch1, sk next ch-1 sp, hdc in next hdc, ch1, sk next ch-1 sp, sc in next sc] 5 times, ch1, sk next ch-1 sp, sc in next 2 sc, (sc, ch3, sc) in ch-2 sp, sc in next 2 sc, [ch1, sk next ch-1 sp, sc in next sc, ch1, sk next ch-1 sp, hdc in next hdc, ch1, sk next ch-1 sp, dc in next dc, ch1, sk next ch-1 sp, tr in next tr, ch1, sk next ch-1 sp, tr in next tr, ch1, sk next ch-1 sp, dc in next dc, ch1, sk next ch-1 sp, hdc in next hdc, ch1, sk next ch-1 sp, sc in next sc] 5 times, ch1, sk next ch-1 sp, sc3tog (working 1st leg in next sc, 2nd leg in next sc and 3rd leg in corner hdc). Turn. (85 sts on each side of the spine)
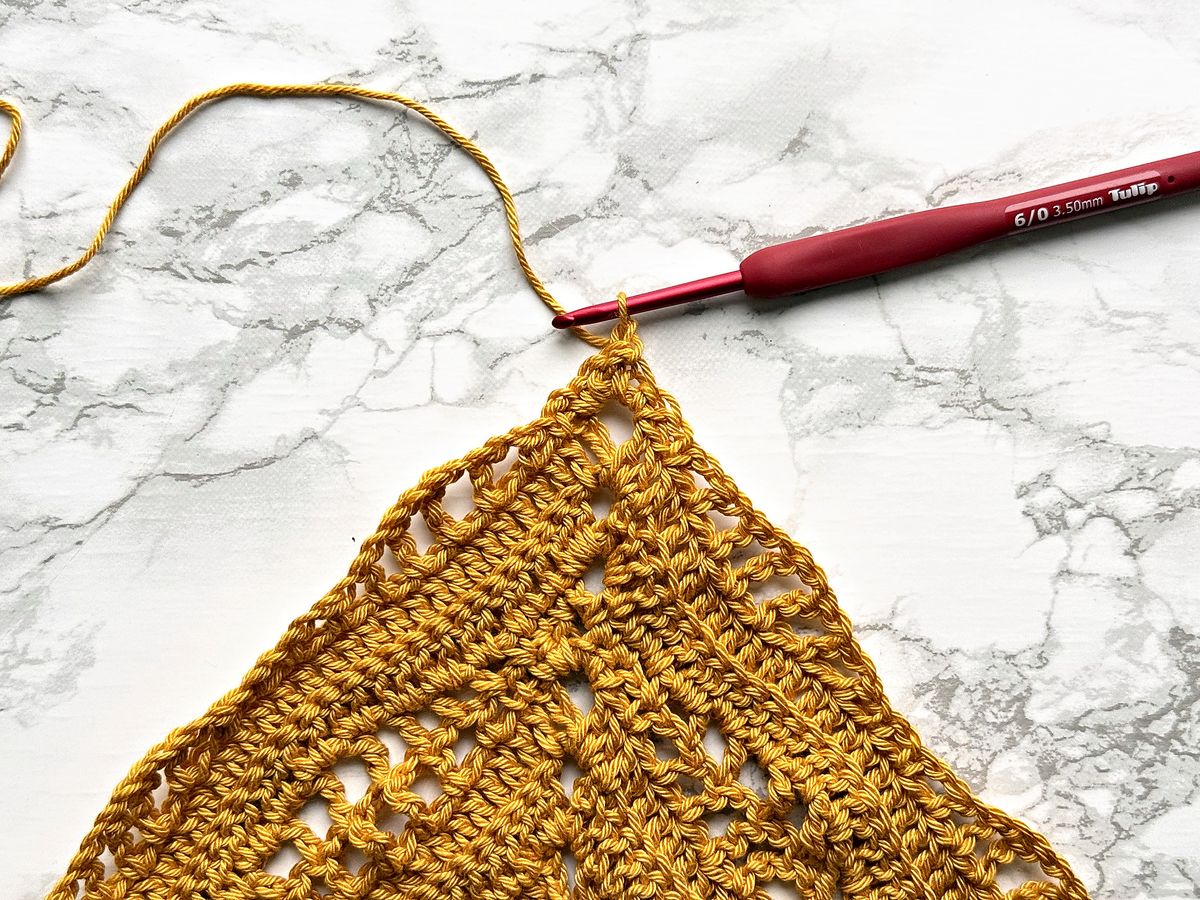
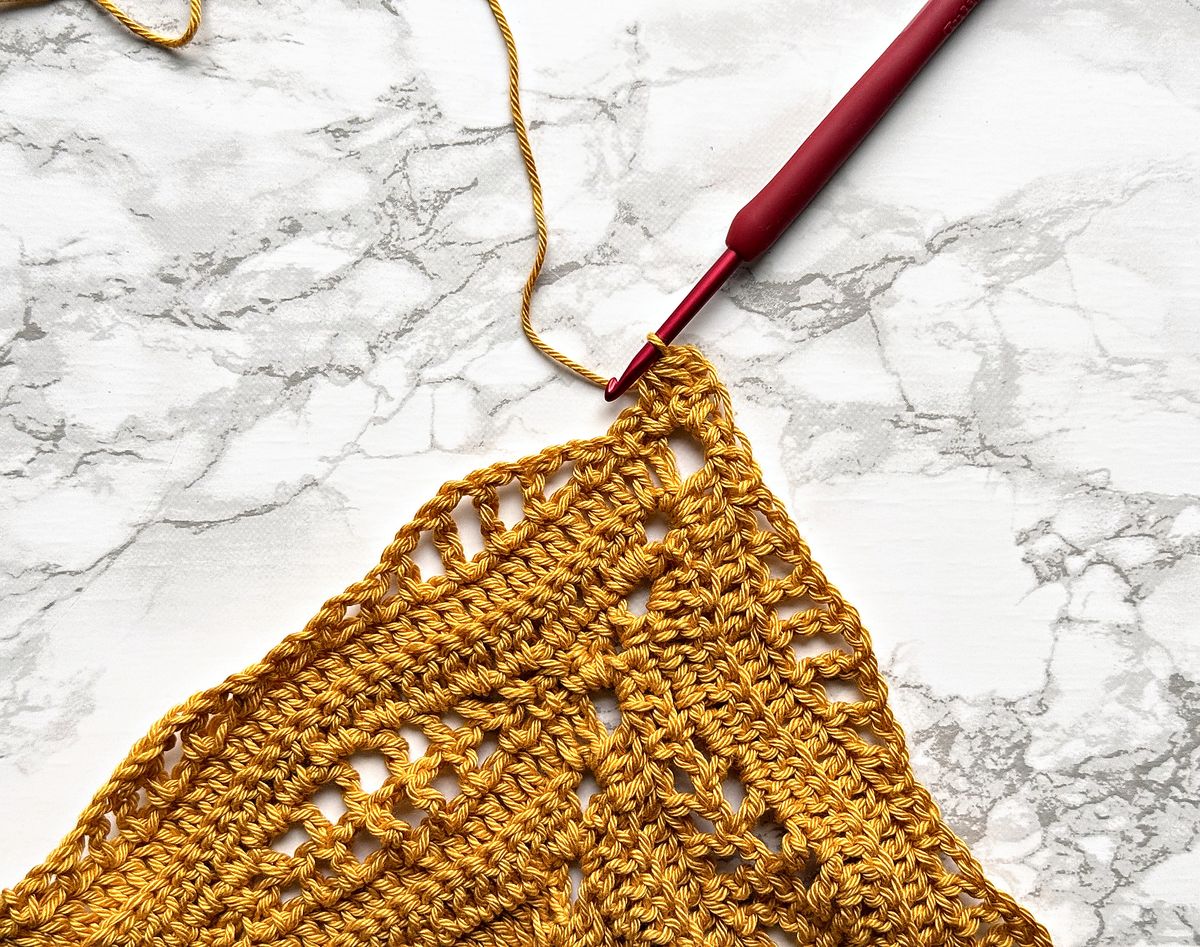
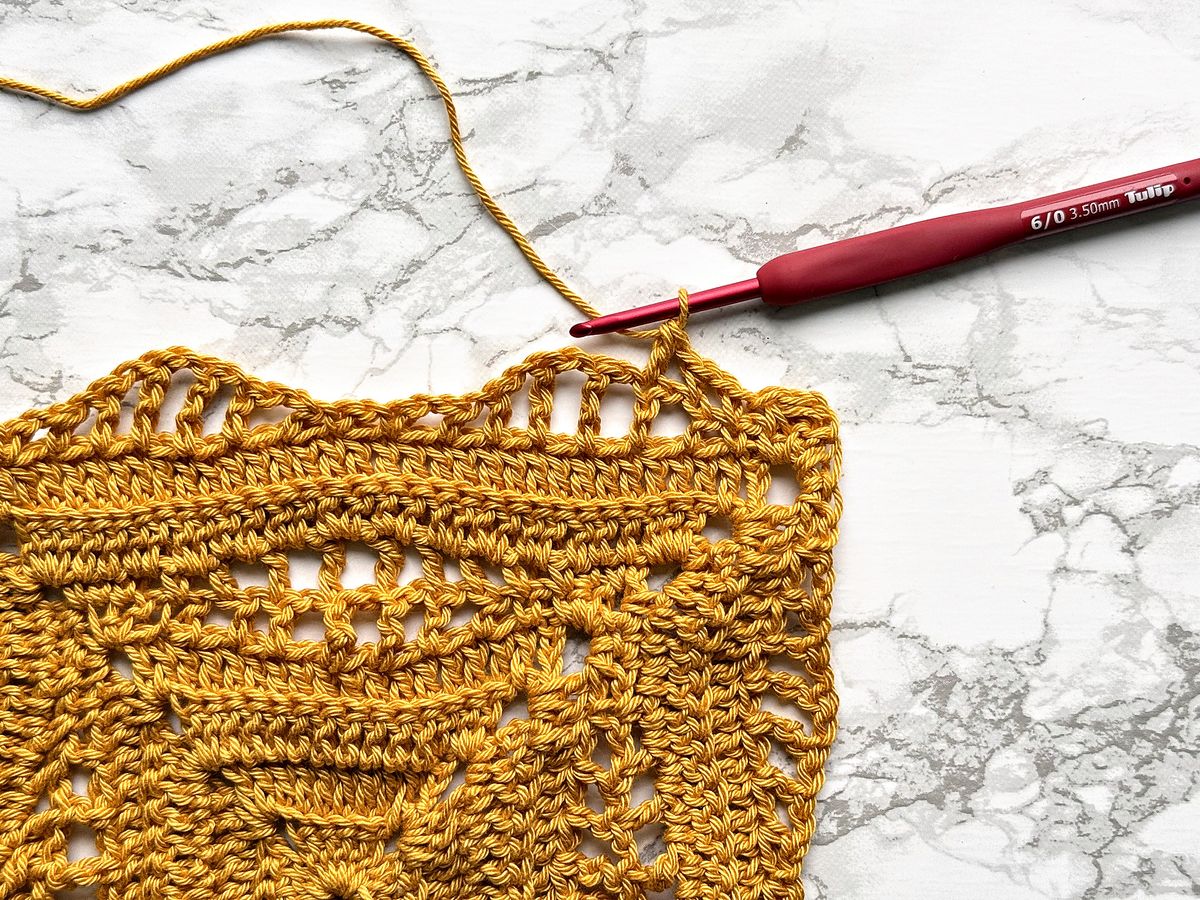
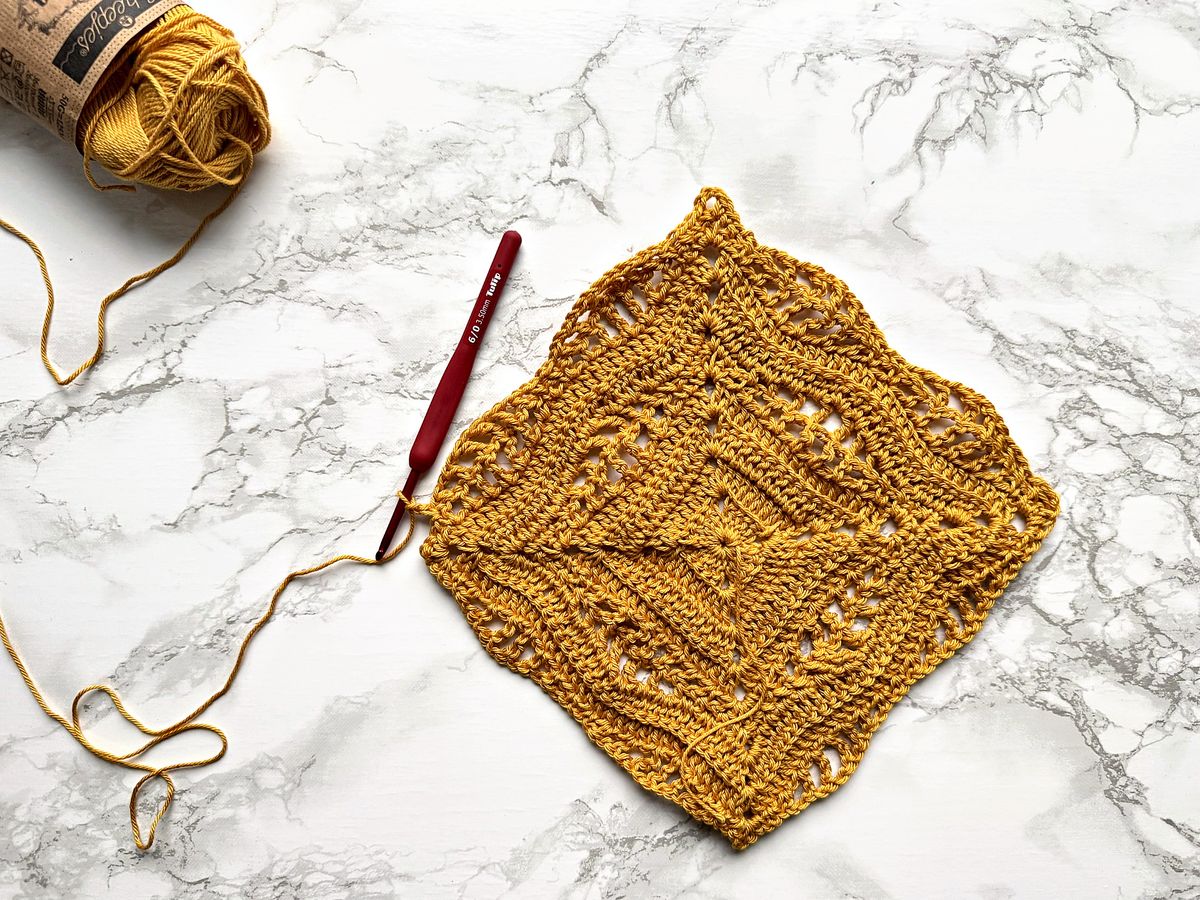
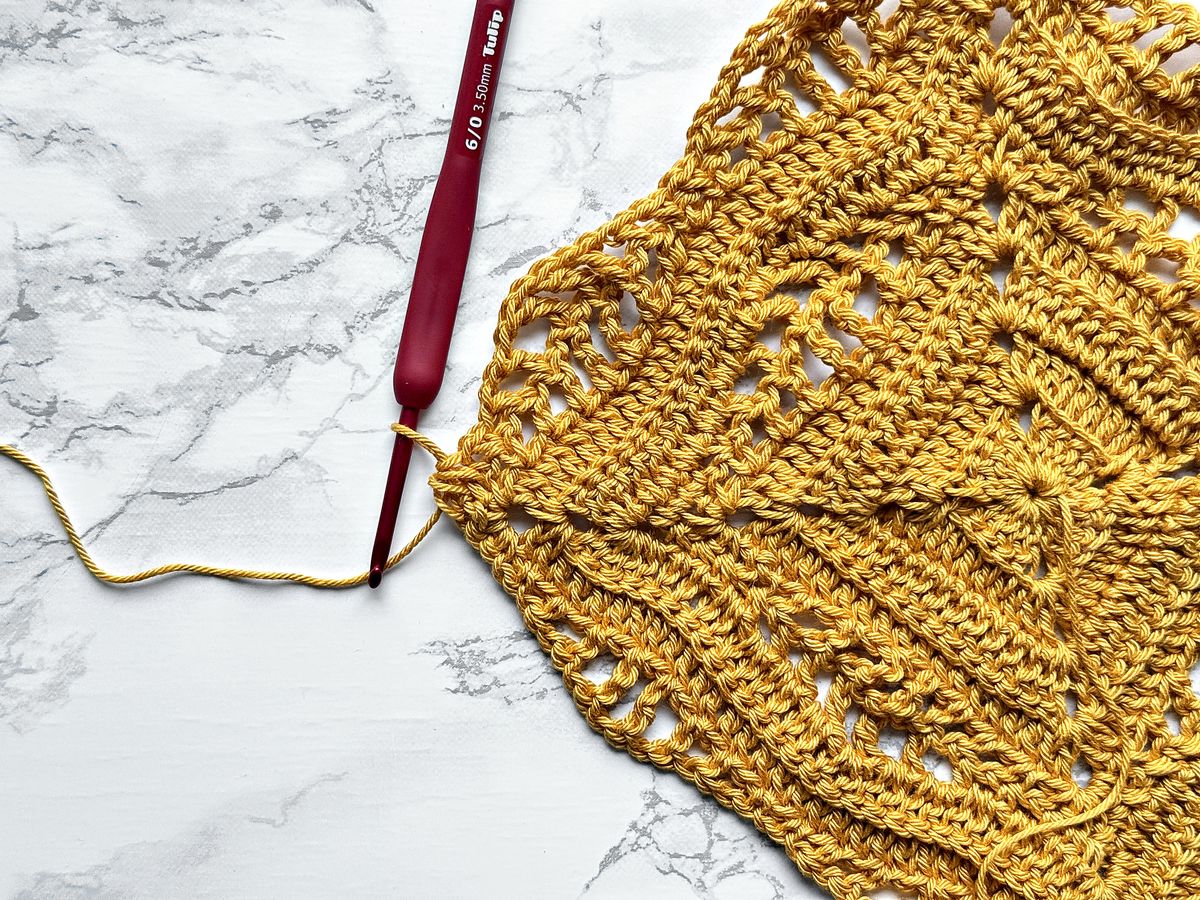
Row 23: ch3 (counts as dc here and throughout), dc3tog (working 1st leg in next ch-1 sp, 2nd leg in next sc and 3rd leg in next ch-1 sp), dc in each st and ch-1 sp until ch-3 sp, (3dc, ch2, 3dc) in ch-3 sp, dc in each st and ch-1 sp until 4 sts remain, dc3tog (working 1st leg in next ch-1 sp, 2nd leg in next sc and 3rd leg in next ch-1 sp), dc in last st. Turn. (86 sts on each side)
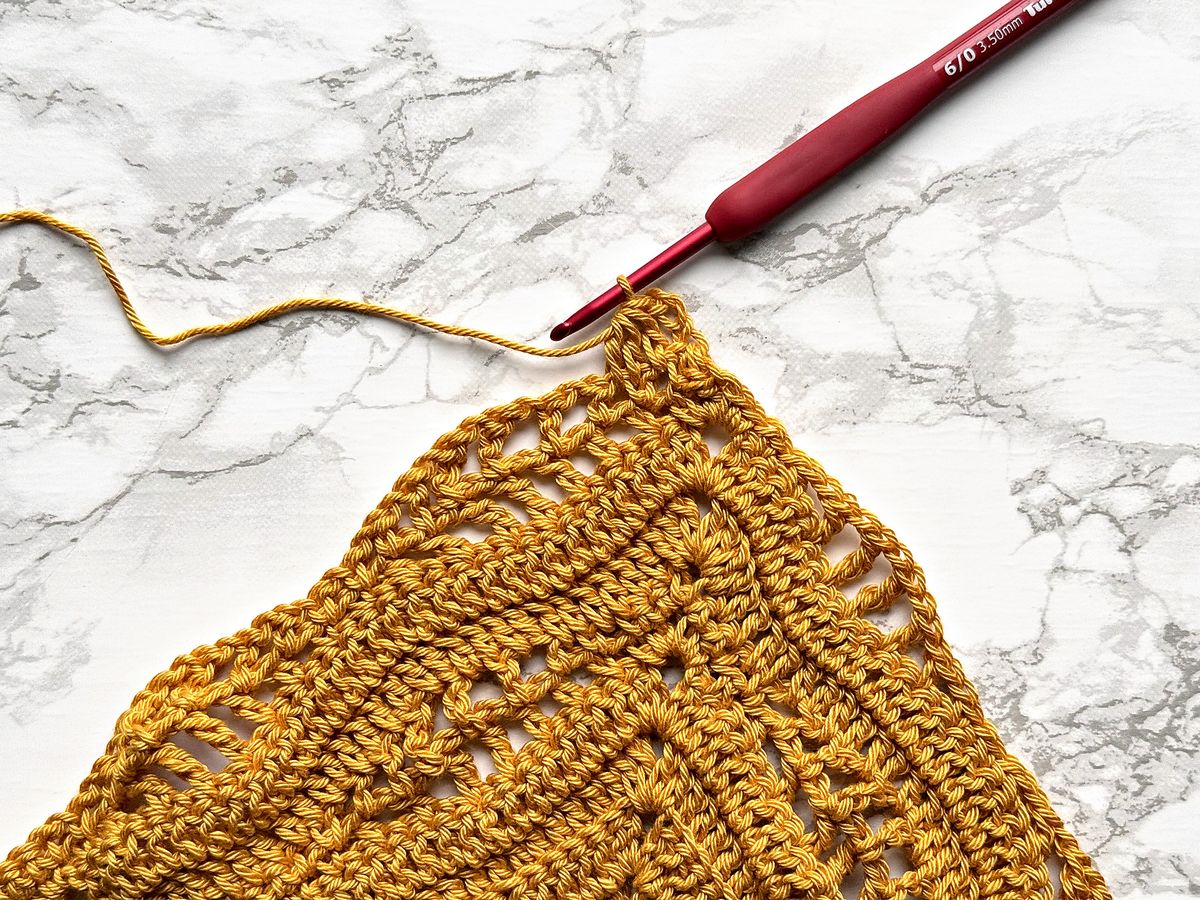
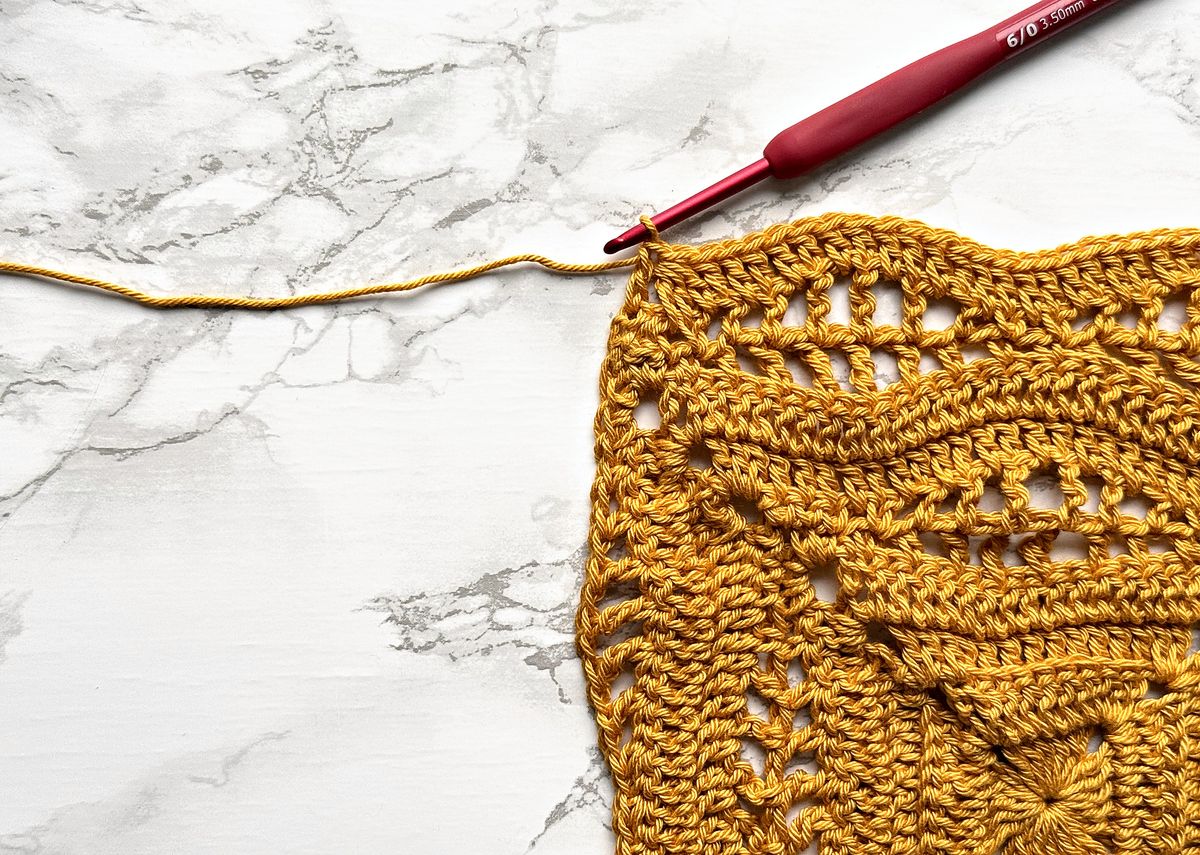
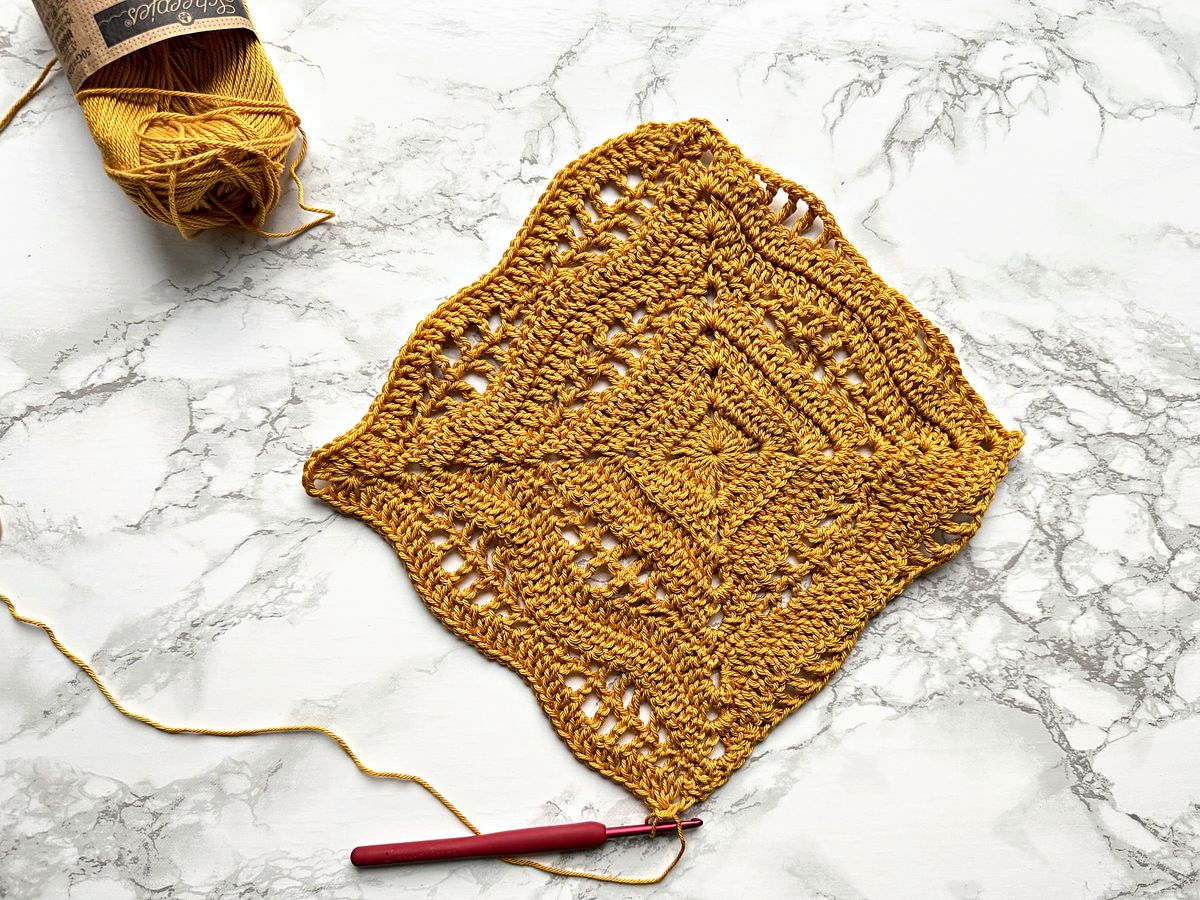
Row 24: ch3, BLdc3tog over next 3 sts, BLdc in each st until ch-2 sp, (2dc, ch2, 2dc) in ch-2 sp, BLdc in each st until 4 sts remain, BLdc3tog over next 3 sts, dc in 3rd ch of ch3 at beg of prev row. Turn. (86 sts on each side)
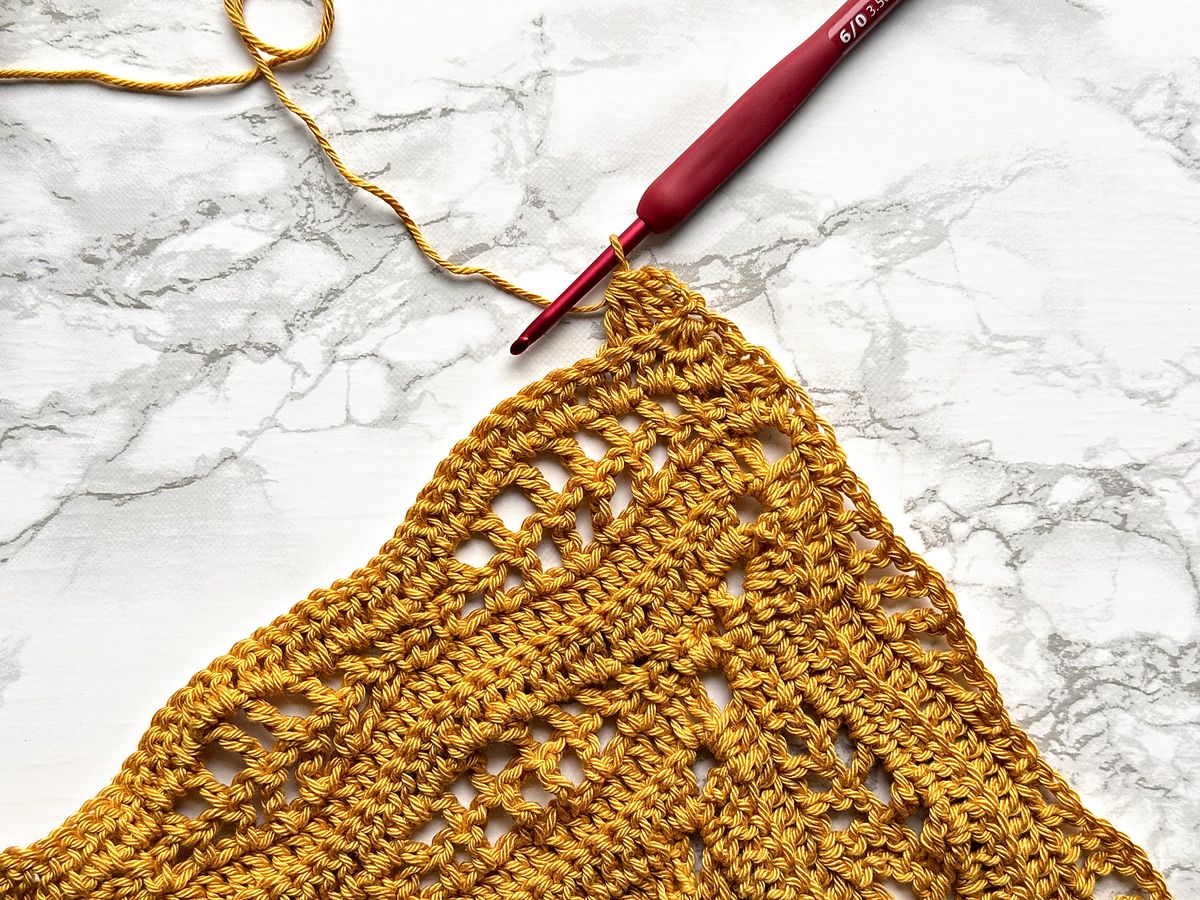
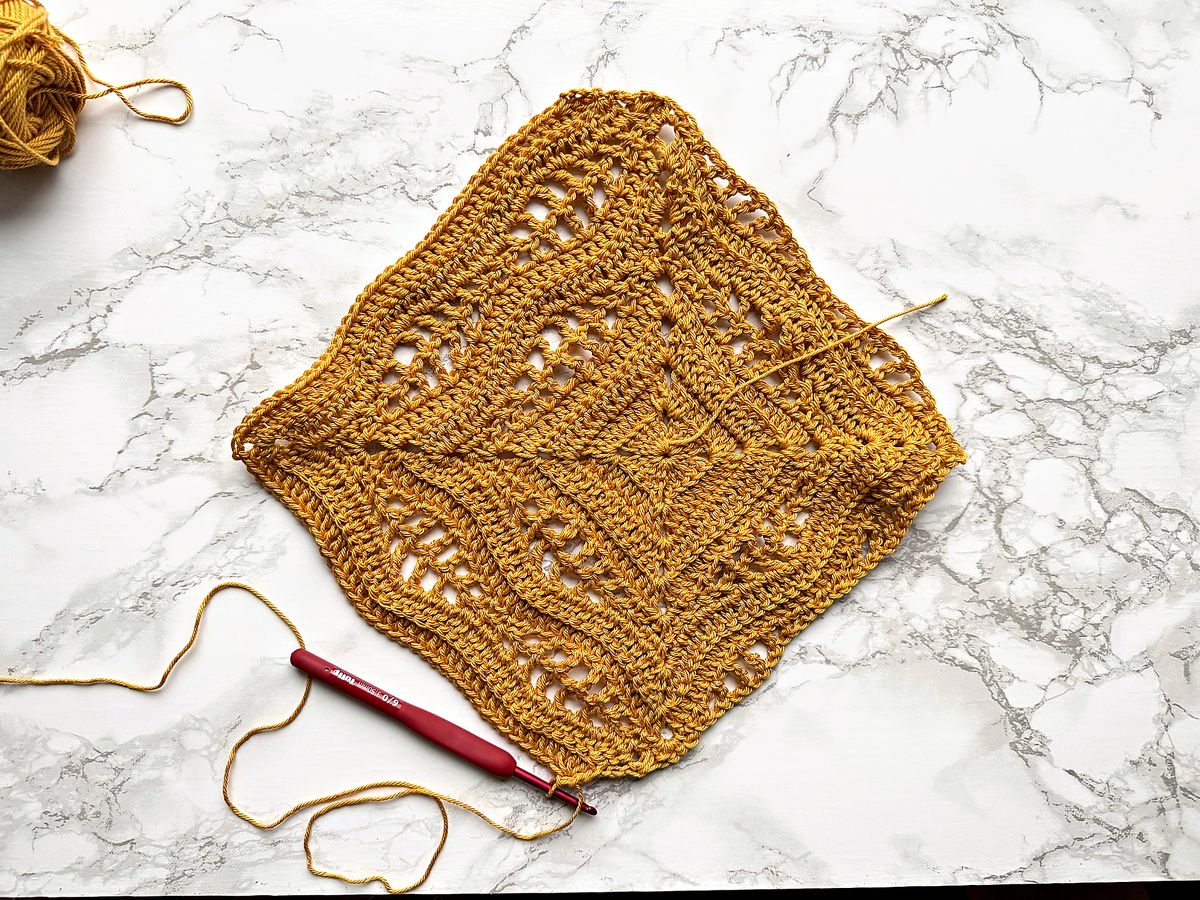
Rows 25–28: Repeat Row 24. (86 sts on each side)
Row 29: ch1, sc in first st, sc3tog over next 3 sts, sc in next st, ch1, sk next st, [sc in next st, ch1, sk next st, hdc in next st, ch1, sk next st, dc in next st, ch1, sk next st, tr in next st, ch1, sk next st, tr in next st, ch1, sk next st, dc in next st, ch1, sk next st, hdc in next st, ch1, sk next st, sc in next st, ch1, sk next st] 5 times, (2sc, ch2, 2sc) in ch-2 sp, ch1, sk next st, [sc in next st, ch1, sk next st, hdc in next st, ch1, sk next st, dc in next st, ch1, sk next st, tr in next st, ch1, sk next st, tr in next st, ch1, sk next st, dc in next st, ch1, sk next st, hdc in next st, ch1, sk next st, sc in next st, ch1, sk next st] 5 times, sc in next st, sc3tog over next 3 sts, sc in 3rd ch of ch3 at beg of prev row. Turn. (86 sts on each side)
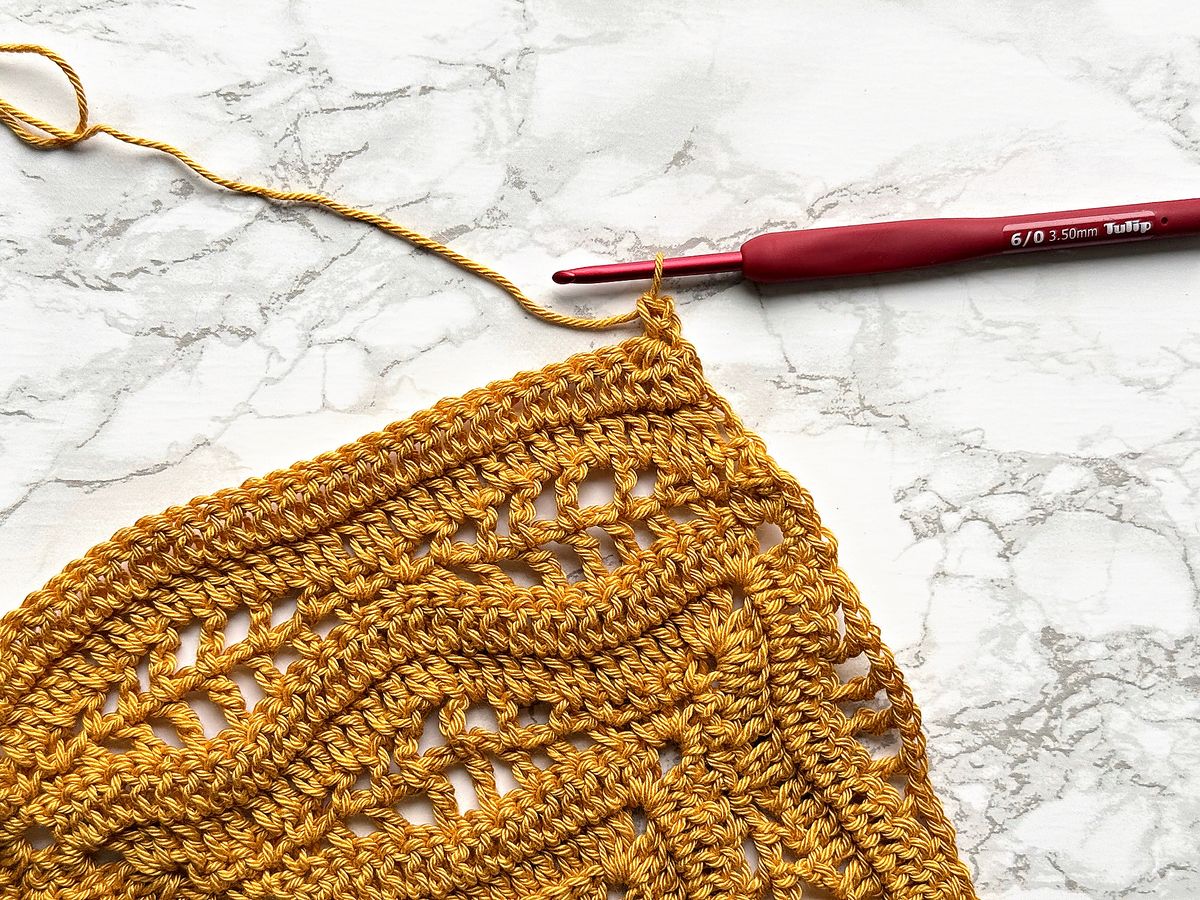
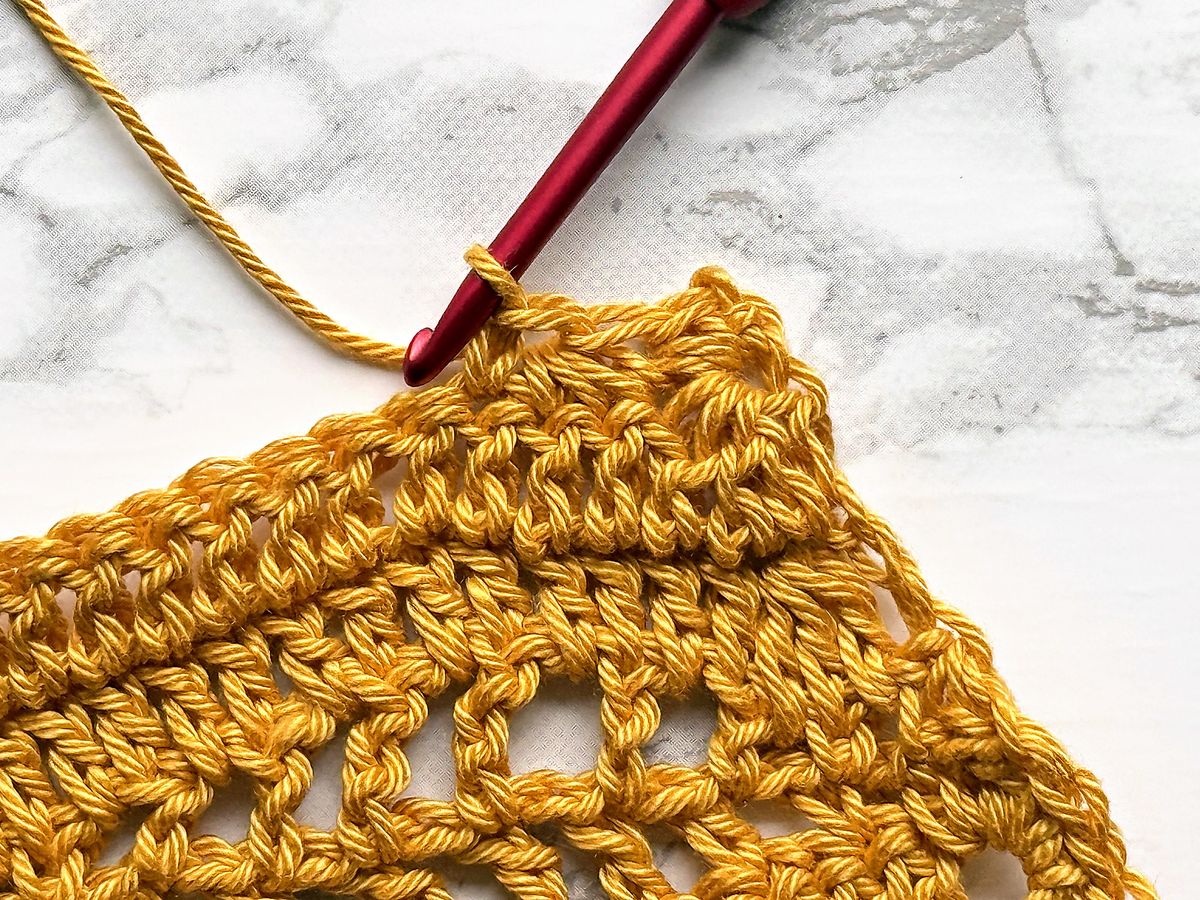
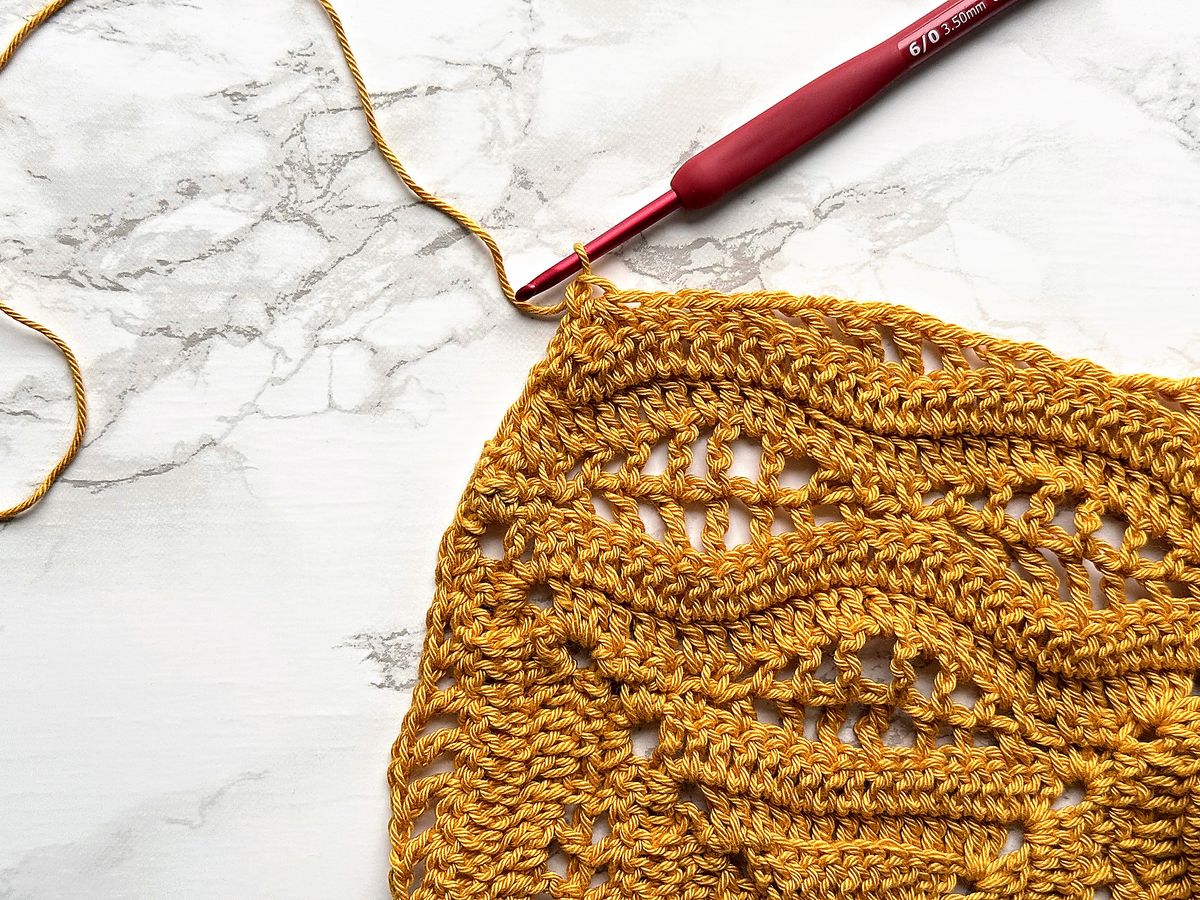
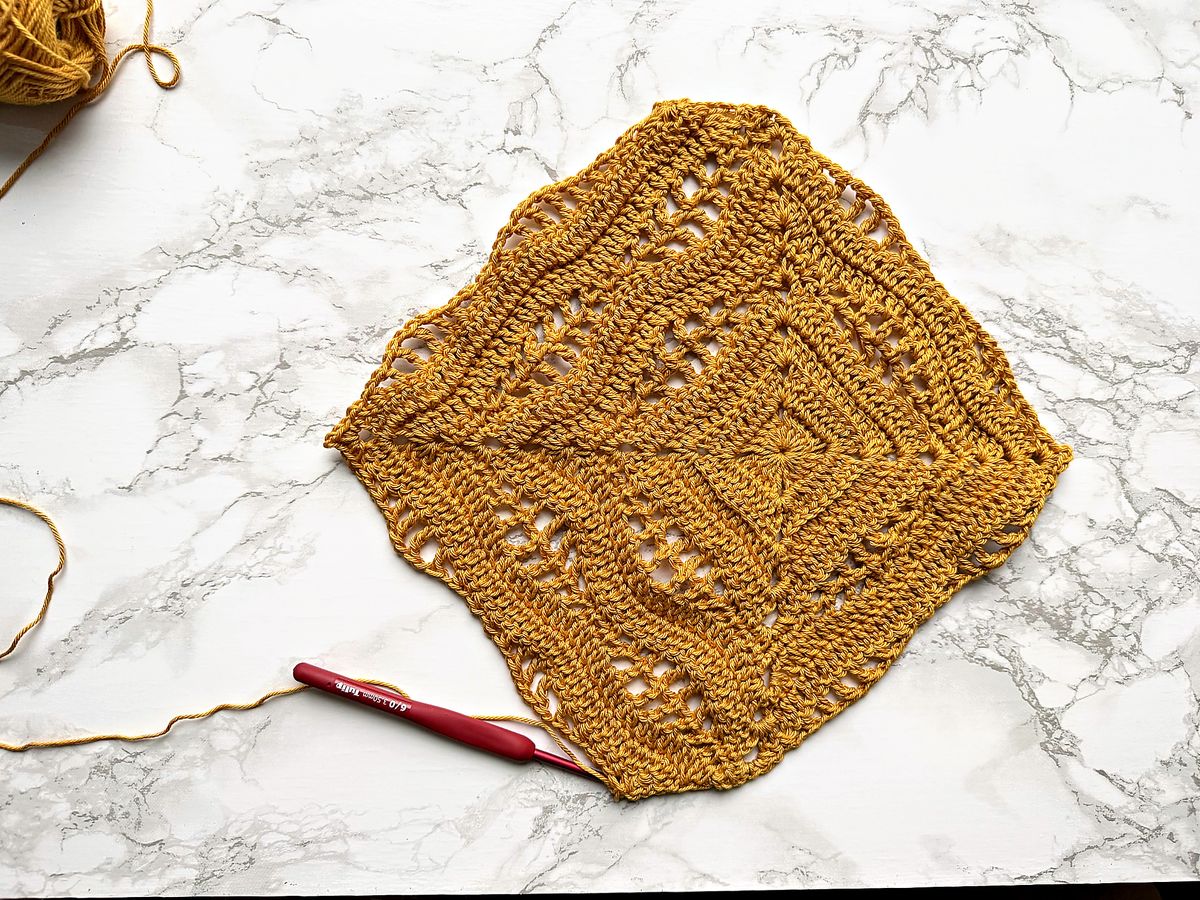
Row 30: ch1, sc3tog over next 3 sts, [ch1, sk next ch-1 sp, sc in next sc, ch1, sk next ch-1 sp, hdc in next hdc, ch1, sk next ch-1 sp, dc in next dc, ch1, sk next ch-1 sp, tr in next tr, ch1, sk next ch-1 sp, tr in next tr, ch1, sk next ch-1 sp, dc in next dc, ch1, sk next ch-1 sp, hdc in next hdc, ch1, sk next ch-1 sp, sc in next sc] 5 times, ch1, sk next ch-1 sp, sc in next 2 sc, (sc, ch3, sc) in ch-2 sp, sc in next 2 sc, [ch1, sk next ch-1 sp, sc in next sc, ch1, sk next ch-1 sp, hdc in next hdc, ch1, sk next ch-1 sp, dc in next dc, ch1, sk next ch-1 sp, tr in next tr, ch1, sk next ch-1 sp, tr in next tr, ch1, sk next ch-1 sp, dc in next dc, ch1, sk next ch-1 sp, hdc in next hdc, ch1, sk next ch-1 sp, sc in next sc] 5 times, ch1, sk next ch-1 sp, sc3tog over last 3 sts. Turn. (85 sts on each side)
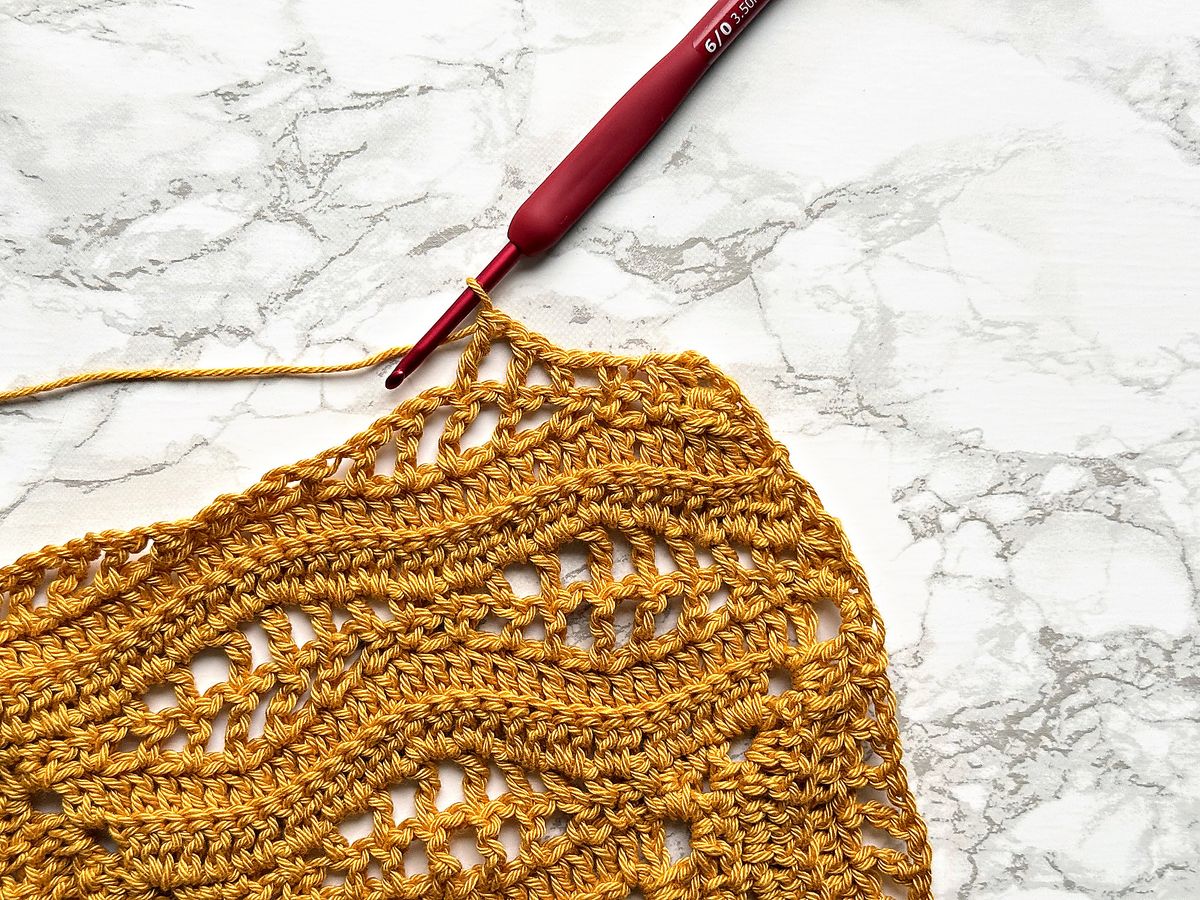
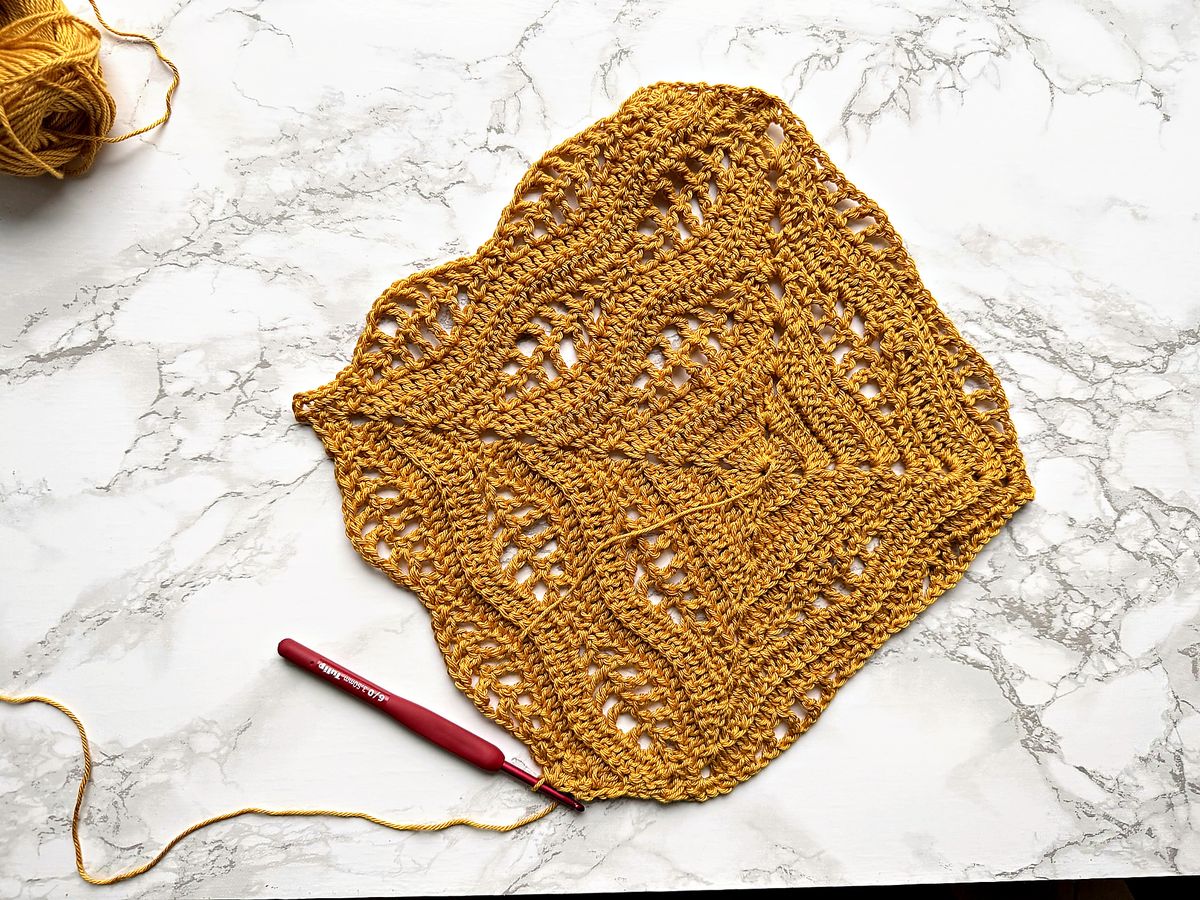
Row 31: Repeat Row 23. (86 sts on each side)
Row 32: Repeat Row 24. (86 sts on each side)
Rows 33–34: Repeat Rows 29–30. (Row 34: 85 sts on each side)
Row 35: Repeat Row 23. (86 sts on each side)
Rows 36–40: Repeat Row 24. (86 sts on each side)
Rows 41–52: Repeat Rows 29–40. (Row 52: 86 sts on each side)
Rows 53–84: Repeat Rows 29–32 eight times. (Row 84: 86 sts on each side)
Fasten off.
Right Wing
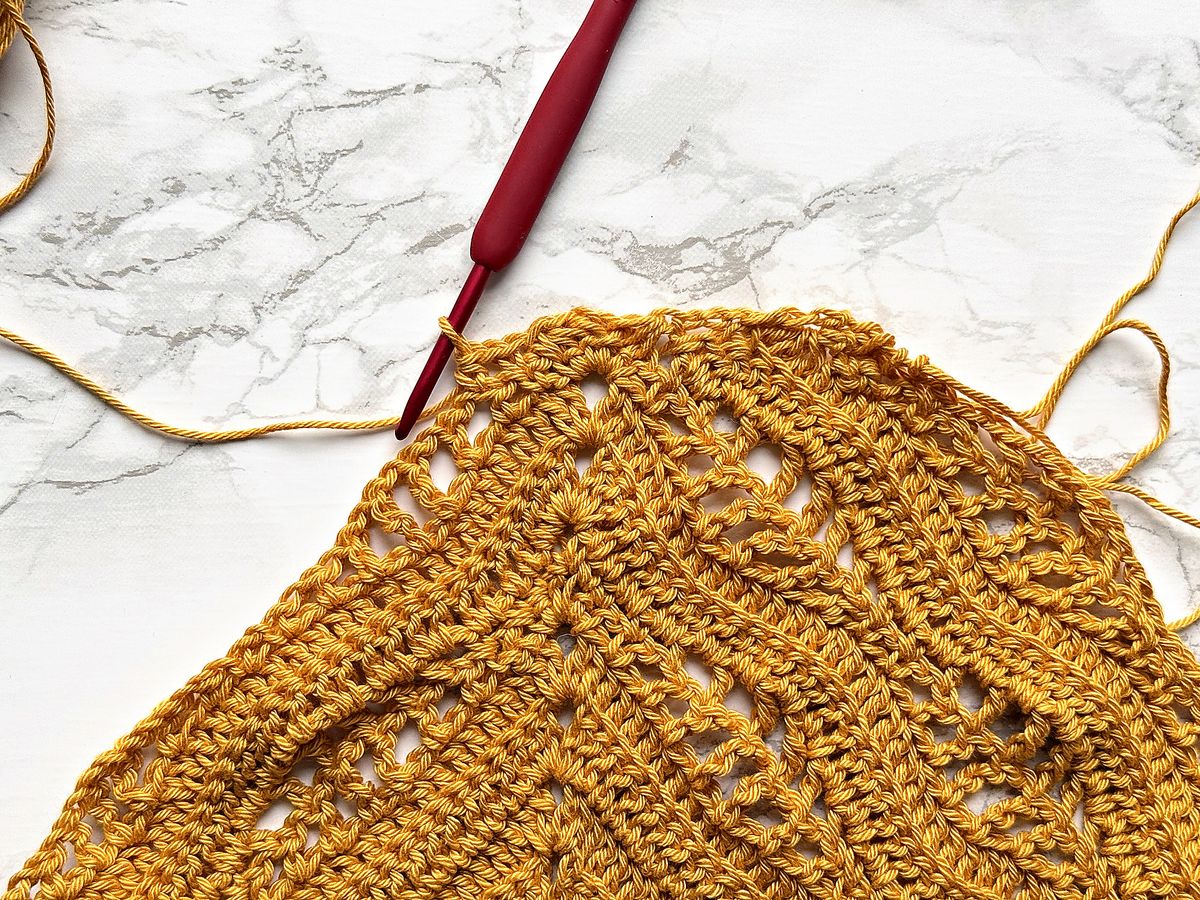
Hold the square with the same side facing you as when you worked Row 22 of the left wing. Join the yarn in the corner hdc where the left wing ended. The right wing is worked around the other two sides of the square, in the same direction as the left wing.
Rows 22–84: Work as Rows 22–84 of the left wing. In Row 22, work the 1st leg of the first sc3tog in the corner hdc where you joined the yarn.
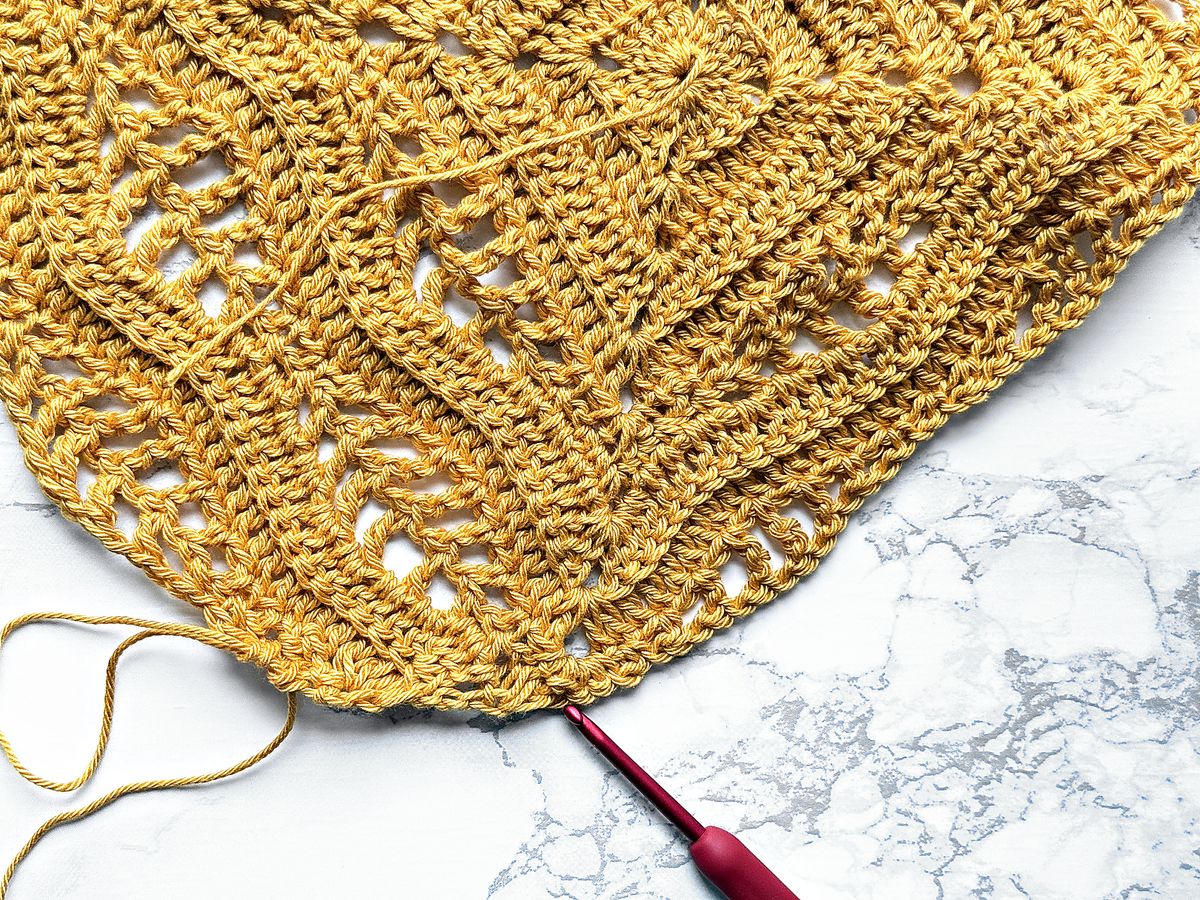
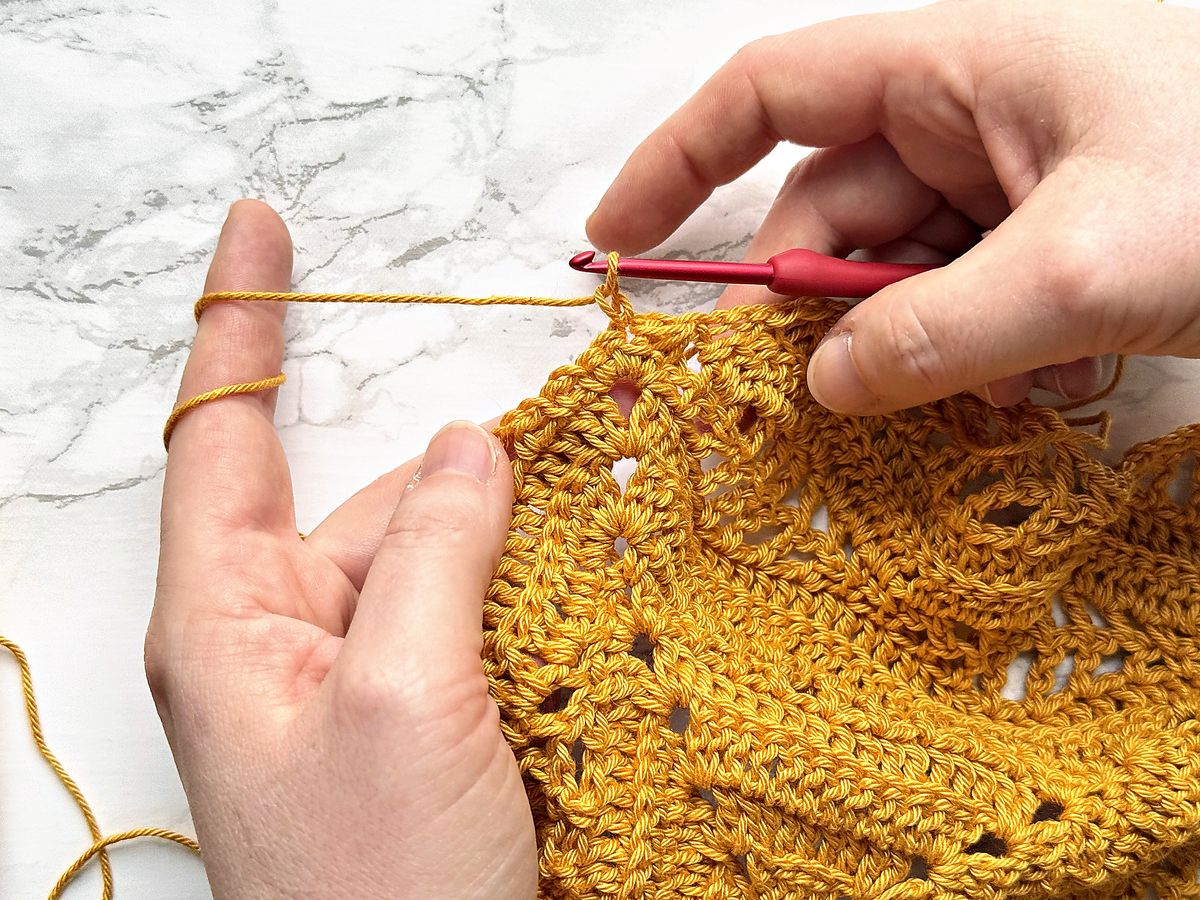
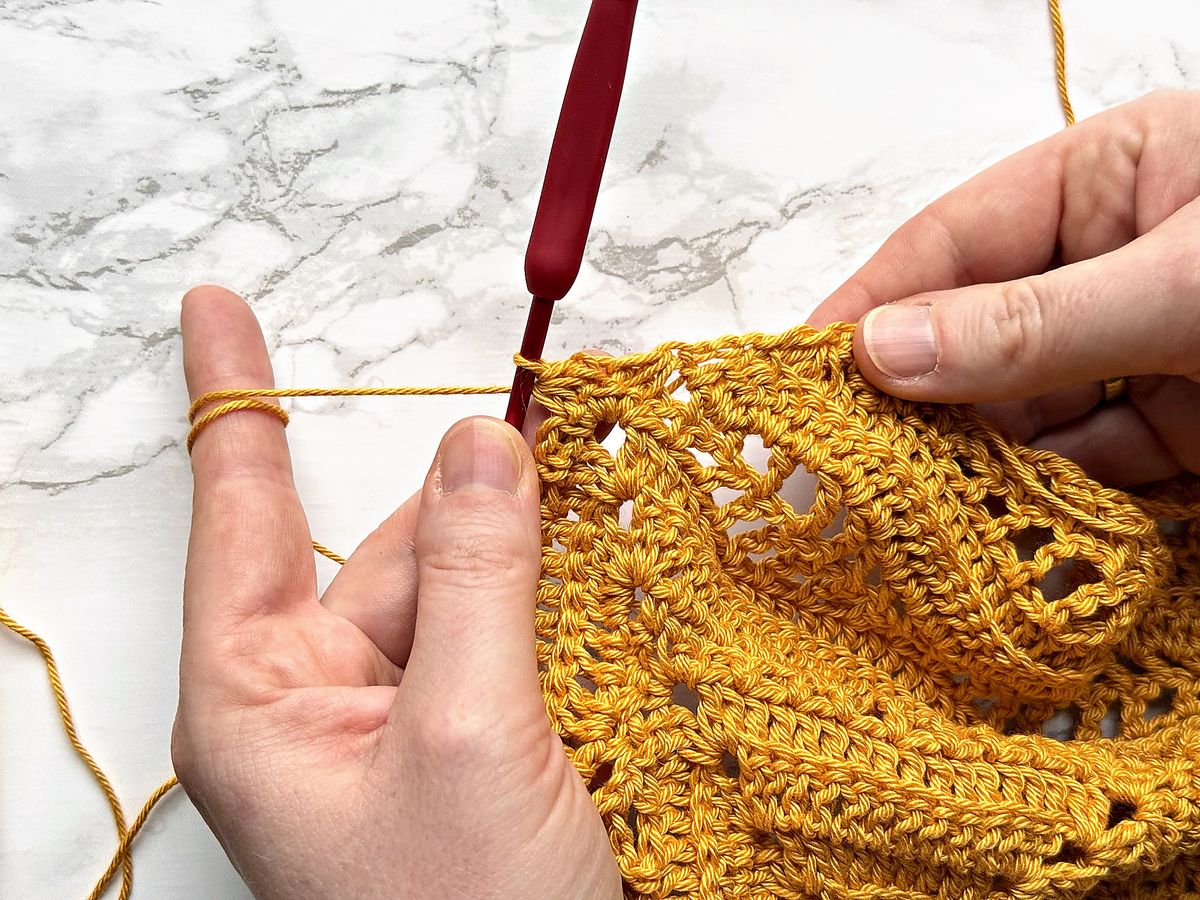
Fasten off.
Finishing
Weave in all ends and block your wrap to shape, pinning out both points.
If you have any suggestions or have found a mistake, please email me at mycrochetory@gmail.com.
Share Your Arrow With Me
Finished one? I’d really love to see your colors, so post a photo on Instagram with #mycrochetory and tag @mycrochetory.
Stuck on a row? Ask in my Facebook Group or Ravelry Group, or write to me at mycrochetory@gmail.com.
The Rest of the Kalinda Family
If the waves got you hooked, there are three more Kalinda patterns on the blog, and no two share the same shape. The same wave also grew into my Tonnta Blanket, which started from the Kalinda Shawl stitch pattern.
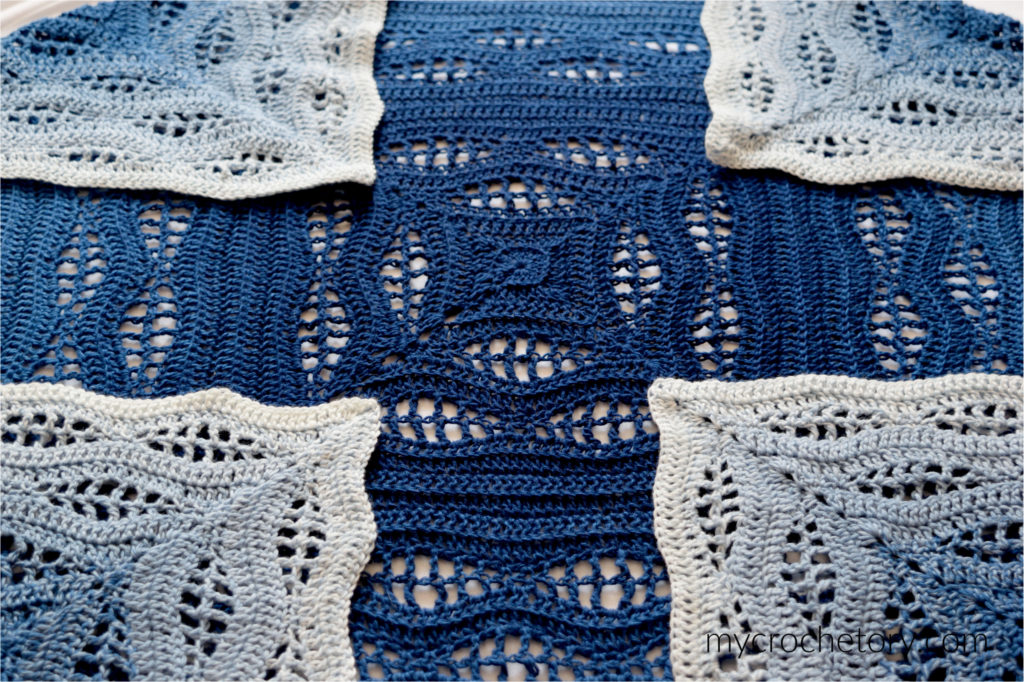

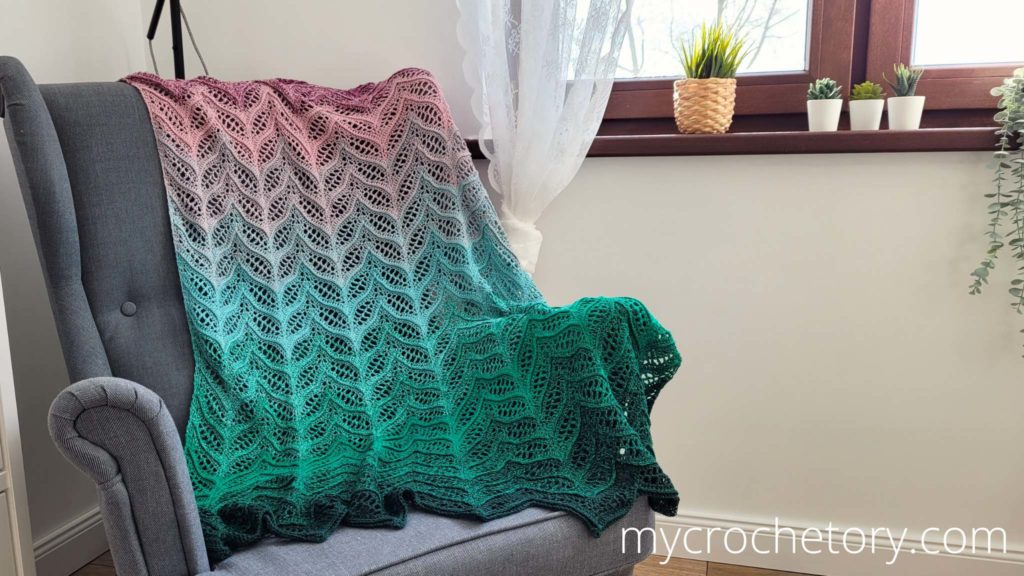
- Kalinda Crochet Blanket is the square from the middle of this wrap, worked from the center out until it grows into a full blanket.
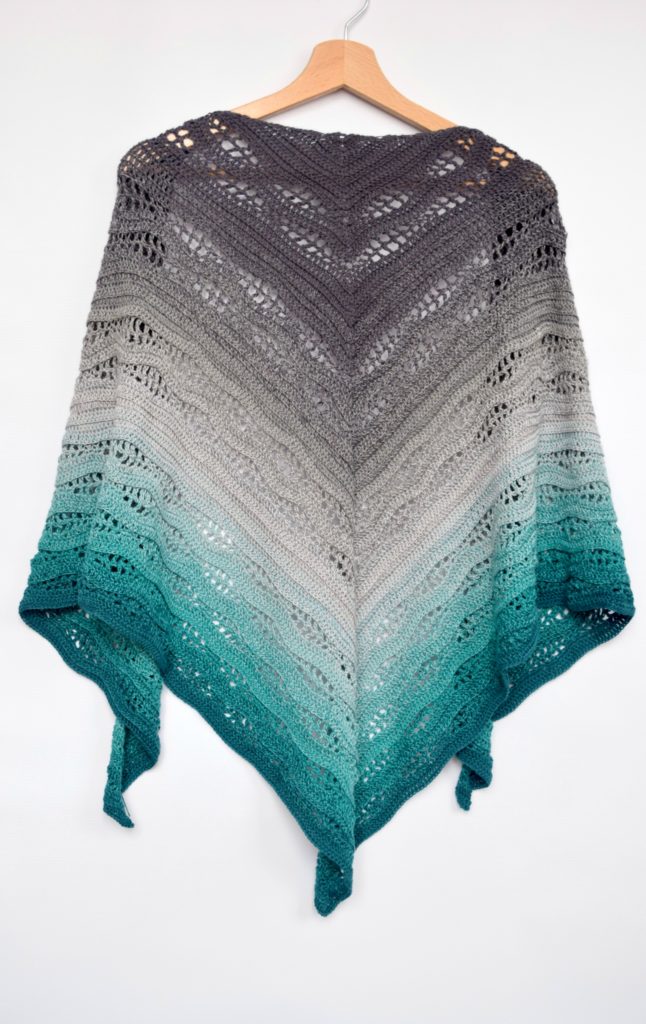
- Kalinda Wrap grows on the diagonal, with increases on one side and decreases on the other, into a long parallelogram.
- Kalinda Shawl is a triangle worked top-down in rows from a single Scheepjes Whirl cake.
More Crochet Wraps to Try Next
Each of these wraps is built its own way, so every one teaches you a new trick.


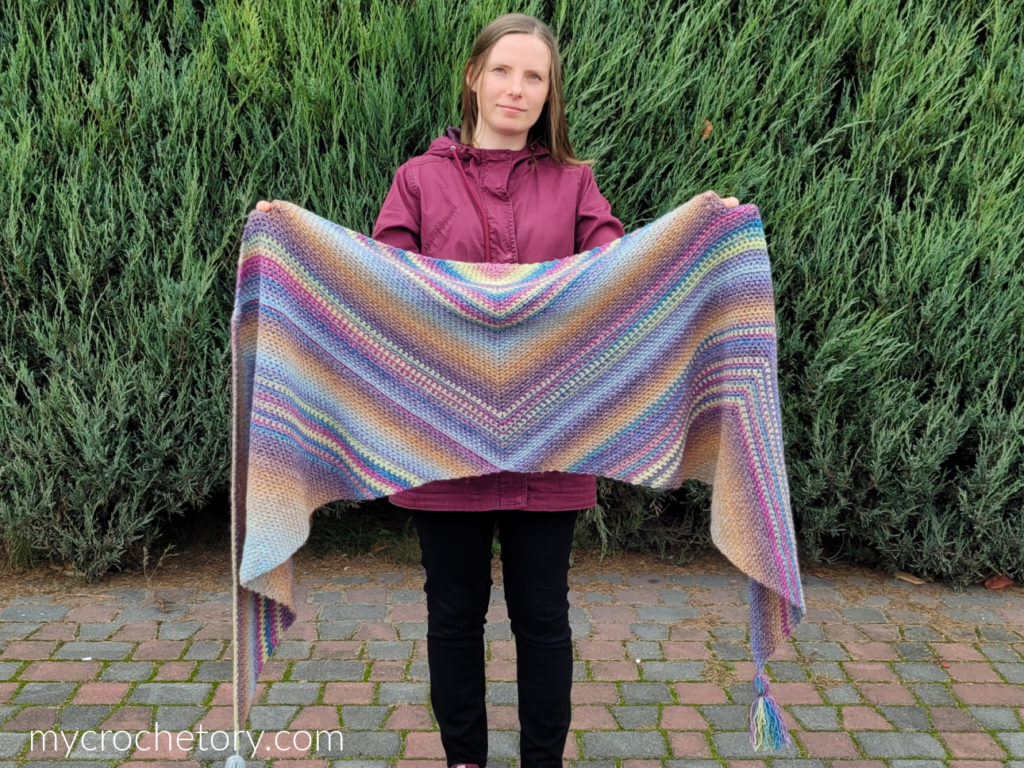

- Arrow Crochet Wrap has one pointed end, one V-shaped end and stripes of two lace patterns, and it looks the same on both sides.
- Havra Wrap was inspired by knitting and pairs the Scheepjes Whirl colorway from my Kalinda Shawl with black.
- Bandos Wrap is a big wrap made of three triangles, with an easy stitch that keeps the unusual construction relaxed.
- Monochrome Bias Wrap is worked on the bias in mosaic crochet, one color at a time.
If this is your first wrap, start with how to crochet a shawl, which shows the 3 easiest ways to begin.
Kalinda Arrow Wrap FAQ
Do I need the Kalinda Blanket pattern to make this crochet wrap?
No. All 21 rounds of the center square are written out here, with the new corners already in place.
Do I have to use a gradient cake?
No. Any yarn that gives you a fabric you like will work, solid or variegated. A gradient cake gives you the dark diamond in the middle and, once split by shade, matching tips.
Why are the step-by-step photos in mustard yarn?
The step-by-step photos show a separate sample in mustard yarn, where every stitch is easy to see. The finished wrap in the other photos is the gray-blue and pink one.
Can I sell wraps made from this crochet wrap pattern?
Yes, you can. Please credit MyCrochetory as the original designer, and don’t share or sell the pattern itself.
Leave a Reply