
Updated: 11 July 2026 by Sylwia (MyCrochetory)
When I made the Kalinda Blanket, I wanted to relax and enjoy every stitch. I love simple stitches because they feel familiar, but I also like a bit of surprise to keep things interesting.
That’s why I mixed plain double crochet rows with wavy parts. The solid rounds show off the colors, and the waves make me want to crochet just a little more every time.
I made this blanket as one big square, starting right in the middle. You don’t need to start with a long chain or sew pieces together. Just begin with a small center and watch your blanket grow as you crochet around the corners, round after round.
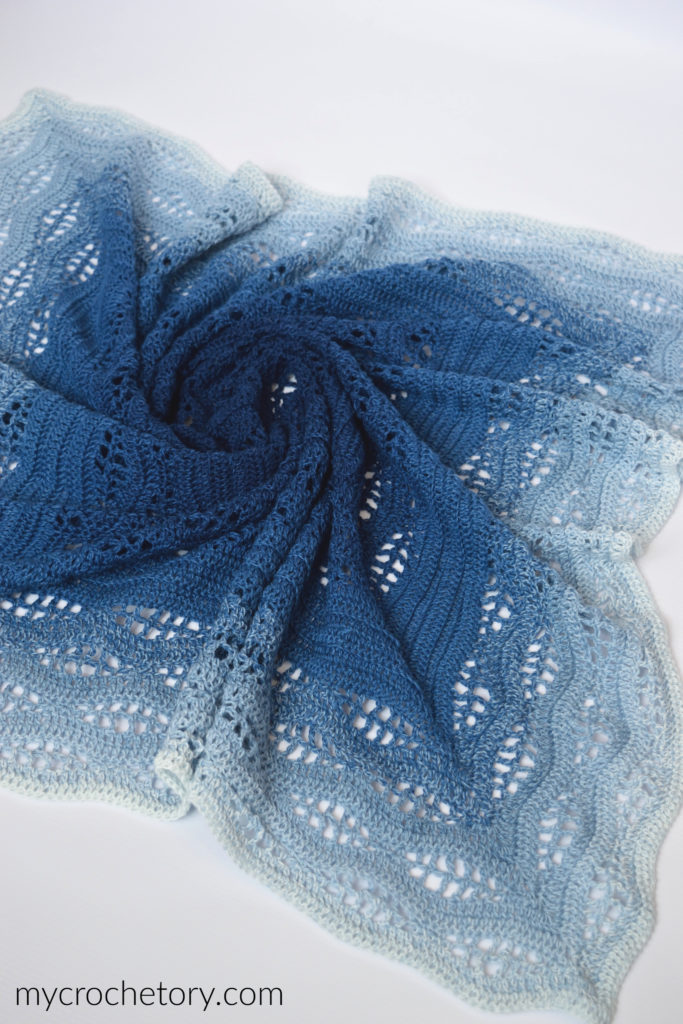
For my original sample, I used one cake of fingering yarn that changed colors on its own. I didn’t have to think about stripes or stop to weave in ends every time the yarn changed. It felt like a little bit of magic.
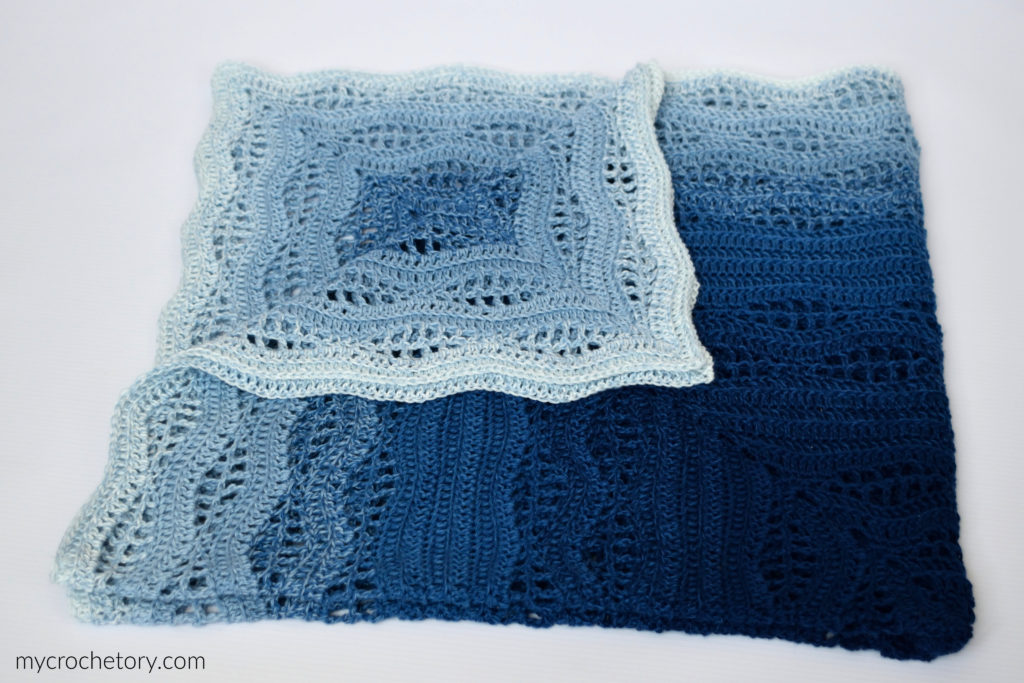
My blanket ended up about 31.5 inches square after blocking. But you can make yours as big as you want. Just keep adding rounds until it feels right for you.
Prefer a clean copy you can print and mark while you work? The ad-free PDF includes my complete written pattern and a stitch chart. You can find it HERE on ETSY or HERE on Ravelry.
The Kalinda Blanket at a Glance
If you’re like me, you want the basics first. Here’s what you should know about my Kalinda Blanket.
- Construction: One-piece square worked from the center out
- Method: Joined and turned rounds
- Skill level: Intermediate
- Yarn weight: Fingering
- Original yarn: Scheepjes Whirl
- Hook size: 3.5 mm
- Finished size: About 31.5 by 31.5 inches after blocking
- Gauge: 8 inches across after Round 11
- Main details: Open waves, back loop double crochet, and four marked corners
- Sizing: Adjustable by adding more repeats
- Crochet terms: US terminology
I built this pattern around four corner spaces. Every time you finish a round, you add more stitches at each corner, so your blanket grows out nice and even on all sides.
The stitch markers really help keep things organized, especially once your square gets bigger. Don’t take them out, even when you feel like the corners are easy to spot. They make life much easier.
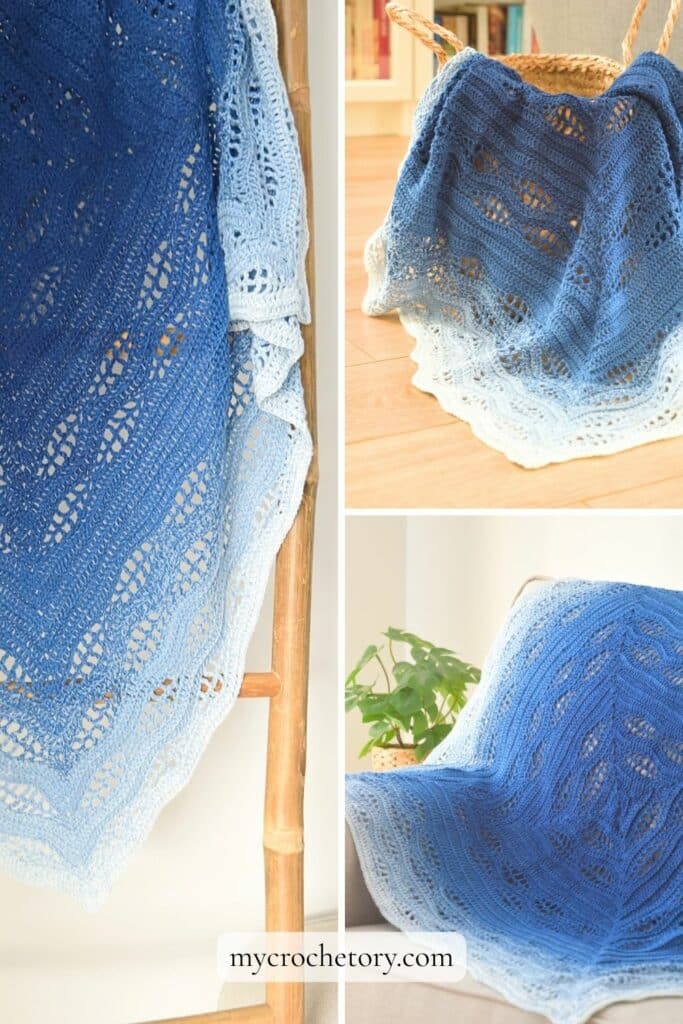
How a Reader Inspired the Kalinda Blanket
A reader who loved my Kalinda Shawl wrote and asked if I could make the wave pattern into a square blanket. That got me thinking, and I had to give it a try.
The shawl is a triangle, so I couldn’t just use the same steps for a square. I had to figure out how to add stitches in every corner and keep the waves looking nice all the way around.
Her question inspired the Kalinda Blanket. It feels a lot like the shawl, but working from the center out makes the waves and colors look new and different.
The shawl feels light and airy. The blanket gives you more room to see the pattern spread out. They come from the same idea, but each one has its own look and purpose.
Why I Chose a Center Out Construction
I’ve never liked starting with a long chain when I make a blanket. It’s easy to twist it or lose count, and mistakes show up way too late.
I wanted to skip all that trouble with this pattern. Kalinda starts with a small ring in the middle, then grows bigger, round by round.
Each round is joined with a slip stitch. After joining, the blanket is turned, and the next round is worked in the opposite direction.
Turning your blanket after every round might feel a bit strange if you’re used to working one way. I do it because it helps the blanket stay even and gives it the feel I like.
Each round starts in a corner chain space. This keeps the join near a corner, so you don’t get a visible line through the middle of a side.
How I Created the Crochet Waves
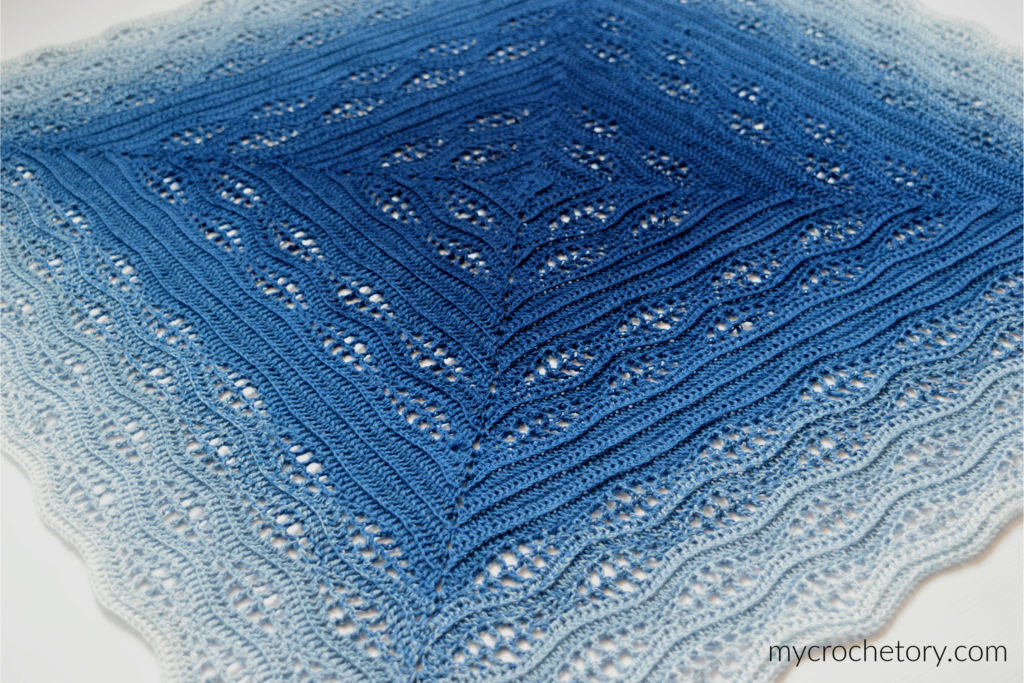
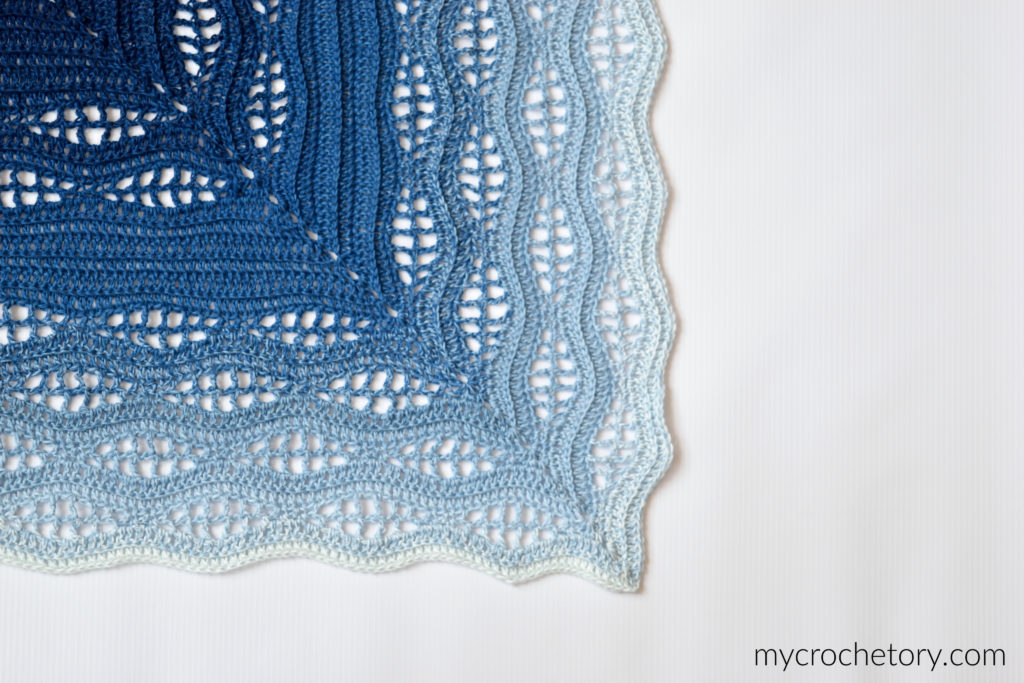
The wave parts look fancy, but really, they’re just made by changing the height of basic stitches. You start with single crochet, then try half double, double, and treble.
Then you go back down in the same way, and that’s what makes the wave shape appear.
The chain spaces between the stitches open the fabric and help the shape stand out. They also make the blanket feel lighter than a square worked only in solid double crochet.
The following round traces the same shape. Every single crochet, half double crochet, double crochet, and treble crochet is worked into the matching stitch below while the chain spaces are skipped.
This is the spot where hook placement can become confusing. After working several chain spaces, it is easy to insert the hook into the next space by habit. Find the actual stitch top before making the next stitch.
When you start to see the stitches go up and down, reading the pattern gets much easier. It’s not just a bunch of letters and numbers—you can watch the wave shape come to life as you go.
Need to check one of the stitches first? These tutorials may help:
Why I Used Gradient Yarn
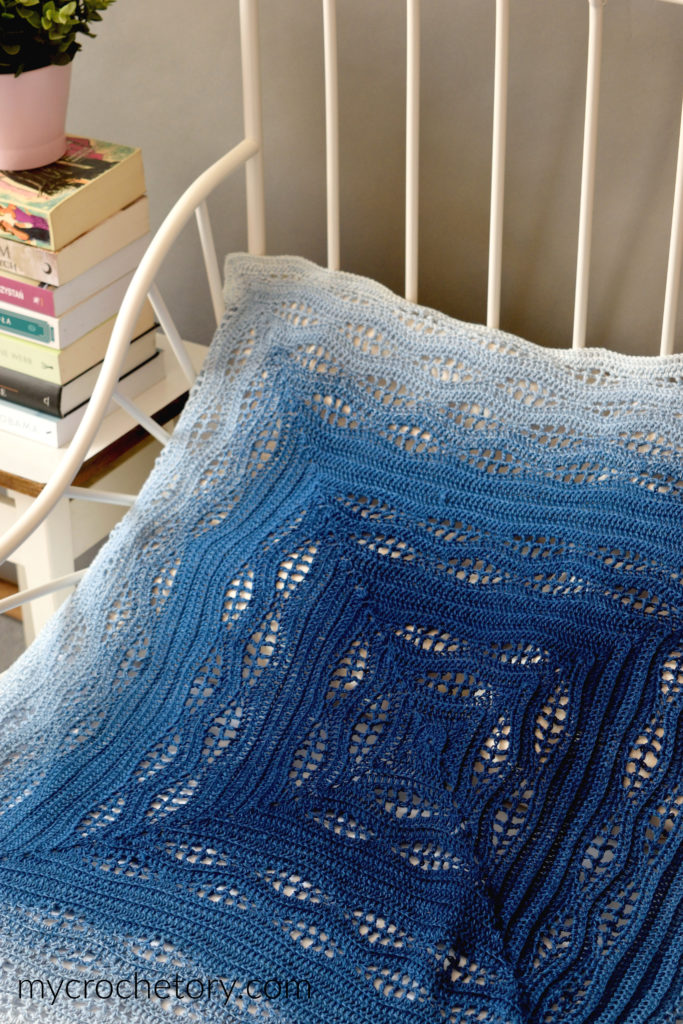
For my blanket sample, I picked Scheepjes Whirl in Indigo Plane. I wanted the colors to slowly drift across the square, and I liked not having to plan every stripe.
One cake has 1,000 meters of fingering yarn. It’s 60 percent cotton, 40 percent acrylic, so your blanket feels light and you can see the wave pattern really well.
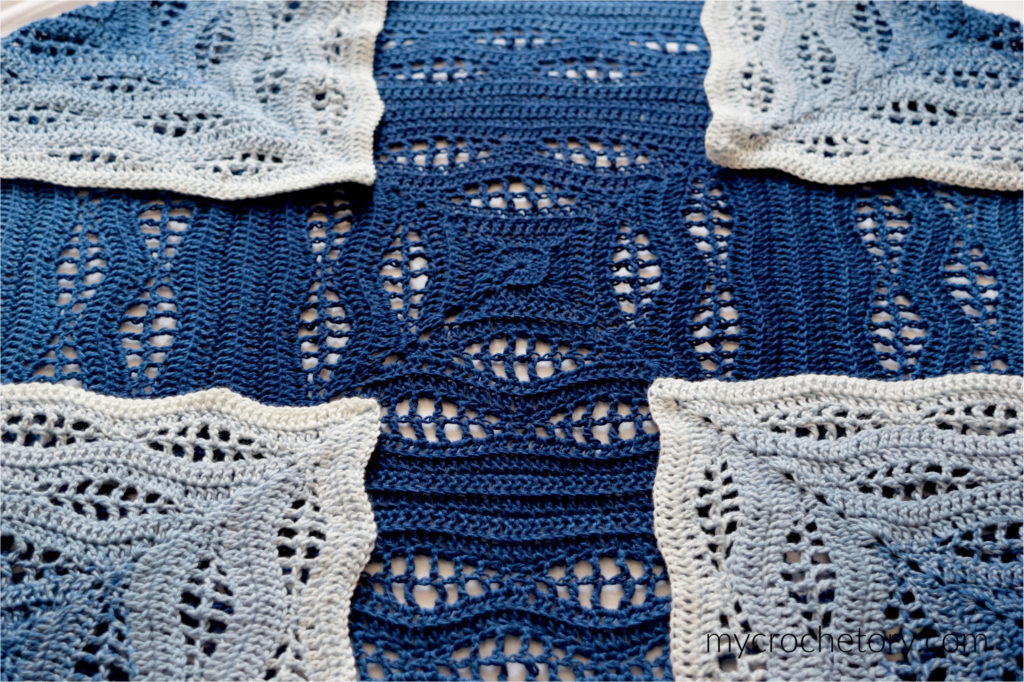
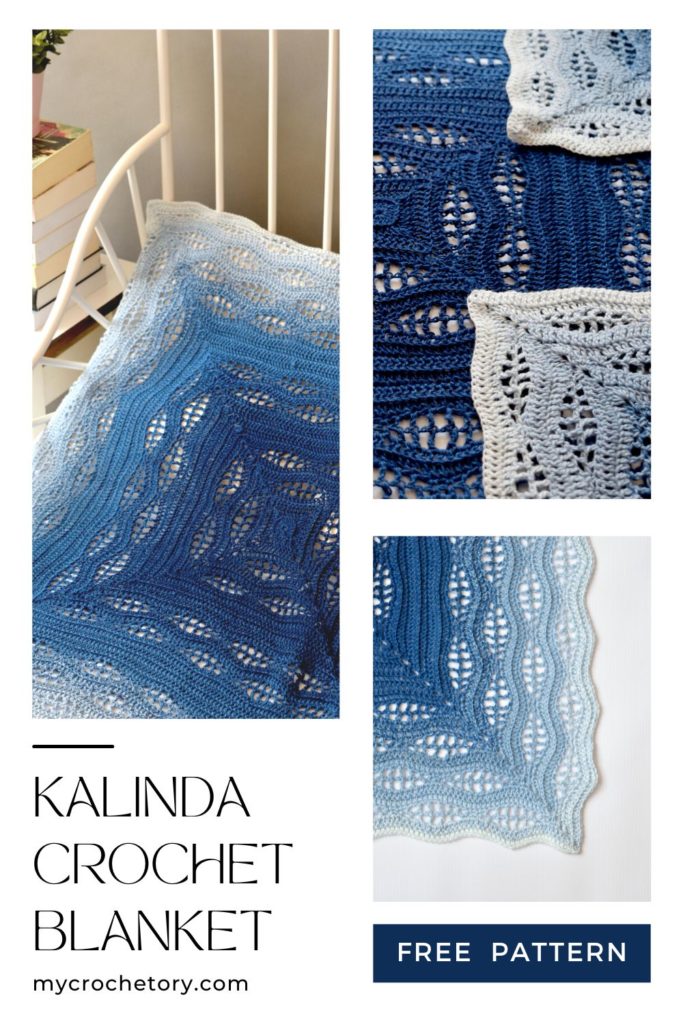
Starting in the center changes how the colors show up. Near the middle, one color might last for a few rounds. As you get farther out, the same color has to go all the way around a much bigger square, so it looks thinner.
That’s why the color stripes get more narrow as you reach the edge. Don’t worry, it’s not a mistake or a problem with your tension. It’s just how the blanket turns out.
Can You Use a Different Yarn?
I made the first blanket with fingering-weight yarn, but you can use any yarn you like. If you want it to look just like mine, go with fingering weight.
A solid color will really show off the wave pattern. If you use stripes or gradient yarn, the changing colors become the main feature.
For this pattern, I recommend yarn with clear stitch definition. Rounds 5 and 6 are much easier to follow when the tops of the sc, hdc, dc, and tr stitches remain easy to see.
If you use thicker yarn, your blanket will turn out bigger and heavier. I like to crochet the center and a few rounds first, just to see how the fabric feels before buying the full amount.
Four Stitch Markers Make a Big Difference
I always use four stitch markers, one for each corner. The corners are easy to spot at first, but after a while they can disappear when your blanket gets big and covers your lap.
Place a marker in every corner of the chain space. Move it as soon as the new corner is completed instead of waiting until the end of the round.
This keeps the correct space visible and reduces the chance of missing an increase. One incomplete corner can affect the shape much faster than a missed stitch in the middle of a side.
Pick stitch markers that stand out from your yarn. They don’t have to match—just make sure you can spot them quickly when you need them.
Leave the markers in until you finish the last round. Even if you think the corners are easy to see, those markers make counting each side a lot faster.
How to Keep the Blanket Flat and Square
A center-out blanket usually gives you a warning when something is wrong. One corner may begin to pull inward, one side may look longer, or the outer edge may start forming deeper ripples.
Check all four corners first. If you miss a chain or forget to add stitches in a corner, your blanket can start to look wonky before you even notice.
Next, compare the sides. The stitch counts should match, and the wave repeats should sit in the same places around the square.
The blanket does not have to look perfectly blocked while it is still on your hook. A little movement along an unfinished edge is normal, especially after a textured section.
Strong cupping, heavy ruffling, or one corner that looks different from the other three needs attention. I would fix that before starting another round, especially once the sides become long.
How to Make the Kalinda Blanket Larger
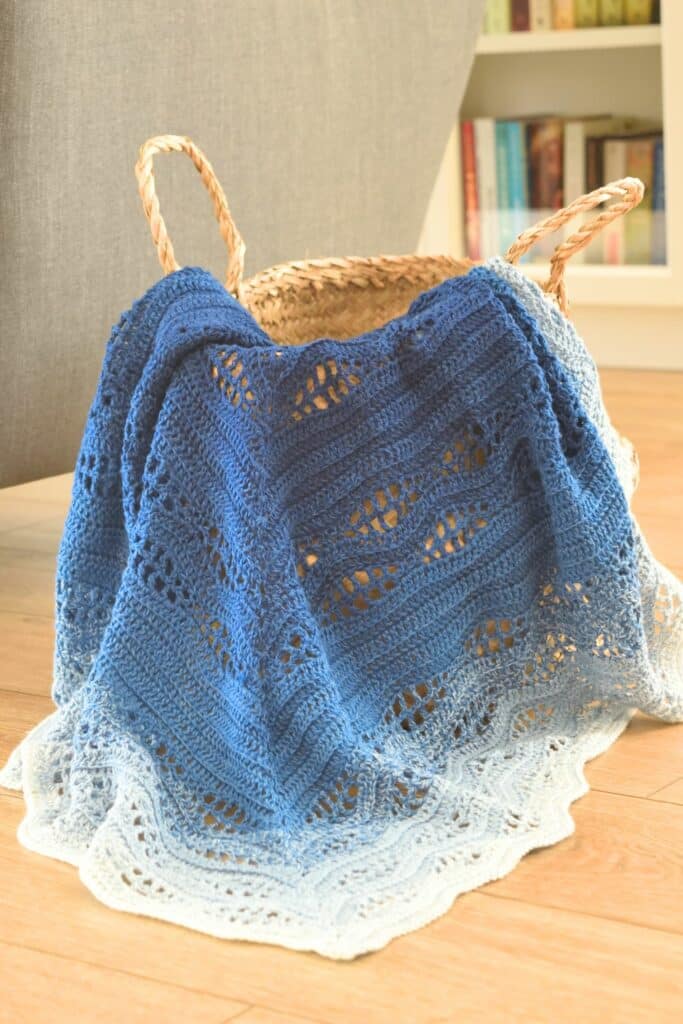
My original Kalinda Blanket measures about 31.5 inches square after blocking. That works well as a baby blanket or a smaller lap blanket, but you can continue the established sequence.
Measure straight through the center instead of along the outer edge. An unblocked edge may curve slightly, so the center gives you a more useful measurement.
Try to stop after a complete pattern section. This keeps the waves balanced on all four sides and gives the blanket a consistent finish.
A larger blanket will need more yarn, and the outer rounds use it much faster than the early ones. Each new round travels around a larger square, so the same amount of yarn adds fewer inches near the edge.
If you plan to add another gradient cake, decide how you want the colors to meet before the first cake runs out. You can continue the color order, reverse the second gradient, or join near a similar shade.
Read This Before Starting Rounds 5 and 6
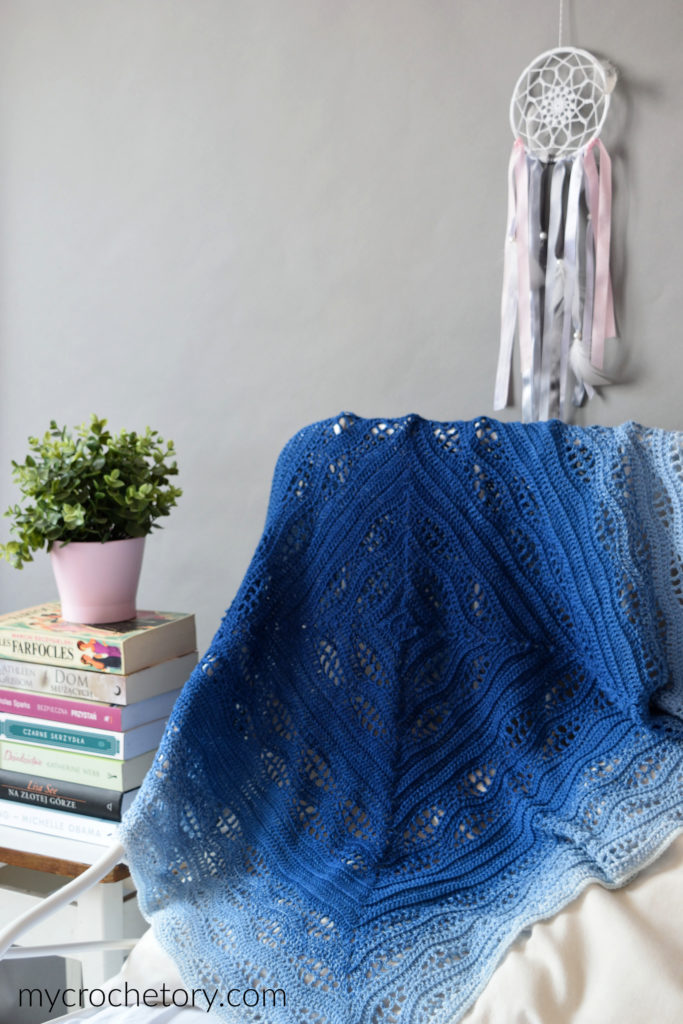
Most of the Kalinda Blanket settles into a comfortable rhythm. Rounds 5 and 6 ask for more attention because this is where the open waves are formed.
These rounds contain square brackets inside curly brackets. The square brackets hold the smaller wave repeat, while the curly brackets cover the larger section worked around the blanket.
Read one full side before beginning. Once you know where the wave starts, reaches its highest point, and comes back down, the instructions feel much less crowded.
I also included stitch count checkpoints after selected rounds. You do not have to count every round, but these checks can catch a mistake before it becomes hidden under a lot more crochet.
For readers who understand the pattern faster when they can see the stitch placement, the printable PDF includes my stitch chart. It also gives you a clean copy that can be printed and marked as you work.
OTHER MODERN CROCHET BLANKET PATTERNS YOU MIGHT LOVE:
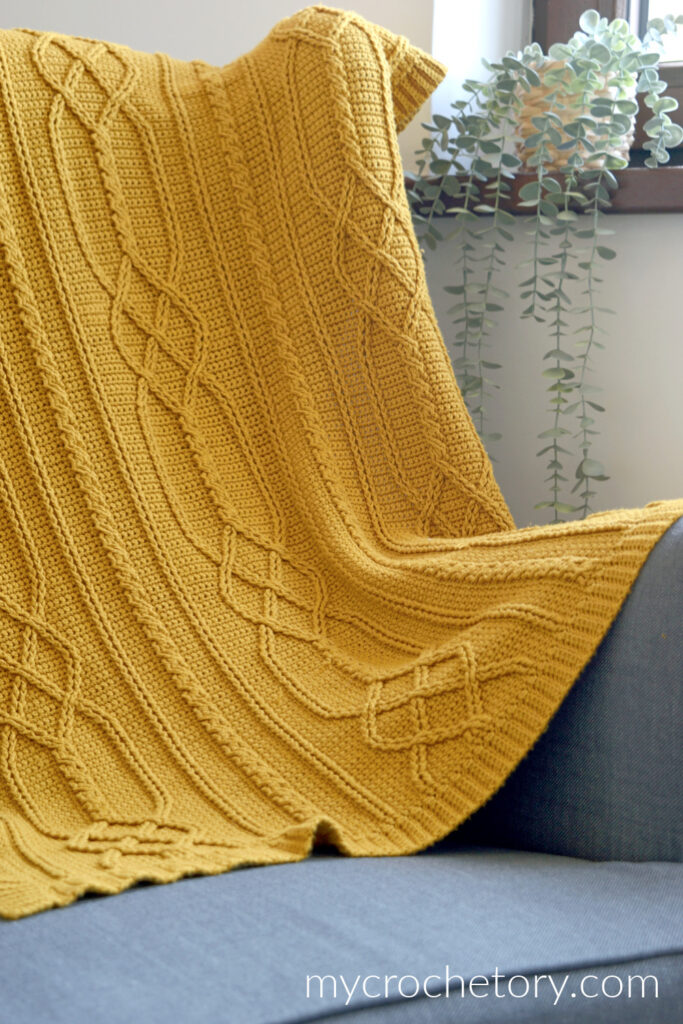
KALINDA BLANKET FREE PATTERN
- Purchase the ad-free, printable PDF with stitch chart here on ETSY or here on Ravelry.
- Add this pattern to your Ravelry Queue HERE.
- Pin it for later.
Copyright 2018 – 2026 MyCrochetory. All right reserved. This pattern is property of Sylwia Kawczyńska @MyCrochetory. Please DO NOT sell the pattern and claim this pattern as your own. The pattern is for personal use only and may not be translated or reproduced in another language. Please respect my rights, DO NOT share or publish this pattern anywhere without my permission.
The modern crochet blanket you make following this pattern is yours you are free to sell it, as long as you credit MyCrochetory as original designer. For more information, please, read Terms Page.
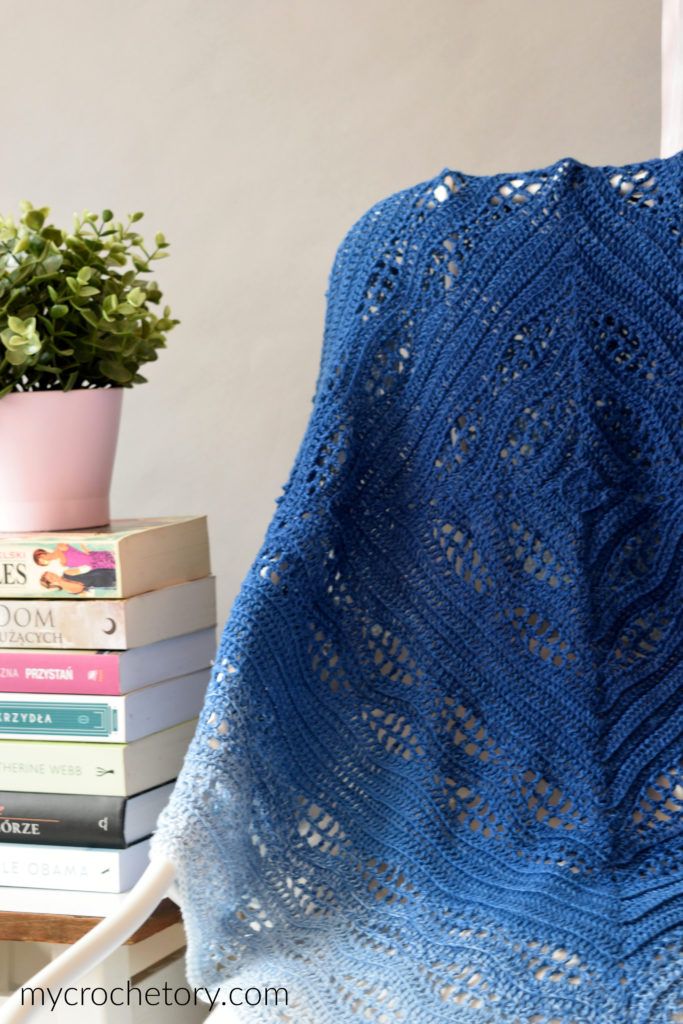
As a bonus in the ad-free, printable PDF, I’ve included a stitch chart. If you’re a visual learner or if you just want to support my work you can purchase this crochet pattern HERE on ETSY or HERE on Ravelry. Thank you and I hope you find it useful!
Materials & Tools:
- Yarn Scheepjes Whirl 215g = 1000m, 60% Cotton, 40% Acrylic, 1 cake. For the blanket sample I used Indigo Plane (553) colorway.
- Hook size 3.5mm. Adjust hook size if necessary to obtain correct gauge,
- Tapestry needle (to weave and hide yarn ends),
- Scissors,
- 4 stitch markers.
Level:
Intermediate.
Size after blocking:
Approx. 80cm x 80cm (31.5’’ x 31,5’’)
Gauge after blocking:
After round 11, measures 20cm (8″).
Gauge is not crucial for this project, however, changes might result in a different yardage requirements and the finished size.
Notes:
- The pattern uses US crochet terminology.
- Kalinda Blanket is a one-piece baby blanket worked in the round from the center out but after each round you will turn your blanket and work on the backside.
- Each round builds on the next, and each round starts in the corner chain space.
- Place the stitch marker in every ch-1 sp corner.
- Pay special attention to row 5 and 6. There are nested brackets {…} which include a square bracket […] inside.
- Instructions in square brackets […] or in {…} are worked as many times as indicated.
- After the written instruction, you can find the stitch counting for some rows.
- This pattern can easily be adapted to use heavier weight yarn and/or additional rows to make desired size.
- The stitch chart is included in the ad-free printable PDF here on ETSY or here on Ravelry.
Stitches & Abbreviations (US terms):
st(s) – stitch(es)
BLdc – back loop only double crochet
yo – yarn over
sp – space
sk – skip
m – marker
Pm – place marker
Rm – reposition marker
You can review the techniques used in the pattern here:
- How to Make a Magic Ring
- How to Single Crochet
- How to Half Double Crochet
- How to Double Crochet
- How to Treble Crochet
- How to Slip Stitch
PATTERN
Read all the pattern notes before starting.
Begin with a magic ring. You can also chain 5 and join with a slip stitch in the first chain to form a ring.
Round 1: ch3 (counts as a dc here and throughout), 4dcs in ring, ch1, Pm, [5dcs in ring, ch1, Pm] rep 3 times in total, slst at the top of ch3 to close the round. Turn.
Round 2, 3, 4: slst into ch-1 sp, ch3, dc in ch-1 sp, [BLdc in every st until ch-1 sp, (2dcs, ch1, Rm, 2dcs) in ch-1 sp] rep 3 times in total, BLdc in every st until last ch-1 sp, 2dcs in last ch-1 sp, ch1, Rm, slst at the top of ch3 to close the round. Turn.
Round 5: slst into ch-1 sp, ch1, sc in ch-1 sp, {ch1, sk next st, [sc, ch1, sk next st, hdc, ch1, sk next st, dc, ch1, sk next st, tr, ch1, sk next st, tr, ch1, sk next st, dc, ch1, sk next st, hdc, ch1, sk next st, sc, ch1, sk next st] rep until ch-1 sp, (2sc, ch1, Rm, 2sc) in ch-1 sp} rep 3 times in total, ch1, sk next st, [sc, ch1, sk next st, hdc, ch1, sk next st, dc, ch1, sk next st, tr, ch1, sk next st, tr, ch1, sk next st, dc, ch1, sk next st, hdc, ch1, sk next st, sc, ch1, sk next st] rep until last ch-1 sp, 2scs in last ch-1 sp, ch1, Rm, slst into ch1 to close the round. Turn.
Round 6: slst into ch-1 sp, ch1, {sc in next 2scs, ch1, sk next ch-1 sp, [sc in next sc, ch1, sk next ch-1 sp, hdc in next hdc, ch1, sk next ch-1 sp, dc in next dc, ch1, sk next ch-1 sp, tr in next tr, ch1, sk next ch-1 sp, tr in next tr, ch1, sk next ch-1 sp, dc in next dc, ch1, sk next ch-1 sp, hdc in next hdc, ch1, sk next ch-1 sp, sc in next sc, ch1, sk next ch-1 sp] rep until 2scs remain before ch-1 sp, sc in next 2scs, (sc, ch3, Rm, sc) in ch-1 sp} rep 3 times in total, sc in next 2scs, ch-1, sk next ch-1 sp, [sc in next sc, ch1, sk next ch-1 sp, hdc in next hdc, ch1, sk next ch-1 sp, dc in next dc, ch1, sk next ch-1 sp, tr in next tr, ch1, sk next ch-1 sp, tr in next tr, ch1, sk next ch-1 sp, dc in next dc, ch1, sk next ch-1 sp, hdc in next hdc, ch1, sk next ch-1 sp, sc in next sc, ch1, sk next ch-1 sp] rep until 2scs remain before last ch-1 sp, sc in next 2scs, sc in last ch-1 sp, ch3, Rm, slst into ch1 to close the round. Turn.

Round 7: 2slst into ch-3 sp, ch3, 2dcs in ch-3 sp, [dc in every st and ch-1 sp until ch-3 sp, (3dcs, ch1, rm, 3dcs) in ch-3 sp] rep 3 times in total, dc in every st and ch-1 sp until last ch-3 sp, 3dcs in last ch-3 sp, ch1, Rm, slst at the top of ch3 to close the round. Turn.
Round 8: Repeat Row 2
After Round 8 repeat :
Rounds 5-8 one time
Round 2 four times
Rounds 5-8 two times
Round 2 four times
Rounds 5-8 four times
Fasten off yarn, weave in all ends and block your blanket.
Stitch Count Checkpoints
Check the number of double crochet stitches on each side at these rounds:
- Round 7: 29 dc per side
- Round 11: 45 dc per side
- Round 19: 77 dc per side
- Round 23: 93 dc per side
- Round 31: 125 dc per side
- Round 39: 157 dc per side
- Round 43: 173 dc per side
Count one side at a time, moving from one marked corner to the next. All four sides should have the same number of stitches.
If one count is different, check the nearest corner first. Then look through the last wave section for a missed stitch or chain space.
Common Problems and How to Fix Them
My Waves Do Not Look Even
Check the stitch placement in Round 6. Each sc, hdc, dc, and tr should be worked into the matching stitch from Round 5.
The chain spaces are skipped during this round. Working into one by mistake shifts the placement and can make the wave lose its shape.
Read the stitches by height. The wave should rise from sc to hdc, dc, and tr, then return through the same heights in reverse.
I Keep Losing My Place
Place a removable marker after one full wave repeat. This gives you a clear point to return to if you are interrupted.
Move the marker along the side as you finish each wave. Remove it after checking the side so it does not become confused with one of the four corner markers.
It may also help to cover the completed part of the written instructions. Keeping only the current repeat visible makes the long round feel less crowded.
One Corner Is Pulling Inward
Compare the problem corner with one that lies flat. Check every stitch and chain inside the corner instruction.
A missing increase can pull the point inward. Very tight corner chains may cause a similar problem when the next round needs several stitches worked into that space.
Do not stretch the corner to force it flat. Correct the stitch count first, then let blocking smooth any small difference that remains.
The Blanket Is Starting to Ruffle
Count each side and check the corner increases. An extra repeat or additional corner stitches can create more fabric than the square needs.
If the counts match, lay the blanket down without stretching it. A little movement along an unblocked edge is normal, but deep ripples that become stronger with every round need checking.
Loose tension may also add movement to the fabric. Avoid changing hook size halfway through unless you have tested the result, since the change may leave a visible line.
The Center Looks Slightly Uneven
The first few rounds place many stitches into a small space. The center may need more weight around it before it lies naturally.
Check that the four corners are evenly spaced and have matching stitch counts. If they do, slight unevenness can usually be improved during blocking.
Blocking can smooth the fabric, but it cannot replace a missing corner increase. Check the construction before deciding to continue.
I Lost a Corner Marker
Look for the grouped corner increase rather than choosing the nearest chain space. The correct corner sits directly above the corner from the previous round.
Compare it with the other three corners. Once you are sure you have the right space, replace the marker before working any farther.
Blocking the Finished Kalinda Blanket
Fresh from the hook, the blanket may not look as neat as it does in the finished photos. The corners may curl slightly, and the open waves may still look a little closed.
I included blocking in the finishing instructions because it helps the square settle. It also opens the chain spaces and makes the wave pattern easier to see.
Follow the care instructions for the yarn you used. My sample was made with a cotton and acrylic blend, so it should be handled according to the yarn label.
Lay the damp blanket on a clean blocking surface and shape it gently. Measure across the center in both directions, then adjust the sides until the measurements match.
Shape the full outer edge instead of pulling only on the four corners. Let the blanket dry completely before removing it from the blocking surface.
This is also a good time to check every yarn end. I would rather find a loose tail on the blocking mat than after the blanket has been used and washed.
More Patterns from My Kalinda Collection
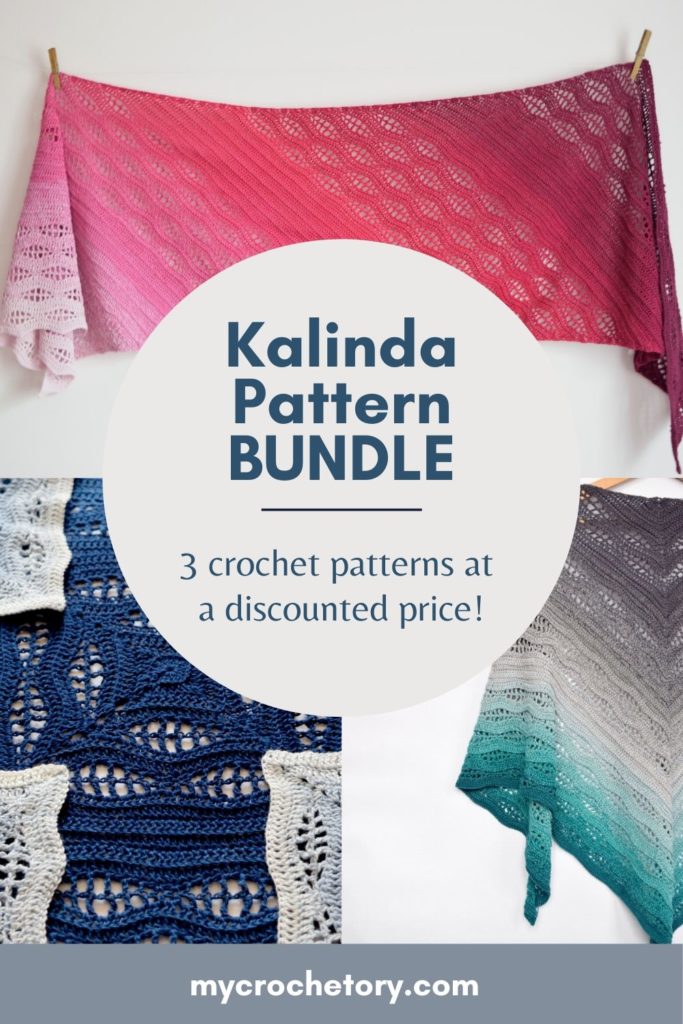
After I made the first Kalinda Shawl and then turned its waves into a square blanket, I wanted to try the same idea in a new shape. That’s how I came up with the Kalinda Wrap.
The Kalinda Shawl grows into a triangle. The Kalinda Wrap is a long rectangle, and the blanket is a classic square that grows from the middle out.
I love seeing how the wave pattern changes in each one. They’re all connected, but every project has its own look and use.
You can get the Kalinda Blanket, Shawl, and Wrap all together in my Kalinda Pattern Bundle too.
Frequently Asked Questions
Is the Kalinda Blanket Suitable for Beginners?
I rated this pattern as intermediate. It uses familiar stitches, but Rounds 5 and 6 contain long, nested repeats that need careful reading.
A confident crocheter who already knows sc, hdc, dc, tr, and slip stitch may be ready to try it. The stitch chart in the paid PDF can also make the wave placement easier to understand.
Is There a Video Tutorial for the Kalinda Blanket?
There is no video tutorial for this pattern. The free version includes my complete written instructions.
The printable PDF contains both the written pattern and my stitch chart. You can follow the format that feels clearer to you.
Can I Make the Blanket Larger?
Yes. I designed the sequence so you can continue it until the square reaches the size you need.
Plan for extra yarn because the outer rounds become very long. They use yarn much faster than the small rounds near the center.
Can I Use Thicker Yarn?
A thicker yarn can be used, but it will create a larger and heavier blanket. Choose a suitable hook that keeps the fabric flexible.
I recommend making the center and several rounds first. This will show you the fabric, size, and wave definition before you commit to the full blanket.
Why Is the Blanket Turned After Every Round?
Turning is part of the construction I created for this pattern. It balances the direction of the stitches and produces the intended fabric.
It becomes more awkward as the blanket grows, but continue turning after every round. Skipping that step may change the texture and tension.
Why Do I Need Four Stitch Markers?
I use one marker for each corner chain space. Moving them as you work reduces the chance of missing a corner increase.
The markers become even more useful when the blanket is large and folded across your lap. A corner can hide in the fabric more easily than you may expect.
Does Gauge Matter?
The square will still form if your gauge is different. Its finished measurements and yarn use will also change.
Measure after Round 11 if you want to stay close to the size of my original 31.5-inch sample.
Can I Sell a Finished Kalinda Blanket?
Yes. You may sell finished blankets made from my pattern as long as MyCrochetory is credited as the original designer.
The written pattern and stitch chart may not be copied, translated, sold, or shared.
If you have any suggestions or have detected any mistakes, please feel free to email me at mycrochetory@gmail.com
This is stunning!! Thanks for sharing.
Thank you!
Is there maybe a video tutorial for this blanket? I have lost my heart on this one nd really want to make it but I am struggling. Please help me.
Hi,
Unfortunately there isn’t a video tutorial for this pattern but, if you think it would be helpful, PDF pattern contains the stitch chart.
I thank you for sharing now to find simarer thread in South Africa