Updated: 22 October 2024 by Sylwia (MyCrochetory)
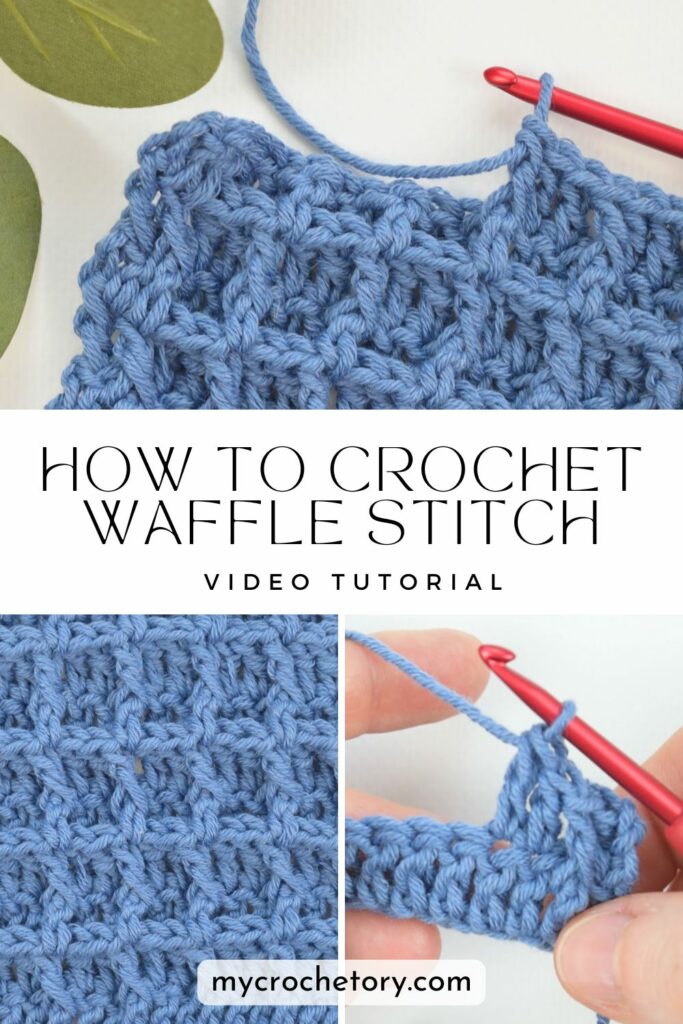
Learn how to crochet the waffle stitch crochet pattern with this friendly guide, including a video tutorial and step-by-step photos. Perfect for cozy projects!
Hello!
Today, I’m so excited to share with you the waffle stitch crochet pattern. This fun stitch creates an amazing texture that looks just like a cozy waffle.
It’s a great choice for many crochet projects, especially baby blankets, dishcloths, and baskets.
The waffle texture adds warmth and squishiness to any item, making it a popular choice among crocheters.
Before we get started, I have some exciting news! There’s a video tutorial available that shows you how to work waffle stitch crochet pattern step by step.
Along with the video, you’ll find written instructions with pictures to guide you through the process. These resources are perfect for visual learners and will make mastering the waffle stitch crochet pattern even easier.
What You’ll Need
First things first, let’s gather our supplies. You’ll need a crochet hook that’s suitable for your chosen yarn and some worsted weight yarn in any color you like.
Personally, I think a solid color really makes the waffle stitch crochet pattern texture stand out, but feel free to use whatever makes you happy.
Don’t forget to have scissors and a yarn needle handy for cutting and weaving in ends. Having everything ready before you start is always a good idea for a smooth crocheting experience.
Abbreviations:
- st(s) – stitch(es)
- ch – chain stitch
- dc – double crochet
- yo – yarn over
- FPdc – front post double crochet – yo, insert hook from front to back to front around post of indicated stitch; yo and draw up loop; [yo and draw through 2 loop on hook] twice. Skip stitch behind FPdc.
Waffle Stitch Crochet Pattern Notes:
- This stitch pattern is written in US crochet terms.
- The turning ch2 at the beginning of each row does not count as a stitch.
- The waffle crochet stitch pattern is a multiple of 3 plus 2 extra chains.
Watch the Waffle Stitch Crochet Pattern Video Tutorial
For those who prefer visual aids, there’s a video tutorial available that shows each step of the waffle stitch crochet pattern. Seeing the stitch in action can make it easier to understand, especially if you’re new to crocheting.
TIP: To view this video tutorial properly, please disable any ad-blocker you have running.
Plus, there are written instructions with pictures that offer a step-by-step photo tutorial. These images show exactly where to place your hook and how the waffle stitch crochet pattern should look as you go along.
Combining the video and photos can be super helpful in mastering this beautiful textured stitch.
Let’s Get Crocheting!
Now for the fun part – starting the waffle stitch crochet pattern. I’ll walk you through each step, sharing some tips along the way.
Starting with the Foundation Chain
The basic principle of the waffle stitch crochet pattern involves a combination of double crochet stitches and front post double crochets (FPdc).
To begin, make a starting chain that’s a multiple of three plus two extra chains.
For example, if you want to create a small sample with six waffle stitch repeats, you would chain 20 stitches. That’s 6 repeats times 3 stitches (18), plus 2 extra chains, totaling 20 chains.

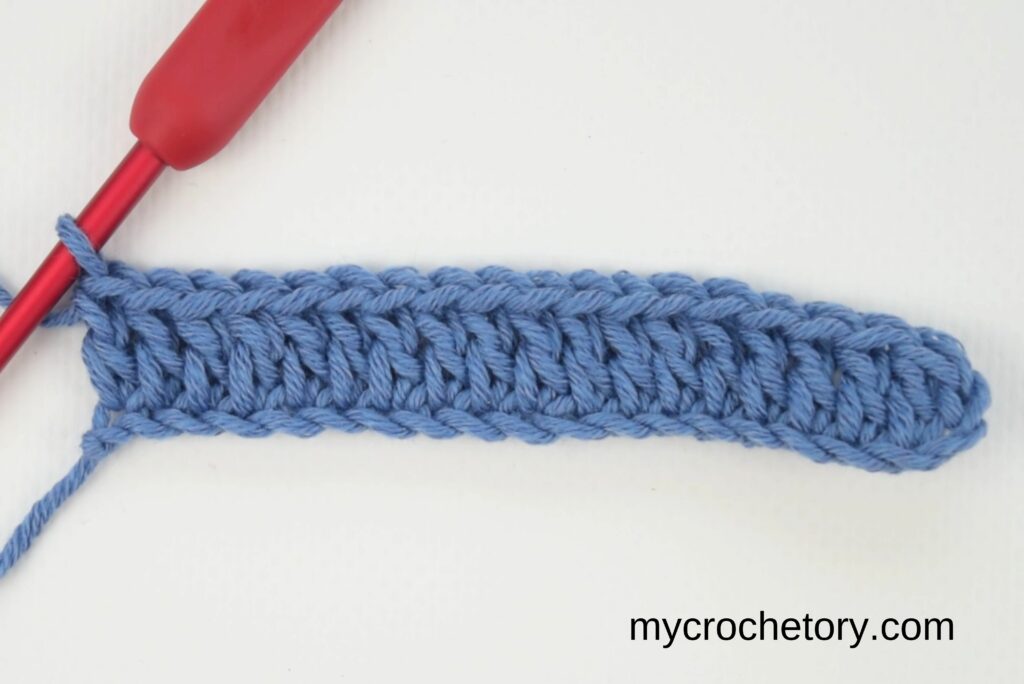
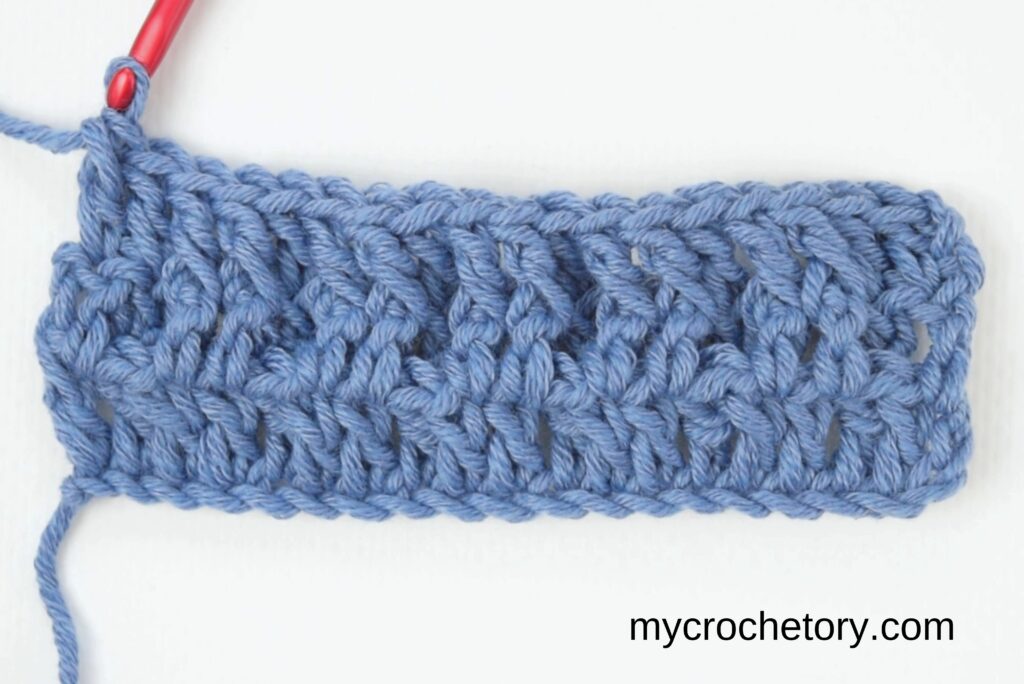
Row 1: Foundation Row
Start by making a double crochet (dc) in the third chain (3rd ch) from your hook.
Remember, the turning chain-2 at the beginning doesn’t count as a stitch in this pattern.
Continue to make one dc in each chain across the row.
By the end of this row, you’ll have a row of double crochets, which forms the foundation of your waffle stitch crochet pattern.
An Alternative Start: Foundation Double Crochet
If you sometimes find the traditional foundation chain a bit tight or tricky, there’s another method you might enjoy – the Foundation Double Crochet (FDC) technique.
This method creates the foundation chain and the first row of double crochets at the same time, giving your piece a bit more stretch at the base.
Rows 2 and 3:
Now, let’s create that lovely waffle texture.
Row 2:
Chain two (ch 2) and turn your work. The turning chain doesn’t count as a stitch.
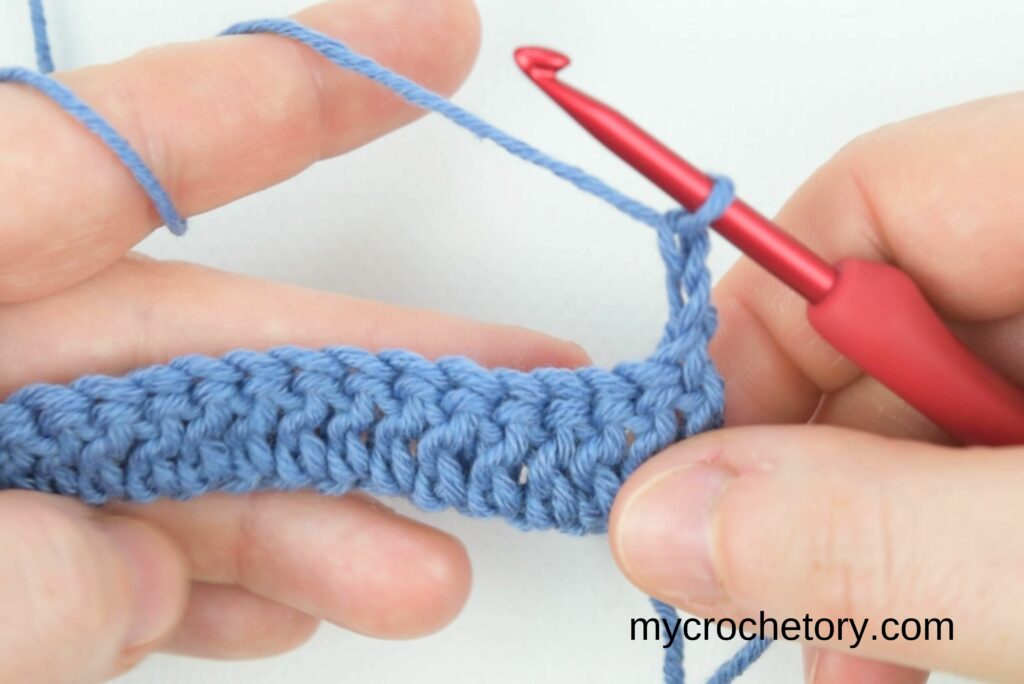
Work one dc into the first stitch.
Then, repeat the following sequence across the row:
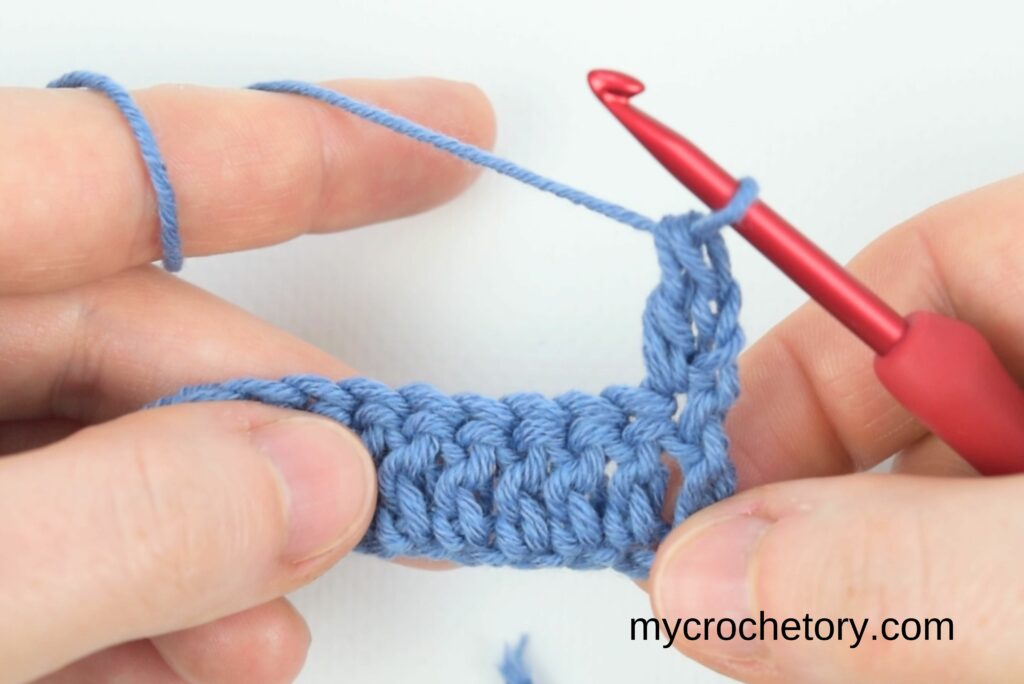
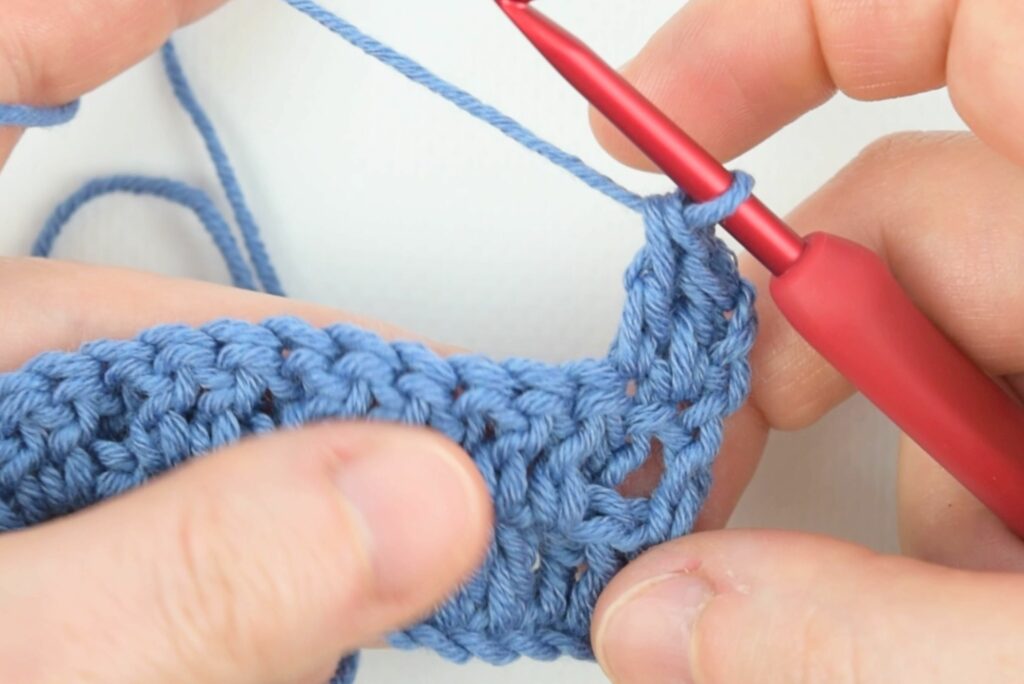
- Work one front post double crochet (FPdc) around the post of the next stitch.
- Work two dc stitches, one in each of the next two stitches.
Continue this pattern – one FPdc, then two dc stitches – across the row.
When you reach the end of the row, just work dc stitches into any remaining stitches.
This row sets up the alternating pattern that creates the waffle texture.
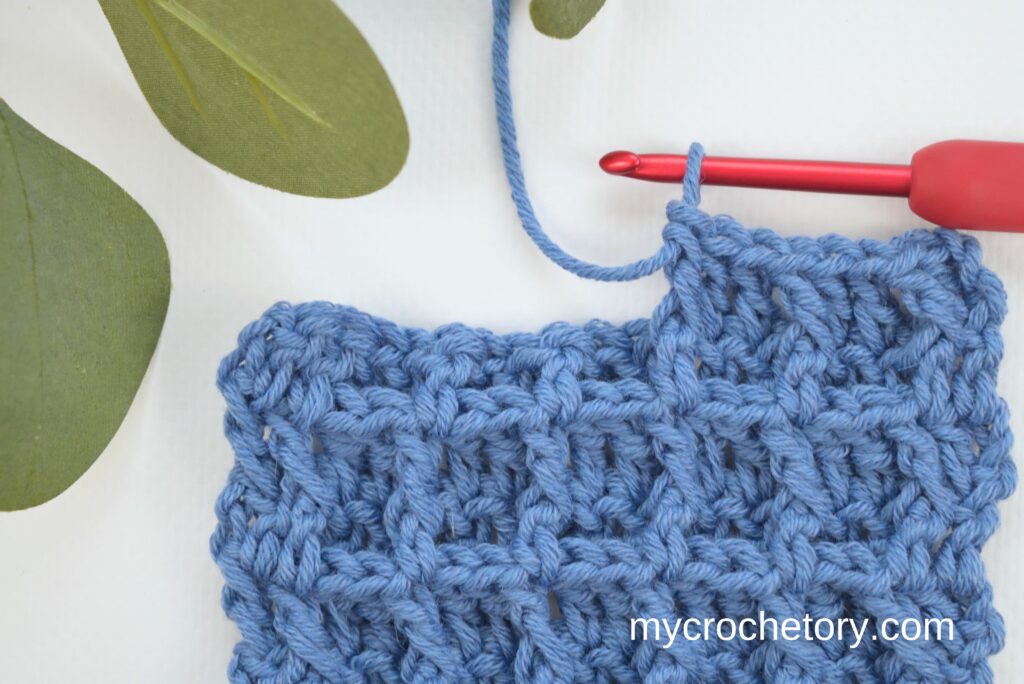
Row 3:
Chain two (ch 2) and turn your work. Again, the turning chain doesn’t count as a stitch.
Work one dc into the first stitch and another dc in the next stitch.
Next, you’ll repeat the following sequence across the row:
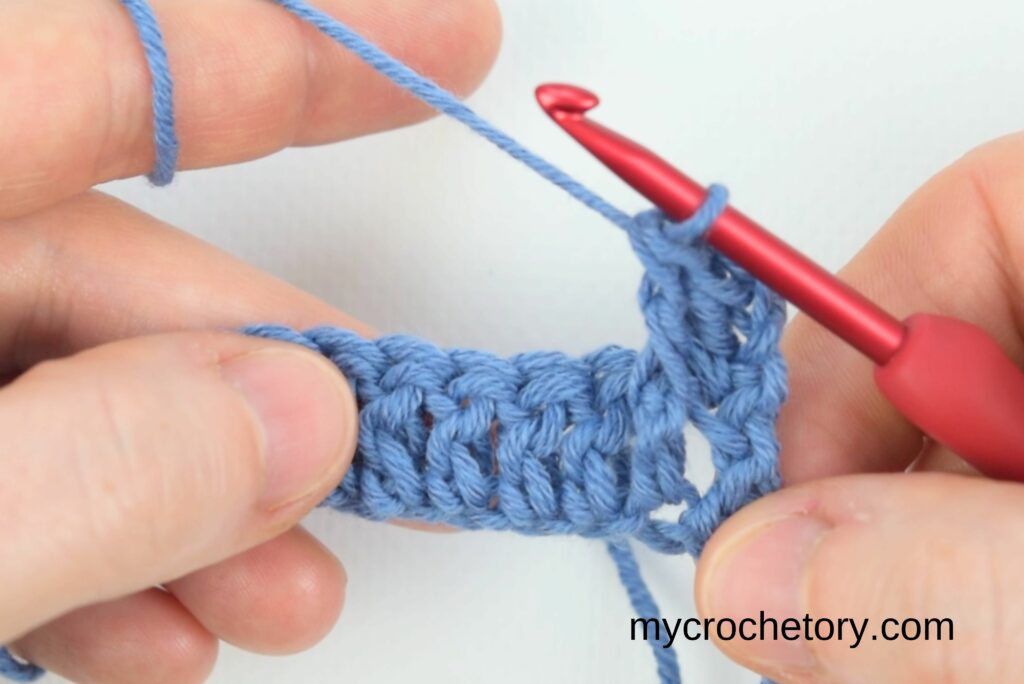
- Work FPdc around each of the next two stitches.
- Work one dc in next stitch.

Basically, you’re working a dc into each FPdc from the previous row, and a FPdc into each dc from the previous row.
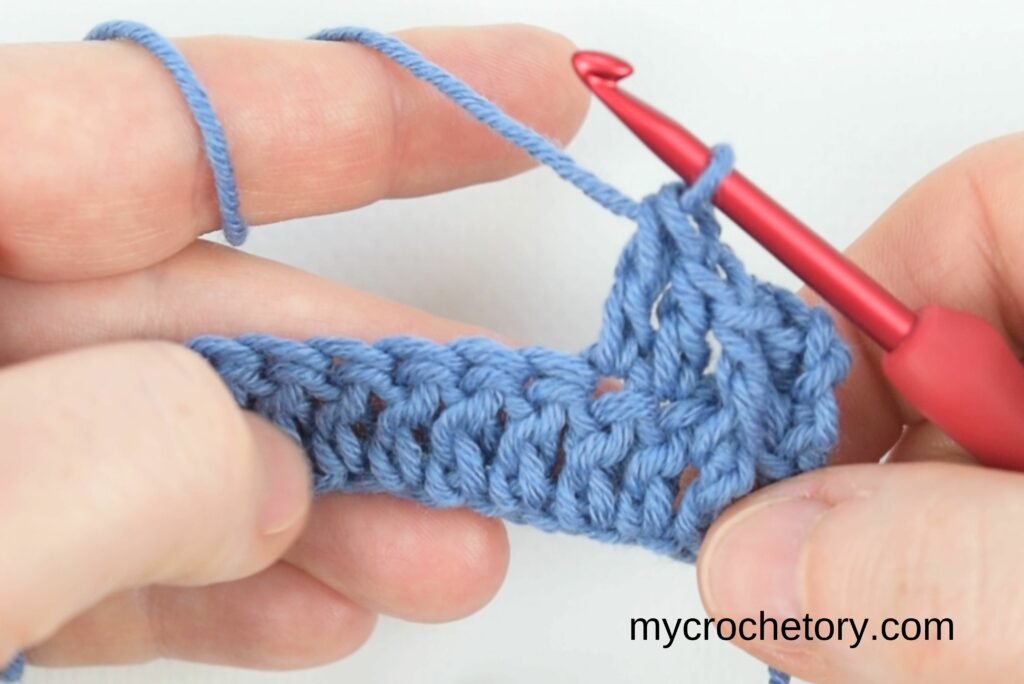
At the end of row, work a dc into the last stitch.
This back-and-forth creates that delightful waffle stitch crochet pattern we all love.
Keep It Going and Finishing Up
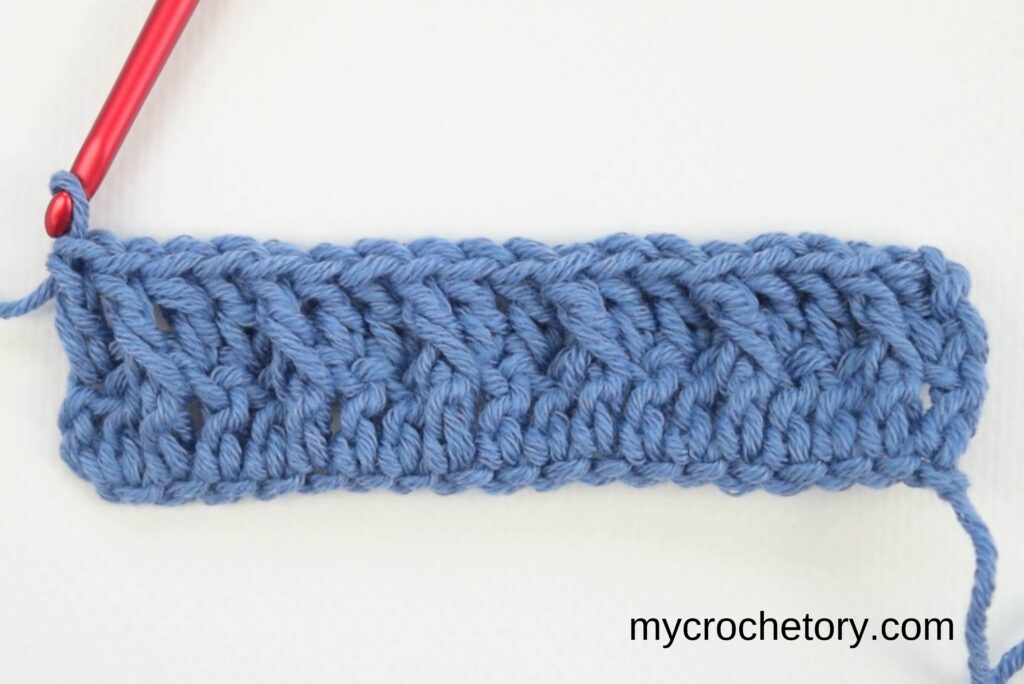
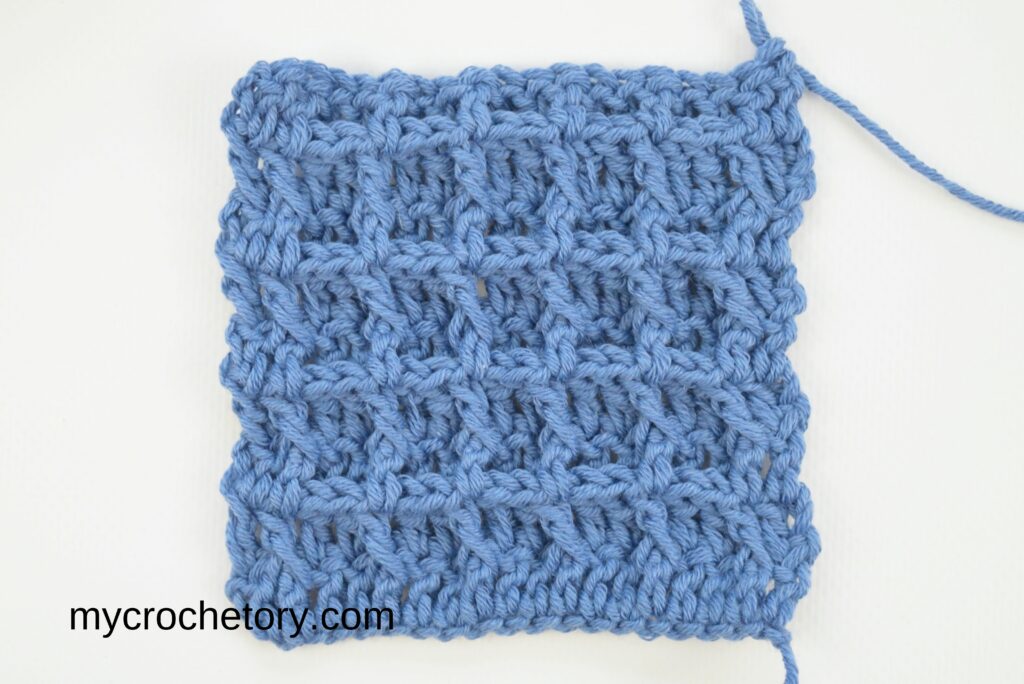
Simply repeat Rows 2 and 3 until your piece reaches the length you want.
As you continue, you’ll see the waffle texture forming beautifully on the right side of your work. It’s so satisfying to watch the pattern come to life row by row!

When you’re ready to finish your project, make sure your last row is a repeat of Row 3.
This keeps the waffle stitch crochet pattern looking consistent and balanced.
After completing the final row, cut the yarn, leaving a tail, and pull it through the loop on your hook to fasten off.
Use a yarn needle to weave in any loose ends securely. I always find this part satisfying because it gives the project a nice, finished look.
I absolutely love how the finished piece feels. The waffle stitch crochet pattern creates such a cozy and inviting fabric that’s hard to resist touching.
Handy Tips
While working on this stitch, I’ve picked up some helpful tips that I’d love to share.
First, it’s a good idea to count your stitches at the end of each row to keep your edges straight. It’s easy to accidentally add or miss a stitch, especially when you’re working with post stitches.
Also, keep in mind that the waffle stitch crochet pattern uses a lot of yarn because of its rich texture. Make sure you have enough yarn for your project so you don’t run out in the middle.
Feel free to experiment with different yarn types. While a solid color really shows off the texture, I’ve seen some stunning pieces made with variegated yarns. They can add a unique flair to your work.
If you’re new to post stitches, don’t worry! Practice makes perfect. There are plenty of video tutorials and step-by-step photos available online that can be really helpful.
Taking the time to master this waffle stitch crochet pattern is definitely worth it.
Fun Variations to Try
One of the best things about the waffle stitch crochet pattern is how versatile it is. There are so many ways to use this stitch in your projects, and you can even tweak the pattern to create different textures.
Mini Waffle Stitch
If you’re aiming for a tighter, more compact texture, the mini waffle stitch crochet pattern is a fantastic option. It’s perfect for washcloths, dishcloths, or any project where you want a denser fabric.
To crochet the mini waffle stitch:
- Foundation Chain: Start with a chain that’s a multiple of two plus two extra chains.
- Row 1: Work a double crochet in the third chain from the hook and in each chain across. Turn your work.
- Row 2: Chain two (does not count as a stitch), then alternate between one front post double crochet (FPdc) and one double crochet (dc) across the row. Turn your work.
- Row 3: Chain two, then alternate between one dc and one FPdc across the row. Turn your work.
- Repeat: Continue repeating Rows 2 and 3 until your piece reaches the desired length.
This stitch creates smaller waffle squares, giving your work a neat and tight appearance. It’s a fun twist on the traditional waffle stitch!
Double Waffle Stitch
For a chunkier texture with deeper ridges, try the double waffle stitch crochet pattern. It’s great for rugs, heavy blankets, or anything that needs a thicker fabric.
To crochet the double waffle stitch:
- Foundation Chain: Start with a chain that’s a multiple of four plus two extra chains.
- Row 1: Work a double crochet in the third chain from the hook and in each chain across. Turn your work.
- Row 2: Chain two (does not count as a stitch), then work the following sequence across the row: two FPdc, two dc. Turn your work.
- Row 3: Chain two, then work: two dc, two FPdc across the row. Turn your work.
- Repeat: Continue repeating Rows 2 and 3 for the pattern.
This variation creates larger waffle squares with more pronounced depth, adding a lovely texture to your projects. It’s perfect when you want something extra cozy!
These variations offer endless possibilities for your future projects. Whether you’re making a waffle stitch dishcloth or trying out a waffle stitch blanket pattern, the texture adds a special touch that sets your work apart.
Conclusion
The waffle stitch is a perfect choice for adding texture and warmth to your projects. It’s an easy pattern once you get the hang of it, and the result is a squishy crochet fabric that’s both cozy and stylish.
Whether you’re making a snug blanket, a textured dishcloth, or a sturdy basket, this stitch brings something special to your work. So grab your crochet hook and yarn, and start your next crochet project with the waffle stitch!
Remember, every new stitch you learn expands your creativity. I’m excited to see where this beautiful textured stitch takes you.
MORE CROCHET STITCHES
If you found this crochet waffle stitch tutorial helpful, you might also like posts:
- Herringbone Crochet Stitch Tutorial
- Crochet Moss Stitch Tutorial
- V-Stitch Crochet Stitch Tutorial
- Crochet Star Stitch Tutorial
- Clamshell Crochet Stitch Tutorial
- Basketweave Crochet Stitch
- How to crochet two rows of DC at the same time
Don’t forget to save this Pin for easy reference: 📌

We’d love to hear about your crochet adventures and see your beautiful creations. Drop a comment below sharing your thoughts, questions, or even your favorite crochet tips! Your voice adds a vibrant thread to our crafting community.
Sharing is caring! If you found this guide helpful, consider spreading the love. Click the share button and inspire other crocheters.
Stay in the loop with our latest crochet guides, tips, and inspiration. Subscribe to our newsletter for exclusive content straight to your inbox. Never miss a stitch—subscribe today!
Happy crocheting, and may your yarn always be tangle-free!
Join my Facebook Group and Official Ravelry Group where you can find necessary support, you can ask questions or share your finished projects.
You can also follow my Instagram, Facebook page and Pinterest.
I love the waffle stitch in your directions, but do you have a pattern for a waffle stitch cape like a poncho but open in the front?