
Updated: 18 September 2026 by Sylwia (MyCrochetory)
I ignored v stitch crochet for a long time. Not on purpose. It just never grabbed me.
Every time I saw it, it looked stiff. A little flat. Like something that only works in perfect photos. So I kept scrolling and picked other stitches instead.
What actually made the difference wasn’t the stitch itself. It was the yarn I used and how tight I was holding everything. Once I switched to a softer yarn and eased up my grip, the fabric looked completely different. Cleaner. Lighter. Much closer to what I actually wanted to make.
This tutorial is for that moment when a stitch should work, but something feels off. I’ll show you how I approach v stitch crochet, where beginners usually get stuck without realizing it, and what small details change how the fabric looks and feels.
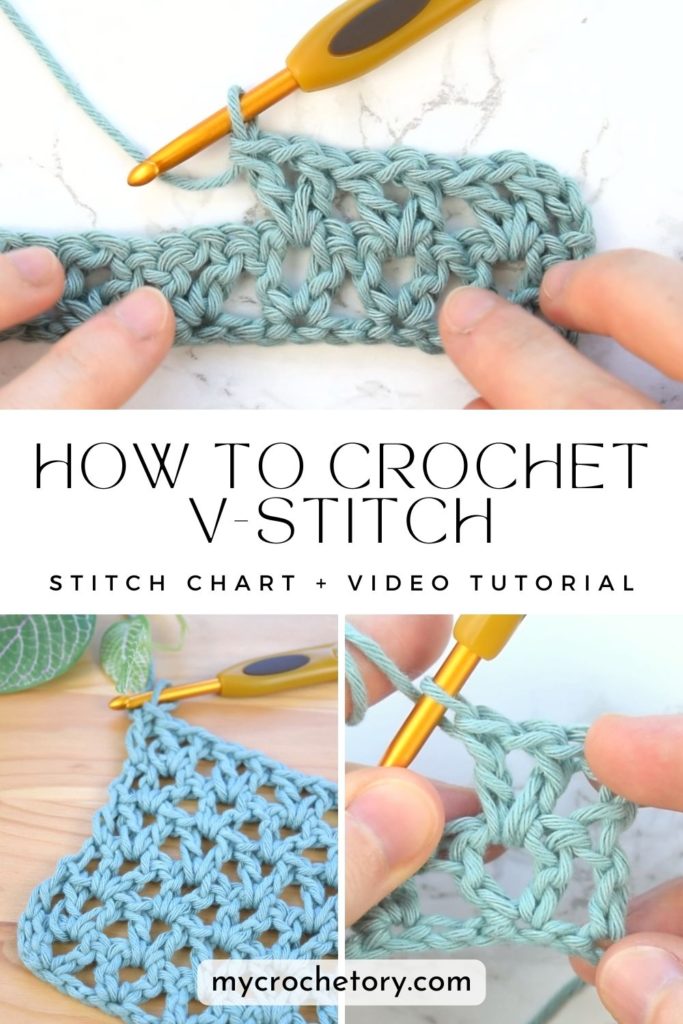
What Is V Stitch Crochet?
V stitch crochet looks simple on paper, but trust me, it reacts fast to how you actually work it.
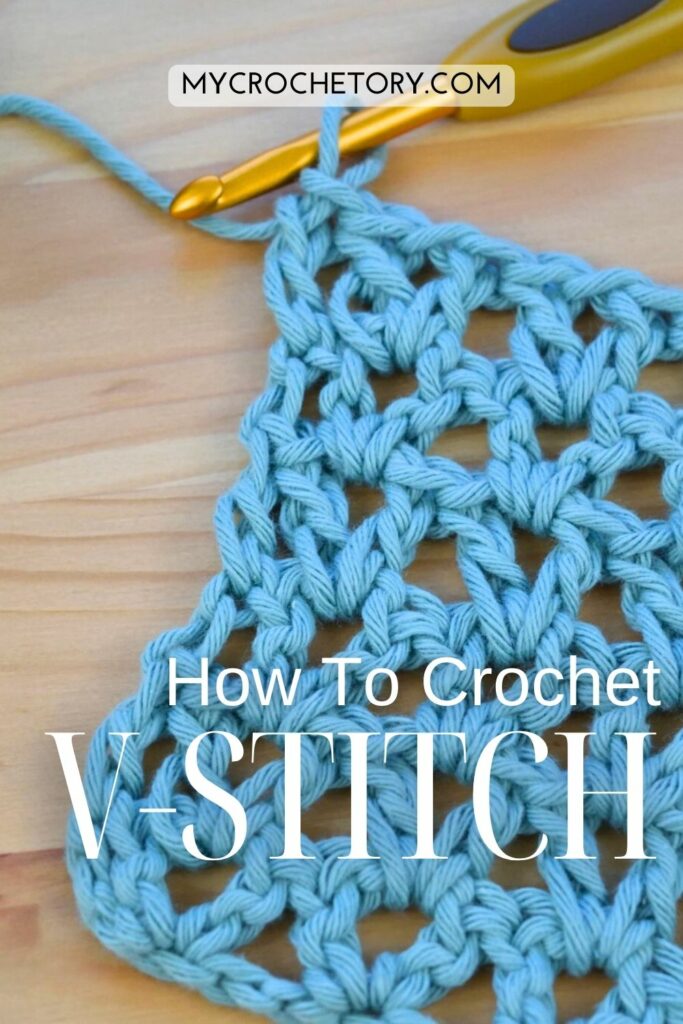
Here’s what’s happening: two double crochets with a chain between them, all worked into the same space. That chain is what gives you space in the fabric. Pull it too tight and you’ll watch that V shape close right in on you. Relax your tension, and the stitch definition just shows up clean.
You’ll notice tension issues with this stitch almost immediately, it’s honestly one of the most revealing stitches out there. Even a small change in your grip shows up fast in the fabric. Keep your tension even and you get clean, open rows. Hold too tight and your fabric turns stiff and uneven.
I reach for this one whenever I want movement and drape, think shawls, wraps, lightweight scarves. You’ll want to skip it for anything rigid or sharply shaped though, since softness matters more than structure here.
What You Need Before You Start
Honestly, you don’t need much to start v stitch crochet, and that’s exactly why it’s such a good one to practice on.
Grab smooth yarn if you can. Heavily textured yarn makes it harder for you to see where each stitch goes, especially in those first few rows. The clearer your stitch definition, the faster you’ll catch your own mistakes instead of noticing three rows too late.
Use the hook size on your yarn label as your starting point, don’t size up or down yet. Just keep your grip relaxed and your stitches even before you start playing with hook changes.
You really only need basic stitches for this. If you’re comfortable making a chain and a double crochet, you’re set. Still feel shaky on those? Check out my basic crochet stitches tutorial, it covers chain, double crochet, and a few other essentials without overcomplicating things.
That’s genuinely it. No special tools, no extra techniques, nothing beyond the basics.
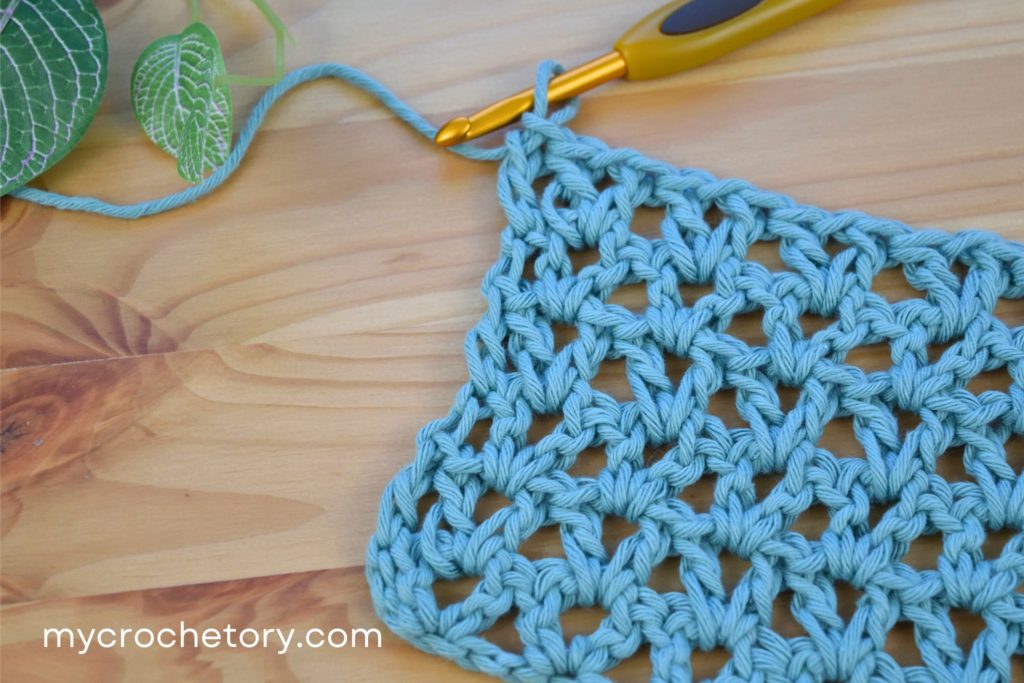
How to Crochet the V Stitch Step by Step
This is the point where v stitch crochet usually starts making sense to you.
Once you see the full repeat and work a few rows, the pattern gets way easier to follow, promise.
Start with a foundation chain in multiples of three. This keeps your V stitches lined up as the row grows.
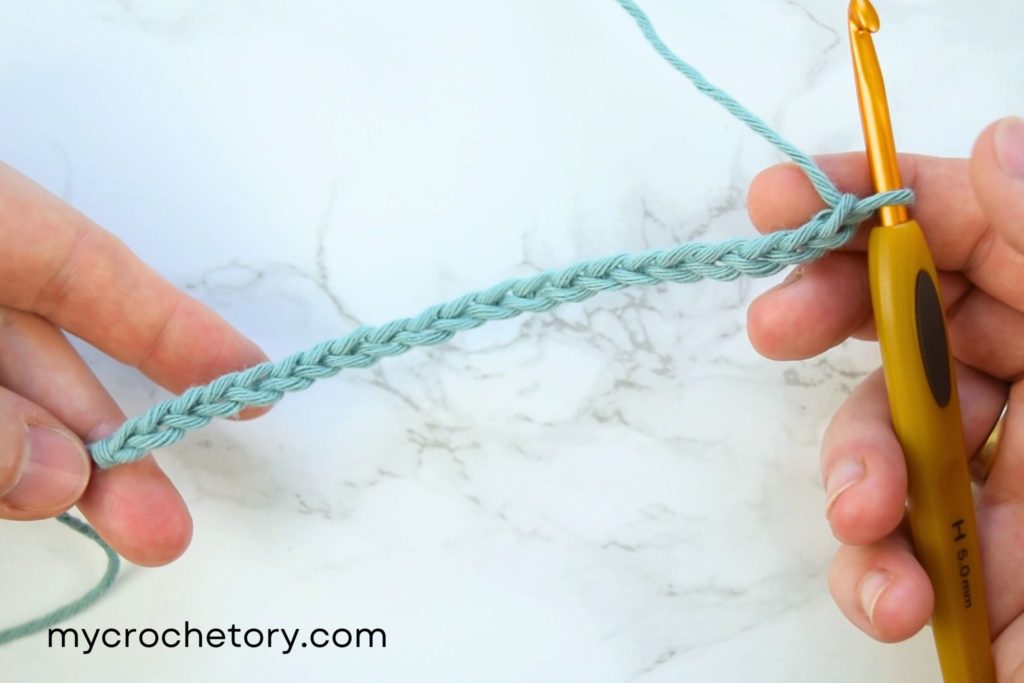
Your first V goes into the fourth chain from the hook. Work one double crochet, chain one, then another double crochet into that same chain.
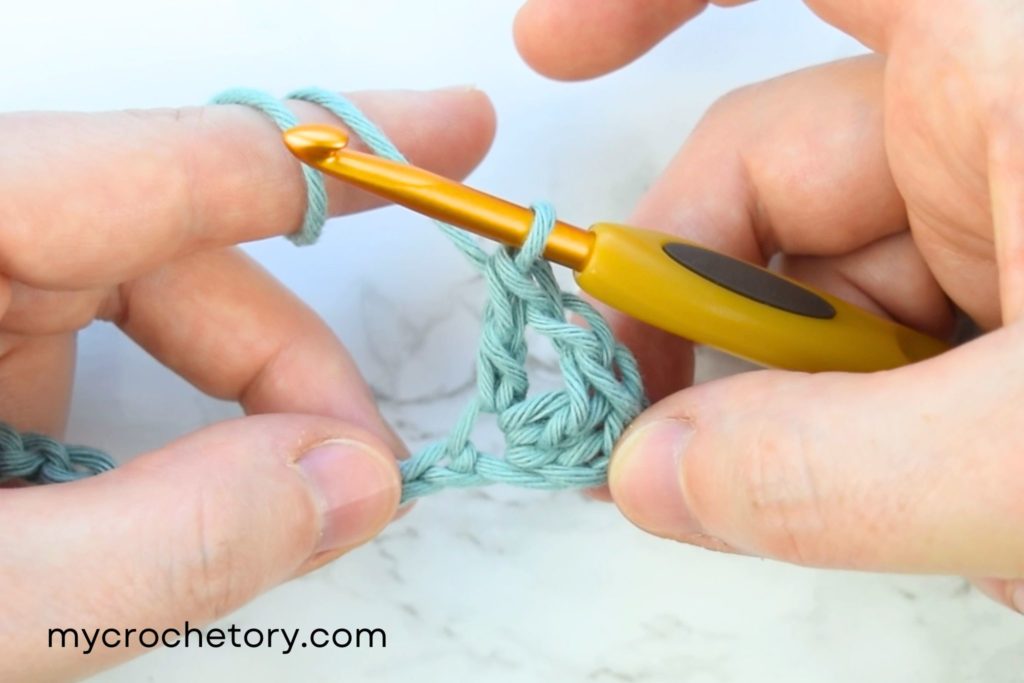
This is exactly where a lot of you tighten your grip without even noticing. If your hands start feeling tense, pause. Loosen up. Then keep going.
Skip two chains and repeat the V stitch across the row. The spacing might look uneven at first, and that’s completely normal. Finish the row before you decide anything’s gone wrong.
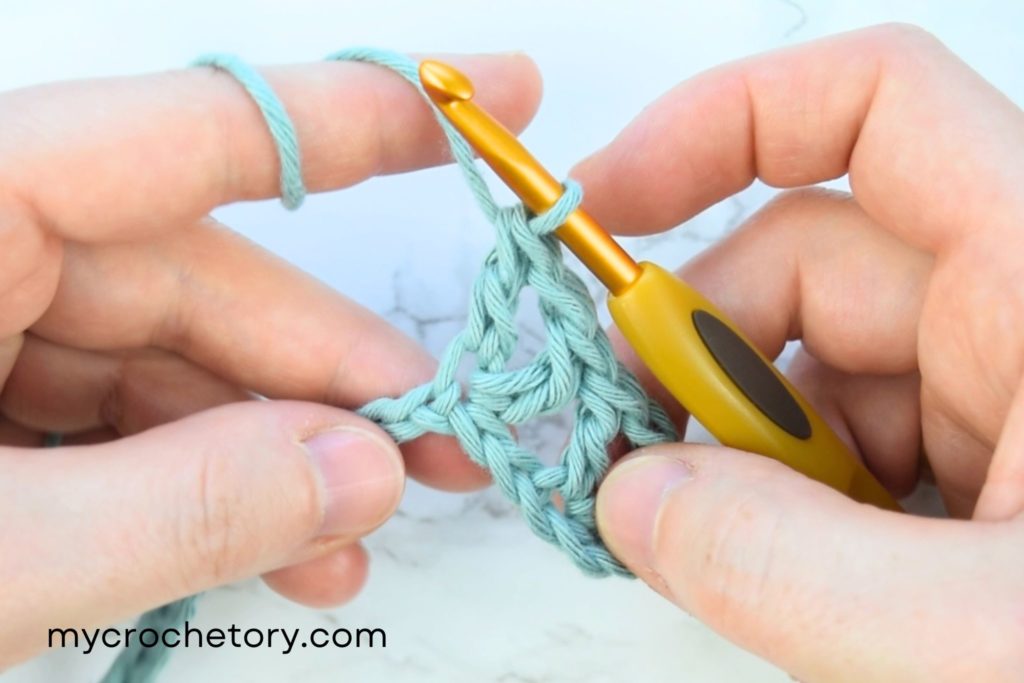
End the row with a double crochet in the last chain. Skip this stitch and you’ll likely see the edge lean as you add more rows.
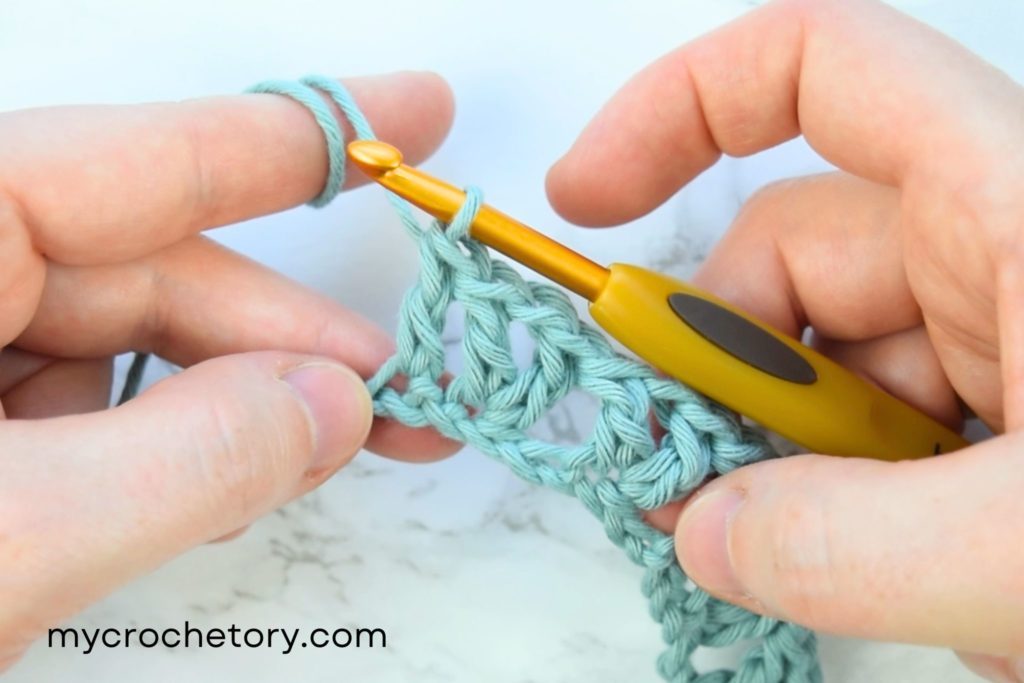
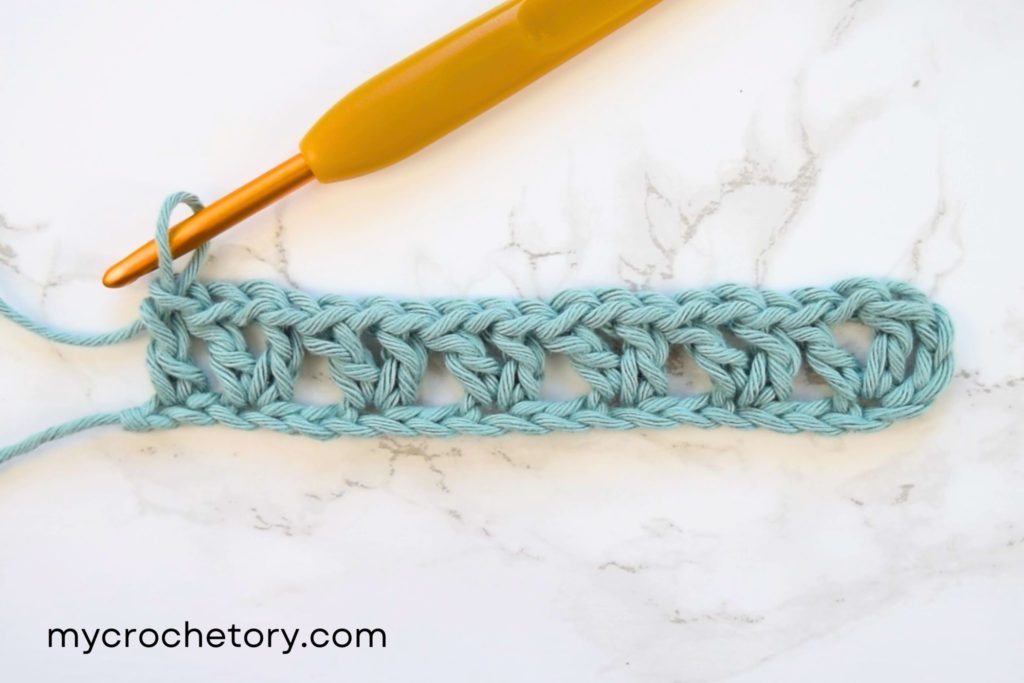
For the next row, start with a chain two. This chain counts as your first double crochet. Work the next V stitch into the chain one space from the row below. Place one double crochet, chain one, and another double crochet into that space.
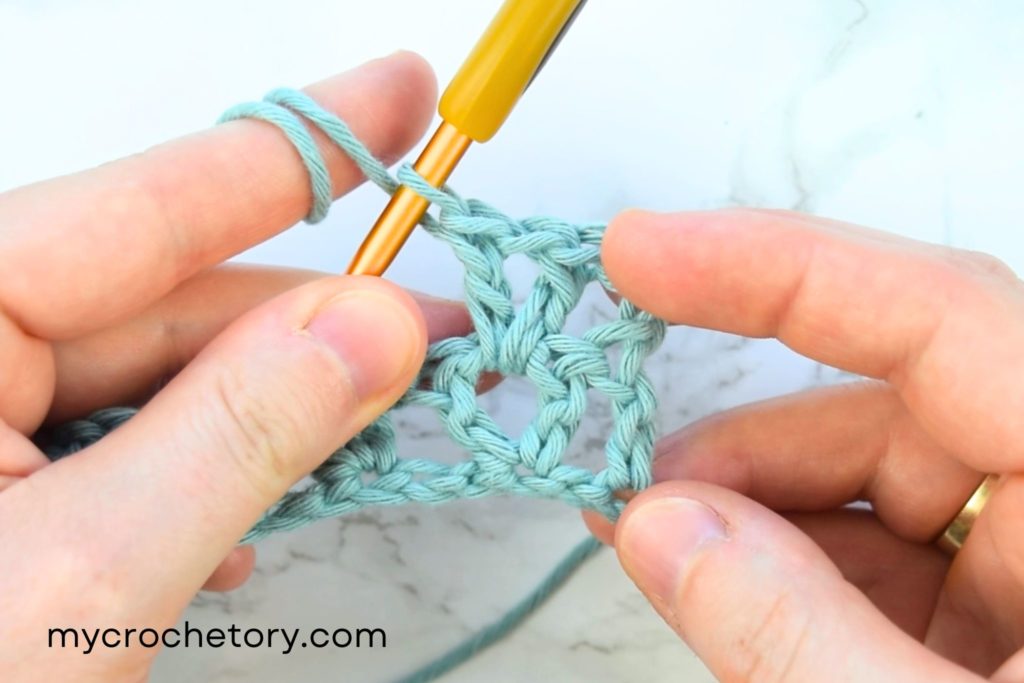
Repeat the V stitch in each chain one space across the row. This placement really is key, each V stitch belongs in the chain space, not into a stitch.
Stay consistent here and your rows stay even and the pattern stays clear.
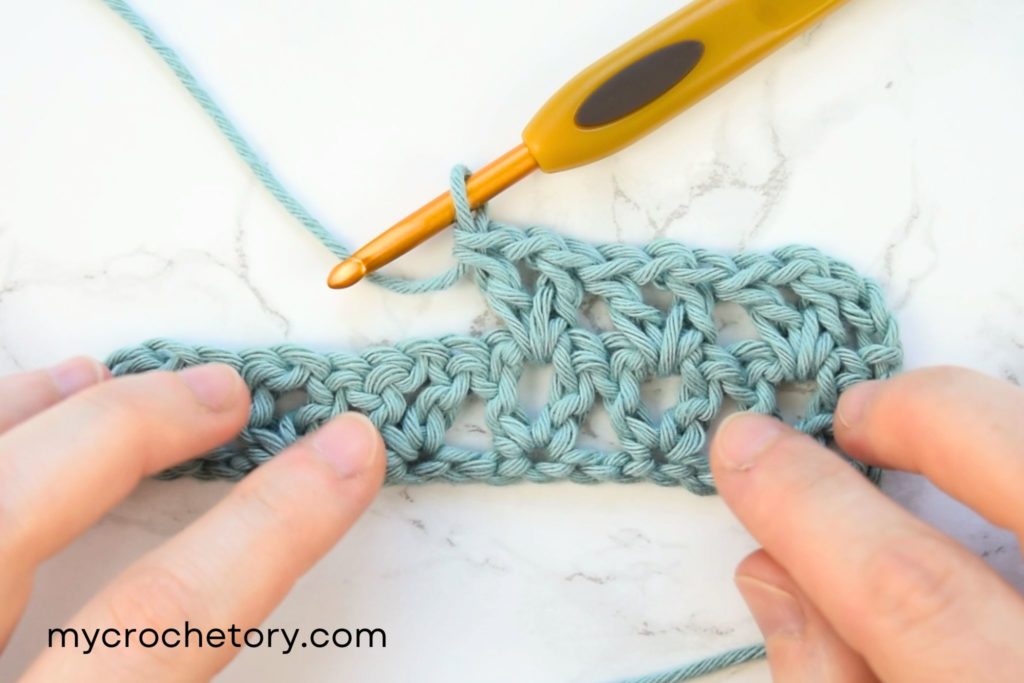
At the end of the row, work one double crochet into the top of the turning chain. Turn your work and repeat the same steps for the next row.
After a few rows, you’ll be able to spot the V shapes without counting every single stitch.
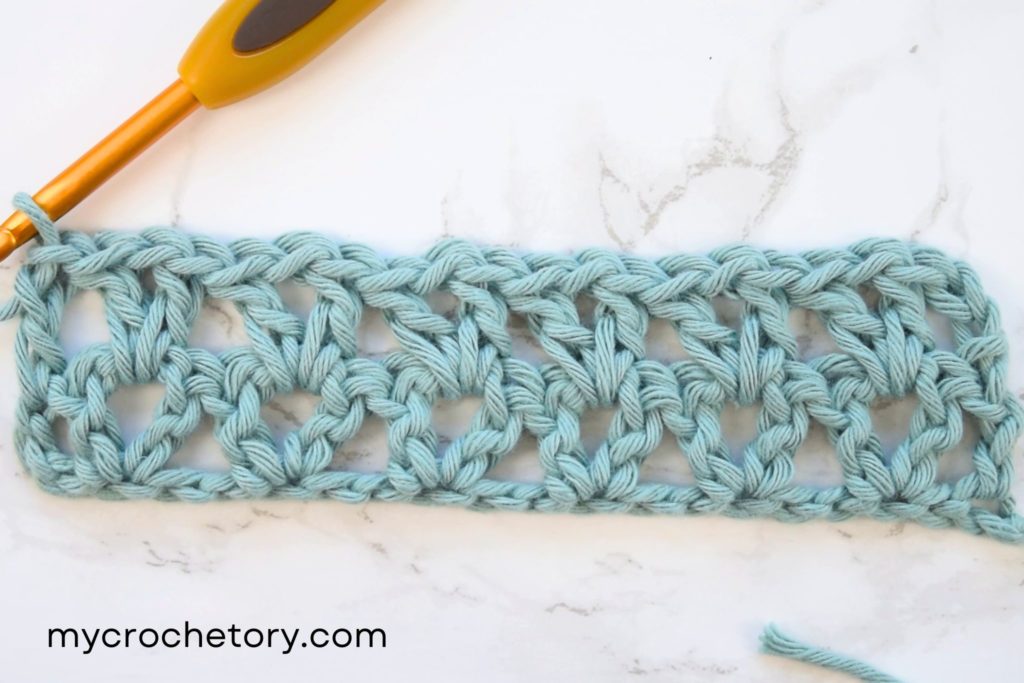
Photos can be a real help here too. Use them to check your stitch placement, chain spaces, and edge stitches. If something looks off, compare it to the previous row before you pull anything out. Small placement fixes solve the problem more often than you’d think.
How to Create V Stitch Rows Evenly
Uneven rows in v stitch crochet usually show up after a few repeats, not in that first row you make.
That’s exactly when small placement mistakes start piling up on you.
The biggest thing to check is where you’re placing each V stitch. Every single V belongs in the chain one space from the row below, not into a stitch, not around it, right into the chain space. Miss that spot even once and it can throw off your whole row.
Tension matters more here than speed. If your grip slowly tightens as you go, you’ll feel your rows start pulling in. Notice your hands getting tense? Pause, shake it out, reset before you keep going. Keep your tension even and those V shapes line up clean for you.
Your turning chains affect the edges way more than you’d think. Keep that chain two consistent at the start of every row. Change the height row to row and you’ll usually spot it later as a wavy or slanted edge.
Something looking uneven? Check your last completed row before you frog everything. Nine times out of ten, it’s just one misplaced V stitch. Fix that single spot and you’re usually back on track.
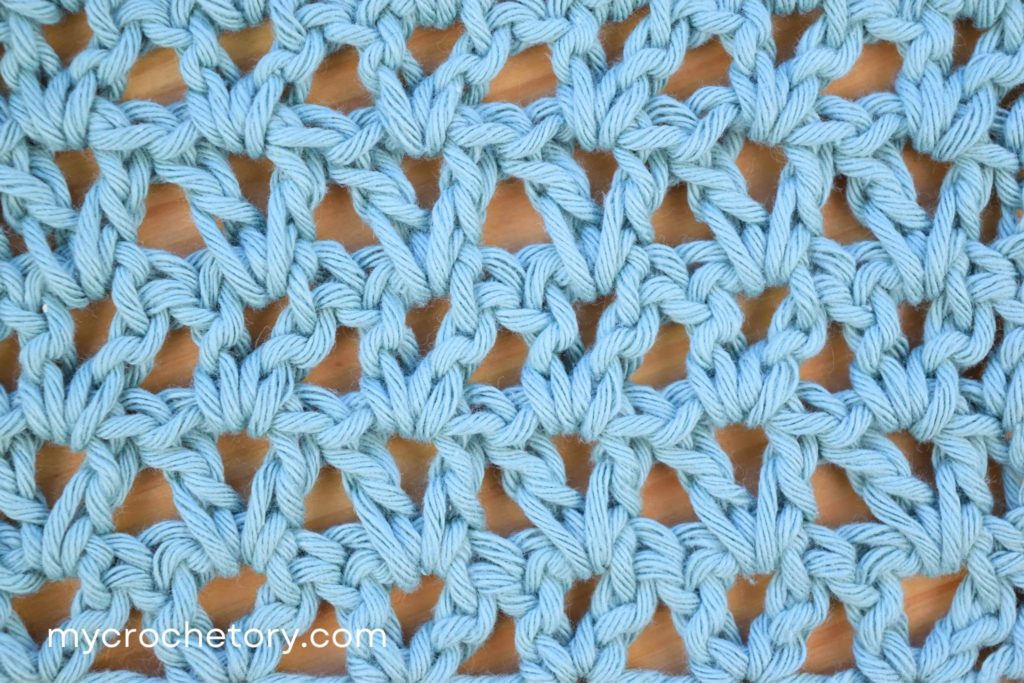
V Stitch Chart
Like having a visual guide nearby? The v stitch crochet chart can be really handy for you.
It shows how your V stitches line up from one row to the next. That makes it way easier for you to check placement, especially after a few rows, when everything starts blending together. A lot of you tell me you use the chart when something looks a bit off and you want to find the issue without pulling out your whole project.
You don’t have to crochet straight from the chart, by the way. It works best as a quick check.
One glance usually confirms your spacing, repeats, or edge stitches. Then you just keep going with the written steps.
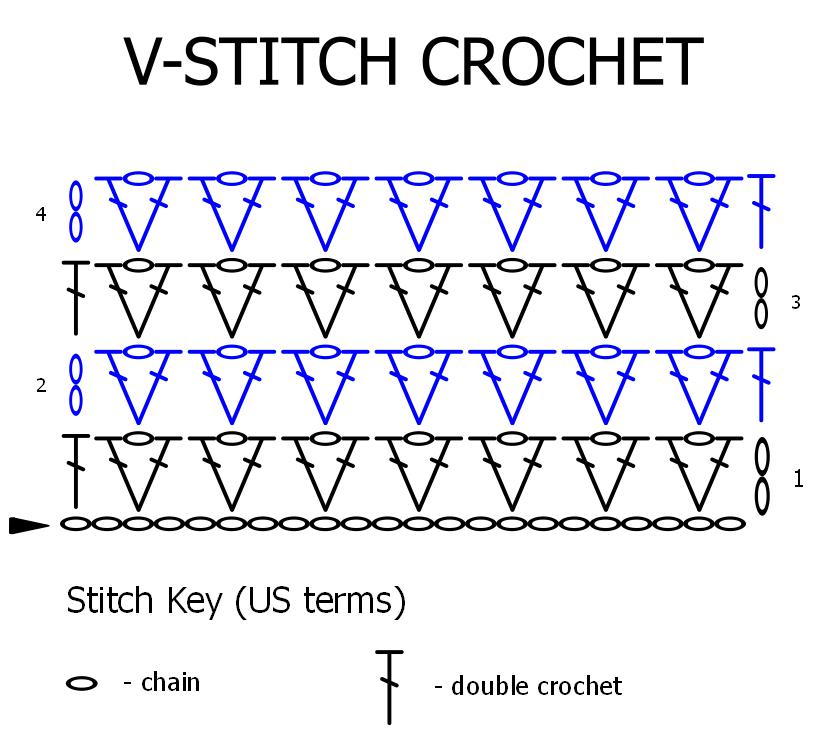
Stitch Key (US terms):
- ○ – chain (ch)
- T – double crochet (dc)
Prefer written instructions? Skip the chart completely, v stitch crochet works well either way for you. But if you like double-checking your work, or just feel more confident with something visual, keep the chart close by.
V Stitch Video Tutorial
Some things just click faster when you see them in action.
The video helps most with stitch placement and row changes. You’ll see exactly where my hook goes, how that chain one space looks, and how I finish the edges at the end of each row. Really handy if your rows start looking uneven and you can’t quite figure out why.
Use the video as a guide, not something you need to follow step by step. Pause whenever you need to. Rewind when something’s unclear. Watching one full row start to finish is usually enough to get you there.
If you learn better by watching than reading, the video backs up the written steps for you. It’s there to help you double-check placement, not rush you through the stitch.
Quick tip: if the video won’t load right, try turning off your ad blocker.
V Stitch Variations You Can Try
Once the basic v stitch crochet feels comfortable, small variations can change the whole look without changing much about the process. Same idea, different stitches. Each one gives you a slightly different fabric, good for different types of projects.
You don’t need to learn anything new here. Just focus on stitch height and spacing, that’s where the difference actually shows up.
Half Double Crochet V Stitch
This one gives you a denser fabric with less space between rows. Good option if you want more warmth or structure.
Start with a foundation chain in multiples of three. For the first row, chain two for the turning chain. Work one half double crochet, chain one, then another half double crochet into the third chain from the hook.
Skip one chain and repeat the same sequence across the row.
For the next row, chain two again. Work the same stitch sequence into each chain one space from the previous row. Keep going until you hit your length.
Treble Crochet V Stitch
This version gives you a taller, more open fabric. Works well for lightweight projects where drape actually matters.
Start with a foundation chain in multiples of three. For the first row, chain four for the turning chain. Work one treble crochet, chain one, then another treble crochet into the sixth chain from the hook.
Skip two chains and repeat across the row.
For the next row, chain four again. Work the same stitch sequence into each chain one space from the row below. Continue as needed.
No Space Double Crochet V Stitch
This one removes the chain space between stitches, giving you a tighter, more solid fabric.
Start with a foundation chain in multiples of six. For the first row, work two double crochets into the fourth chain from the hook. Skip one chain and repeat across the row. End with one double crochet in the last chain.
For the next rows, chain three. Skip two stitches, then work two double crochets between each V from the previous row. Repeat until you reach your desired length.
Double Crochet V Stitch with Picot
This version adds a decorative detail without changing the base structure at all.
Start with a foundation chain in multiples of three plus one. Chain three, which counts as your first double crochet. Work another double crochet into the fifth chain from the hook. Chain one, make a picot by chaining three and slip stitching into the first chain, then work another double crochet into the same stitch.
Skip two stitches and repeat across the row.
For the next row, chain three. Work the V stitch with picot into the chain space of each V from the previous row.
This variation adds a light decorative detail and works well when you want something simple but not plain.
Quick Notes Before You Choose a Variation
Each of these versions uses the same V stitch placement. Once you understand where the stitches go, switching between them feels pretty straightforward.
Not sure which one to use? Make a small swatch first. The difference between dense and open fabric becomes clear after just a few rows.t. The difference between dense and open fabric becomes clear after just a few rows.
Tips and Fixes for a Neater V Stitch
You don’t need perfect rows for v stitch crochet to look good, honestly. You just need to pay attention as you go.
Most small issues come from tension, not from you doing anything wrong. A lot of you start relaxed and then slowly tighten your grip without even noticing, it happens to almost everyone. Hands feeling tense? Stop for a second. Stretch your fingers out. Then keep going with a lighter grip. Even tension matters more than speed here, trust the process over rushing through it.
Placement is the next thing you’ll want to watch. Each V stitch goes into the chain one space from the row below. Stay consistent with that spot and your pattern stays clear, your rows line up nicely for you.
Your turning chains play a bigger role than you’d think too. Try to keep that chain two the same height every single time. Small changes row to row often show up later as edges that lean or look uneven.
Something looking off to you? Check your last row first. Most of the time, one stitch is just sitting in the wrong place. Fix that one spot and you’re usually good, no need to pull out half your work right away.
Fabric feeling tight or stiff? Tension’s almost always the reason. Loosen your grip a little and work one more row before you make any big decisions. V shapes drifting to one side on you? Check placement first. Edge leaning? Look at your turning chain and the final stitch of the row.
Taking a short pause to look things over before you frog anything can save you a lot of time. Most v stitch crochet issues have a simple fix once you know where to look.
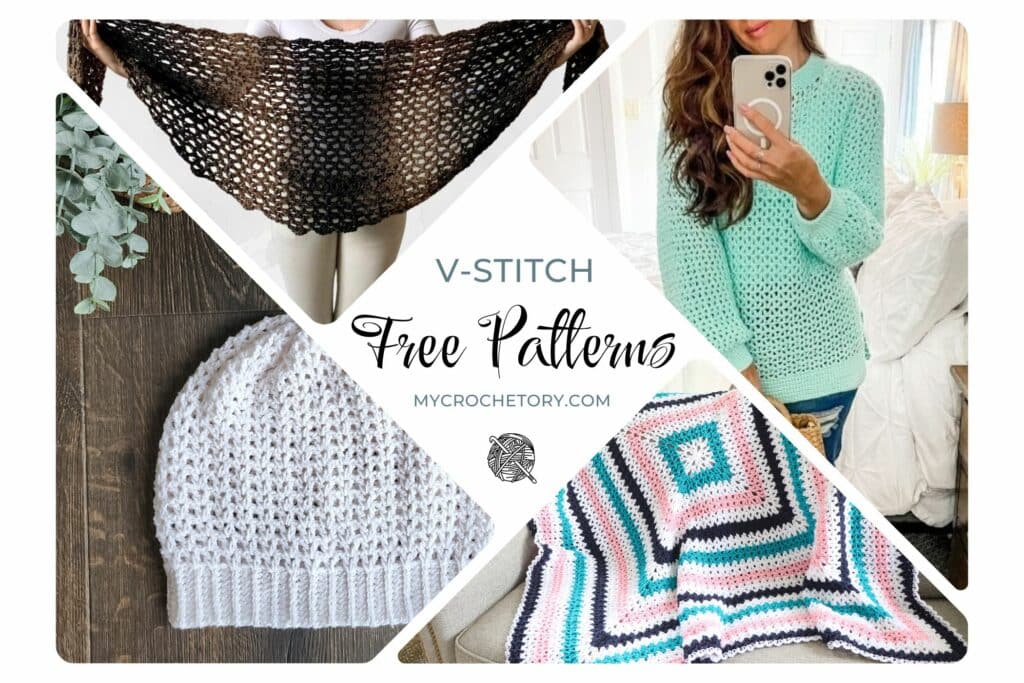
Projects You Can Make with the V Stitch
This is a stitch you’ll actually want to use again, not just test once and move on.
It works really well for projects where you want the fabric to feel light and easy. Shawls and wraps are a great place to start, this stitch gives you that nice drape without adding weight. Lightweight scarves are another good option if you want texture but not too much bulk.
Blankets are a great fit too. Your rows build up at a steady pace, which helps on bigger projects. The finished fabric feels soft and flexible, not thick or stiff.
You can use v stitch crochet for simple garments as well, think relaxed tops or easy layers. These stay comfortable to wear and never feel tight or restrictive. Just keep in mind this stitch works better for soft shapes than sharp, structured designs.
Want ideas before you pick your next project? Check out these free V stitch crochet patterns, seeing finished pieces makes it way easier to picture how the stitch will look in your own work.
Not sure where to start? Try something small first. A scarf or a simple wrap is usually enough to get a feel for the stitch and decide what you want to make next.
Frequently Asked Questions About V Stitch Crochet
Is v stitch crochet beginner friendly?
Yes. If you can make a chain and a double crochet, you’ve got what you need. Just take your time in those first few rows.
Why do my V stitches look uneven?
Usually comes down to placement or tension. Make sure each V goes into the chain one space from the row below and keep your grip relaxed.
What yarn works best for the V stitch?
Smooth yarn makes stitch placement way easier to see, especially while you’re learning. Heavily textured yarn can hide small mistakes and make the stitch harder to read.
Does v stitch crochet use a lot of yarn?
A bit more than very tight stitches, but nothing extreme. The open structure balances things out.
Can I use the V stitch for garments?
Yes, especially relaxed pieces and layers. The fabric stays flexible and comfortable, which works well for tops, wraps, and light cardigans.
MORE CROCHET STITCHES
If this v stitch crochet tutorial helped, you might like these too:
- How to crochet HERRINGBONE STITCH
- How to crochet MOSS STITCH
- How to crochet BASKETWEAVE
- How to DC 2 Rows at Once
- How to crochet CLAMSHELL STITCH
- How to crochet STAR STITCH
Don’t forget to save this Pin for easy reference: 📌
Made something using v stitch crochet? I’d love to see it, drop a photo in the comments or tag me on Pinterest.
Got a question about placement or tension? Ask away, I read every comment.
If this helped, sharing it helps other crocheters find it too. There’s a share button right below.
Leave a Reply