Updated: 26 January 2024 by Sylwia (MyCrochetory)
Learn how to crochet Clamshell Stitch with our step-by-step tutorial. Create stunning shawls and cozy blankets using this unique stitch. Follow our easy tutorial with photos and a VIDEO.

Join my Facebook Group and Official Ravelry Group where you can find necessary support, you can ask questions or share your finished projects.
You can also follow my Instagram, Facebook page and Pinterest.
Discovering the charm of Clamshell Stitch
Ready for a new crochet journey? Let’s explore the realm of the Clamshell Crochet Stitch, an eye-catching pattern that’s sure to charm your creative soul.
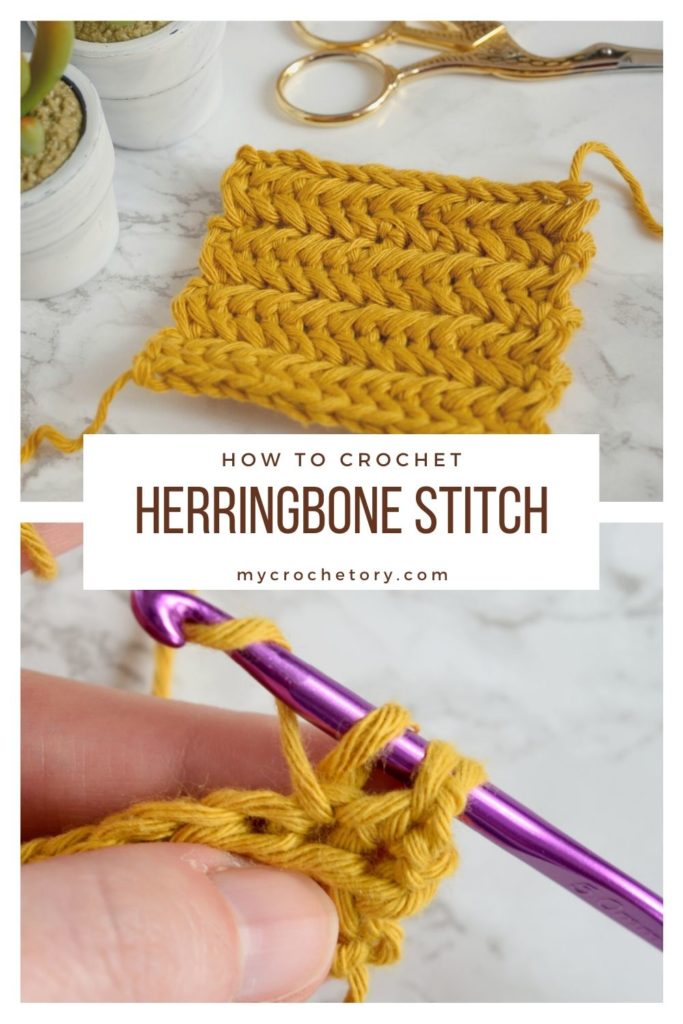
After the popularity of our Herringbone Stitch tutorial, we’re back with another stitch to add to your repertoire.
Let’s uncover the Clamshell Stitch secrets in this simple and enjoyable photo and VIDEO guide.
The Basics – Crocheting the Clamshell Stitch
Before we unleash our crochet hooks, let’s briefly understand the essence of the Clamshell Stitch.
Unlike its name, it’s not as complex as it sounds! This stitch, though it may seem intricate, is perfect for crafters of all levels.
If you have a basic understanding of crochet, you’re already on the right track.
The Clamshell Stitch in Action
With your crochet skills in hand, it’s time to infuse color and creativity into your projects.
The Clamshell Stitch might seem like a puzzle, but as you start stitching, the pieces come together to form a beautiful scalloped stripes pattern.
As you unravel this stitch, you’ll discover its potential for a symphony of hues that dance across your projects.
Endless Possibilities with the Clamshell Stitch
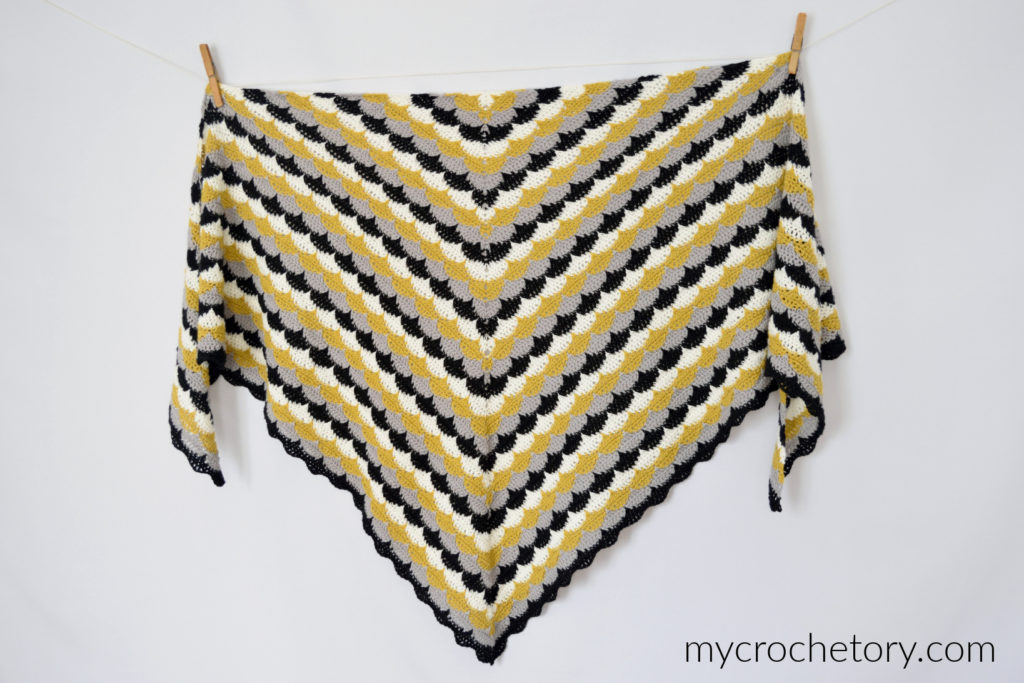
Imagine wrapping yourself in a vibrant Clamshell Shawl or adorning your home with exquisite pillow covers and blankets, all woven together with the charm of the Clamshell Stitch.
With this stitch in your repertoire, your creativity knows no bounds. Discover the joy of making, whether you’re a crochet veteran or a curious beginner.
Your Guide to Success – Tutorial, Pictures, and Video
Ready to get your hands busy?
Our step-by-step photo tutorial takes you on a journey through the Clamshell Stitch. Each image is a snapshot of creativity, guiding you through every loop and twist.
But that’s not all – we’ve also prepared a VIDEO tutorial to infuse life into the process, making learning even more enjoyable.
And for those who love visual aids, we’ve got a STITCH CHART to unravel the pattern at a glance.
Remember, it all starts with a single stitch, but it’s the journey that weaves the magic.

HOW TO CROCHET CLAMSHELL STITCH – VIDEO TUTORIAL
To learn how to crochet clamsgell stitch, watch the step-by-step video tutorial below and scroll down for the written instructions.
TIP: To view this clamshell crochet stitch video tutorial properly, please disable any ad-blocker you have running.
HOW TO CROCHET CLAMSHELL STITCH – PHOTO TUTORIAL
This tutorial uses American crochet terms.
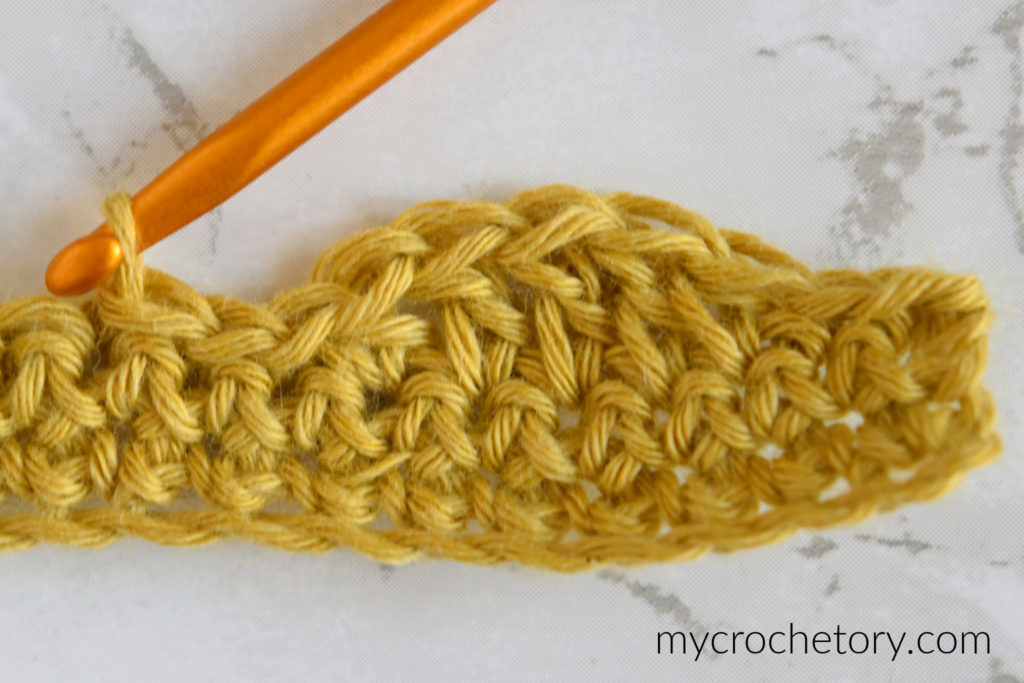
Using your first color of yarn, work a starting chain in multiples of 8 plus 2. For this tutorial I used 34 chains.

Row 1:
Work first single crochet in the second chain from the hook, and then work one single crochet in each chain across to the end. Turn your work.

Row 2:
Chain 1 (turning chain, do not count as a stitch). Work single crochet in each stitch across to the end. Turn your work.


Row 3:
Do not work a turning chain. Work slip stitch into the first two stitches. Then, work one half double crochet in the next stitch, double crochet in the next 3 stitches and half double crochet in the next stitch. Then slip stitch the next three stitches. After these stitches the pattern will repeat as you do 1 half double crochet, 3 double crochets, 1 half double crochet and 3 slip stitches. Continue this pattern until the end of the row, which finishes with one slip stitch into the last two stitches. At this point, you should change the color of your yarn. Turn your work.
SLST – slip stitch, HDC – half double crochet, DC – double crochet.


Row 4:
Chain 3 (counts as a double crochet). Work another double crochet in the next stitch, 1 half double crochet in the next stitch, single crochet in the next 3 stitches and then another half double crochet in the next stitch.

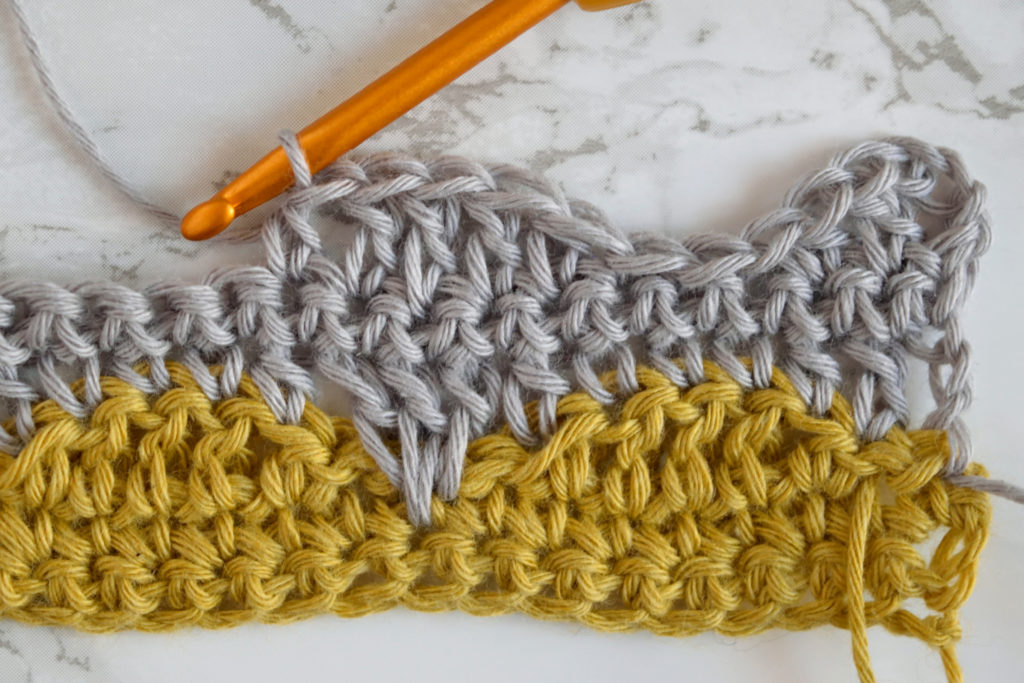
Next, we are going to make a Clamshell Spike. To make this skip the first slip stitch and work double crochet one row below the next slip stitch (into the single crochet of row 2 under this second slip stitch). The needle points at the right place.


Then, work a second double crochet right below your last double crochet – into the single crochet two rows below. The needle points at the right place. Make sure that your both double crochets have the same height.


To work the third double crochet of the Clamshell Spike, you have to put this stitch into exactly the same stitch that the first double crochet was placed. The needle points at the right place. Make sure your yarn does not cross at the back.


And now your Clamshell Spike is done!
After the Clamshell Spike you have to skip the next slip stitch and work one half double crochet in the next stitch. Then, work 3 single crochets and 1 half double crochet.


It’s time for a another Clamshell Spike, and then again 1 half double crochet, 3 single crochets and 1 half double crochet. Continue this pattern until the end of the row, which finishes with one double crochet into the last two stitches.


Row 5:
Chain 1 (turning chain, do not count as a stitch). Work single crochet in each stitch across to the end. Turn your work.

Row 6:
Chain 3 (counts as a double crochet). Work another double crochet in the next stitch. Then, work one half double crochet in the next stitch, slip stitch in the next 3 stitches and half double crochet in the next stitch. Then double crochet the next three stitches. After these stitches the pattern will repeat as you do 1 half double crochet, 3 slip stitches, 1 half double crochet and 3 double crochets. Continue this pattern until the end of the row, which finishes with one double crochet into the last two stitches. At this point, you should change the color of your yarn.


Row 7:
Chain 1 (turning chain, do not count as a stitch). Work another single crochet in the next stitch. Then, work one half double crochet. Now it’s time for a Clamshell Spike, just like we did before. Skip the first slip stitch and work a double crochet into the single crochet (Row 5) below the second slip stitch. Then work a double crochet into the single crochet two rows below (Row 4) right below the first double crochet you just made. Then work the last double crochet into the same place as the first double crochet was made (into the single crochet of Row 4 below the second slip stitch). The Clamshell Spike is now done.

After the Clamshell Spike you have to skip the next slip stitch and work one half double crochet in the next stitch. Then, work 3 single crochets and 1 half double crochet.
It’s time for a another Clamshell Spike, and then again 1 half double crochet, 3 single crochets and 1 half double crochet. Continue this pattern until the end of the row, which finishes with one single crochet into the last two stitches.

Row 8:
Chain 1 (turning chain, do not count as a stitch). Work single crochet in each stitch across to the end. Turn your work.

Next, repeat instruction for Row 3 – Row 8, changing the colors every three rows.


If you’d like to support me, please share this tutorial with others using the share buttons at the bottom of post and pin it to your Pinterest board.
Thank you for stopping by and Happy Crocheting!
Subscribe to my Newsletter and be the first to know about new patterns and design, tutorials and more!
Join my Facebook Group and Official Ravelry Group where you can find necessary support, you can ask questions or share your finished projects.
You can also follow my Instagram, Facebook page and Pinterest.
MORE CROCHET TUTORIALS YOU MIGHT LIKE
Love it! Thank you!
Beautiful thank you.🧶🍀
Thank you very much! Like very much this new, fantastic pattern.
Have a great weekend!
Marianne
Wonderful tutorial! Exactly what I had been searching for and hadn’t been able to find (or understand lol) in any crochet stitch books on my shelf. I truly appreciate the time and energy you’ve put in.
Thank you 👏🏼
Thank you for the close-up photos and detailed instructions. Makes it easier than a video that I have to keep stopping and backing up.