Updated: 1 April 2025 by Sylwia (MyCrochetory)
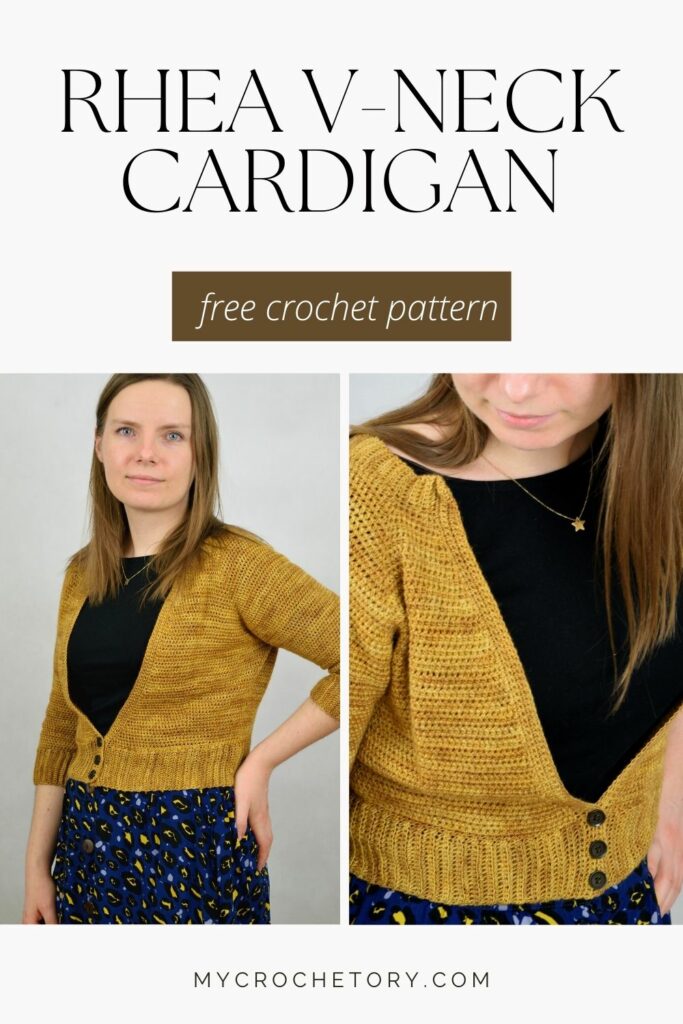
Crochet your next favorite piece: a cropped crochet cardigan pattern worked in one piece with raglan shaping and soft, wearable texture.
Scroll down to see the Rhea V-neck Cropped Crochet Cardigan pattern free or you may choose to purchase the ad-free, printable PDF crochet pattern HERE on ETSY or HERE on Ravelry.

Let’s be real — a lot of crochet cardigans look better in photos than they feel when you wear them. Either the sleeves pull weird, the fit is off, or the seams never quite sit right.
I’ve made those kinds of cardigans. I’ve also frogged them more times than I care to admit.
That’s why I designed this Rhea V-neck cropped crochet cardigan pattern — something that feels as good on your body as it looks on your blocking mat.
It’s light enough for spring, flattering with high-waisted anything, and (my favorite part) made in one piece from the top down. No front panels to seam. No sleeves to attach. Just clean shaping, a soft drape, and easy details that make a big difference.
This one’s for the makers who are ready to move beyond rectangles — but don’t want to be drowning in complex shaping, either.
Keep scrolling. I’ve packed this post with tips for getting a great fit, how to make the most of basic stitches, and what makes this cropped crochet cardigan pattern different from all the others in your bookmarks.

No Seams, No Stress — Just One Smooth Flow
This cropped crochet cardigan pattern starts at the neckline and flows all the way down — sleeves, body, and all. It’s worked as a single piece with no need to stitch together front panels, the back panel, or sleeves later. That alone makes it feel breezy and doable.
The trick is in the setup. You’ll begin with a clean foundation chain and use stitch markers to section off the raglan increases. Once you understand where your first st and last st land in each next row, you’re off and running. Or stitching.
Working this way keeps your stitch flow smooth. And finishing the cardigan? It’s just a matter of reaching that final row, no assembly required.

It’s All in the Shape (Raglan Magic)
Raglan shaping is one of those sneaky-simple techniques that gives your cropped crochet cardigan pattern a polished, wearable look — with hardly any fuss.
The shaping lines start at the neckline and guide the fabric outward, forming natural sleeve openings and that perfect drape through the shoulders.
It doesn’t matter if you’re working one of the larger sizes or something more fitted — this type of shaping adjusts easily. And since it happens row by row, you can control everything from the bust width to sleeve length with just a few well-placed increases.
There’s very minimal shaping needed beyond the raglan lines. Just a smooth rhythm, a steady stitch count, and your favorite crochet hook.

Back to the Back — Let’s Talk Short Rows
Have you ever finished a cardigan only to realize it rides up in the back or sits too high in the front? That’s where short rows come in.
This design uses them across the back panel, subtly adding extra height so the cardigan contours naturally around your shoulders.
Short rows can sound intimidating, but here, they’re gentle. You’ll work a few extra rows at the back neckline with easy turns. No fancy tricks, just a few non-decreasing rows and an extra rep row or two where it counts.
And if you ever want to tweak the fit more, you can add an extension row before the hem to get a bit of extra coverage. Comfort and flexibility, all in one go.

The Stitch That Changed My Cardigan Game
I wanted this cropped crochet cardigan pattern to have a clean, almost knit-like texture — soft and wearable, but still unmistakably crochet. So instead of standard hdc, I used half double crochet between the stitches.
It’s one small change, but wow — what a difference.
This technique creates smooth, subtle lines that stretch and move with you. It’s the kind of texture that works beautifully with lighter yarns, and it makes this cropped version ideal for warmer seasons.
If you’re new to it, check out my quick tutorial here. You’ll never look at basic stitches the same way again.

Style It Your Way — and Wear It Everywhere
I wear this cardigan constantly — over flowy dresses, with high-waisted jeans, even tossed over a tank top and shorts. The cropped length makes it easy to layer without bulk, and the neckline sits open and relaxed.
This cropped crochet cardigan pattern is written specifically for fingering weight yarn, which gives it that soft, breathable feel — perfect for spring and summer.
If you’re tempted to switch it up, just keep in mind that different yarn weight will change the drape and fit. And this design really shines in its intended form.
You can personalize your cropped crochet cardigan pattern too. Want longer sleeves? Add more rows. Prefer a looser fit? Work a few extra increases.
This one’s flexible enough to make it your own without rewriting the whole thing.
Pro Tips from Someone Who Frogged It First
Let me save you a little trouble — and a little yarn.
First: always do a gauge swatch. I know. But if your stitch count is off, everything else will be too. And with a top-down design, fit starts from the neckline — so it’s worth the few extra rows.
Mark your right side early, especially if you’re using blo hdc or blo sc for any detail work. Stitch placement matters here, from the 2nd ch to the next st and every last st in between.
When it’s time to add a new ball of yarn, use this invisible join method to keep things tidy. And for cleaner shaping, I always recommend the invisible decrease. You’ll be amazed at how it disappears into your rows.
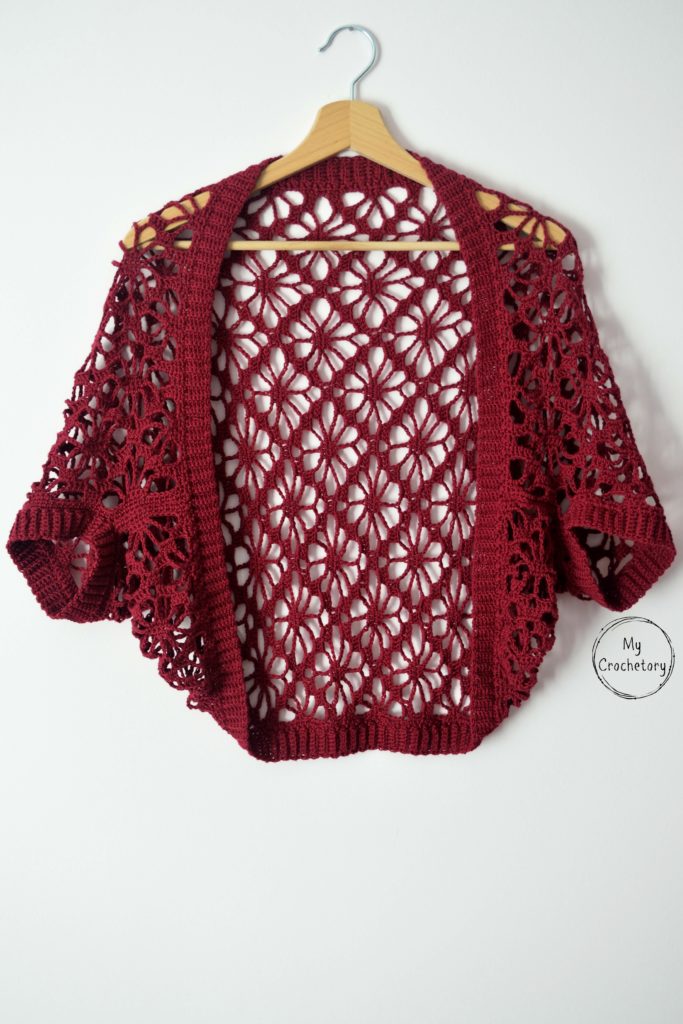
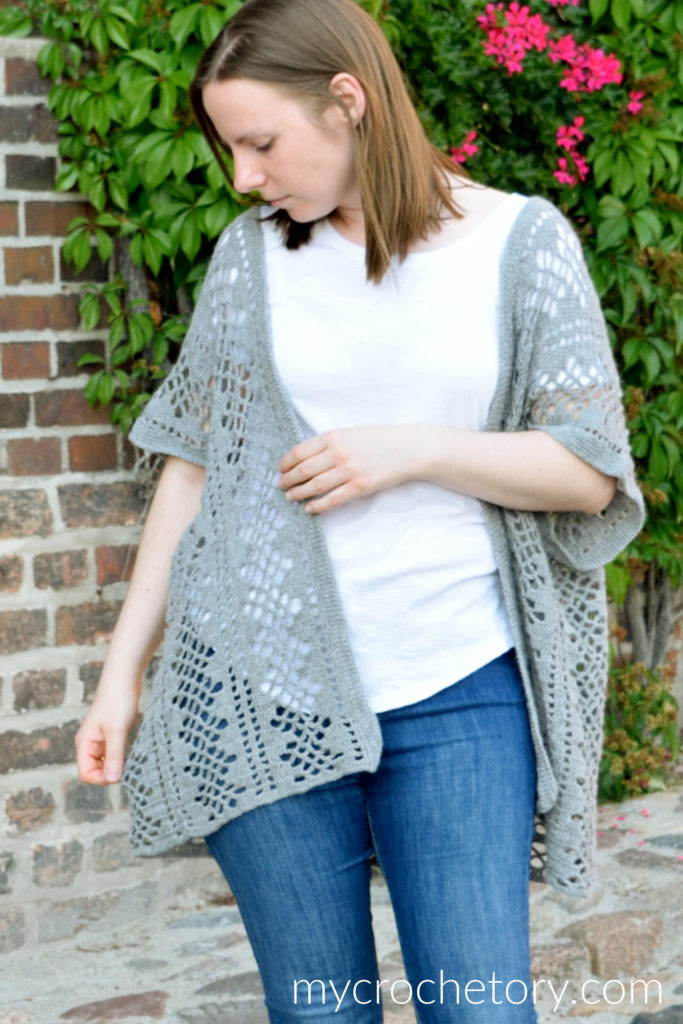
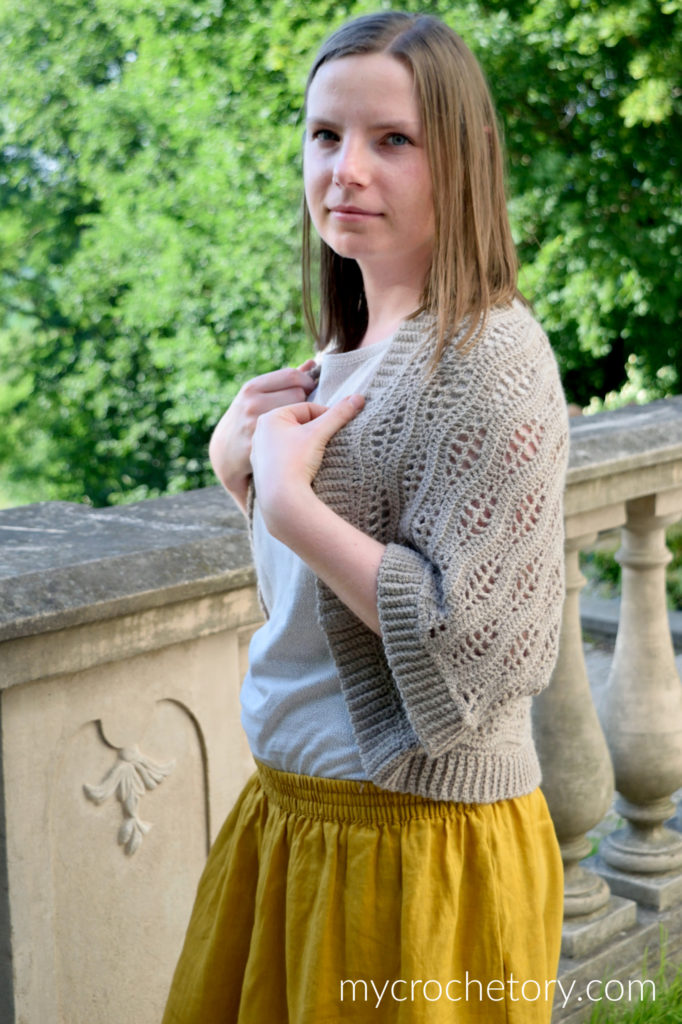
FREE CROCHET CARDIGAN PATTERNS YOU MIGHT LOVE
Let’s Make Something You’ll Love
So go find a safe place to spread out, curl up near your favorite heat source, and grab that tapestry needle, your yarn, and your hook. This is a great project for sharpening your skills, exploring modern cardigans, and maybe even learning something new about your own style.
Ready? Scroll down for the full free cropped crochet cardigan pattern, written in clear US crochet terms, with everything you need — from foundation row to final row.
And when you’re done, don’t forget to share your version and tag me. I love seeing your makes, and it’s a beautiful way to grow your account and celebrate your work.
Let’s do this.

RHEA V-NECK CROPPED CROCHET CARDIGAN PATTERN FREE
- Purchase the ad-free, printable PDF here on ETSY or here on Ravelry.
- Add this cropped crochet cardigan pattern to your Ravelry Queue HERE.
- Pin it for later.
Copyright 2018-2025 MyCrochetory. All right reserved. This pattern is property of Sylwia Kawczyńska @MyCrochetory. Please DO NOT sell the pattern and claim this pattern as your own. The pattern is for personal use only and may not be translated or reproduced in another language. Please respect my rights, DO NOT share or publish this pattern anywhere without my permission.
The cropped crochet cardigan pattern you make following this pattern is yours you are free to sell it, as long as you credit MyCrochetory as original designer. For more information, please, read Terms Page.
Materials & Tools:
- Yarn Slavicayarns Vesna 115g = 460m (504yds), 60% SW Merino, 20% Baby Alpaca, 20% Silk.
861(1011, 1105, 1148, 1259)(1385, 1493, 1658, 1752)m
942(1106.5, 1209, 1256, 1377.5)(1516, 1634, 1814, 1917)yds
Note that yardage may vary depending on yarn used, gauge variations or modifications.
- Hook size 3mm.
Adjust hook size if necessary to obtain correct gauge, - Tapestry needle (to weave and hide yarn ends),
- Scissors,
- Stitch markers,
- 3 buttons.
Skill Level:
Intermediate
Sizes:
1 (2, 3, 4, 5)(6, 7, 8, 9)
Finished measurements:
Measurements given are for the finished cropped crochet cardigan pattern. Recommended ease is -1 to 0”/-2.5 to 0 cm.
To pick your best size, measure your full bust and pick the finished bust circumference closest to that number.
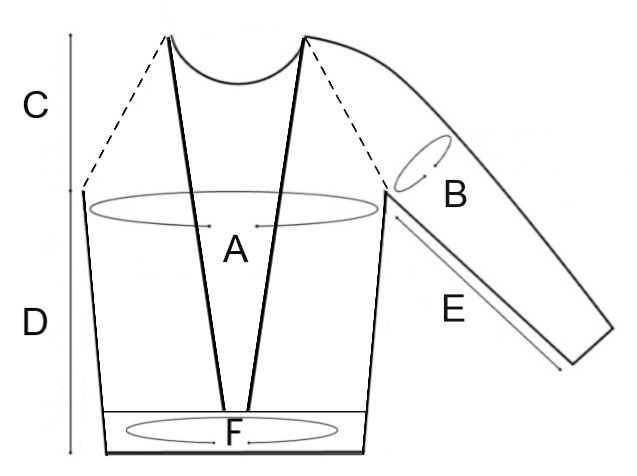
A: Bust circumference (including V-neck gap)
79(84, 89, 94, 99)(104, 109, 115, 120)cm
31(33, 35, 37, 39)(41, 43, 45, 47)”
B: Upper sleeve circumference
30.5 (31.5, 33, 34, 35)(38.5, 40, 42, 45.5)cm
12 (12.4, 13, 13.4, 13.8)(15.2, 15.7, 16.5, 18)”
C: Back neck to underarm
14.5 (15, 16, 16.5, 17)(18.5, 19.5, 20.5, 21)cm
5.75 (6, 6.25, 6.5, 6.75)(7.25, 7.75, 8, 8.25)”
D: Hem to underarm
22 (22, 23, 23, 24)(24, 24, 25, 25)cm
8.75 (8.75, 9, 9, 9.5)(9.5, 9.5, 10, 10)”
E: Sleeve length
27(27, 29, 29, 31)(31, 31, 33, 33)cm
10.5(10.5, 11.5, 11.5, 12)(12, 12, 13)”
F: Waist circumference
64(66, 70, 76, 78)(84, 86, 90, 96)cm
25(26, 27.5, 30, 30.5)(33, 33.75, 35.25, 38)”
Sample pictured is a size 4 on a model with a 37″[94 cm] bust, worn with 0″[0cm] of positive ease.
Gauge after blocking:
20 sts and 19 rows to 10 x 10cm (4 x 4”) using 3mm hook with hdc worked under three loops.
If necessary, adjust hook size to obtain the correct gauge.
General Notes:
- This cropped crochet cardigan pattern uses US crochet terminology.
- Cardigan is worked from the top down with raglan and deep V-neck shaping.
- Stitch marker placement: When instructed to place your marker, place on the last st worked unless otherwise instructed. It should lie on a stitch, not between stitches.
- The yoke is worked top down in rows.
- The lower body is worked top down in rows. You will then add the hem in rows, joining them to the body as you go.
- The sleeves are worked top down in unturned rounds. You will then add the cuffs in rows, joining them to the sleeves as you go.
- The length of the sleeves is easily adjustable.
- When only one number is given, it applies to all sizes.
- Instructions in square brackets […] are worked as many times as indicated.
Stitches & Abbreviations (US terms):
st(s) – stitch(es)
BOR – beginning of the row/round
BLsc – back loop only single crochet
yo – yarn over
hdc – half double crochet – yo, insert hook under three loops, yo, draw up a loop, yo, pull through all three loops.
hdc2tog (half double crochet 2 together) – yo, insert hook in next st, yo, draw up a loop, insert hook in next st, yo, draw up a loop, yo, pull through all 4 loops.
M – marker
PM – place marker
sp – space
sk – skip
beg – beginning
prev – previous
RS – right ride
WS – wrong side

FREE PATTERN
YOKE
Neckband
How to start your crochet project with a crochet ribbing TUTORIAL HERE.
With 3mm hook ch8.
Row 1: sc in second ch from hook, sc in each ch to end. Turn.
Row 2: ch1 (doesn’t count as a sc), sc in first st, BLsc across until last st remain, sc in last st. Turn.
You should have 7 stitches in each of neckband’s rows.
Repeat Row 2 75 (79, 80, 89, 90)(97, 102, 109, 129) times for a total of 77 (81, 82, 91, 92)(99, 104, 111, 113) rows.
Don’t join the first and last row and don’t break the yarn.
Marker set up (RS):
With 3mm hook make ch1 (does not count as a st) and sc in first neckband’s row, sc in next 4(4, 4, 5, 5)(6, 7, 7, 7) neckband’s rows, sc in next neckband’s row, PM, sc in next 13(14, 14, 16, 16)(17, 18, 20, 21) neckband’s rows, sc in next neckband’s row, PM, sc in next 37(39, 40, 43, 44)(47, 48, 51, 53) neckband’s rows, sc in next neckband’s row, PM, sc in next 13(14, 14, 16, 16)(17, 18, 20, 21) neckband’s rows, sc in next neckband’s row, PM, sc in next 5(5, 5, 6, 6)(7, 8, 8, 8) neckband’s rows.
These raglan markers indicate divisions between front right, right sleeve, back, left sleeve and front left sections.
After this row you should have (excludes 4Ms) 37(39, 40, 43, 44)(47, 48, 51, 53)sts on back, 13(14, 14, 16, 16)(17, 18, 20, 21)sts on each sleeve sections and 5(5, 5, 6, 6)(7, 8, 8, 8)sts on each front sections.
Next rows:
In this part of the yoke you will be working two sets of shaping AT THE SAME TIME: raglan shaping in each row and neckline shaping in every 4th row starting from row 1.
Row 1 (neckline shaping): ch2 (doesn’t count as a stitch here and throughout), hdc in first st, 2hdc in next st, [hdc in each st to next M, 3hdcs in M (reposition M to second made hdc)] rep until last M, hdc in each st until 2sts remain, 2hdc in next st, hdc in last st. Turn.
Row 2: ch2, [hdc in each st to next M, 3hdcs in M (reposition M to second made hdc)] rep until last M, hdc in each st to end. Turn.
Rows 3 – 4: Repeat Row 2
Repeat Rows 1 – 4 until Row 17(20, 23, 24, 26)(25, 28, 30, 31) ending with repeat of Row 1(2, 2, 2, 2)(1, 2, 2, 2).
After the last repeat of Row 1 or Row 2, you should have on back 71(79, 86, 91, 96)(97, 104, 111, 115)sts; on each sleeves: 47(54, 60, 64, 68)(67, 74, 80, 83)sts; on each front sides: 26(30, 34, 36, 39)(39, 43, 46, 47)sts, plus 4 raglan sts.
ALL SIZES EXCEPT FOR SIZE 5:
NEXT, you will be increasing just a sleeve sections, whilst continuing neckline shaping.
Next row: ch2, hdc in each st to next M working neckline shaping as necessary, 2hdc in M (reposition M to
first made hdc), hdc in each st to next M, 2hdc in M (reposition M to second made hdc), hdc in each st to next M, 2hdc in M (reposition M to first made hdc), hdc in each st to next M, 2hdc in M (reposition
M to second made hdc), hdc in each st to end working neckline shaping as necessary. Turn.
Work above Next row 4(2, 1, 0, -)(2, 0, 0, 2) more times.
After your last row, you should have on back 71(79, 86, 91, 96)(97, 104, 111, 115)sts; on each sleeves: 57(60, 64, 66, 68)(73, 76, 82, 89)sts; on each front sides: 27(31, 35, 37, 39)(39, 44, 46, 48)sts, plus 4 raglan sts.
ALL SIZES:
NEXT, you will be working JUST a neckline shaping.
Next row: ch2, hdc in each st to next M working neckline shaping as necessary, [1hdc in M (reposition M), hdc in each st to next M] rep until last M, 1hdc in M (reposition M), hdc in each st to end working neckline shaping as necessary. Turn.
Work above Next row 6(6, 5, 5, 6)(6, 8, 8, 6) more times.
After your last row, you should have on back 71(79, 86, 91, 96)(97, 104, 111, 115)sts; on each sleeves: 57(60, 64, 66, 68)(73, 76, 82, 89)sts; on each front sides: 28(32, 36, 38, 40)(41, 46, 48, 49)sts, plus 4 raglan sts.

SEPARATE BODY AND SLEEVES
Next the body and sleeves are separated.
NOTE: Continue to work neckline shaping every 4th row while working the following section.
Next row: ch2, hdc in each st to next M working neckline shaping as necessary, hdc in M (remove M), ch5(ch3, ch2, ch2, ch2)(ch5, ch3, ch2, ch2), sk all sts to next M, hdc in M (remove M), hdc in each st to next M, hdc in M (remove M), ch5(ch3, ch2, ch2, ch2)(ch5, ch3, ch2, ch2), sk all sts to next M, hdc in M (remove M), hdc in each st to end working neckline shaping as necessary. Turn.
LOWER BODY
Lower body is worked in rows of hdcs till work measures 14(14, 15, 15, 16)(16, 16, 17, 17)cm/ 5.5(5.5, 6, 6, 6.25)(6.25, 6.25, 6.75, 6,75)” from underarm.
When you come to underarm chains, work regular hdc in each chain until end of the underarm. Continue neckline shaping (every 4th row).
Row 1: ch2 (doesn’t count as a stitch here and throughout), hdc in each ch and st across to end working neckline shaping as necessary. Turn.
Repeat Row 1 9(6, 6, 6, 5)(7, 4, 4, 6) more times.
In the following section, you will be working two sets of shaping AT THE SAME TIME: continue neckline shaping (every 4th row) and waist shaping.
You can also continue to work without waist shaping.
Waist shaping pattern:
Row 1 (decrease row): ch2 (doesn’t count as a st), hdc in each st across to end working neckline shaping as necessary and working six decreases (hdc2tog six times) evenly. Turn.
Row 2 – 3: ch2, hdc in each st across to end working neckline shaping as necessary. Turn.
Repeat Rows 1-3 4(5, 6, 6, 7)(6, 7, 8, 7) more times.
SIZE 5, SIZE 6, SIZE 8, DON’T WORK FOLLOWING SECTION UNTIL HEM.
Next row: ch2 (doesn’t count as a st), hdc in each st across to end working neckline shaping as necessary and working two decreases (hdc2tog two times) evenly. Turn.
Repeat above Next row 1(1, 0, 0,-)(-, 0, -, 0) more times.
HEM
How to add a crochet ribbing at the end TUTORIAL HERE.
The hem is worked in rows and attached to the body as you go. Continue with 3mm hook.
With RS facing you.
Row 1: ch17, starting with 2nd ch from hook, work 1 sc in each ch back to edge of main body. Join to the next st of the edge of main body using slst and work one more slst in the next st of main body (2 slst(s) in total for joining) plus make ch1. Turn.
Row 2: Starting from 4 st from hook, work BLsc in each st across. Turn.
Row 3: ch1 (does not count as a st), BLsc in each st across [16sts]. Join to the next st of the edge of main body using slst and work one more slst in the next st of main body (2 slst(s) in total for joining) plus make ch1. Turn.
Repeat Rows 2-3 until your hem is joined to the entire lower edge. Don’t fasten off.
Buttonhole band
Turn a quarter, ch1 (dosn’t count as a st) and work with sc evenly along the first front edge up to neck opening, turn.
Next row (WS): ch1, sc across until the bottom. Turn.
Buttonhole row (RS): ch1, sc in next 2sts, ch2, sk next 2sts, sc in next 4sts, ch2, sk next 2sts, sc in next 4sts, ch2, sk next 2sts, sc in each st to neck opening. Turn.
Next row (WS): ch1, sc in each st working 2sc in each ch-2sp across until the bottom. Turn.
Next row (RS): ch1, sc across until neck opening. Turn.
Fasten off.
Button band
With RS facing, attach the yarn at the neck opening of the second front edge and work with sc evenly up to the bottom, turn.
Next Row: ch1 (doesn’t count as a st), sc in each st across. Turn.
Repeat last row three more times.
Fasten off.
SLEEVES (Both worked the same):
Sleeves are worked in one continuous spiral of hdcs.
With RS facing you, attach main Yarn with sl st in a central space in the underarm to begin working around.
Round 1: ch1, sc in same ch as join, place BOR marker, hdc in each ch and st around (don’t join the round)
Continue with Round 1making one hdc2tog decrease round every 4th round 4(4, 5, 5, 5)(5, 5, 6, 6) times, then every 3th round 4(4, 4, 4, 5)(5, 5, 5, 5) times. Reposition BOR as you go.
Work rounds of hdc and decreases till work measures 19(19, 21, 21, 23)(23, 23, 25, 25)cm/ 7.5(7.5, 8.25, 8.25, 9)(9, 9, 9.75, 9.75)” from underarm (or 8cm/3” short of desired length of the sleeve).
DON’T fasten off and DON’T cut the yarn. The chain 17 that begins the cuff originates from attached yarn point.
CUFF
How to add a crochet ribbing at the end TUTORIAL HERE.
The cuffs are worked in rows and attached to the sleeve as you go. Continue with 3mm hook.
With RS facing you.
Row 1: ch17, starting with 2nd ch from hook, work 1 sc in each ch back to edge of main body. Join to the next st of the edge of main body using slst and work one more slst in the next st of main body (2 slst(s) in total for joining) plus make ch1. Turn.
Row 2: Starting from 4 st from hook, work BLsc in each st across. Turn.
Row 3: ch1 (does not count as a st), BLsc in each st across [16sts]. Join to the next st of the edge of main body using slst and work one more slst in the next st of main body (2 slst(s) in total for joining) plus make ch1. Turn.
Repeat Rows 2-3 until your hem is joined to the entire lower edge. Then join your last row with the first row using the slip stitches.
Fasten off yarn, weave in all ends and block your cropped crochet cardigan pattern to measurements. Sew up underarm holes if necessary.
Sew on buttons to match the button holes.
If you have any suggestions or have detected any mistakes, please feel free to email me at mycrochetory@gmail.com
Don’t forget to save this Pin for easy reference: 📌

I’d love to hear about your crochet adventures and see your beautiful creations.
Drop a comment below sharing your thoughts, questions, or even your favorite crochet tips! Your voice adds a vibrant thread to our crafting community.
Sharing is caring! If you found this guide helpful, consider spreading the love. Click the share button and inspire other crocheters.
Stay in the loop with my latest crochet guides, tips, and inspiration. Subscribe to my newsletter for exclusive content straight to your inbox. Never miss a stitch—subscribe today!
Happy crocheting, and may your yarn always be tangle-free!
Join my Facebook Group and Official Ravelry Group where you can find necessary support, you can ask questions or share your finished crochet projects.
You can also follow my Instagram, Facebook page and Pinterest.
Leave a Reply