
Updated: 3 November 2025 by Sylwia (MyCrochetory)
Learn How do I crochet magic circle with this beginner-friendly picture and VIDEO tutorial. Explore THREE methods and create seamless starting rings for your crochet projects.
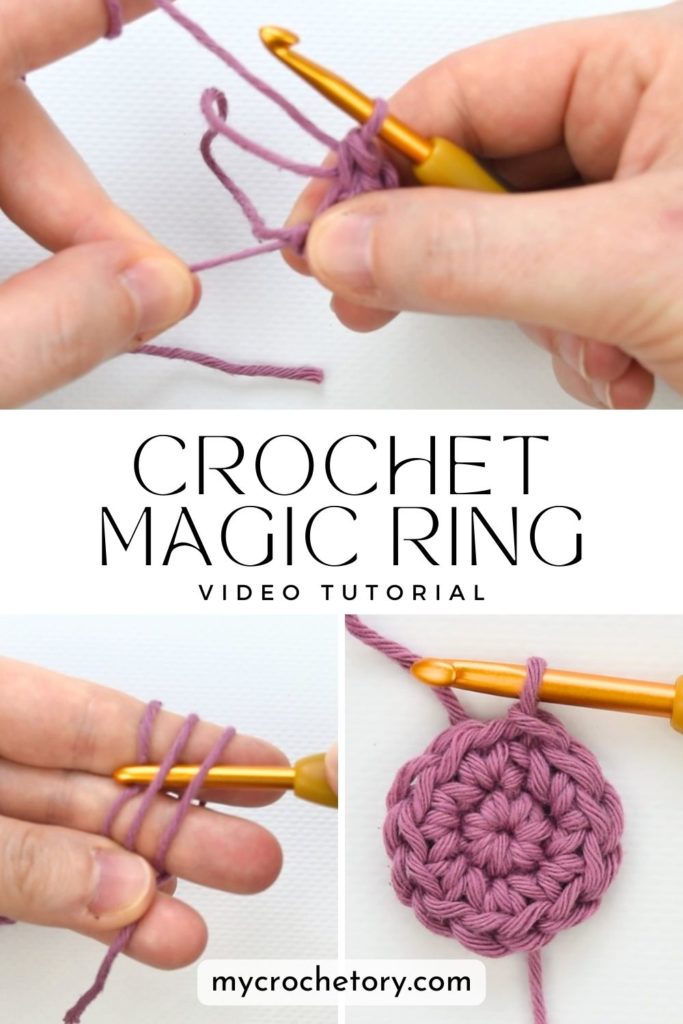
If you’ve been wondering, “How do I crochet a magic circle?”, you’re not alone. I remember feeling completely lost when I first tried it too!
The magic circle — also known as the magic loop or adjustable ring — is a total game-changer for starting round crochet projects. It lets you create a perfectly tight center without that little hole in the middle, making your work look neat and professional.
In this guide, I’ll walk you through three easy methods for creating a crochet magic circle, share a short video tutorial, and point you to some beautiful free patterns to practice with.
And just so you know — at the very end, I’ll also show you when not to use the magic circle (and what to do instead), because even the “perfect” trick has its moments when it’s not the best choice.
But before we talk about when to skip it, let’s start with why this little loop deserves a spot in every crocheter’s toolkit.
Why Use the Magic Circle?
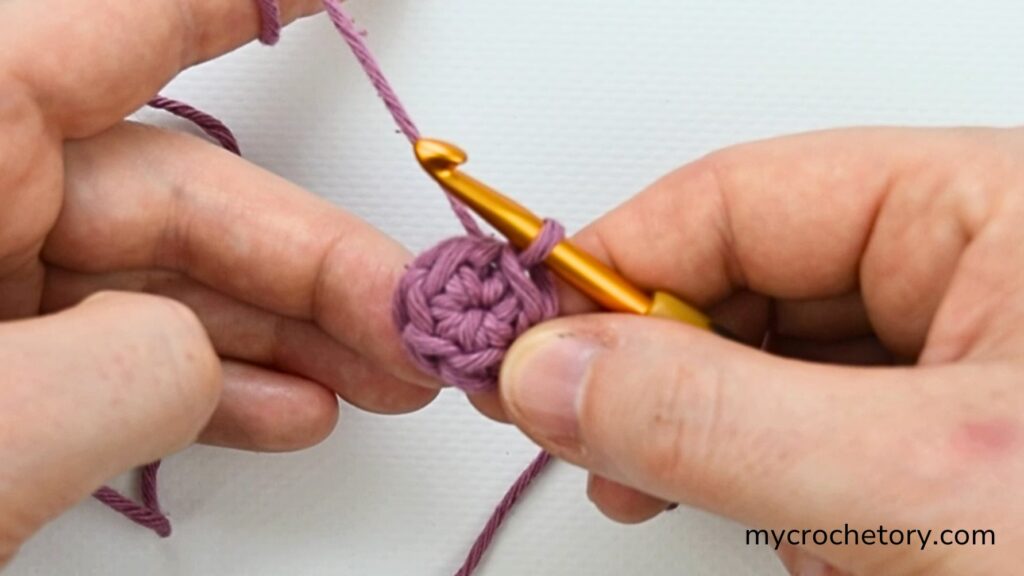
The magic circle technique is the best way to start projects like amigurumi, granny squares, hats, and coasters.
Unlike chaining a loop, which can leave a small opening, the magic circle method allows you to pull the yarn tail and close the center completely. It’s perfect for achieving a polished look.
Before I learned how to make a magic ring, my projects often had a messy or loose center. But once I mastered it, everything changed!
Now, my work looks clean and professional, especially when I’m starting projects that begin in the center of the ring.
What Can I Create with the Magic Circle?
Learning how do I crochet magic circle opens up so many possibilities! Here are some ideas and free patterns you can use to practice this technique:
1. Coasters and Small Round Items
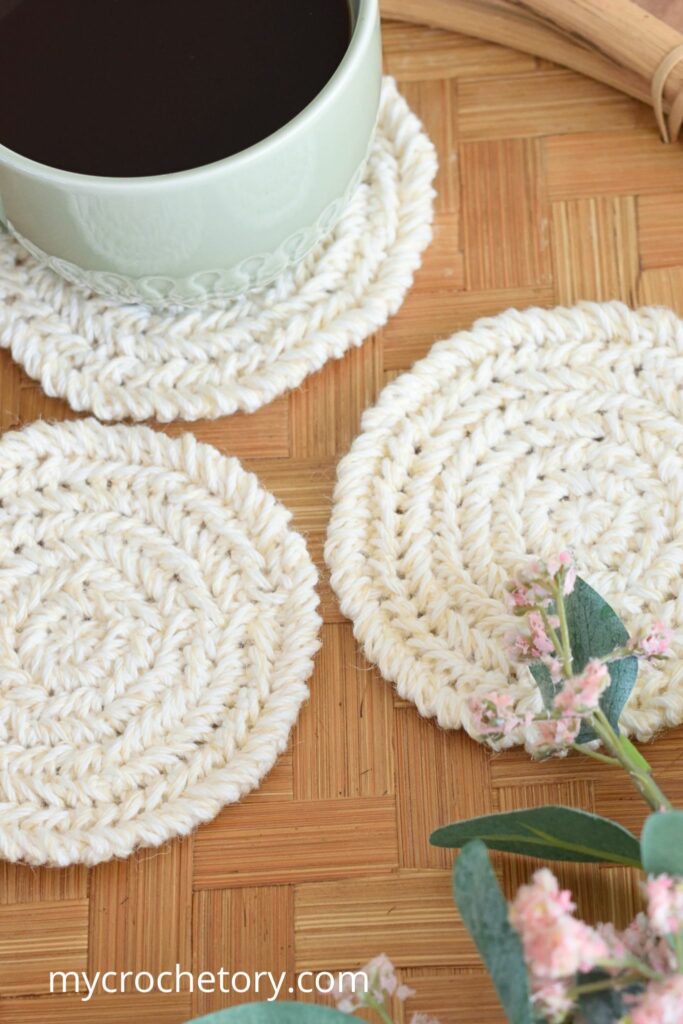
Start small with projects like coasters. The Round Crochet Coaster Pattern is a simple yet stylish design that uses the magic loop and herringbone stitch. It’s perfect for beginners!
2. Blankets and Afghans
The magic circle technique ensures a clean, seamless center for blanket squares:
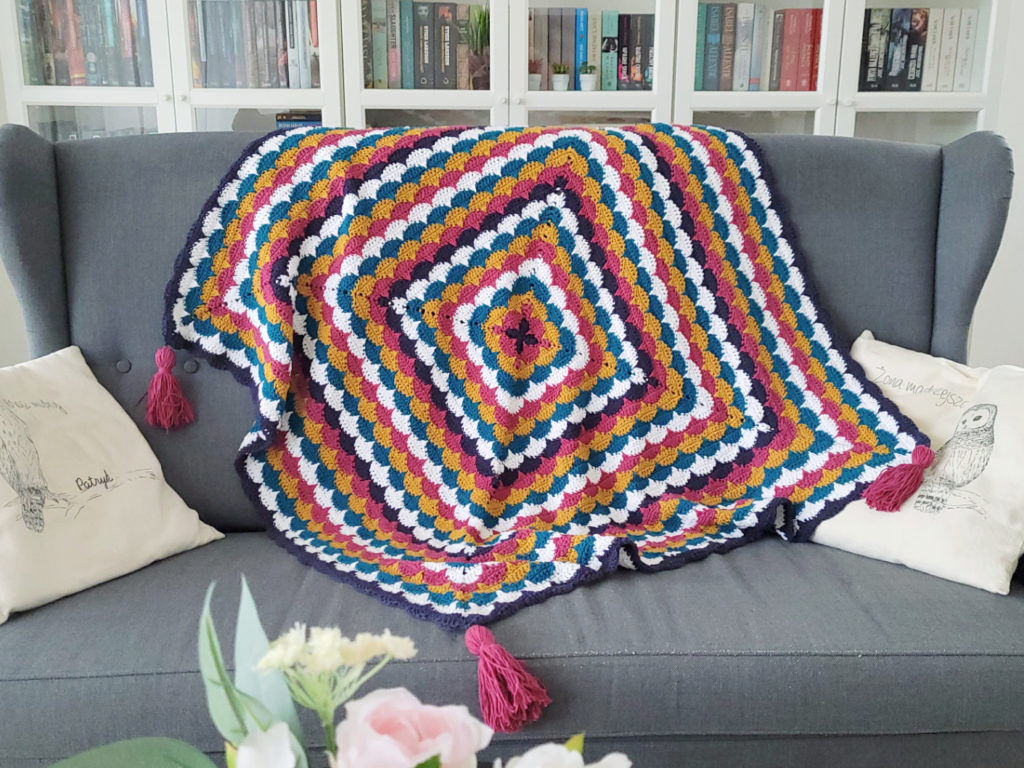
- The Clamshell Stitch Square Crochet Blanket features unique clamshell motifs that start with a magic ring method.
- The Granny Pinwheel Blanket transforms the classic granny square into a playful pinwheel pattern.
- For even more inspiration, check out the 60+ Free Crochet Squares Patterns collection. Many of these designs begin with a magic loop, so you can try a variety of patterns.
3. Pillows and Cushions
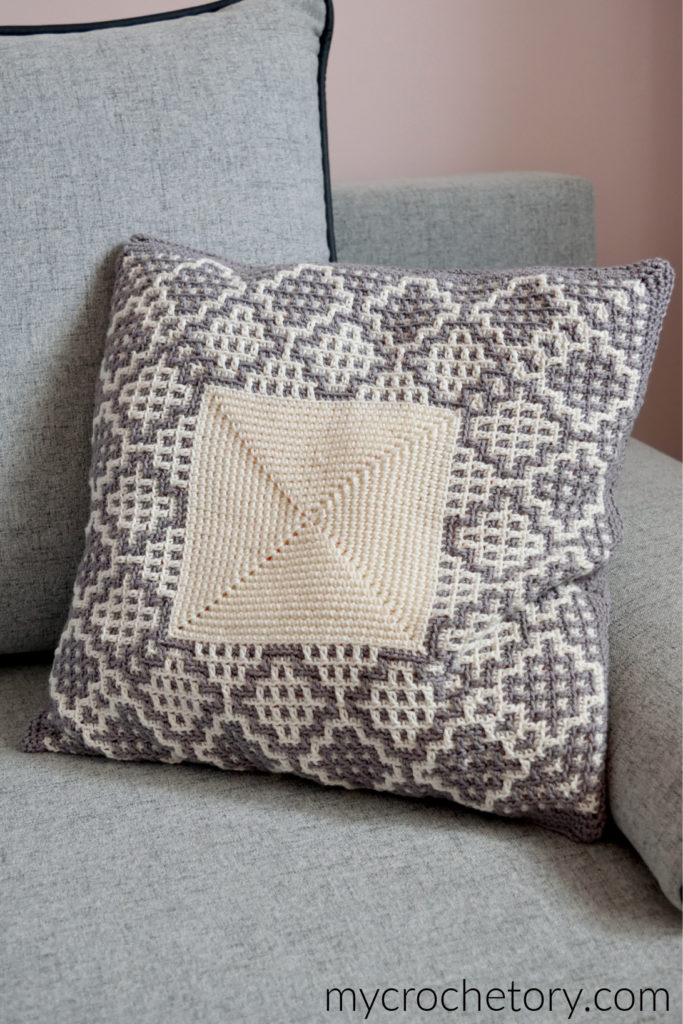
The Carina Crochet Square Pillow uses mosaic crochet techniques to create a geometric, modern design. Starting each square with a crochet magic circle ensures a flawless finish.
4. Scarves and Shawls
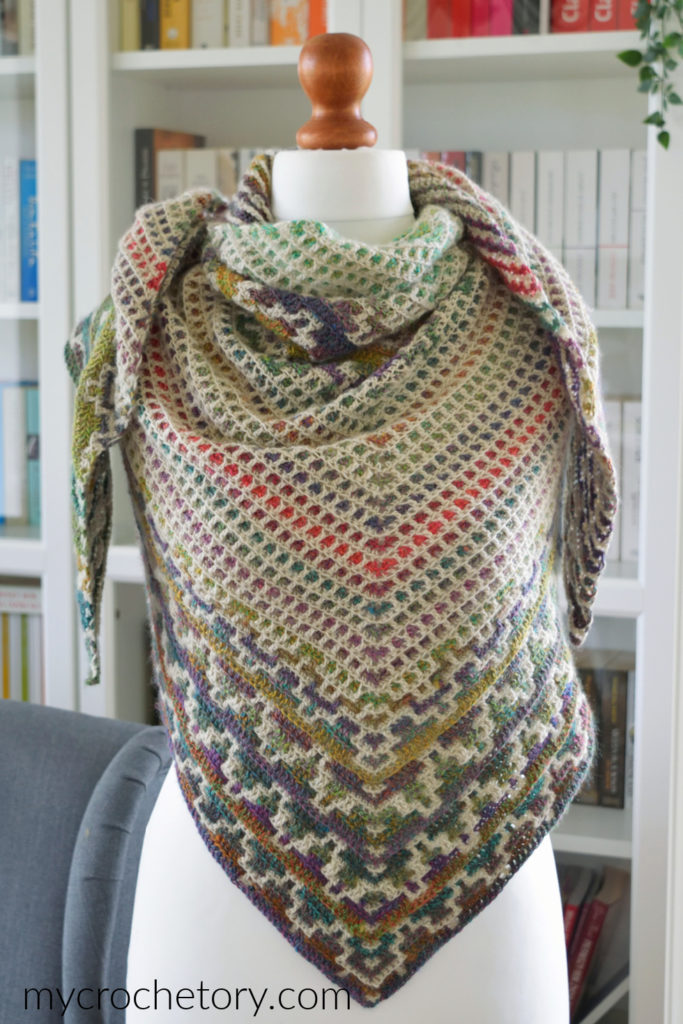
The Namari Mosaic Triangle Scarf combines the magic circle method with mosaic crochet for a stunning gradient design. It’s both stylish and fun to make.
5. Adorable Animal Projects
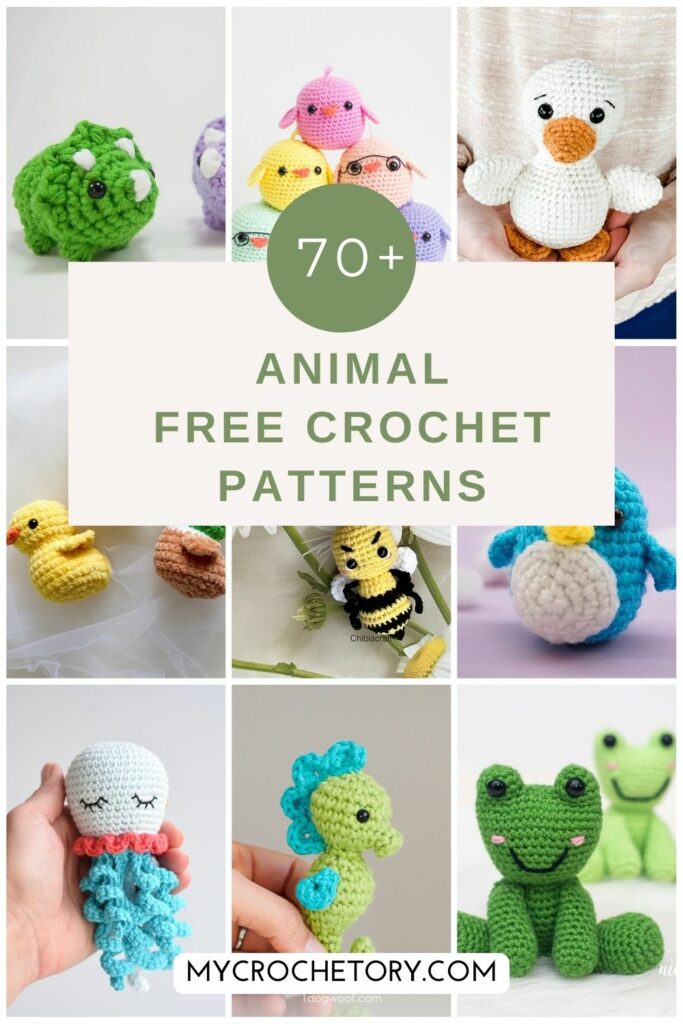
The magic circle technique is a must for creating charming amigurumi projects, especially when you want a tight center to keep stuffing securely inside. I
f you’re a fan of crocheting cute animals, check out the Free Crochet Animal Patterns. This collection includes a variety of designs, from cuddly bears to playful bunnies.
Many animal patterns use the magic ring method, making this a great way to practice and create something adorable at the same time.
Watch the Magic Circle Video Tutorial
If you’re still asking, “How do I crochet magic circle?”, watching a video can make all the difference. I’ve put together a video tutorial showing all three methods step by step. It’s perfect for visual learners or anyone who wants to double-check their technique.
TIP: To view How to crochet a MAGIC CIRCLE video tutorial properly, please disable any ad-blocker you have running.
How Do I Crochet Magic Circle? 3 Easy Methods
Let’s explore three different methods to create a magic loop. Find the one that works best for you!
METHOD 1: Standard Magic Ring
STEP 1: Create an Adjustable Loop
To begin, hold the tail end of the yarn in your left hand. and place it over the flat of your palm.
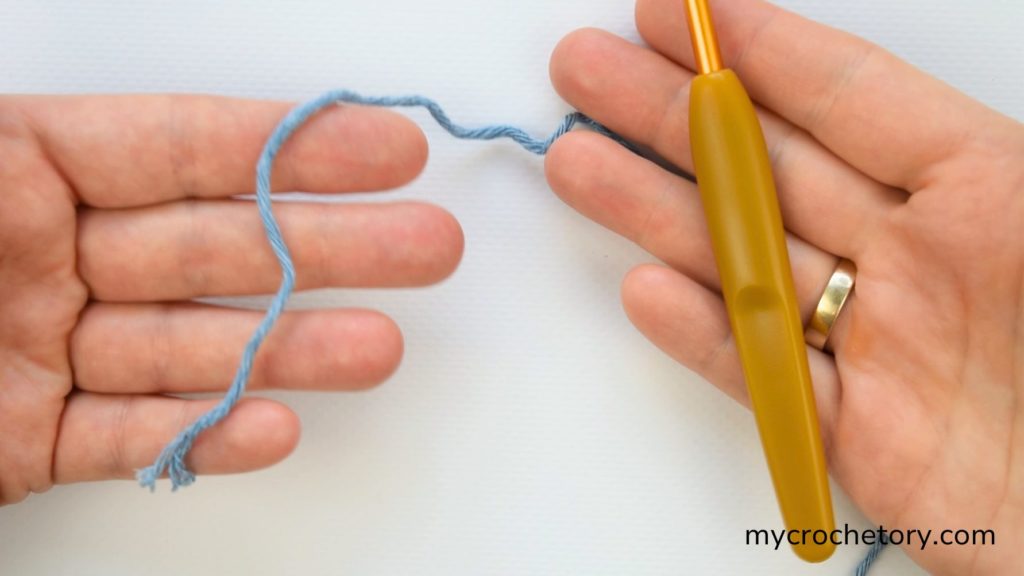
Now, Wrap the working yarn (the part connected to the yarn ball) around your index finger and middle finger to form a loop. As you do this, rotate your hand to make a full loop, and gently cross the working end of the yarn over the tail end.
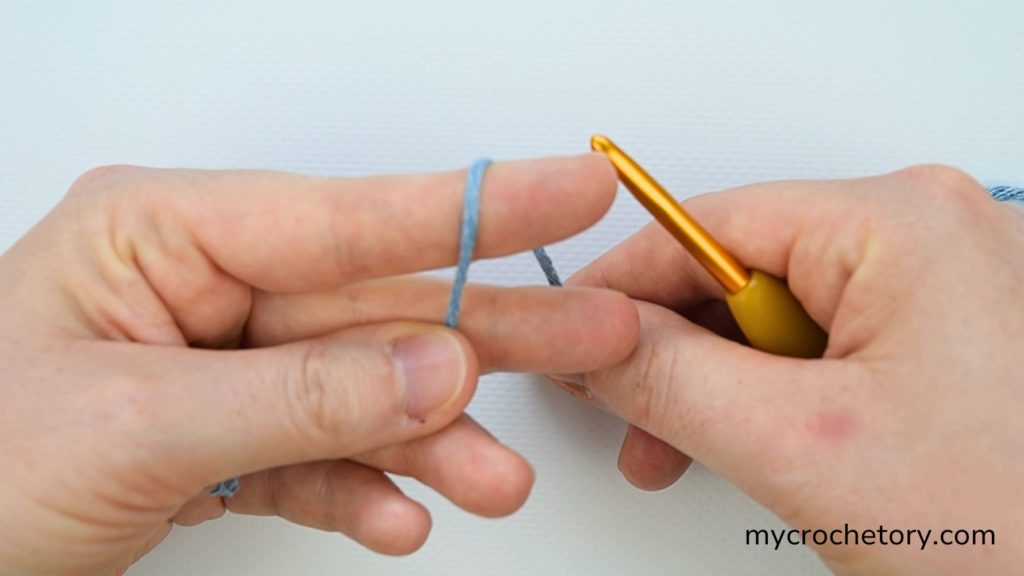
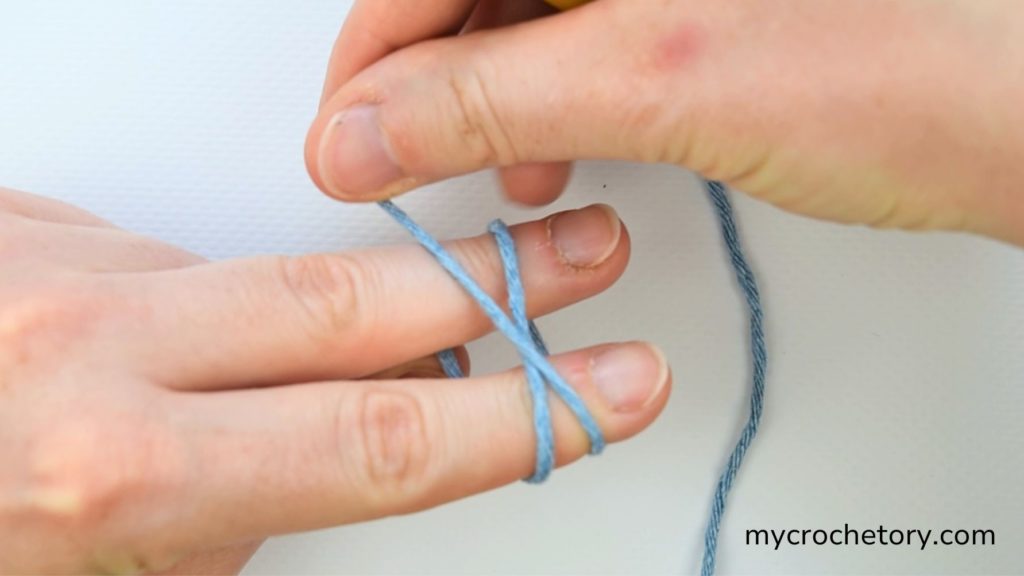
Keep the loop in position with your other fingers – it’s like a magical foundation for your crochet journey!
STEP 2: Hook and Pull Up
Hold the crochet hook in your right hand, and with confidence, slide it under the top right-hand yarn.
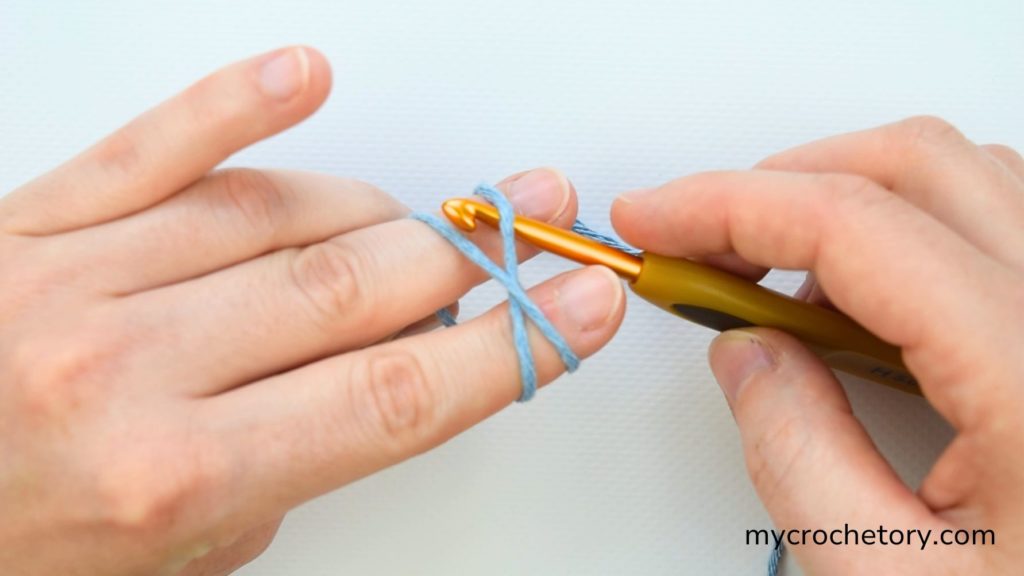
Next, grab hold of the left-hand yarn and gently pull it up, all while rotating the hook towards you.
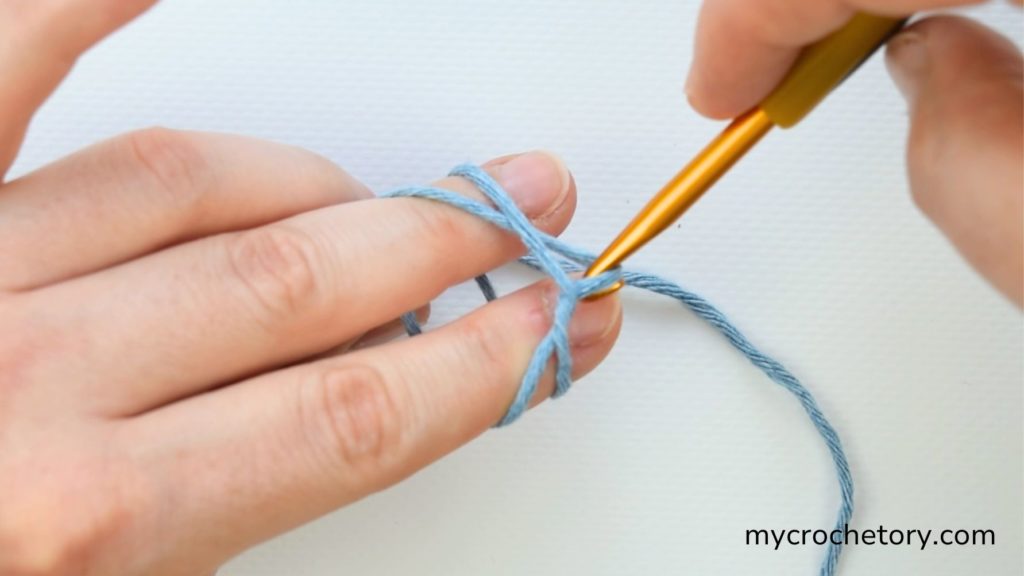
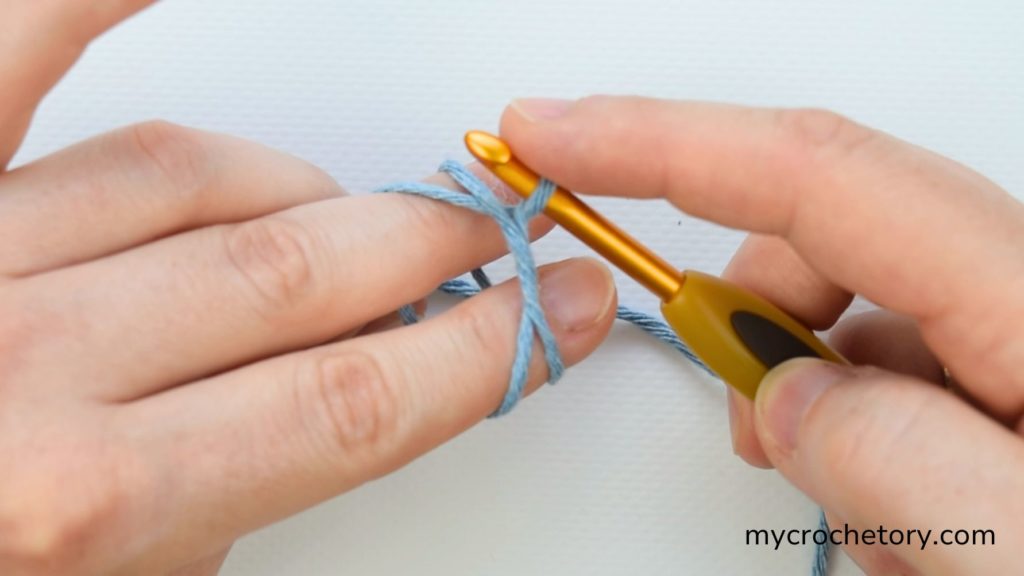
You’ll be amazed at how easily the loop forms!
Step 3: Chain Stitch
Keep that yarn circle in your left hand, and let’s create the foundation for your crochet masterpiece!
Wrap the working yarn from the back to the front over the hook and draw it gently through the loop on the hook. This simple yet essential move completes one chain stitch, ensuring your project starts on solid ground.
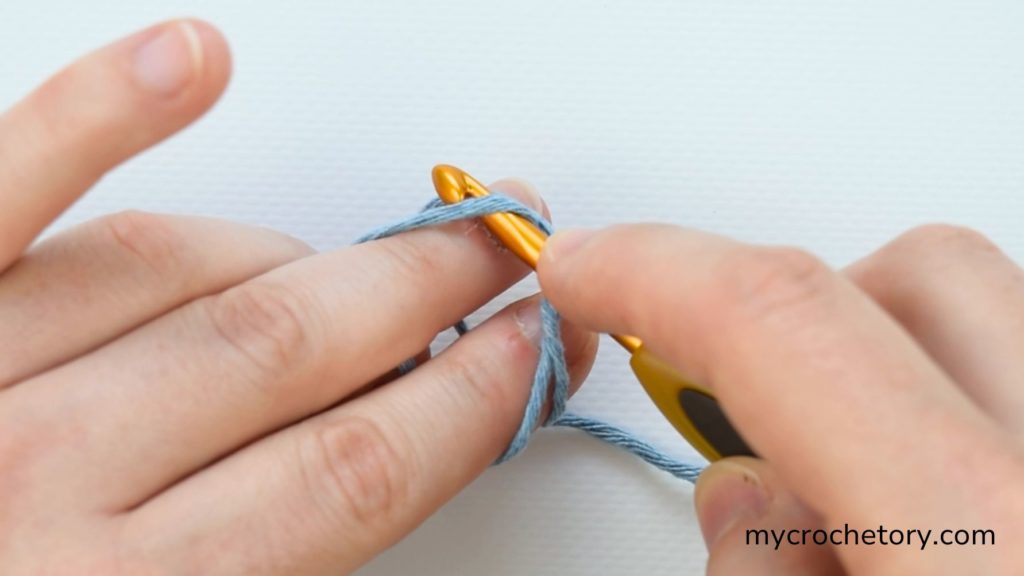
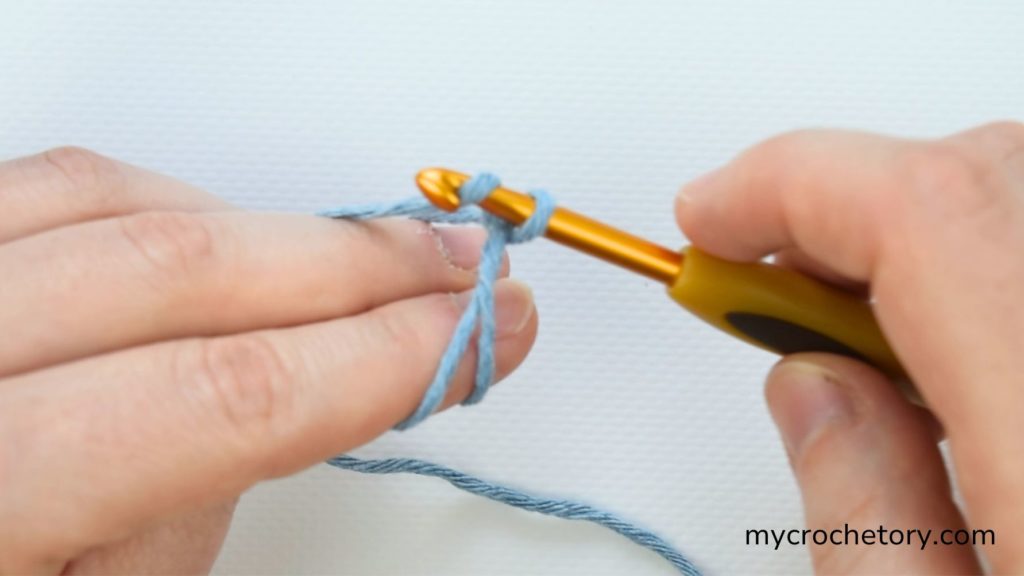
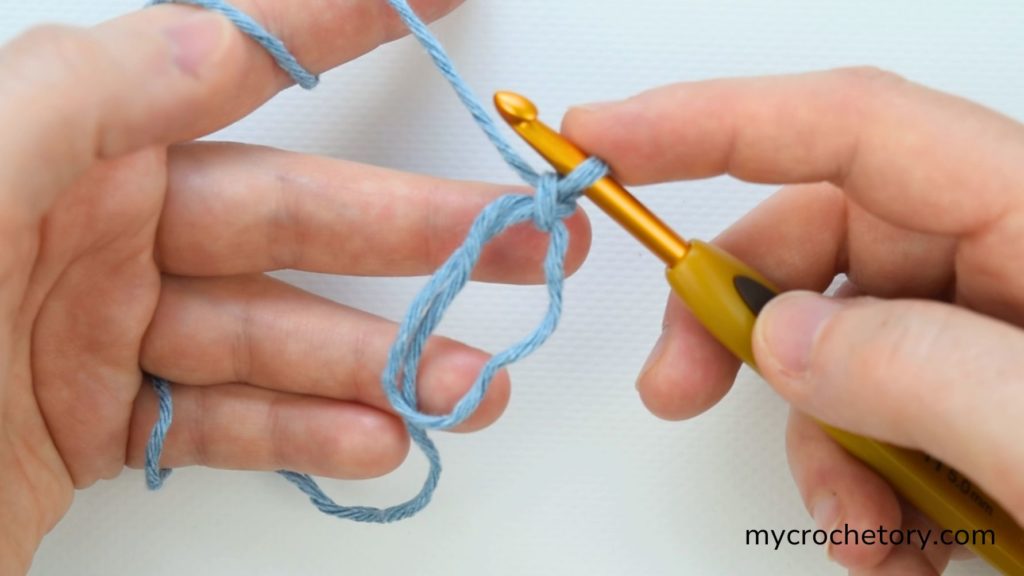
Remember, the number of chain stitches depends on your pattern’s first round.
For single crochet, you’ll only make one chain; for half double crochet, add one more for a total of two chains, and for double crochet stitches, create a total of three chains.
Step 4: Stitching the Magic Ring
Get ready to weave your crochet magic! It’s time to create your first round of stitches into the magical ring.
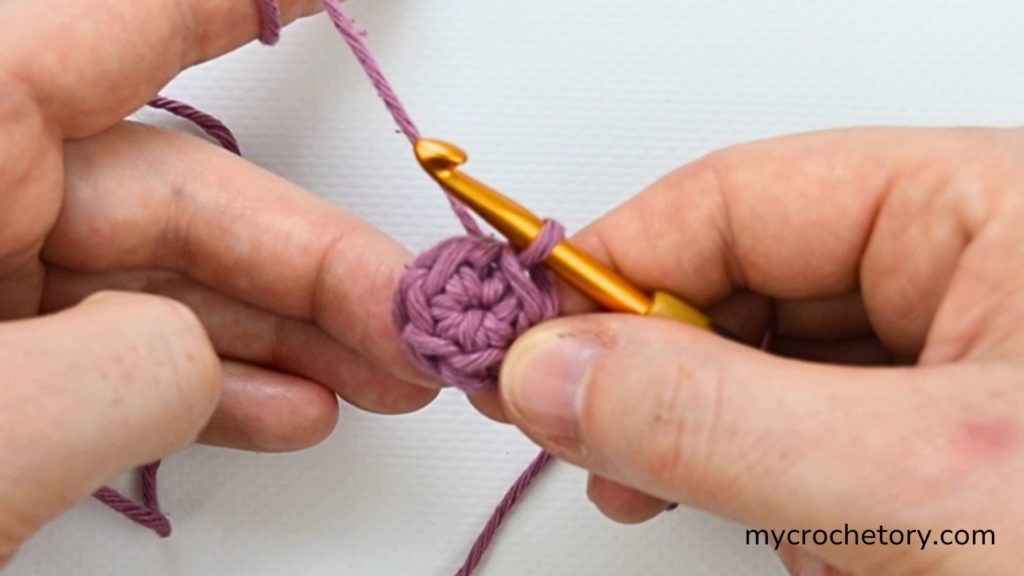
Gently insert the hook into the center of the ring, and draw up a loop to start your first single crochet. Remember, you’ll be crocheting over both strands – the loop and the yarn tail.
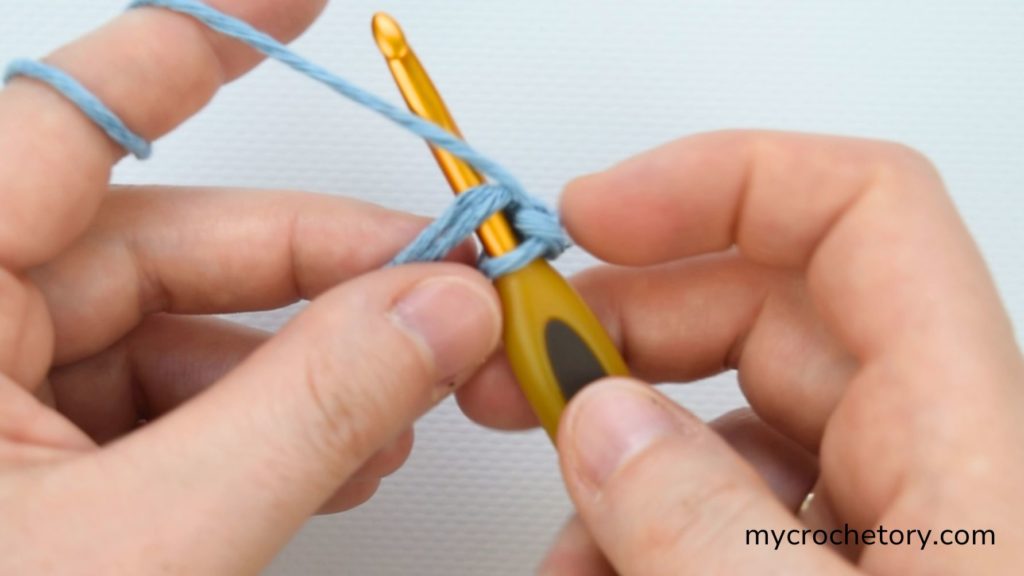
Complete the single crochet by yarn over and draw the yarn through both loops on the hook. The magic is in your hands!
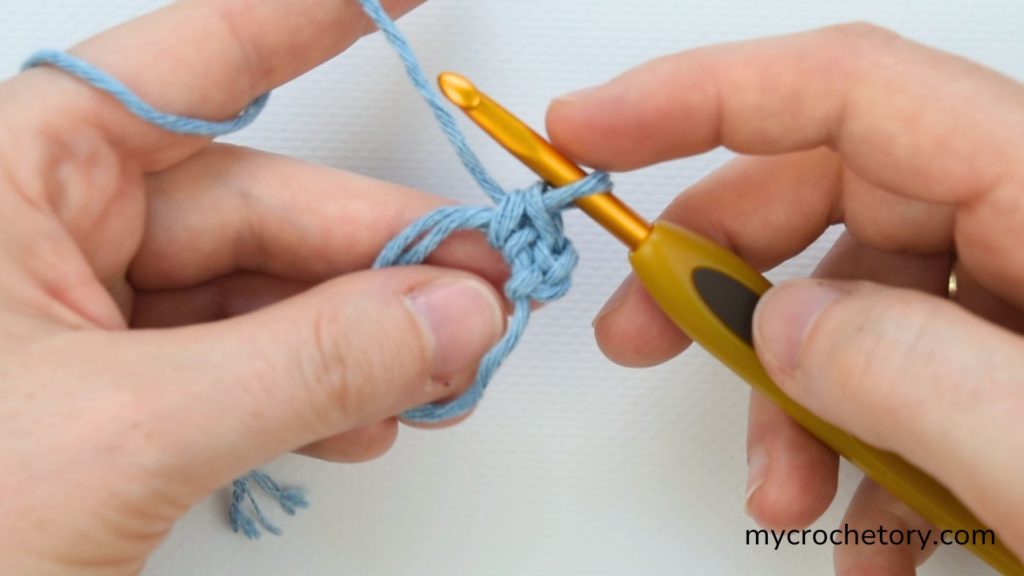
Keep going, making stitches into the loop until you reach the required number for your pattern. Don’t worry if the ring looks a bit loose and open; we’ll take care of that in the next step.
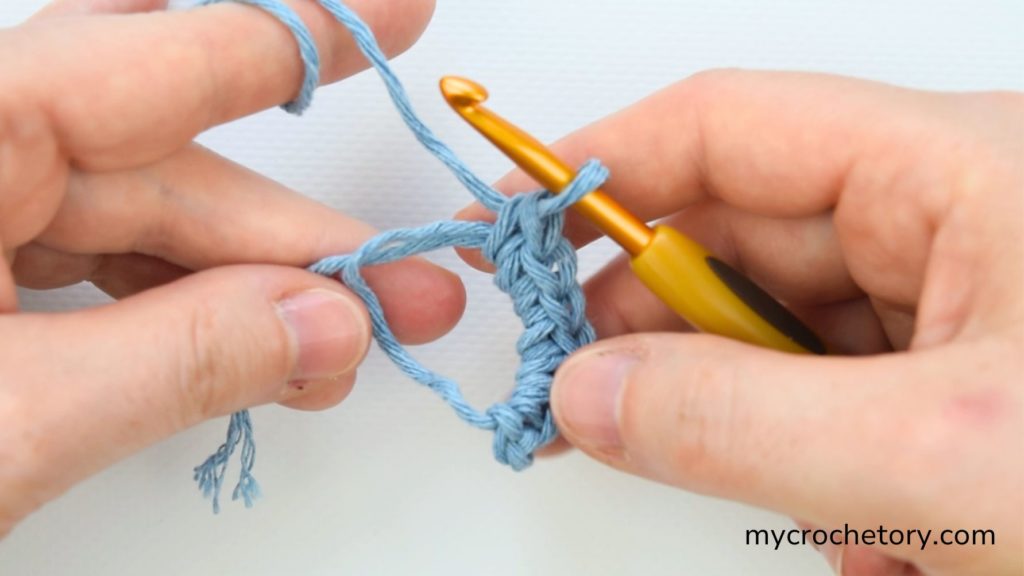
Step 5: Secure and Tighten the Ring
With your right-hand fingers holding onto the stitches, use your left hand to gently pull the yarn tail.
As you do this, watch the center of the ring close up like a drawstring bag, creating a snug and secure finish. Notice how the turning chain and the last stitch of the round come closer together, ensuring a flawless result.

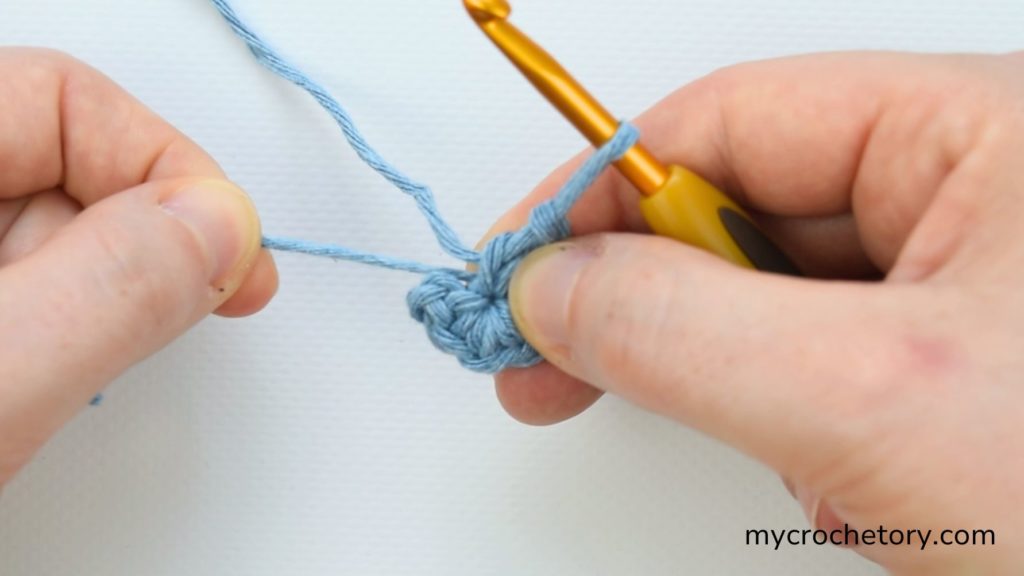
Step 6: Close the Round with a Slip Stitch
If you’re working in joined rounds, make a slip stitch into the first stitch to join the round. Be cautious not to stitch into your chain; it should be the first stitch of the round.
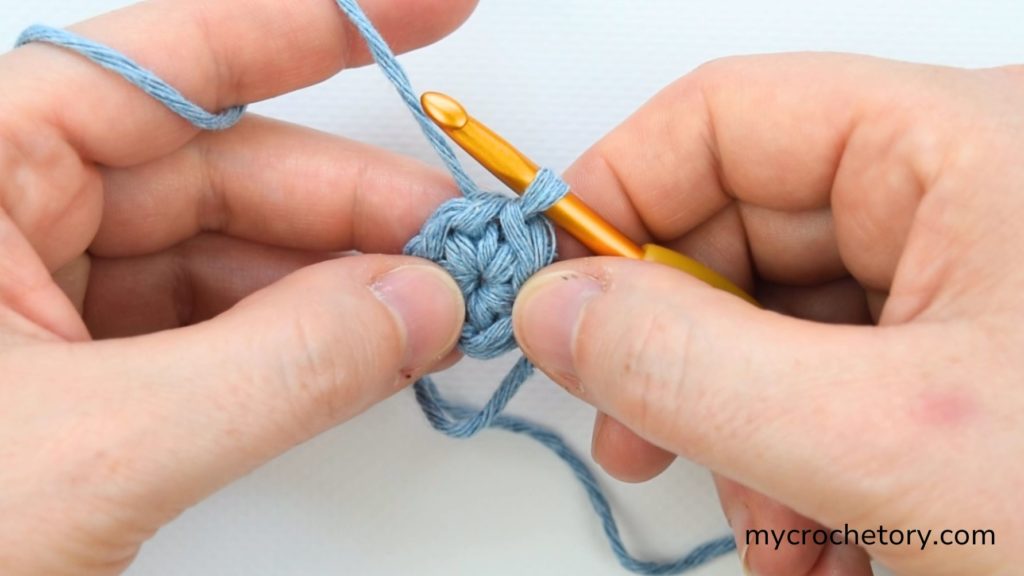
Continue with your pattern from there.
For continuous spiral work, skip the slip stitch and directly start the next round in the first stitch of Round 1. This continuous technique keeps your project seamlessly flowing without any interruptions.
Finishing Touch: As you work through your pattern, if the center ring loosens slightly, simply pull on the yarn tail to tighten it back up. Once you’ve woven in the ends securely, your magic ring will stay firmly in place, ensuring a delightful and professional finish to your crochet project.
Now that you’ve got the hang of the magic circle technique, you’re all set to follow the rest of your pattern with confidence.
Happy crocheting and have fun creating amazing projects!
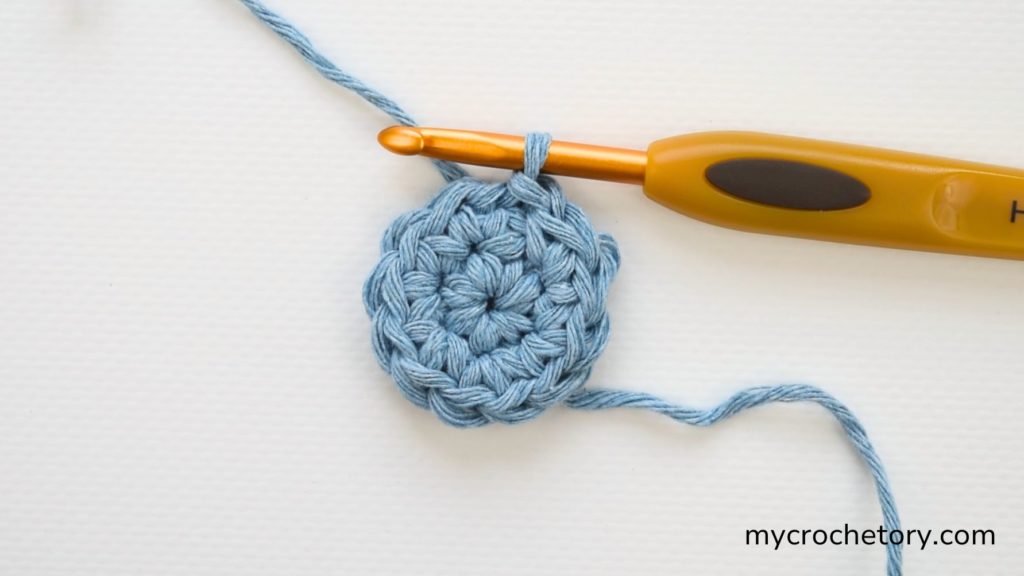
METHOD 2: Double Magic Ring
STEP 1: Creating an Adjustable Loop
Instead of creating a single loop like the standard magic ring, wrap the yarn around the fingers of your left hand twice, forming two loops. Keep the tail at the back on the right side, while the working yarn gracefully rests at the front towards your palm.
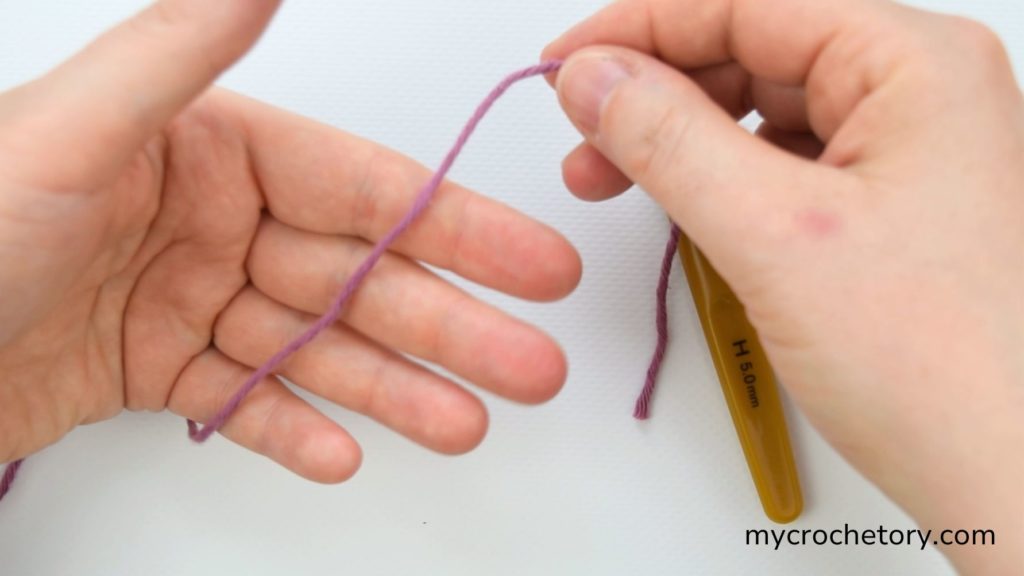
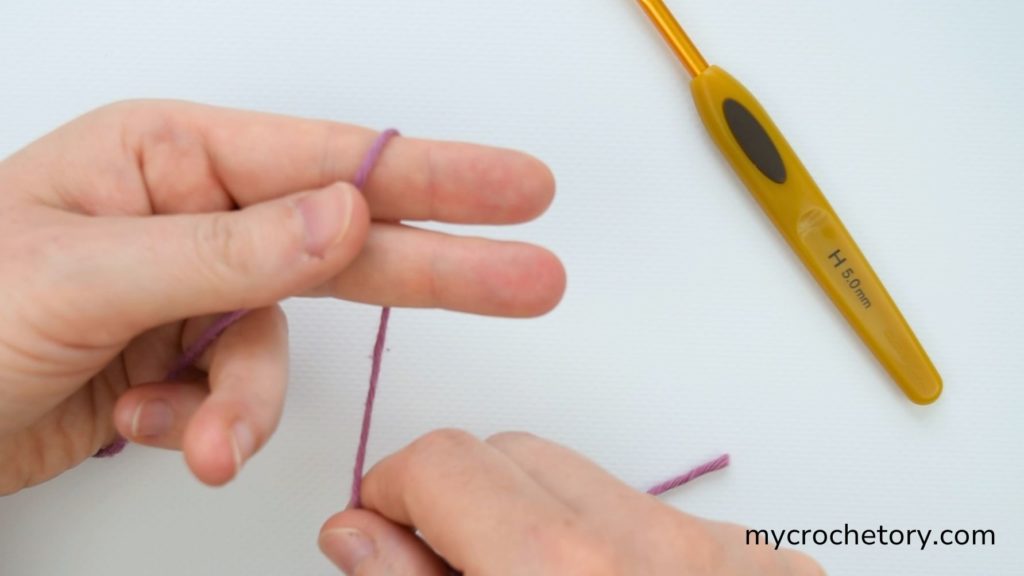
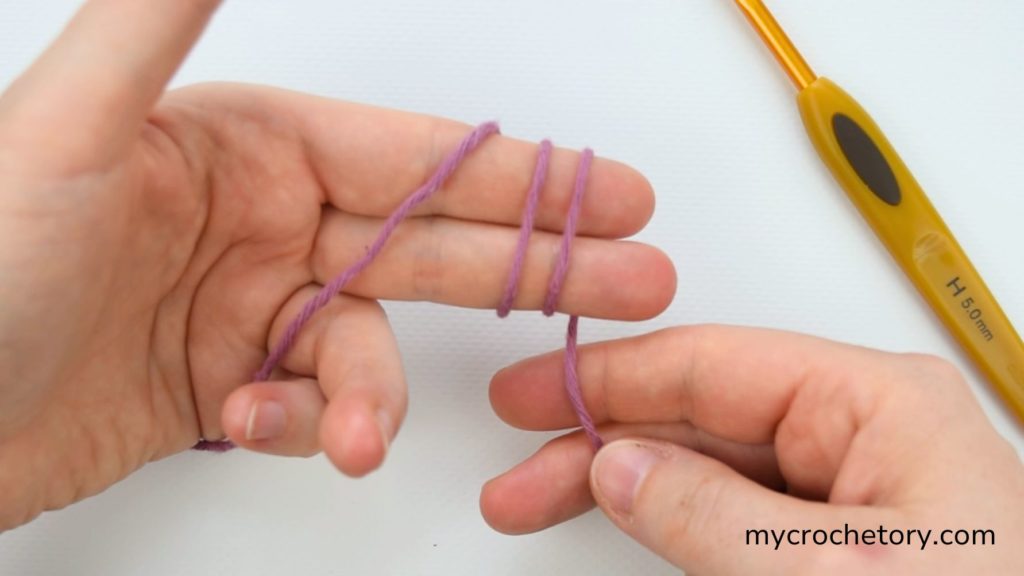
This technique is akin to the standard magic ring, but many prefer the double ring for extra durability in projects that see a little more action.
STEP 2: Pulling up a loop
Slide the hook under the two loops of your double ring closest to your fingertips. Grab the working end of the yarn and pull it back through to the right, creating a loop on the hook.
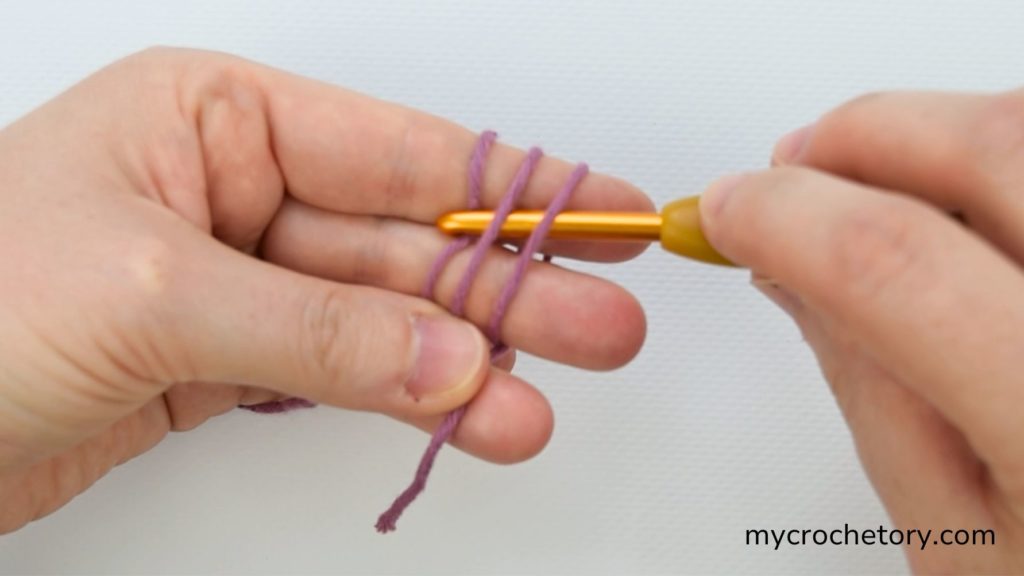
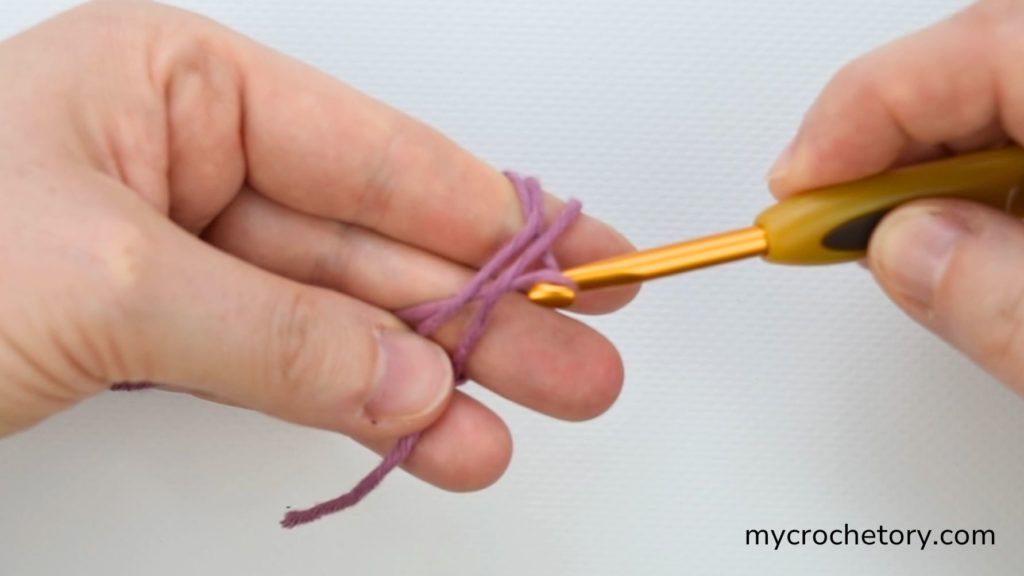
Even though it’s called a double ring, you only need a single loop on the crochet hook. The “double” aspect comes from the double loop you made at the beginning.
STEP 3: Chain Stitch
Hold onto that yarn circle in your left hand and get ready for the chain stitch.
Gently wrap the working yarn from the back to the front over the hook, then draw it smoothly through the loop on the hook. Voila! You’ve completed one chain stitch, providing a sturdy start to your project.
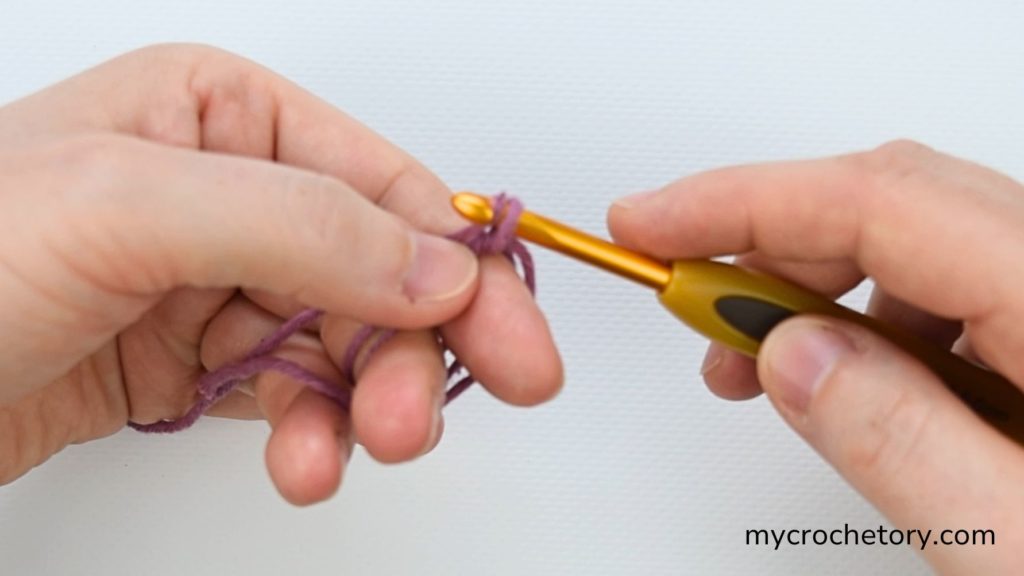
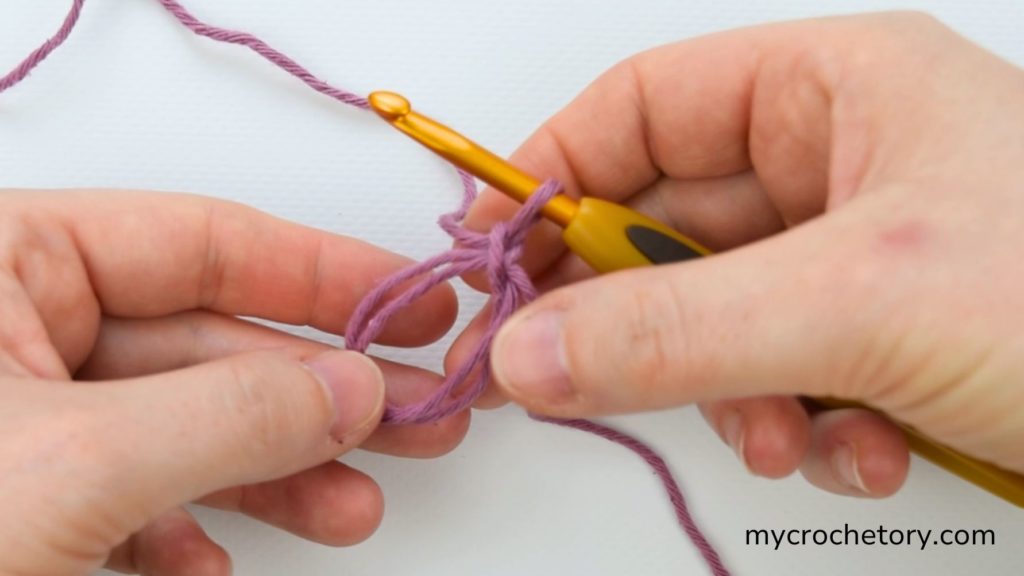
Remember, the number of chain stitches depends on your pattern’s first round.
For single crochet, just make one chain; for half double crochet, add one more for a total of two chains, and for double crochet stitches, create three chains.
STEP 4: Stitching the Magic Ring
It’s time to create your first round of stitches into the magical ring.
Gently insert the hook into the center of the ring and draw up a loop to start your first single crochet. Don’t forget, you’ll be crocheting over both strands – the loop and the yarn tail.
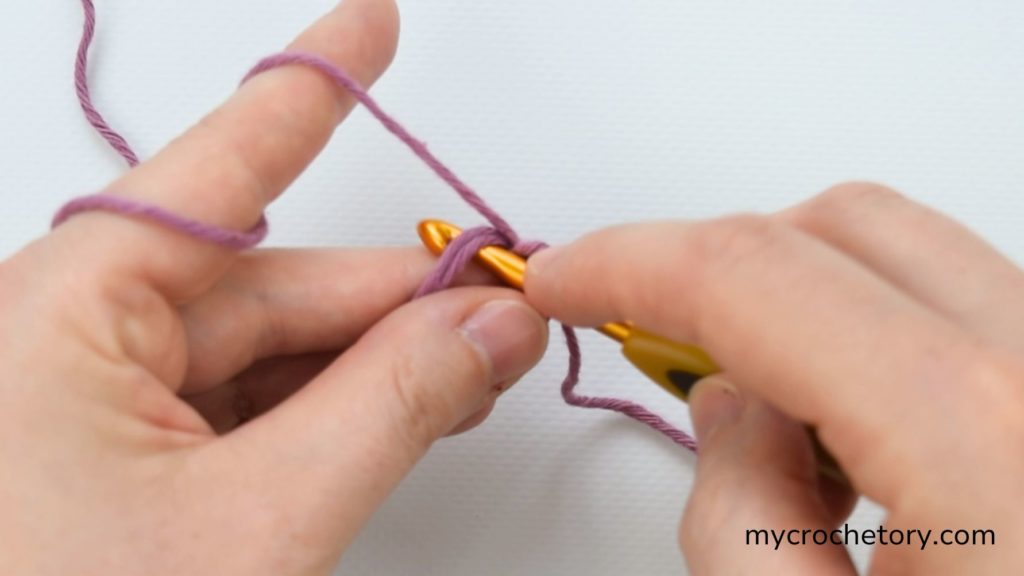
Complete the single crochet by yarn over and draw the yarn through both loops on the hook.
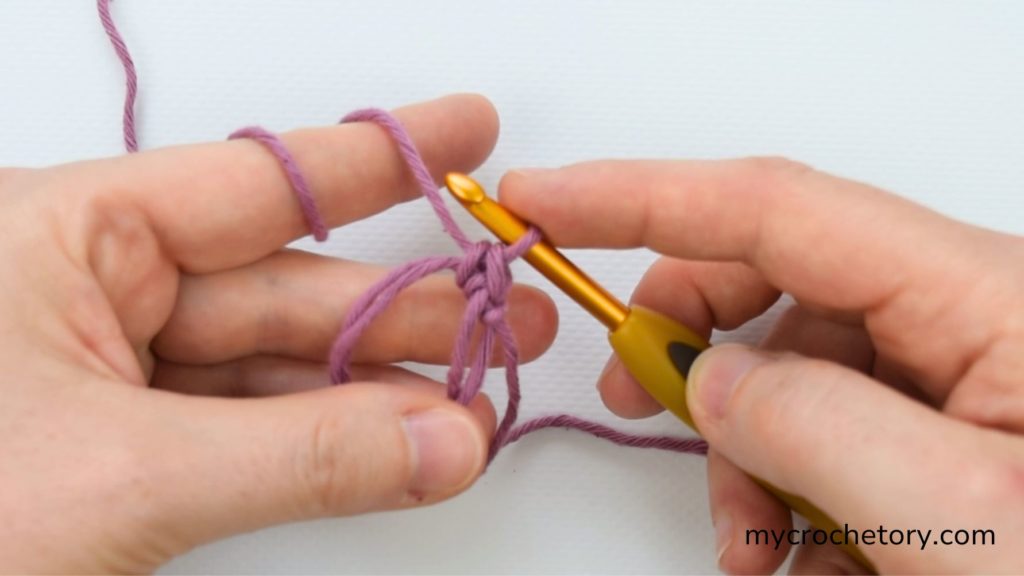
Keep going, making stitches into the loop until you reach the required number for your pattern.
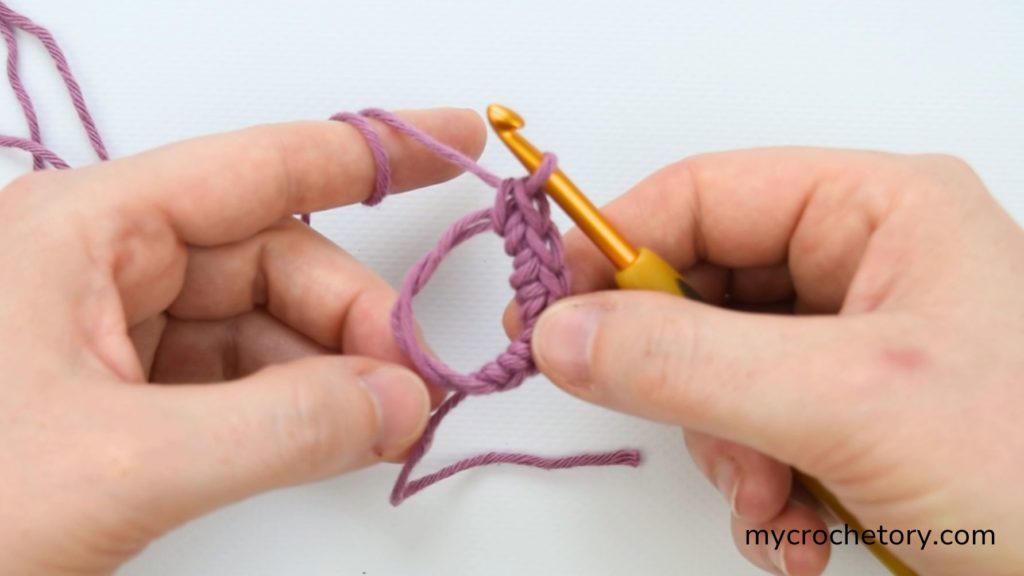
STEP 5: Secure and Tighten the Ring
With your right-hand fingers holding onto the stitches, use your left hand to gently pull the yarn tail.
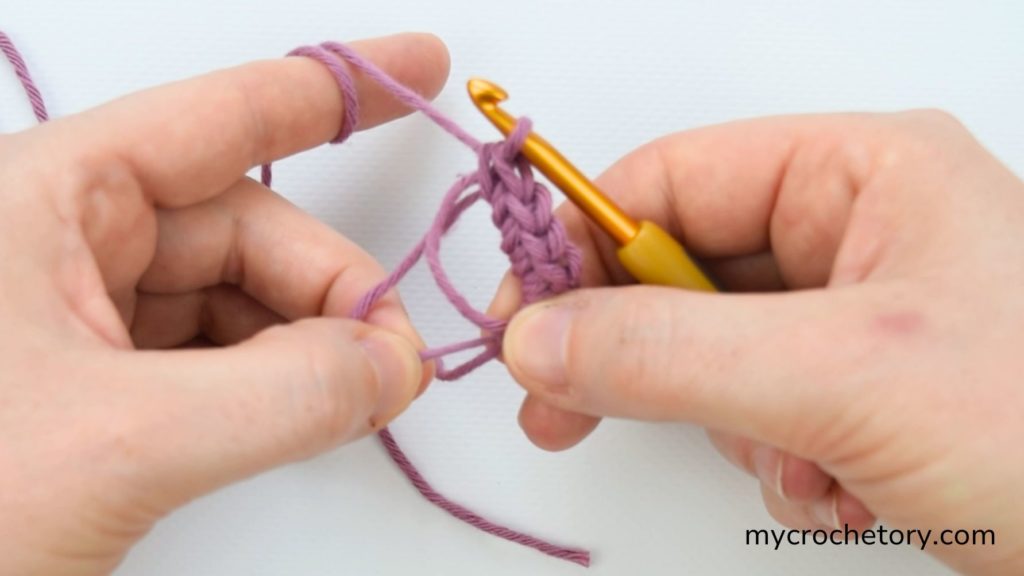
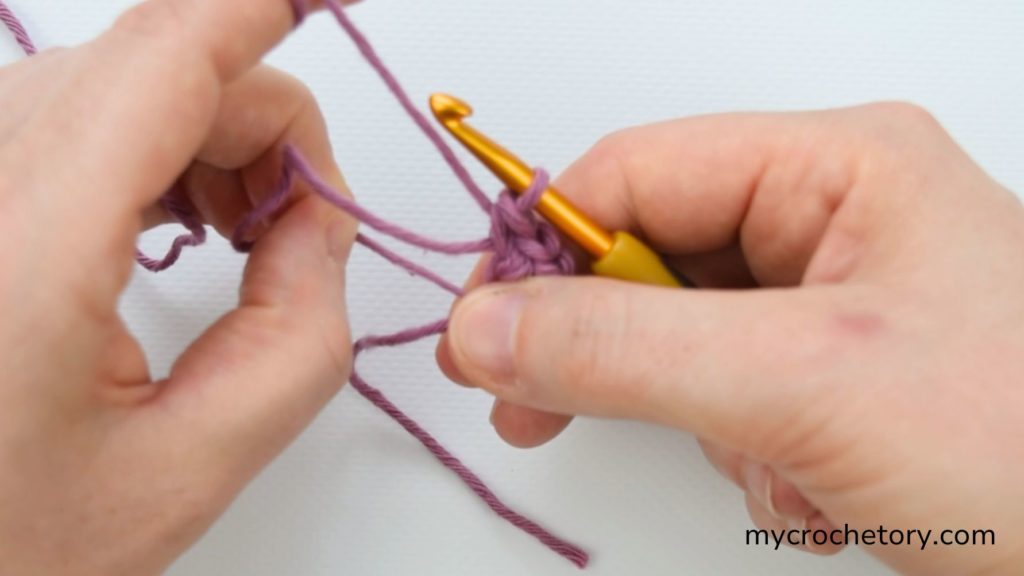
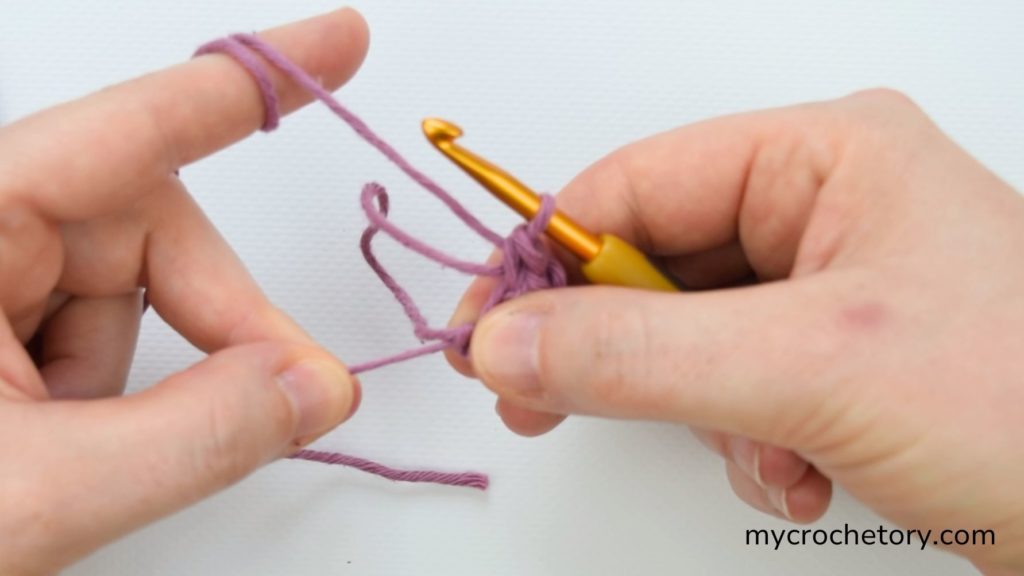
Watch the center of the ring close up like a drawstring bag, creating a snug and secure finish. Notice how the turning chain and the last stitch of the round come closer together, ensuring a flawless result.
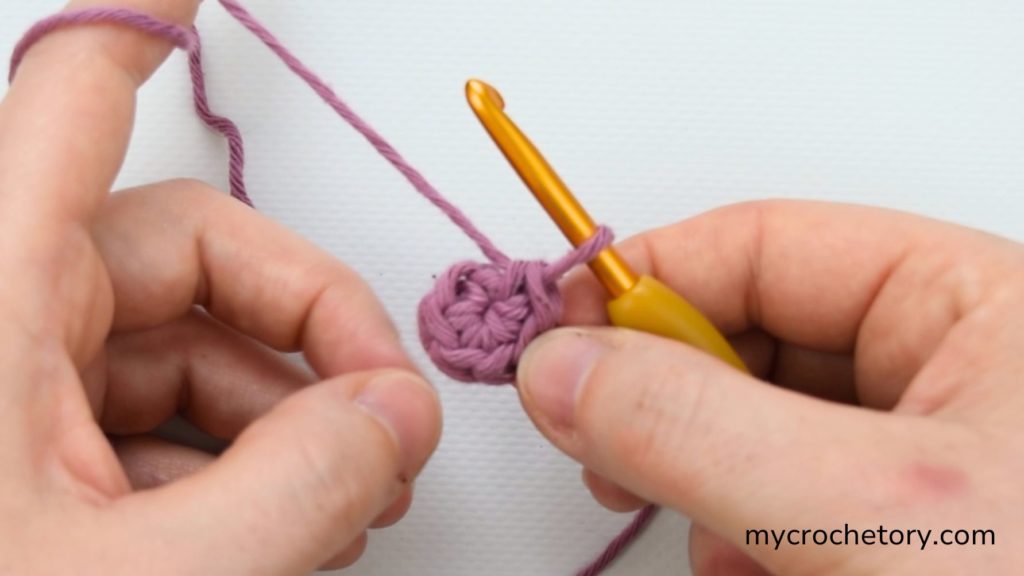
Finalizing the Magic: As you crochet your pattern, if the center ring becomes a bit loose, gently tug on the yarn tail to tighten it back up. Once you’ve securely woven in the ends, your magic ring will stay firmly in place, giving your crochet project delightful and professional finish.
Now that you’ve got the hang of the magic ring technique, you can easily follow the rest of your pattern’s instructions and crochet your projects with joy. Happy crafting!
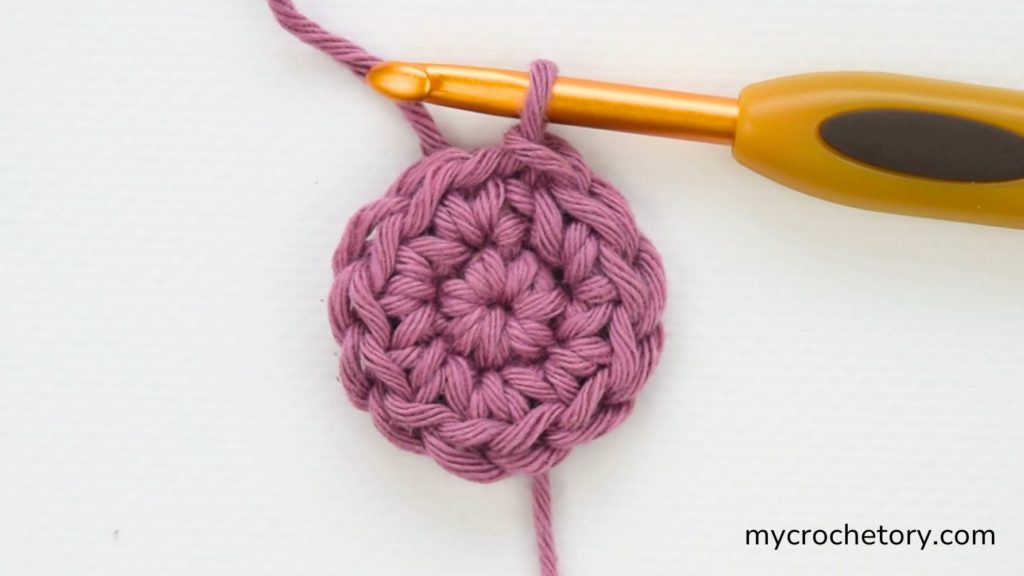
METHOD 3: An Alternative Approach
If you’re facing challenges with the magic ring technique, don’t worry! This alternative method is here to help you get started with confidence.
Let’s explore this technique together!
STEP 1:
Make a slip knot and work:
- chain 2 if your pattern calls for first round of single crochet stitches,
- chain 3 if your pattern calls for first round of half double crochet stitches,
- chain 4 if your pattern calls for first round of double crochet stitches.
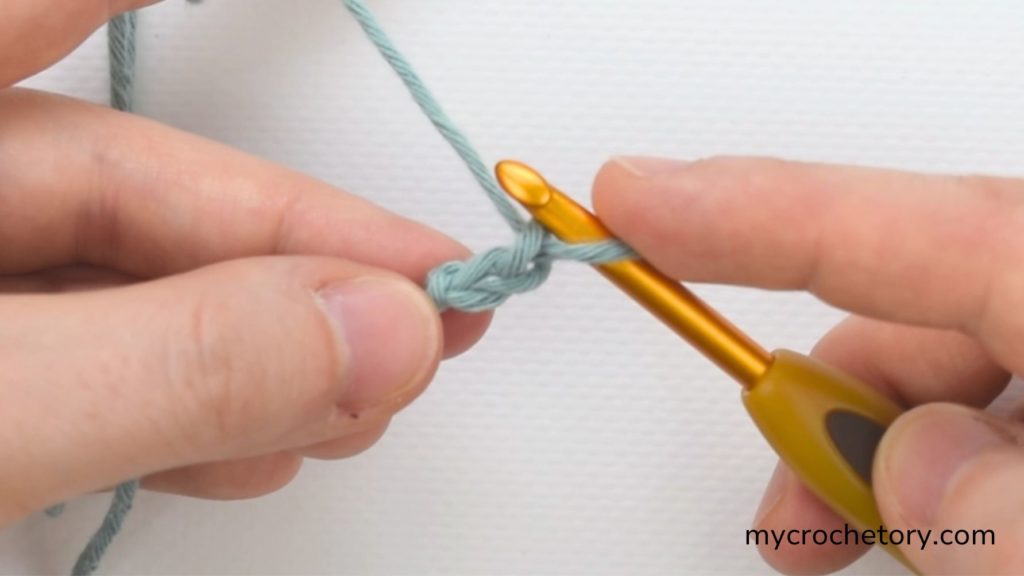
STEP 2:
Work respectively:
- single crochet into second chain from hook,
- half double crochet into third chain from hook,
- double crochet into forth chain from hook.
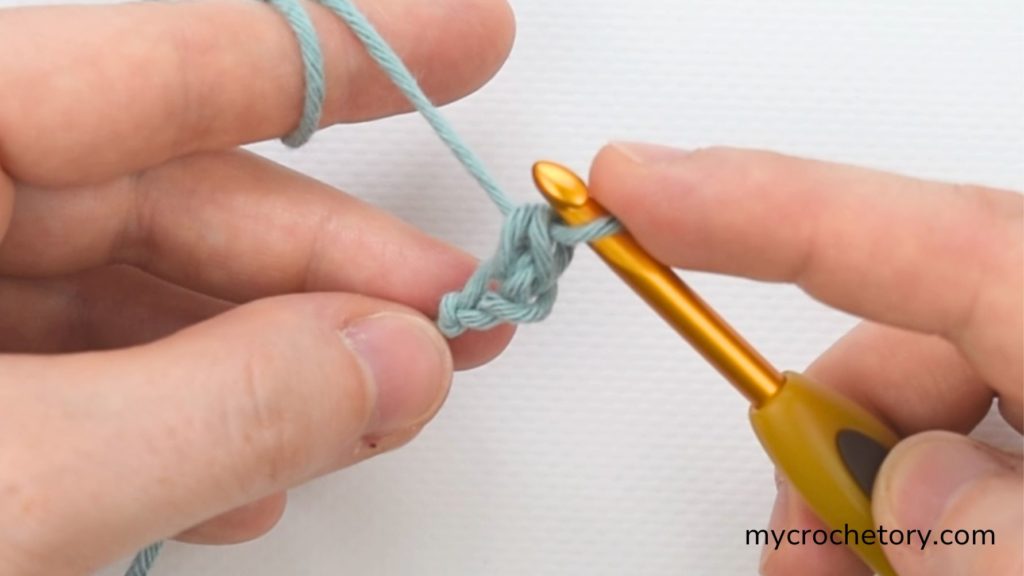
STEP 3:
Keep going, making stitches into the same chain until you reach the required number for your pattern.
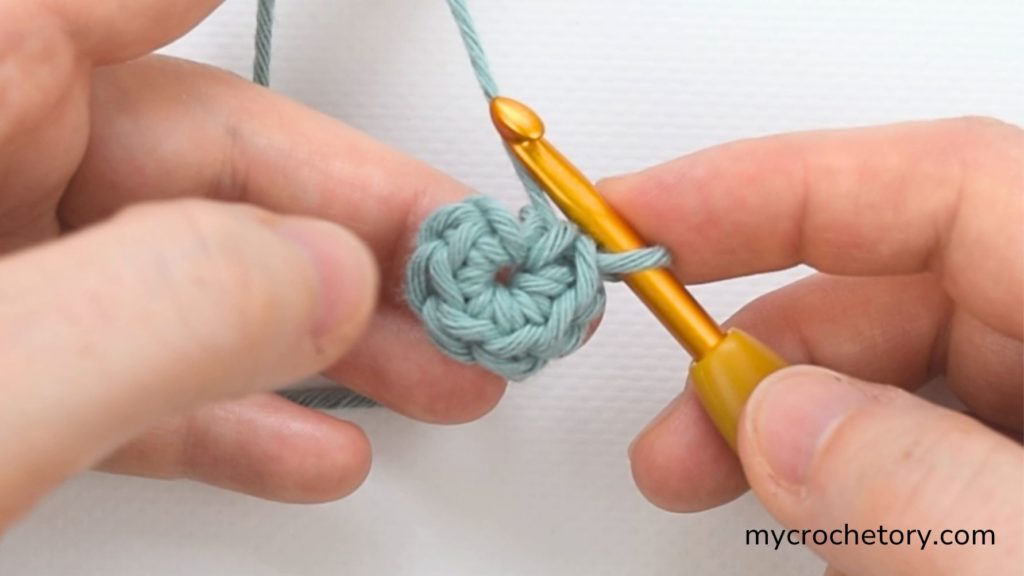
STEP 4:
Make a slip stitch into the first stitch of your ring to close this round and begin the next part of your pattern.
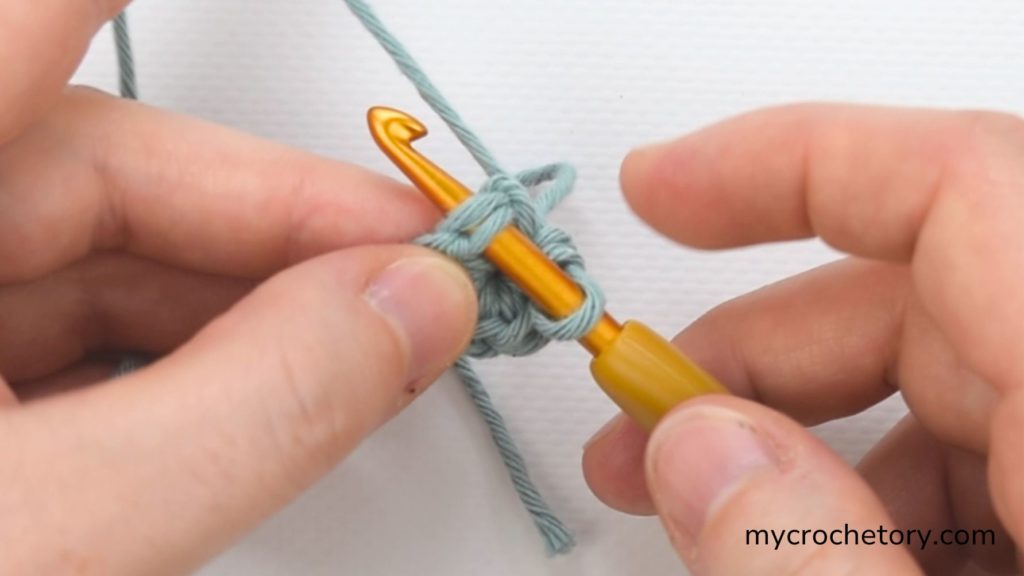
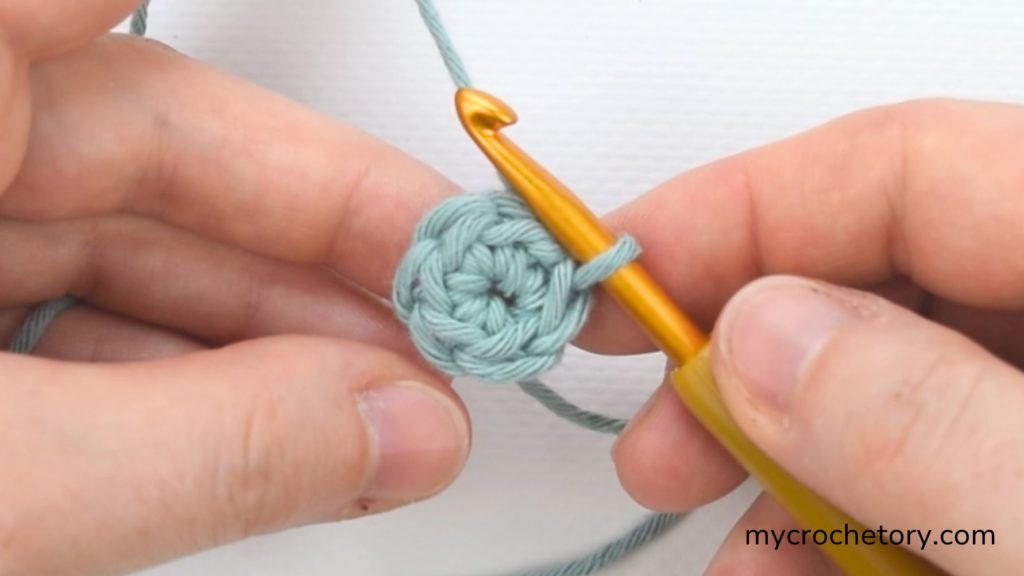
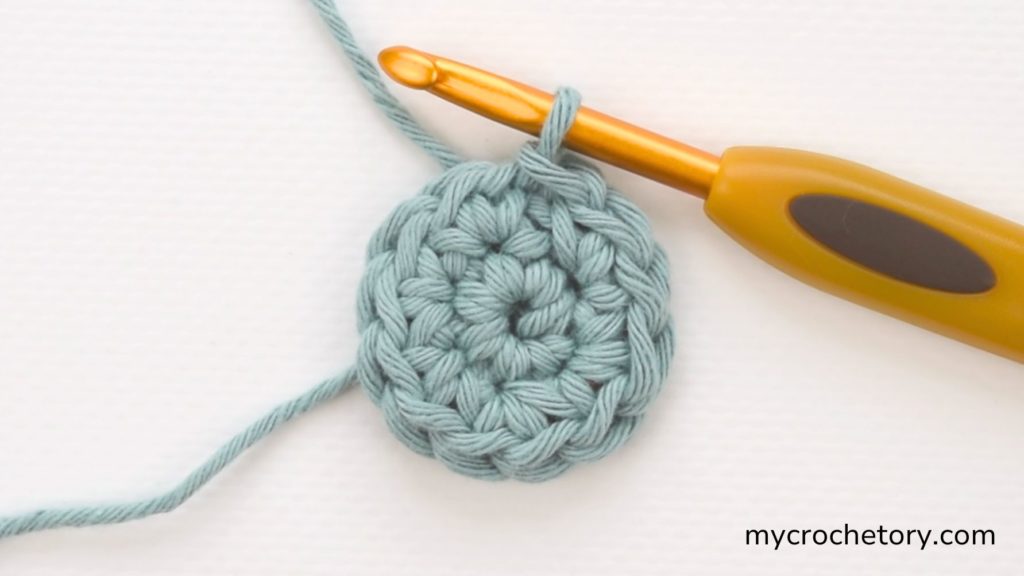
Keep in mind that this ring is not adjustable like the magic ring, but it will still give you the crocheted round you need for your pattern, and you may find it easier to work with.
Now you’re all set to continue your crochet journey with confidence!
Tips for Success: Master the Magic Circle
- Make the Loop Larger: A bigger adjustable loop is easier to handle when you’re learning.
- Pinch the Loop: Use your non-dominant hand to hold the loop steady while working the first single crochet stitch.
- Use Chunky Yarn: Practice with chunky yarn to see your stitches more clearly.
- Choose the Right Hook: A smooth crochet hook glides through the yarn without snagging.
- Mark the First Stitch: Use a stitch marker in your first stitch to stay on track.
- Pull the Tail Slowly: Tighten the yarn tail gently to avoid snapping delicate yarn.
When not to use the Magic Circle
I know, I know — the magic circle feels like a superpower. That perfectly closed center? Chef’s kiss.
But after years of crocheting, I’ve learned it’s not always the hero we need.
If you’re using silky or mercerized cotton yarn, that little loop can start misbehaving later. You pull it tight, finish your project, and a week (or a few washes) later — surprise, there’s a tiny hole staring back at you. I’ve been there.
It also doesn’t play well with projects that get stretched or tugged a lot, like hats, bags, or anything kids will grab and twist. The circle can loosen over time, no matter how carefully you weave in the tail.
And when it comes to blocking, especially strong wet blocking, that adjustable loop in the center can shift and mess with your tension — which drives me a little crazy after spending hours on even stitches.
So these days I keep it simple:
👉 I reach for a magic circle when I want that neat, closed look — like in amigurumi, coasters, or top-down hats.
👉 But if I’m making something that’ll be stretched, blocked, or washed a lot, I go old-school: a chain-4, slip stitch, and crochet into the ring. It’s not as fancy, but it stays put.
Because sometimes, “good enough” in crochet means your project still looks great years later.
MORE CROCHET TUTORIALS
If you found this guide helpful, you might also like posts:
- How to foundation single crochet
- Magic Knot for Joining Yarn
- How To Double Crochet 2 Rows at Once
- How to crochet ribbing
- Mattress stitch join tutorial
- How To Crochet an I-CORD
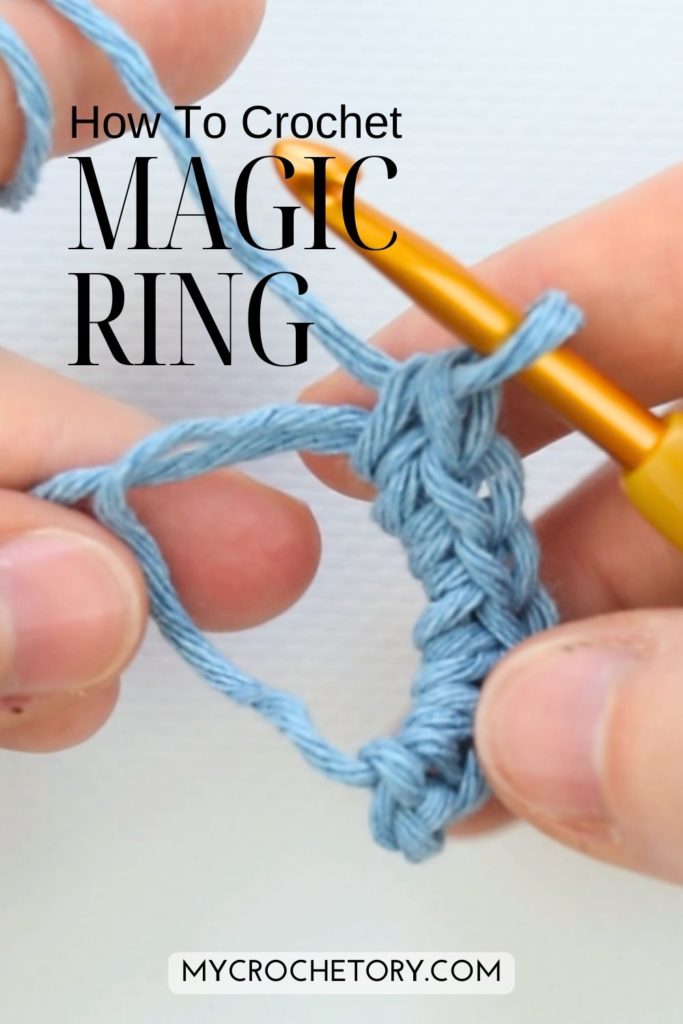
Don’t forget to save this Pin for easy reference: 📌
We’d love to hear about your crochet adventures and see your beautiful creations. Drop a comment below sharing your thoughts, questions, or even your favorite crochet tips! Your voice adds a vibrant thread to our crafting community.
Sharing is caring! If you found this guide helpful, consider spreading the love. Click the share button and inspire other crocheters.
Stay in the loop with our latest crochet guides, tips, and inspiration. Subscribe to our newsletter for exclusive content straight to your inbox. Never miss a stitch—subscribe today!
Happy crocheting, and may your yarn always be tangle-free!
Join my Facebook Group and Official Ravelry Group where you can find necessary support, you can ask questions or share your finished projects.
You can also follow my Instagram, Facebook page and Pinterest.
This is such a helpful post! I love how you broke down the different methods for creating a magic ring. It was especially useful to see the photos alongside the instructions. Can’t wait to try it out in my next project! Thank you for sharing!
This post was super helpful! I’ve always struggled with the magic circle technique, but your step-by-step instructions made it so much easier to understand. I can’t wait to try out all three methods! Thanks for sharing!
Great tips! I’ve always struggled with the magic circle, but your clear explanations and photos really helped me understand the technique. Can’t wait to try it out on my next project! Thank you!
Thank you for the detailed explanation on the magic circle! I’ve always struggled with starting my projects this way, but your step-by-step guide and tips made it so much easier to understand. Can’t wait to try these methods on my next crochet project!
Thanks for sharing these easy methods for creating a magic circle! I’ve always struggled with starting my projects this way, but your step-by-step instructions made it so much clearer. Can’t wait to try it out on my next blanket!
This post was super helpful! I’ve always struggled with starting my projects using a magic circle, but your three methods made it so much easier to understand. I can’t wait to try them out on my next amigurumi! Thanks for sharing these tips!
Thanks for these super clear instructions!