Updated: 26 January 2024 by Sylwia (MyCrochetory)
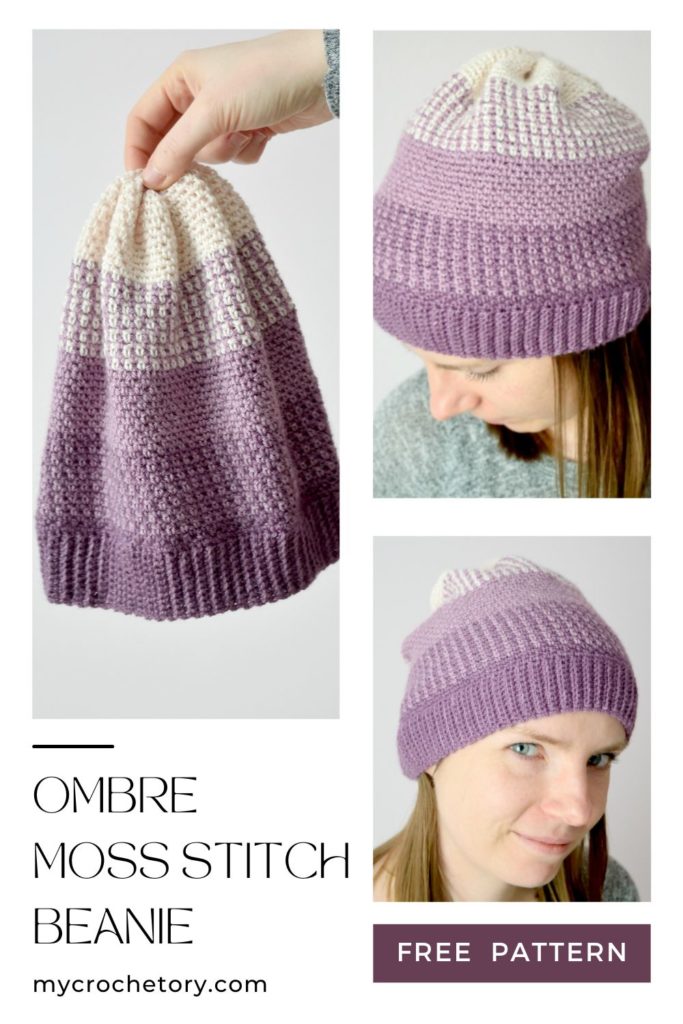
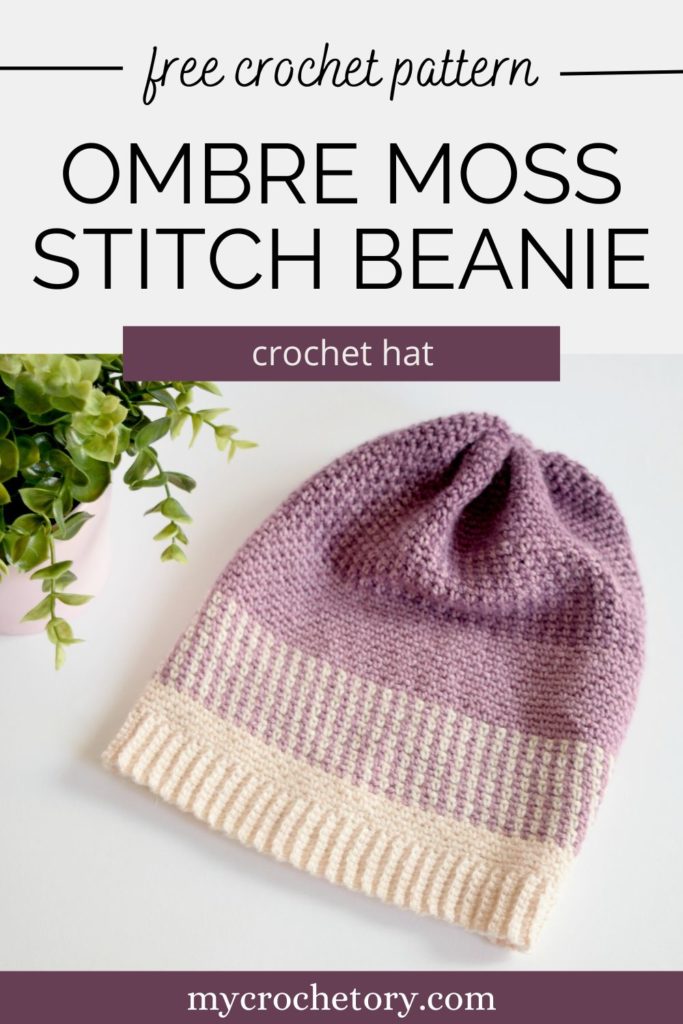
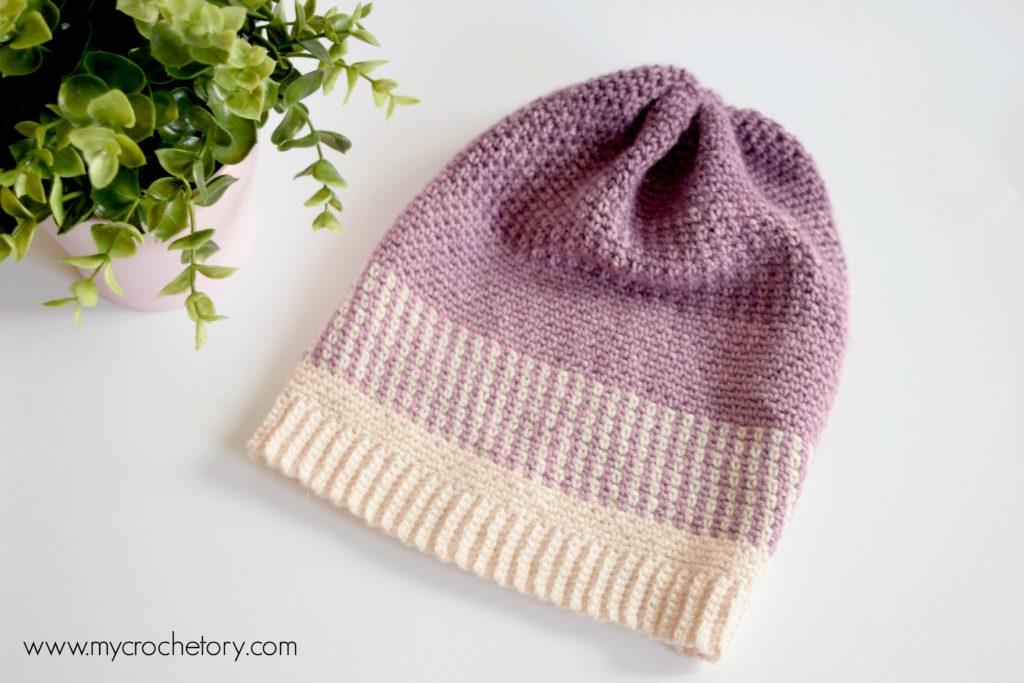
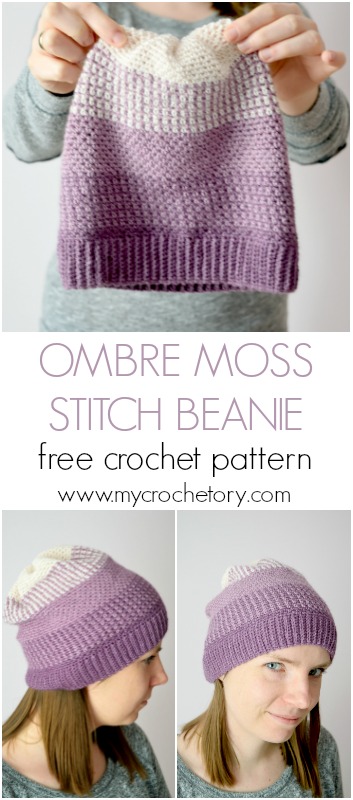
Learn how to crochet a hat with the free crochet hat pattern for the Ombre Moss Stitch Beanie. Discover the beauty of the crochet moss stitch pattern and create a warm and stylish accessory for the cold winter days.
Scroll down to see the Ombre Moss Stitch Beanie crochet pattern or you may choose to purchase the ad-free, printable PDF crochet pattern HERE on ETSY or HERE on Ravelry.
Join my Facebook Group and Official Ravelry Group where you can find necessary support, you can ask questions or share your finished projects.
You can also follow my Instagram, Facebook page and Pinterest.
Welcome to the World of Hat Crocheting
As the cold winter sets in, what could be more satisfying than wearing and making your own warm crocheted items?
Today, I want to introduce you to the beautiful Ombre Moss Stitch Beanie, a delightful project that combines elegance and coziness.
Join me as we explore how to crochet this hat, featuring the mesmerizing crochet moss stitch pattern. Get ready to embrace the joy of creating something truly special.
How To Crochet a Hat With the Gradient Effect?
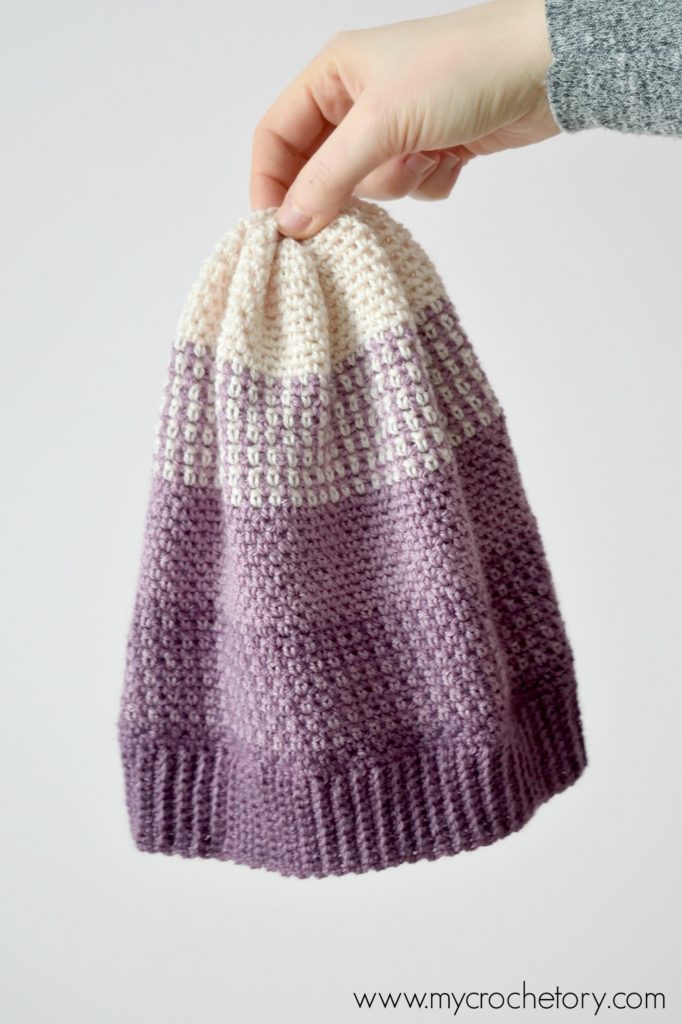
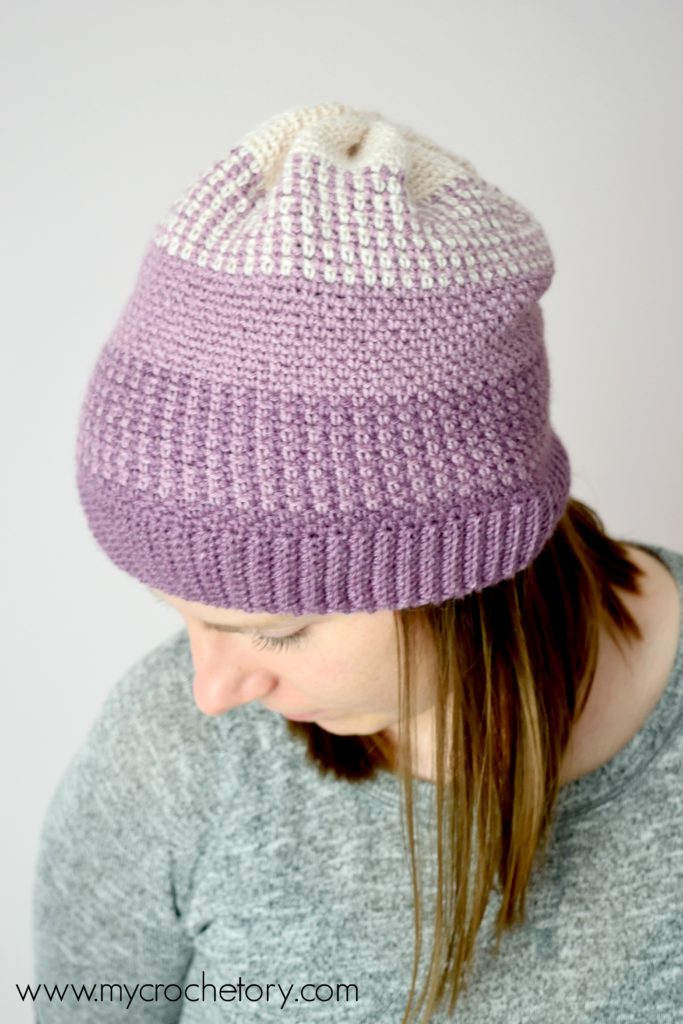
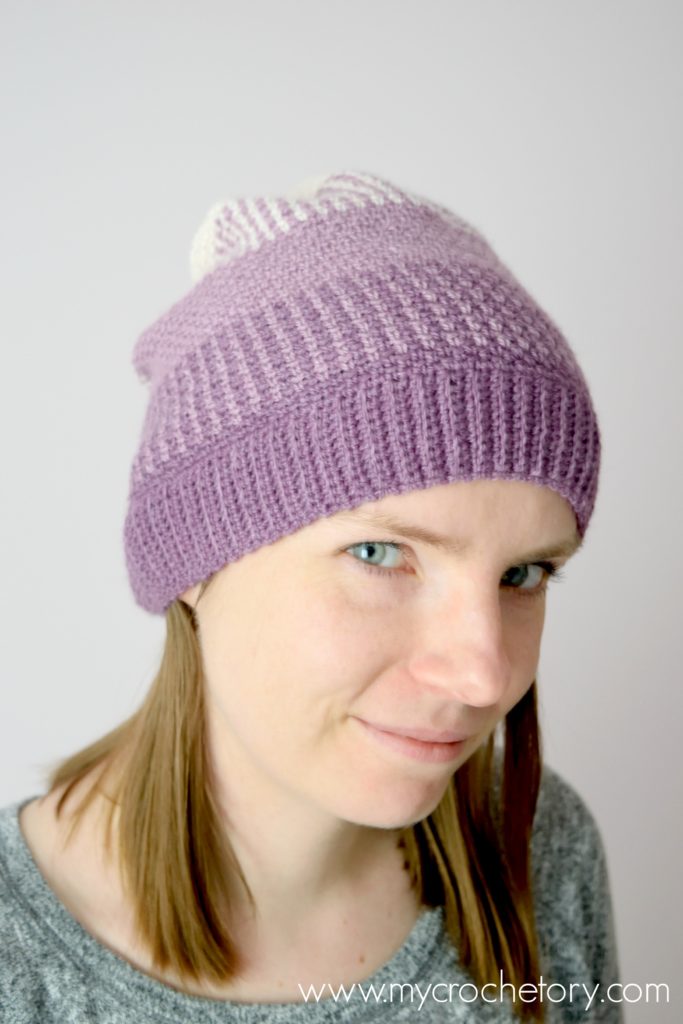
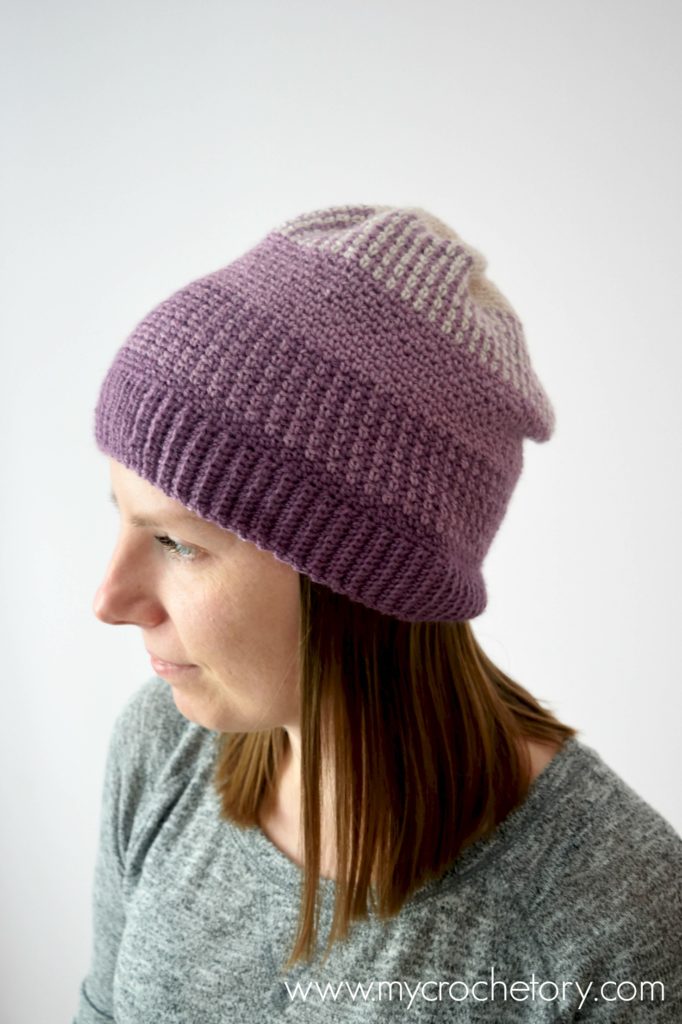
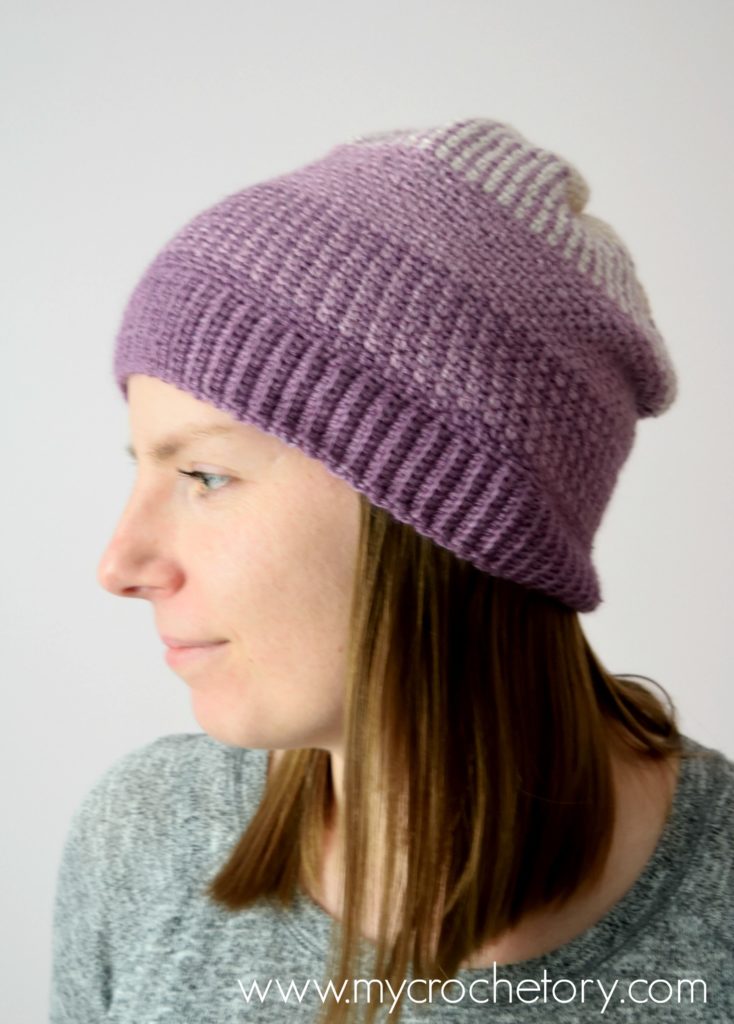
How pretty is the Ombre Moss Stitch Beanie?
I fell in love with the gradient effect it creates, thanks to the Drops BabyAlpaca yarn I used. The blend of baby alpaca wool and mulberry silk makes it irresistibly soft, smooth, and delicate.
The subtle shine and plush texture of the yarn bring this hat to life, ensuring both comfort and style.
Get ready to crochet your own piece of winter warmth!
The Versatility of the Crochet Moss Stitch Pattern
For the body of this beanie, I utilized the timeless crochet moss stitch pattern, also known as the linen stitch or granite stitch.
Its simplicity makes it a perfect choice for beginners.
With just single crochet and chain stitches, you’ll be able to create a hat that boasts stunning texture.
The best part? It works up quickly, allowing you to enjoy the satisfaction of completing your project in no time.
How To Crochet a Hat with a Perfect Fit
Let’s dive into the process of making your own Ombre Moss Stitch Beanie.
With a 3.5 mm hook, you’ll begin working the moss stitch in the round.
No need to worry about increasing or decreasing stitches.
It’s a straightforward pattern that will guide you effortlessly through the creation of your hat.
If you need a refresher on crocheting the moss stitch, check out my step-by-step tutorial, complete with helpful pictures, for a seamless experience.
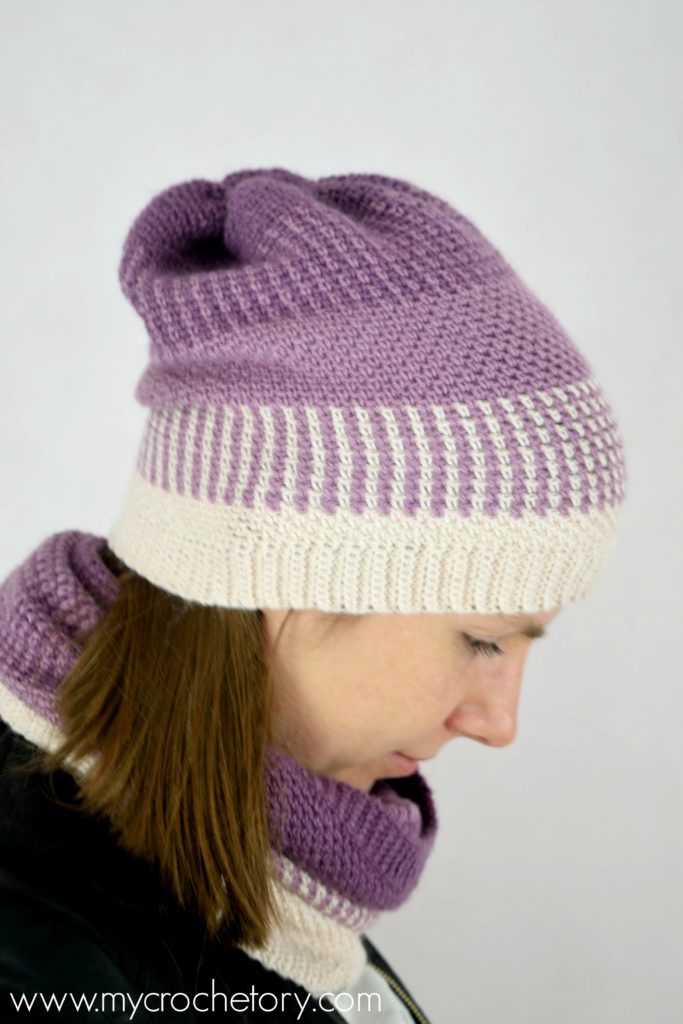
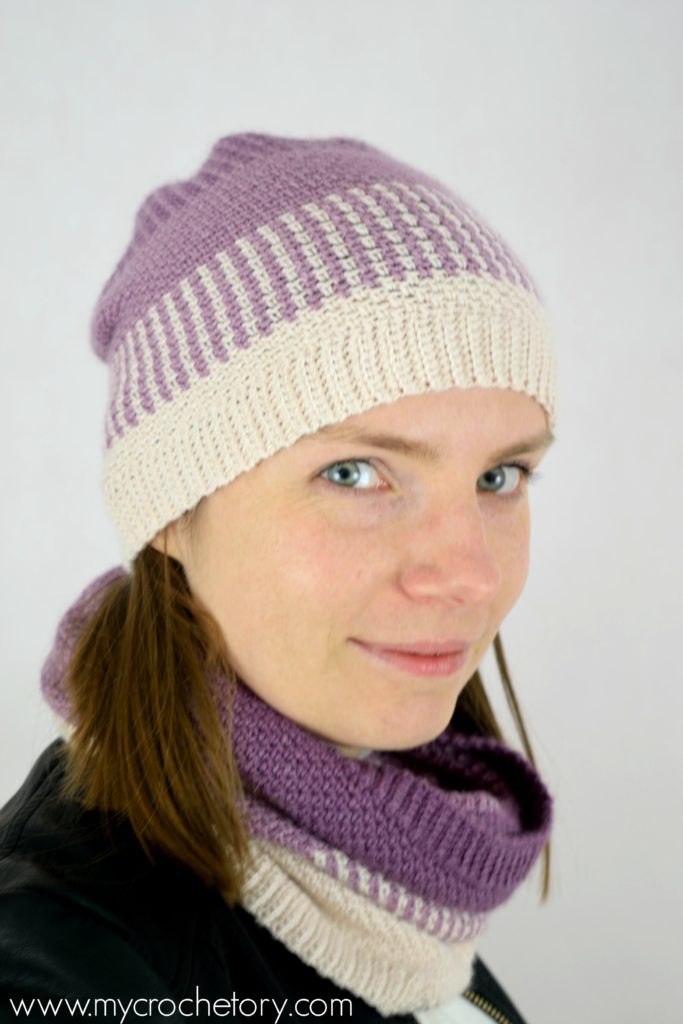
A Perfect Set for Winter Fashion
Last year, I designed the Ombre Moss Stitch Cowl, and it took me months to develop a matching crochet beanie.
With this set, you can stay cozy and fashionable throughout the cold winter days and early spring.
The combination of the cowl and beanie adds a touch of flair to your casual wear, making a statement wherever you go.
Don’t miss out on the opportunity to elevate your winter wardrobe.
Frequently Asked Questions
Q: Is the Ombre Moss Stitch Beanie suitable for beginners?
A: Absolutely! The pattern is designed with simplicity in mind, making it ideal for beginners who have mastered single crochet and chain stitches.
Q: Can I customize the Ombre Moss Stitch Beanie?
A: Certainly! Feel free to experiment with different colors and yarn types to create a personalized hat that matches your style.
Q: How long does it take to complete the Ombre Moss Stitch Beanie?
A: The beauty of this pattern lies in its speed. With its simple design, you’ll be able to finish the beanie in no time.
Now that you have discovered the magic of the Ombre Moss Stitch Beanie, it’s time to pick up your crochet hook and begin a delightful journey.
With its beautiful gradient effect and the simplicity of the moss stitch pattern, this hat is sure to become a cherished accessory.
Enjoy the process and relish in the satisfaction of creating something with your own hands.
Stay warm, stylish, and happy crocheting!
MORE FREE CROCHET MOSS STITCH PATTERNS YOU MIGHT LOVE
FREE OMBRE MOSS STITCH CROCHET BEANIE PATTERN
- Purchase the ad-free, printable PDF with a stitch chart here on ETSY or here on Ravelry.
- Add this pattern to your Ravelry Queue HERE.
- Pin it for later.
Copyright 2018 – 2024 MyCrochetory. All right reserved. This pattern is property of Sylwia Kawczyńska @MyCrochetory. Please DO NOT sell the pattern and claim this pattern as your own. The pattern is for personal use only and may not be translated or reproduced in another language. Please respect my rights, DO NOT share or publish this pattern anywhere without my permission.
The crochet hat pattern you make following this pattern is yours you are free to sell it, as long as you credit MyCrochetory as original designer. For more information, please, read Terms Page.
Materials & Tools:
- Yarn Drops BabyAlpaca Silk (70% alpaca, 30% silk – 50g/167m) in 3 different colors: approx. 23g of Yarn A heather (4088), approx. 26g of Yarn B light old pink (3250), approx. 21g of Yarn C powder (1306).
- Hook size 3.5 mm (US E/4-UK 9), 2,5 mm (US C/2-UK 12). Adjust hook size if necessary to obtain correct gauge.
- Tapestry Needle (to weave and hide yarn ends).
- Scissors.
Level:
Intermediate – if you don’t know how to do the Moss Stitch in rounds and how to change colours check out my TUTORIAL.
Size after blocking:
One size: 54-56cm/21-22” circumference. Length from the bottom of the brim to top – about 24 cm/ 9.45”.
Gauge after blocking:
For the hat body: 24 sts and 26 rows = 10cm x 10cm using the moss stitch.
Notes:
- The pattern uses US crochet terminology.
- Beanie is worked in rounds without cutting the yarn after each round.
- For more slouchier look (with more height), add more rounds to the body. To make the hat shorter, decrease the number of rounds in the body.
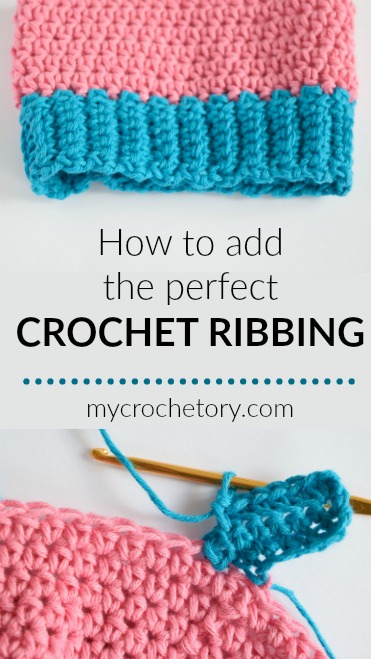
- The ribbed brim is formed by working single crochets in the back loops and can be adjusted.
- The body of the hat is worked using 3.5 mm crochet hook and the ribbed brim is worked using 2.5 mm crochet hook.
- To close up top of the hat I followed the technique as demonstrated in this VIDEO.
Stitches & Abbreviations (US terms):
st(s) – stitch(es)
yo – yarn over
BLsc – back loop only single crochet
sp – space
beg – beginning
prev – previous
sk – skip
Instructions in square brackets […] are worked as many times as indicated.
PATTERN
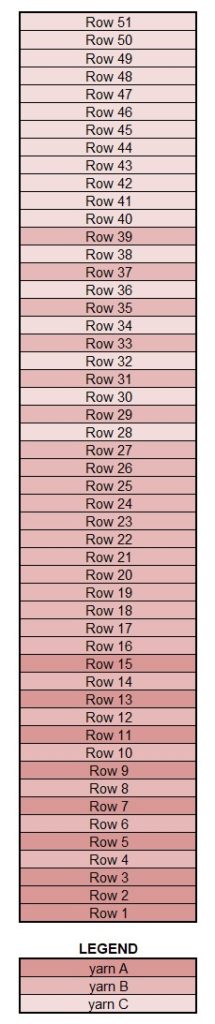
Using 3,5mm hook start with a yarn A and then follow color diagram for each row.
Ch 122 and sl st in the first st to close the round.
You can also make any EVEN number of chain stitches to make your desire circumference, but changes might result in a different yardage requirement.
Be careful and join your starting chain without twisting.
Round 1: ch1 (doesn’t count as a sc), sc around in every ch, sl st in first sc to close the round.
Round 2: ch2 (doesn’t count as a sc and ch1), sc in 2nd st, [ch1, sk 1 sc, sc1 in next sc] –
rep […] until end of the round. Sl st under 2nd ch of the beginning ch2.
The last stitch should be a sc in the last chain
Round 3: ch2 (counts as a first sc and ch1), [sc in next ch-1 sp, ch1, sk 1 sc] – rep […] until end
of the round. Sl st to the first ch1 of the beginning ch2.
The last stitch should be a ch1.
Round 4: ch2 (doesn’t count as a sc and ch1), sc in first ch-1 sp, [ch1, sk 1st, sc in next ch-1 sp] – repe
at […] until end of the row. Sl st under 2nd ch of the beginning ch2.
The last stitch should be a sc in the last chain.
Round 5 – Round 51: Repet Row 3 – Row 4 according to the color diagram.
Fasten off yarn and weave in all ends.
Tip: You can avoid weaving in all those ends by not cutting the yarn when you finish a round. Simply carry the other color along the inside and pick it back up with your hook when you need to use it again.
To close up top of the hat I followed the technique as demonstrated in this VIDEO.
HAT BRIM
Use hook 2,5 mm.
Now we are going to add a ribbed brim to the body of the hat using color A.
With right side facing
Row 1: Pick any place on the edge of the hat and attach your yarn with a slip stitch. Work 11 chains, starting with 2nd chain from hook, work 1 single crochet in each chain back to edge of hat. Join to the next stitch of the edge of hat using slip stitch and work one more slip stitch in the next stitch of hat (2 slip stitches in total for joining) plus make one chain. Turn.
Row 2: Starting from 3 stitch from hook, work single crochet in back loop of each stitch across (10 back loop single crochet). Turn.
Row 3: chain 1 (does not count as a stitch), single crochet in back loop in each stitch across (10 stitches). Join to the next stitch of the edge of hat using slip stitch and work one more slip stitch in the next stitch of hat (2 slip stitches in total for joining) plus make one chain. Turn.
Repeat Row 2-3 until you reach beginning Row 1. Then join your last row with the first row using the slip stitches.
You can also make longer brim by adding extra chains.
Click HERE to find my picture tutorial how to attach a ribbed collar to your piece.
Fasten off yarn, weave in all ends and block your hat.
If you have any suggestions or have detected any mistakes, please feel free to email me at mycrochetory@gmail.com
To make the matching Ombre Moss Stitch Cowl, check out the free pattern HERE!
Let me know if you will be making this set and what colour you will be using!
Join my Facebook Group and Official Ravelry Group where you can find necessary support, you can ask questions or share your finished projects.
You can also follow my Instagram, Facebook page and Pinterest.
Thank you so much for the pattern. Unlike many other patterns, this gave a neat join along the side.