Updated: 26 January 2024 by Sylwia (MyCrochetory)
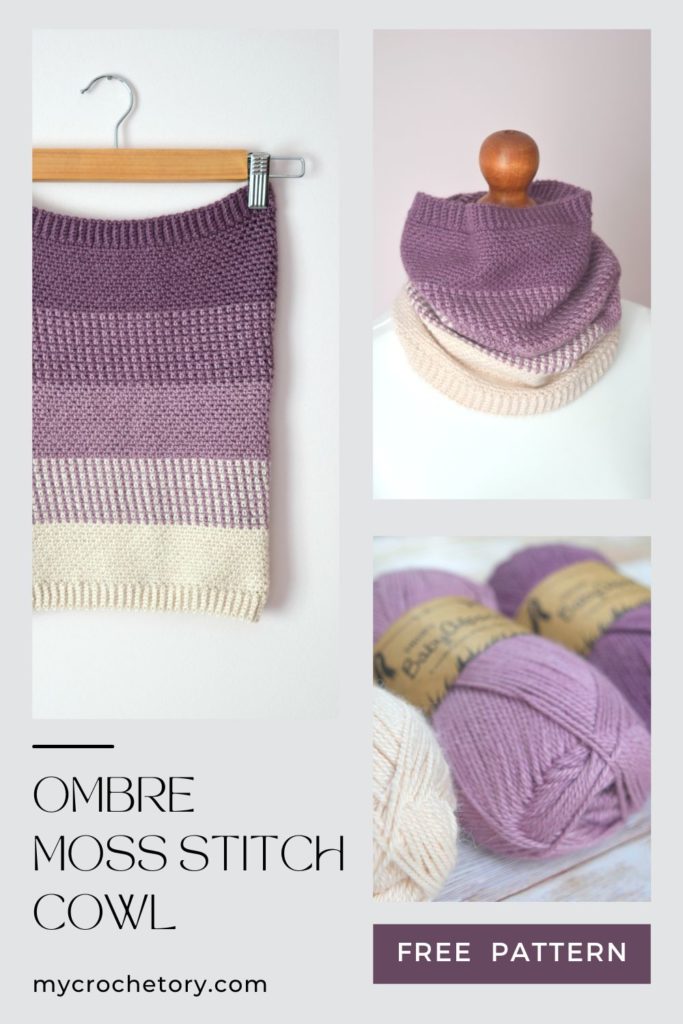
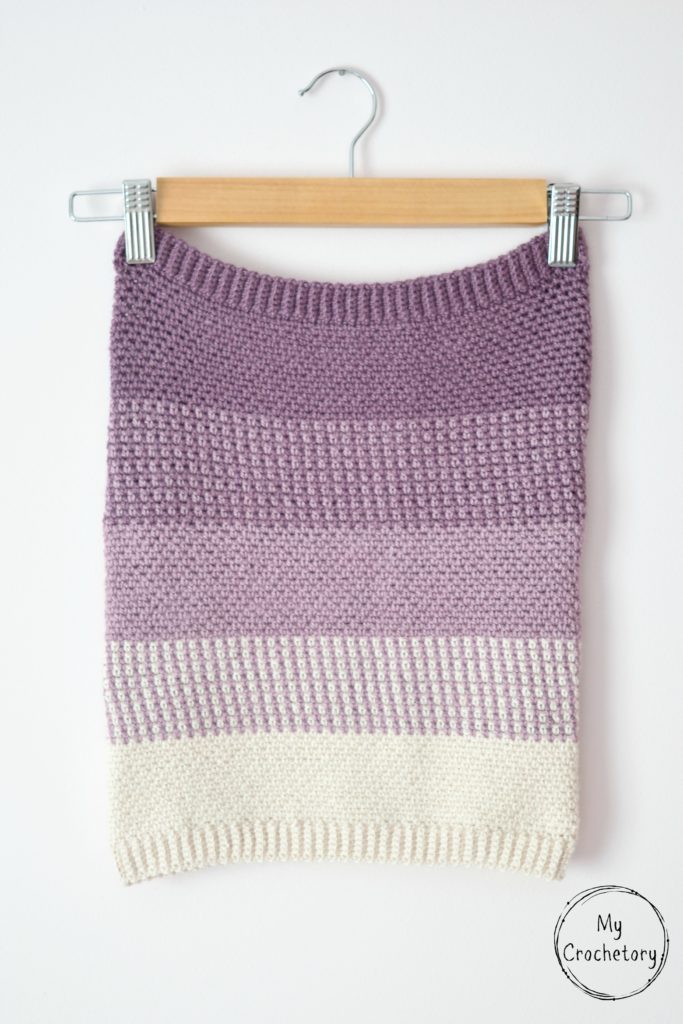
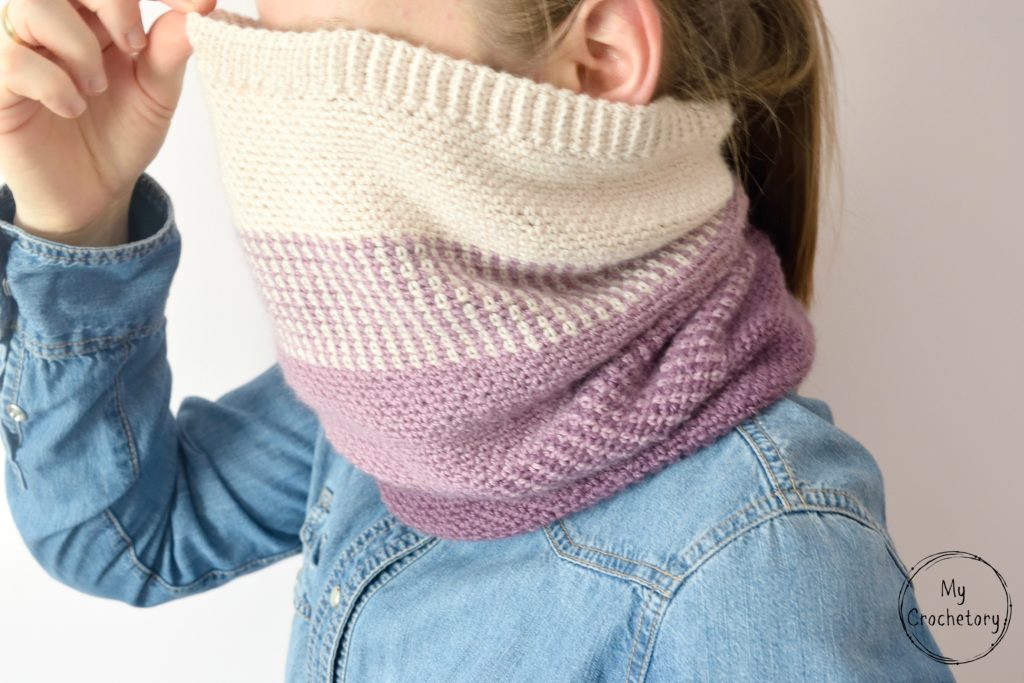
Dive into the world of crochet with our free cowl crochet pattern for a simple, yet stunning Ombre Moss Stitch Cowl. This versatile and fashionable accessory features an ombre effect and a knit look design. Get ready for an adventurous crochet journey!
Scroll down to see the Ombre Moss Stitch Cowl crochet pattern or you may choose to purchase the ad-free, printable PDF crochet pattern with stitch chart HERE on ETSY or HERE on Ravelry.
Join my Facebook Group and Official Ravelry Group where you can find necessary support, you can ask questions or share your finished projects.
You can also follow my Instagram, Facebook page and Pinterest.
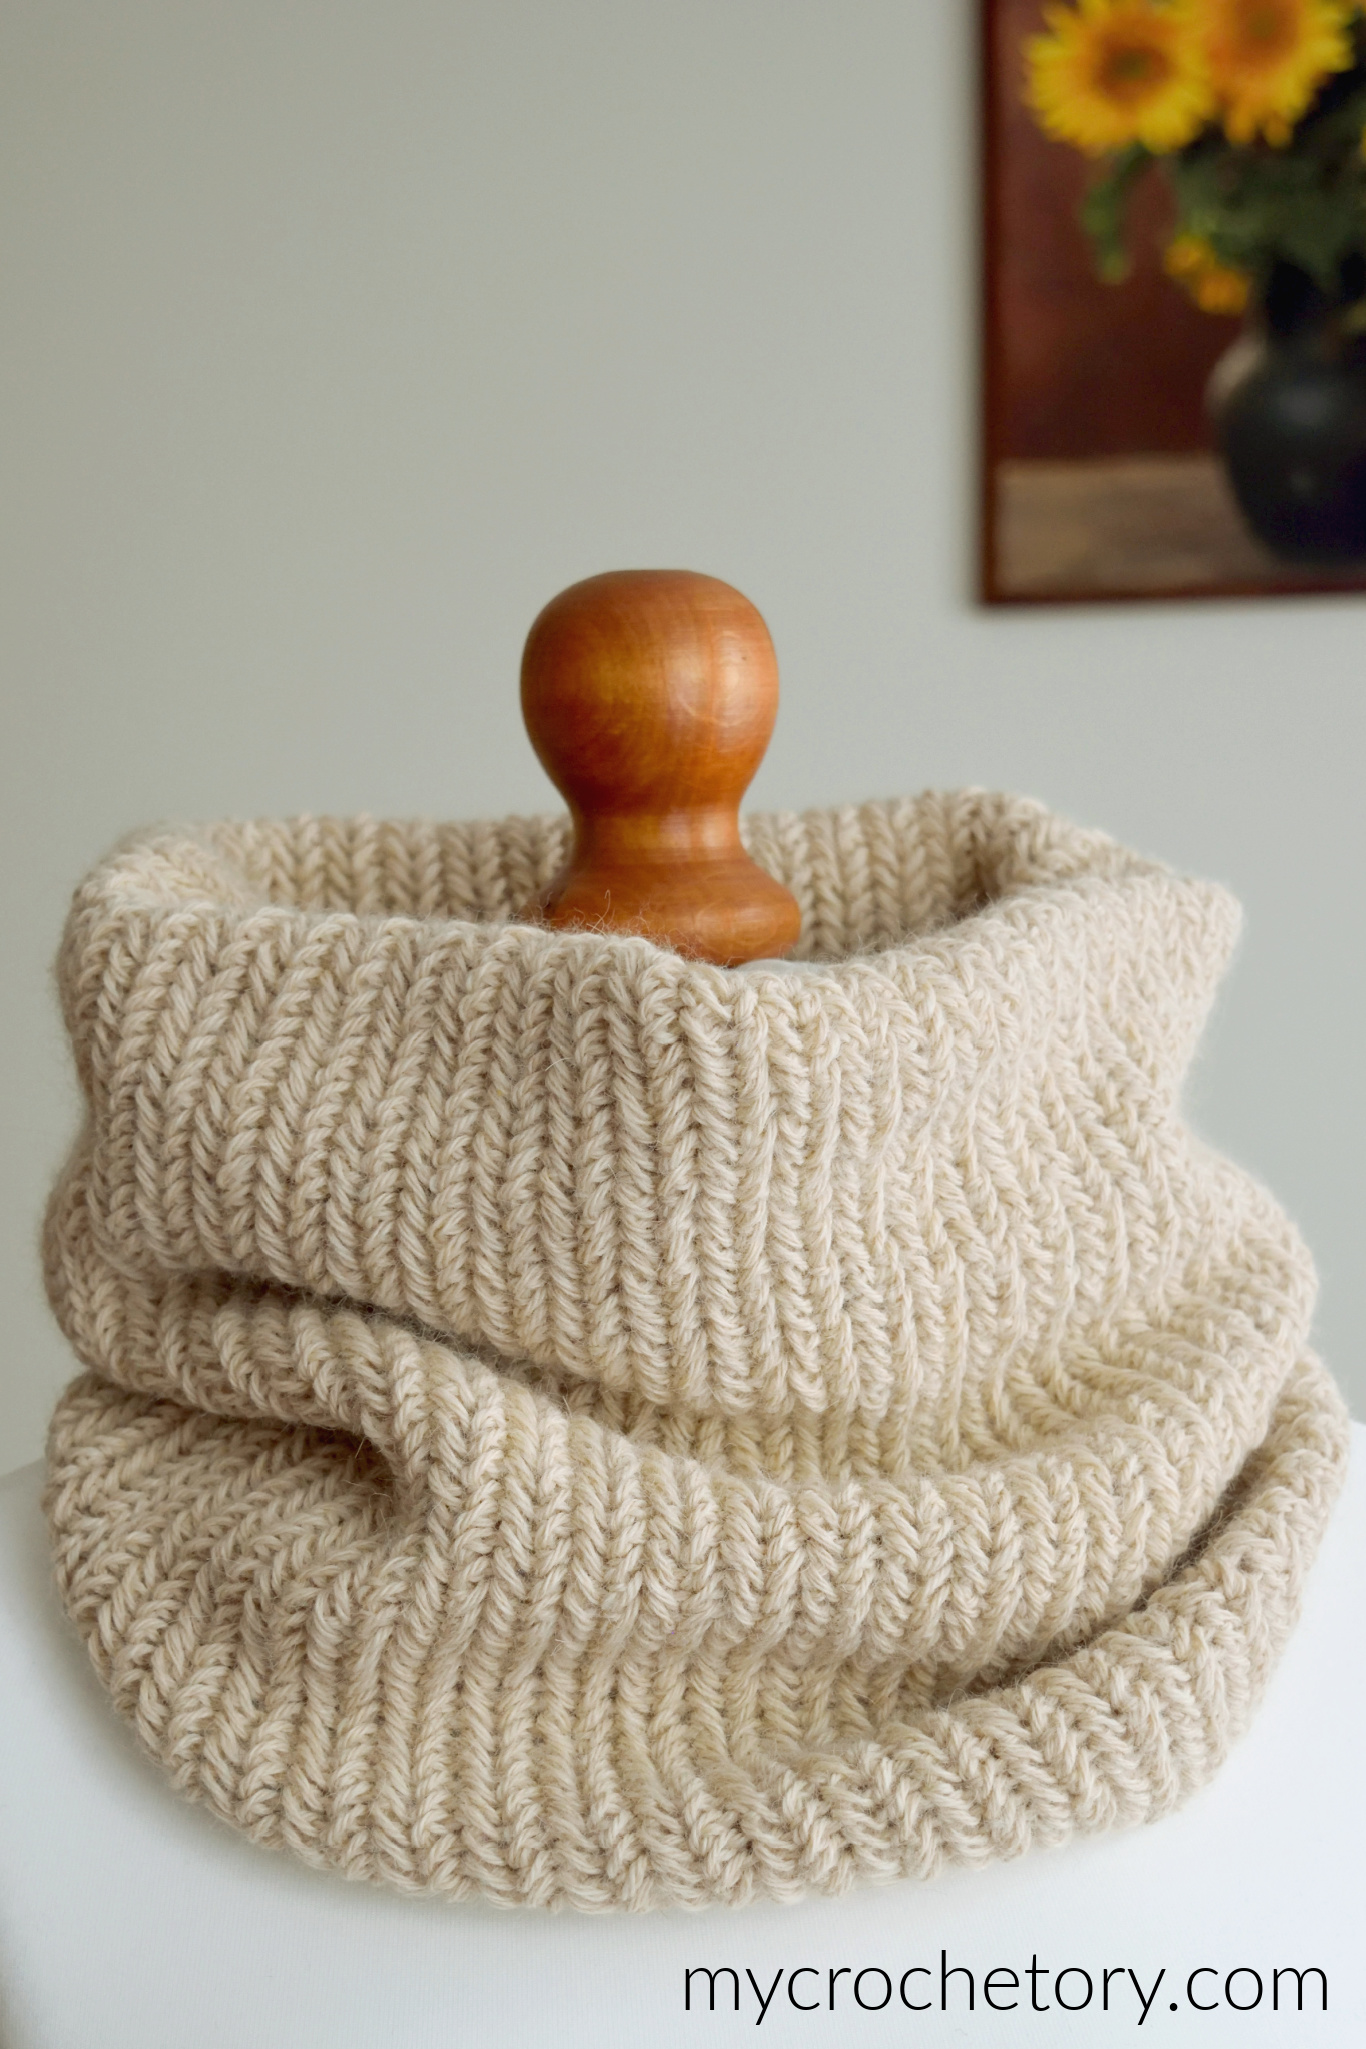
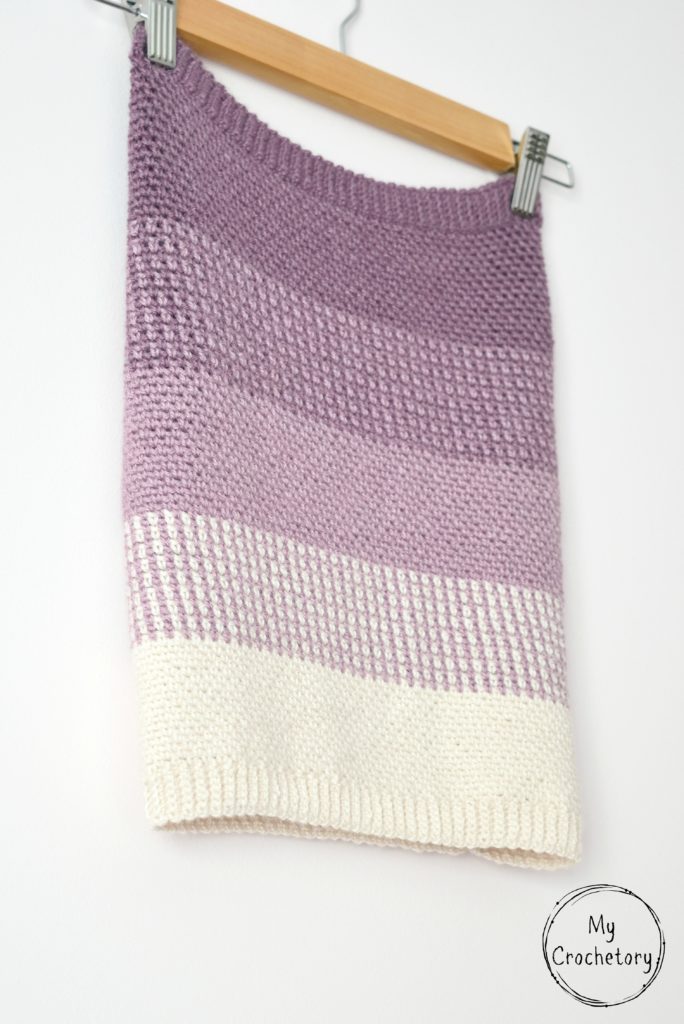
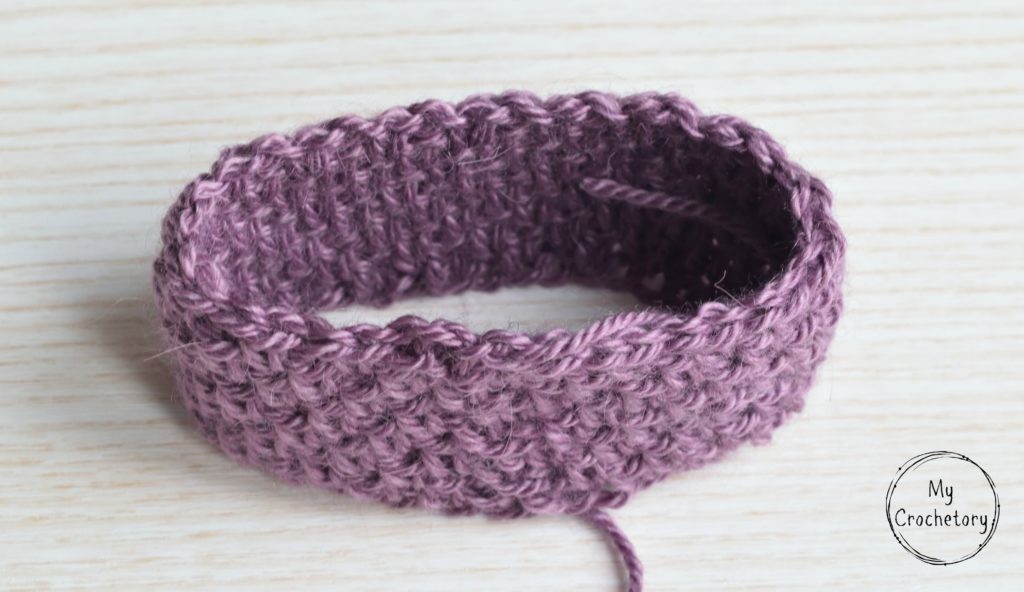
The Enchanting Ombre Moss Stitch Cowl
Once upon a time, in the world of crochet, there was a magnificent creation known as the Ombre Moss Stitch Cowl.
This stylish accessory captured the hearts of crafters with its captivating design.
It was a masterpiece that showcased the skill and artistry of crochet mastery.
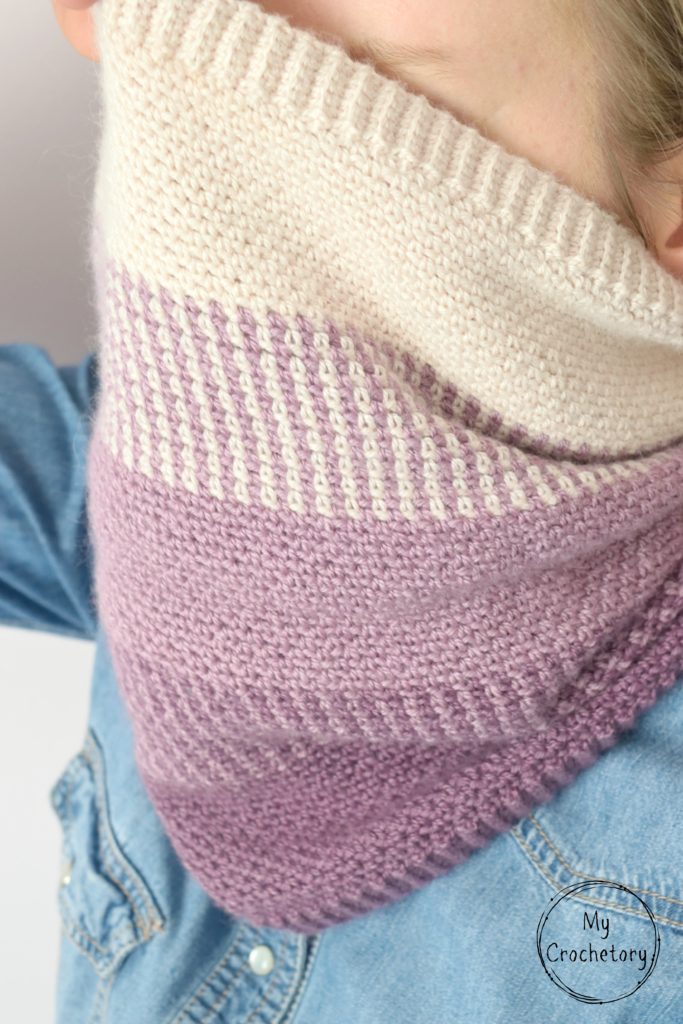
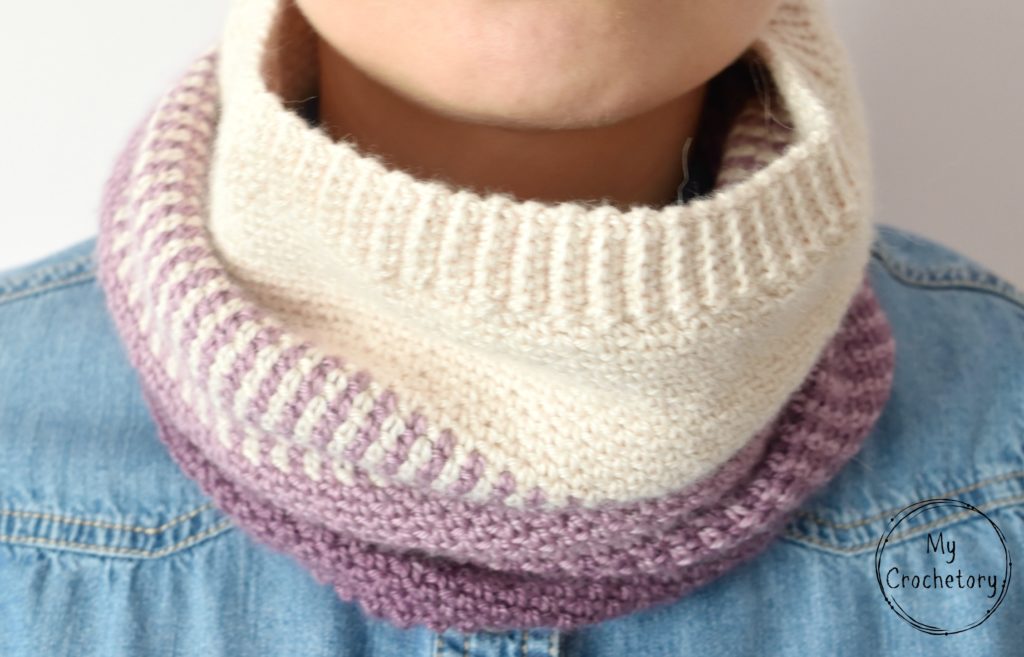
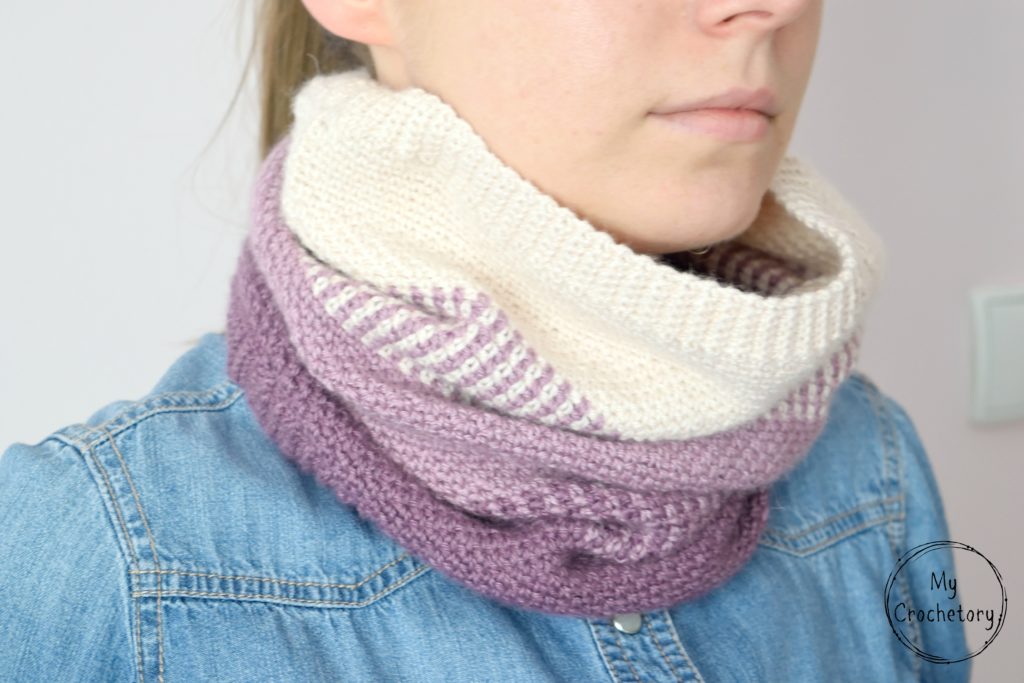
The crochet moss stitch used in this pattern creates a beautifully textured fabric with a woven appearance. It involves alternating single crochet and chain stitches, resulting in a versatile stitch pattern that adds depth and visual interest to your crochet projects.
Get the Free Pattern for a Stylish Cowl
If you’re yearning for a simple yet fashionable cowl, you’re in luck!
We have a free pattern for the Ombre Moss Stitch Cowl that will leave you feeling both cozy and chic.
It’s the perfect project for those who appreciate the beauty of simplicity.
This pattern has both chart and written instruction. I will also show you how to add a ribbing brims to the Ombre Moss Stitch Cowl. For this crochet pattern you will also need to follow my color chart.
Crafting a Stunning Color Transition
Let’s embark on a journey into the mesmerizing world of ombre.
With the Ombre Moss Stitch Cowl, you have the opportunity to create a striking color transition that will make heads turn.
Dive into the world of color blending and watch as your crochet project comes to life.
Achieving the Knit Look
Who doesn’t love the elegance of a knit look?
With a few clever techniques, you can achieve that sophisticated appearance in your crochet cowl.
Let’s explore how to add that finishing touch of elegance to your Ombre Moss Stitch Cowl and make it truly stand out.
Frequently Asked Questions (FAQs)
Q1: Can beginners make the Ombre Moss Stitch Cowl crochet pattern?
A: Absolutely! This pattern is designed with simplicity in mind, making it accessible for beginners who are eager to embark on their crochet journey.
Q2: What stitches do I need for this mesmerizing cowl?
A: You’ll only need three basic stitches: the chain stitch, single crochet stitch, and slip stitch. These stitches may be familiar to you or can be easily learned, ensuring a smooth and enjoyable crocheting experience.

Q3: How can I create the beautiful ombre effect in my crochet project?
A: To achieve the stunning ombre effect, you can select yarns in different shades of the same color or go for a gradient yarn. Begin with one color and gradually transition to another, creating a visually captivating ombre effect.
Q4: Are there written instructions and a color chart available for this pattern?
A: Absolutely! We understand the importance of clear instructions. The Ombre Moss Stitch Cowl pattern provides both written instructions and a color chart, ensuring that you have all the guidance you need to bring your cowl to life.
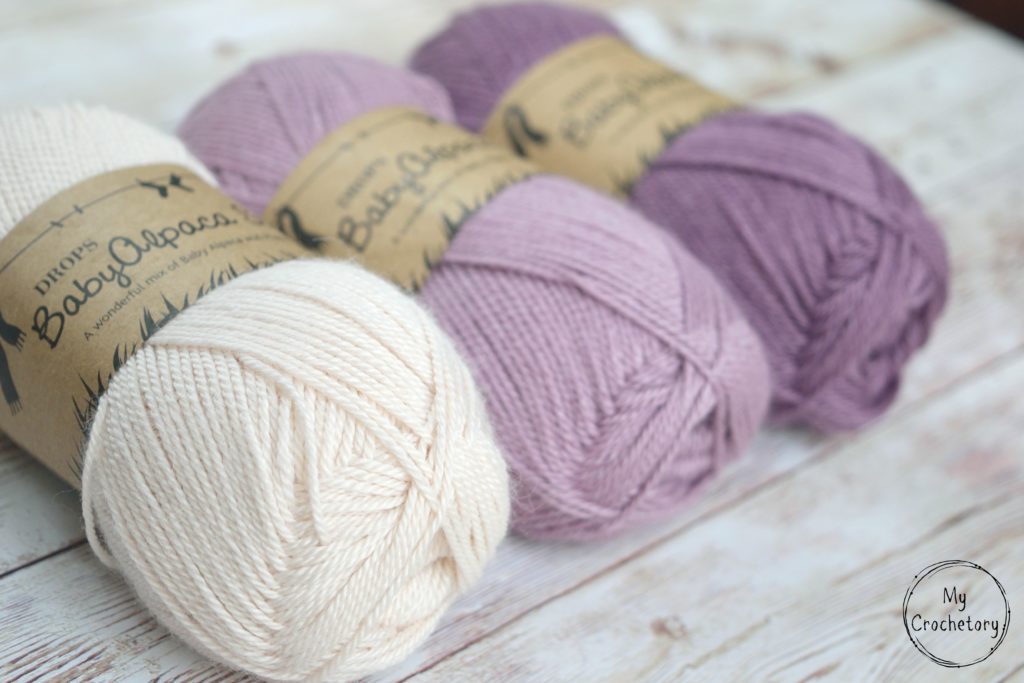
Q5: What yarns do you recommend for this adventurous crochet journey?
A: For this adventurous crochet journey, we recommend using a soft and cozy yarn that will enhance the comfort and beauty of your cowl. Choose yarns that complement each other for the ombre effect and make your project truly extraordinary.
Get ready to embark on a crochet adventure like no other! This pattern is for the daring and creative souls who seek to infuse their projects with a touch of magic.
Happy crocheting, my fellow adventurers!
OTHER COWL CROCHET FREE PATTERNS YOU MIGHT LOVE
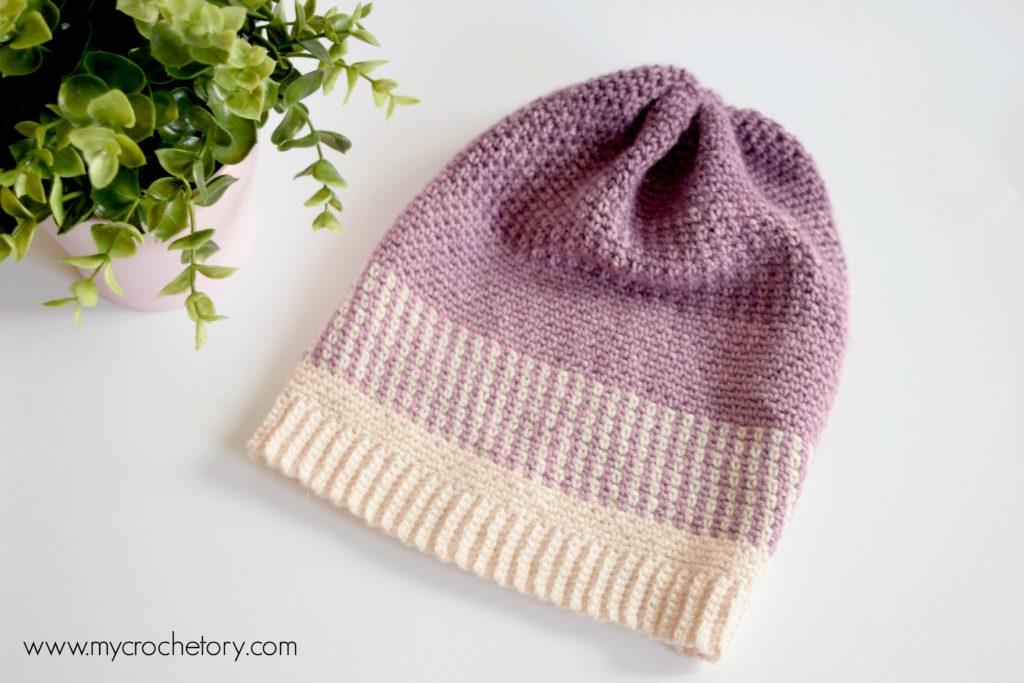
UPDATE:
Click HERE and find free pattern for a matching beanie.
If you want to share your wips and finished Ombre Moss Stitch Cowl on social media, please, use hashtag #mycrochetory. I love to see your finished project!
FREE OMBRE MOSS STITCH CROCHET COWL PATTERN
- Purchase the ad-free, printable PDF with STITCH CHART here on ETSY or here on Ravelry.
- Add this pattern to your Ravelry Queue HERE.
- Pin it for later.
Copyright 2018 – 2024 MyCrochetory. All right reserved. This pattern is property of Sylwia Kawczyńska @MyCrochetory. Please DO NOT sell the pattern and claim this pattern as your own. The pattern is for personal use only and may not be translated or reproduced in another language. Please respect my rights, DO NOT share or publish this pattern anywhere without my permission.
The crochet cowl pattern you make following this pattern is yours you are free to sell it, as long as you credit MyCrochetory as original designer. For more information, please, read Terms Page.

Materials & Tools:
- Yarn 3 skeins of Drops BabyAlpaca Silk (70% alpaca, 30% silk – 50g/167m) in 3 different colors: Yarn A powder (1306), Yarn B light old pink (3250), Yarn C heather (4088).
- Hook size 3.5 mm for body of the cowl and 2.5 mm for ribbing. Adjust hook size if necessary to obtain correct gauge.
- Tapestry Needle (to weave and hide yarn ends).
- Scissors.
Level:
Beginner Plus – if you don’t know how to do the Moss Stitch check out my tutorial.
Finished size:
Approx 27 cm wide across middle (not across ribbing), approx 34 cm long.
Gauge
25 sts and 30 rows = 10 cmx 10 cm using the moss stitch.
Gauge is not crucial for this project. However, changes might result in a different yardage requirement.
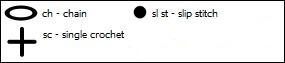
Stitches & Abbreviations (US terms)
st(s) – stitch(es)
yo – yarn over
BLsc – back loop only single crochet
PATTERN
Using Yarn A and hook 3.5mm
Ch 150 and sl st in the first st to close the round.
You can also make any EVEN number of chain stitches to make your desire circumference, but changes might result in a different yardage requirement.
Be careful and join your starting chain without twisting.
Round 1: ch1 (doesn’t count as a sc), ch1, sc in 2nd ch, [ch1, skip 1ch, sc1 in next ch] – repeat […] until end of the round. The last stitch should be a sc in the last chain. Sl st under 2nd ch of the beginning ch2.
Round2: ch1 (counts as a first sc), ch1, [sc in next ch-1 space, ch1, skip 1 sc] –repeat […] until end of the round. The last stitch should be a ch1. Sl st to the first ch1 of the beginning ch2.
Round 3: ch1 (doesn’t count as a sc), ch1, sc in first ch-1 space, [ch1, skip 1st, sc in next ch-1 space] –repeat […] until end of the row. The last stitch should be a sc in the last chain. Sl st under 2nd ch of the beginning ch2.
Round 4 – Round 84: Repet Row 2 – Row 3 according to the color chart.
Fasten off yarn and weave in all ends.
Don’t forget to check out the Moss Stitch step-by-step tutorial showing how to work this stitch in a round!
Tip: You can avoid weaving in all those ends by not cutting the yarn when you finish a round. Simply carry the other color along the inside and pick it back up with your hook when you need to use it again.
Ombre Moss Stitch Cowl – chart

If you have any suggestions or have detected any mistakes, please feel free to email me at mycrochetory@gmail.com
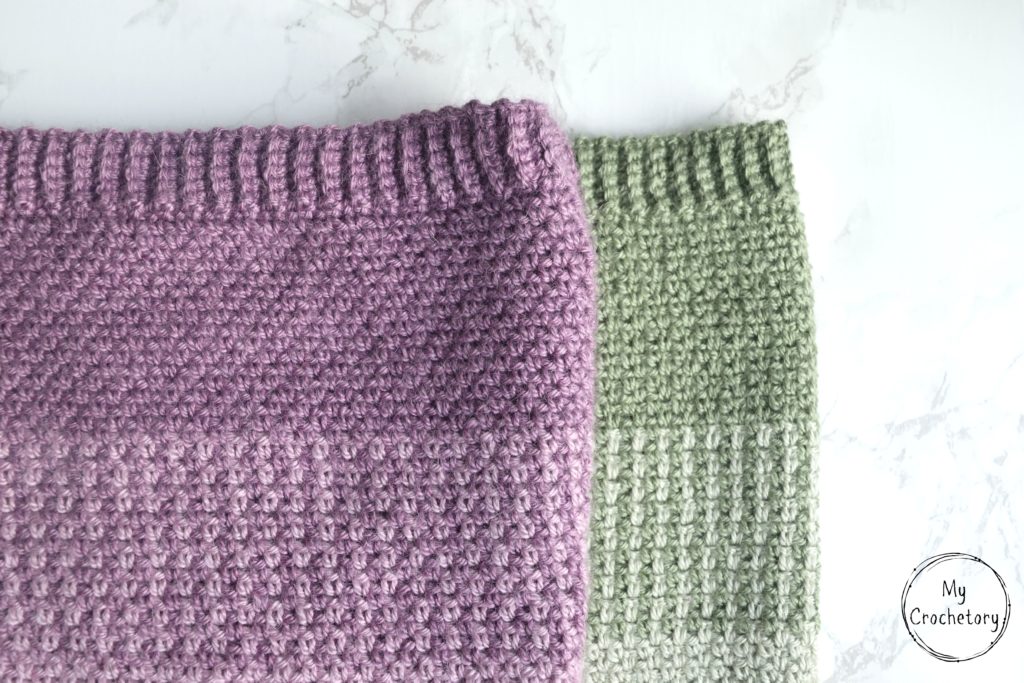
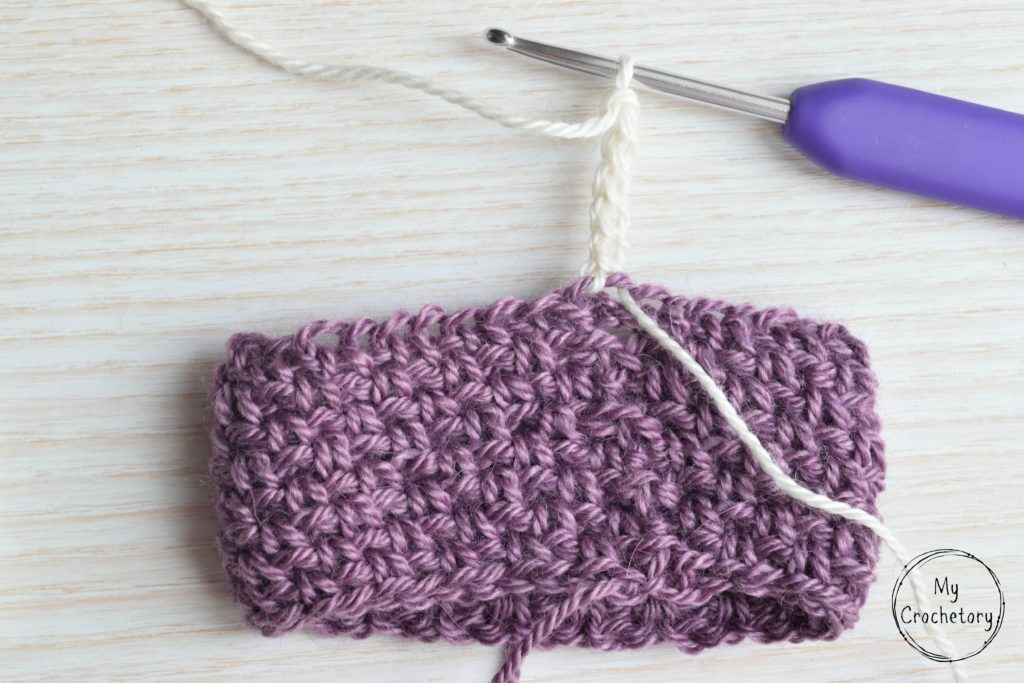
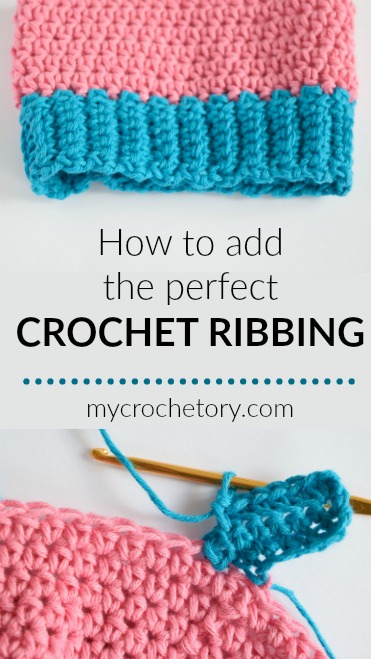
RIBBING
Ribbing plays a vital role in the Ombre Moss Stitch Cowl, adding a touch of knit-look finishing to elevate the project.
To achieve this, I decided to incorporate a crochet single crochet ribbed brim, which I’ll guide you through.
Although the example provided is a small sample and not the actual cowl from the pattern, the technique remains the same.
For the ribbing, I used a slightly smaller hook size (2.5mm) compared to the one used for the cowl’s body.
So let’s dive into this exciting addition to the Ombre Moss Stitch Cowl!
To join a new yarn for ribbing, insert your hook into the first stitch of a round, wrap the new yarn over the hook and pull it throught the remaining two loops on the hook.
Then, decide how wide your brim will be. For my Ombre Moss Stitch Cowl you will need 6 chains for a 5 stitch wide single crochet ribbed brim.
Make a single crochet in the second chain from the hook (pic. 1), and 5 single crochet stitches to the end (pic. 2)

Next, you have to slip stitch in the next two stitches on the final round of your Ombre Moss Stitch Cowl. On the pic. 3 and pic. 4 the needle points the right stitches.
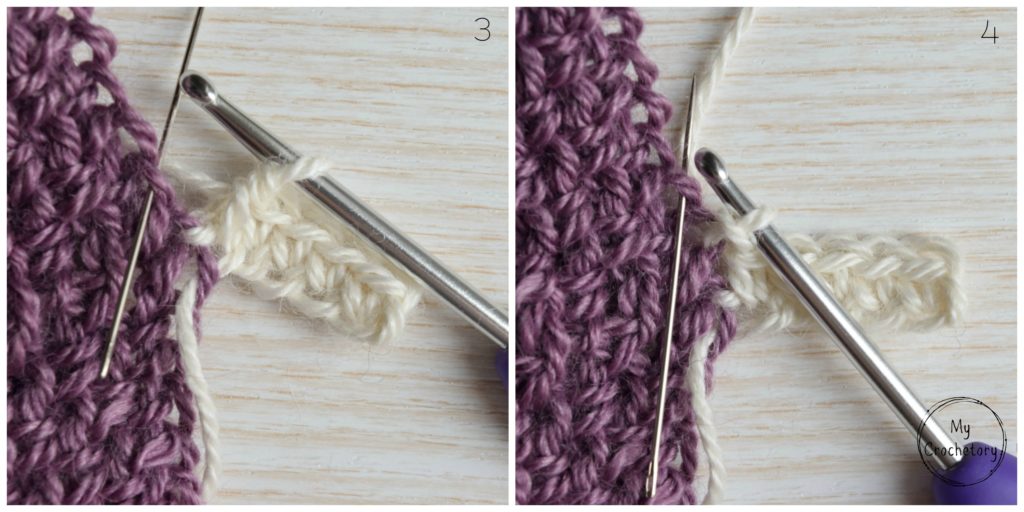
When the two slip stitches has been created make a 1chain and rotate your project to start working the back up where the single crochet you need. This is the first row of your ribbing.
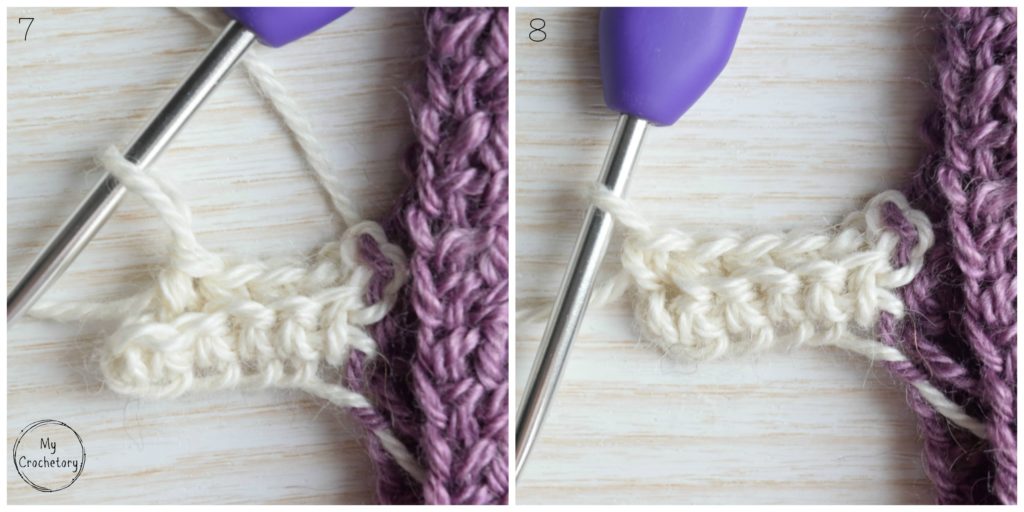
Then, skip the chain1 and two slip stitches just made (the needle points the correct stitch on pic. 6) and make single crochet at the back loop only of the next 4 stitches (pic. 7).
The last single crochet work through the both loops (pic. 8) and you have now two rows of your ribbing.

Next, turn your work and make a chain1.
Then make single crochet in the first stitch and back loop only single crochet in the next 4 stitches.
After that, slip stitch in the next two stitches on the final round of your Ombre Moss Stitch Cowl (pic. 10 and pic. 11) and chain 1.
Now, rotate your project and repeat Row 2 and Row 3 of the ribbing until you have worked all the way around.
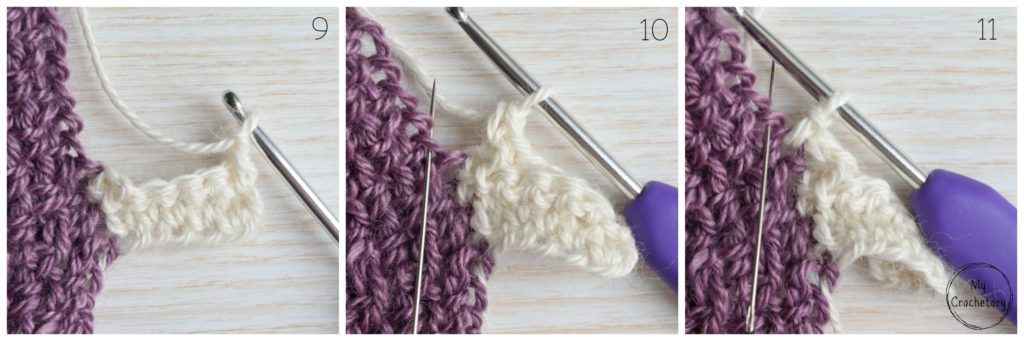
When you make the last row of your cowl brim and you want to have a nice clean look you have to close up your ribbing. For this, turn your cowl inside out, insert your hook in the loop and slip stitch these two layers of the fabric together (5 slip stitches).
Fasten off yarn and weave in all ends.
I hope this helped you give your cowls a more finished knit-look.
This cowl is simply beautiful. Thank you for the pattern and the color ideas.
Thank you for this lovely pattern, I can’t wait to try it. But I’m a bit confused on the yarn colors. The colors you used look like they are in lavender and purple family on my device, but when I go to order them the color names and accompanying photos are clearly in the pink family. Could you please tell me if the cowl is more pink or lavender? Thank you.
Thank you! Light old pink and Heather colors are in lavender tone.
That’s what I was hoping! Much thanks👍🏻
You got 1 skein of each color to do the cowl itself. How much extra did you have to have to do the ribbing?
No extra yarn is needed. These 3 skeins are enough to make body of the cowl and the ribbing.
so lovely! thank you xo
Ho! This is a lovely pattern, thank you!! I’d like to dry it for my little girl, 2 years old..can you reccomand the su se please.
Than you
Hi. Thank you! I don’t have a tested version for kids so you need to try to make for example 100 chains and put it around her neck to see if it fits.
Thanks 😉
I’ve started this pattern but the seam seems to veer on an angle as I go.. is this because I’m adding a single crochet in at the end or is this what is supposed to happen?
Please check the stitich chart for this pattern. There should not be any seam veering. You can also send me a pic of your cowl and I will try to look closer.
Thanks for your advice but embarrassingly I don’t know how to read a chart.. does each row end in a sc or a ch before the join?
Don’t worry! The odd rows end in a sc before the join and the even rows end in a ch before the join. Ask if you need help!
Thank you for sharing, I am excited to try tnis for my grandchild.
Gahhh, I read this as 3 skeins of each other. I ordered quite a lot extra bunch of yarn 😳
is it stretchy ?
Yes, it is stretchy.
Hello! Just recieved my yarns and can’t wait to start this project! How much wool was left after you finished? Wondering maybe to make it a little bit longer or wider 🙂 Did you try it with any other stitches?
Hi! I’m sorry, but I don’t know how much wool was left, I didn’t write it down.