Updated: 4 June 2026 by Sylwia (MyCrochetory)
Let’s be honest, some stitches look amazing but are secretly a pain to work with.
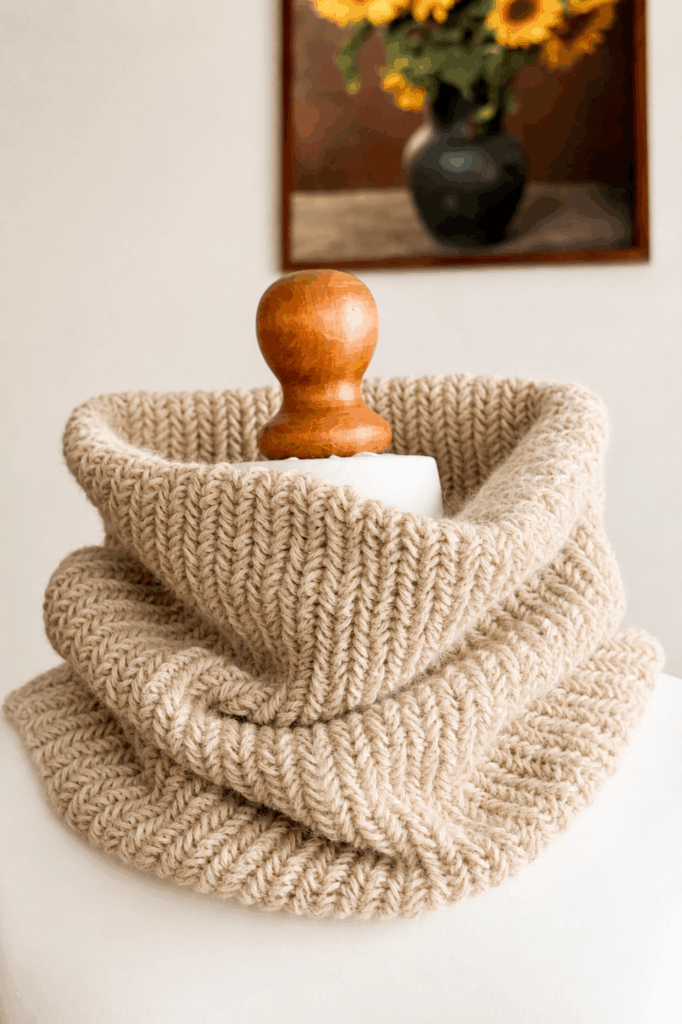
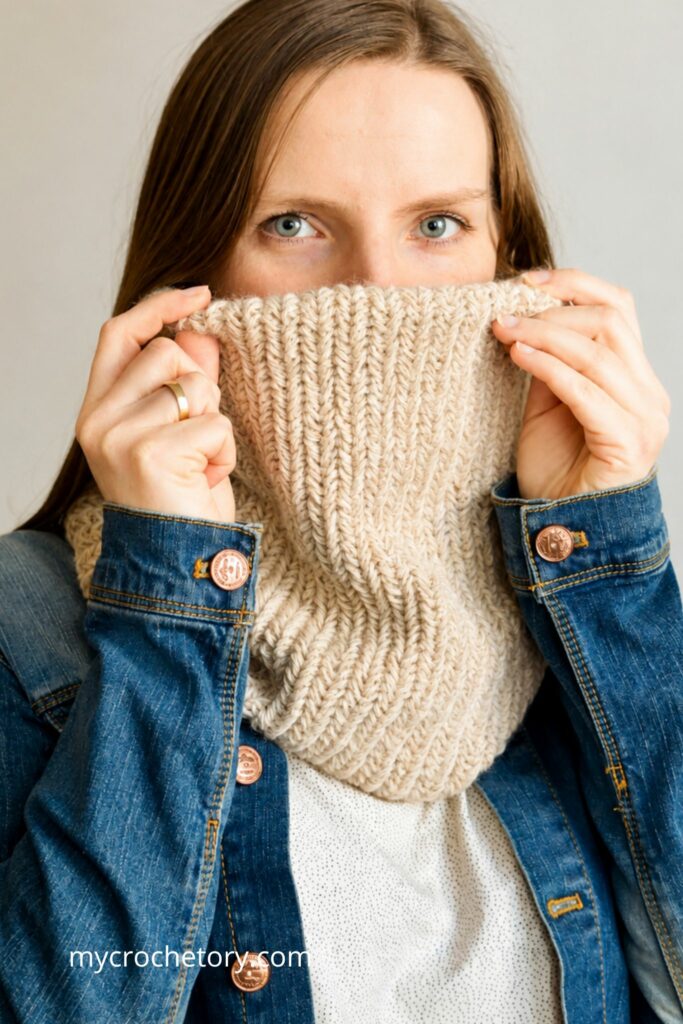
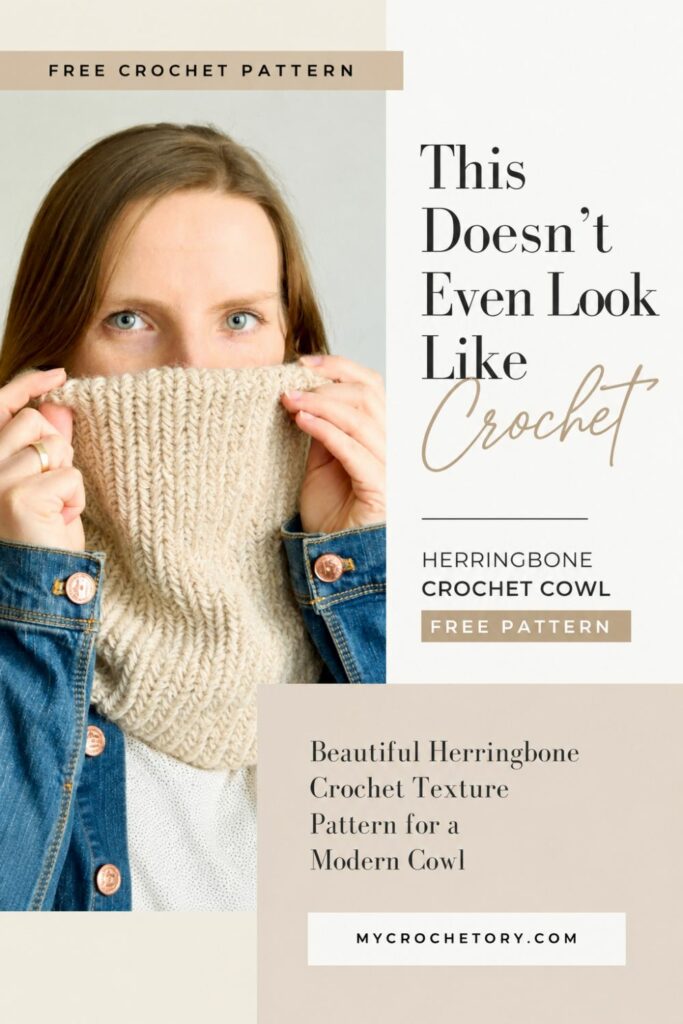
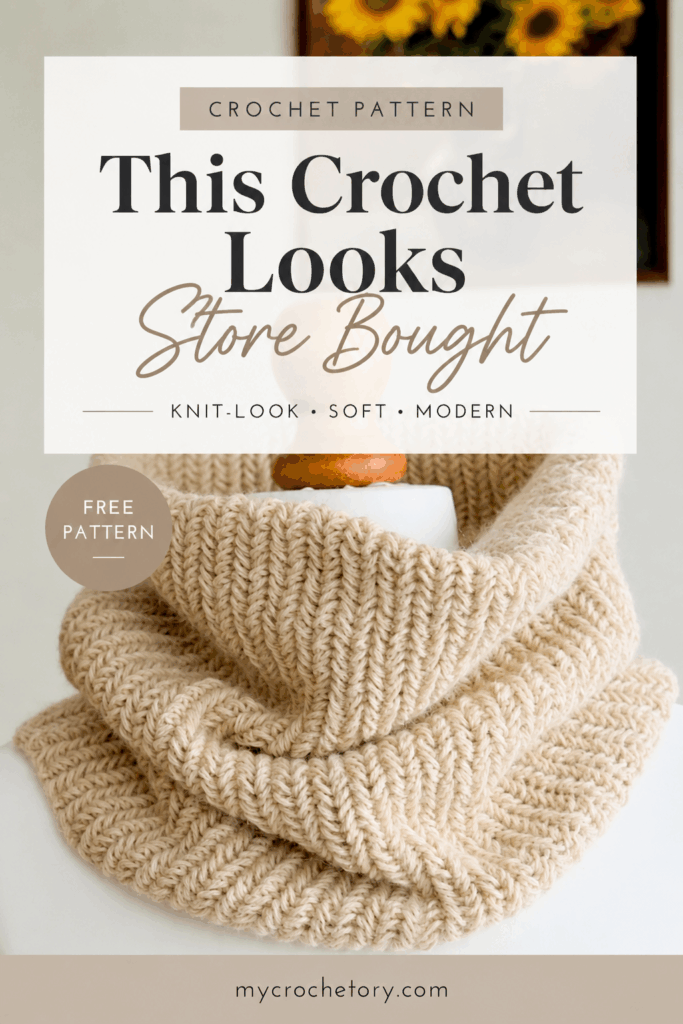
The herringbone stitch is the total opposite. It looks elegant, it feels relaxing, and it makes a cowl that actually looks store-bought once it’s done.
I wanted a modern herringbone crochet cowl pattern that was quick, textured, and warm enough for real winter weather. Something easy to make on the sofa, with a cup of tea and a good series playing in the background.
This free herringbone crochet neck warmer pattern became exactly that. It’s soft, it fits perfectly, and it works for everyone — from beginners to advanced makers.
In this post you’ll find:
- the full herringbone crochet cowl free pattern
- helpful photos and step-by-step guidance
- yarn ideas and tips on how to adjust the size
- a link to my herringbone stitch crochet tutorial, which shows exactly how to crochet the herringbone single crochet rows
And if you’re the type who likes clean printouts, there’s a crochet herringbone neck warmer printable PDF without ads version on Etsy and Ravelry.
This crochet textured cowl pattern herringbone stitch is perfect for you or someone who deserves a handmade gift.
It might just be the best crochet neck warmer pattern for winter, cozy, unisex, and always stylish.
Why You’ll Love This Cowl
The first time I tried the herringbone stitch, I couldn’t stop staring at the texture.
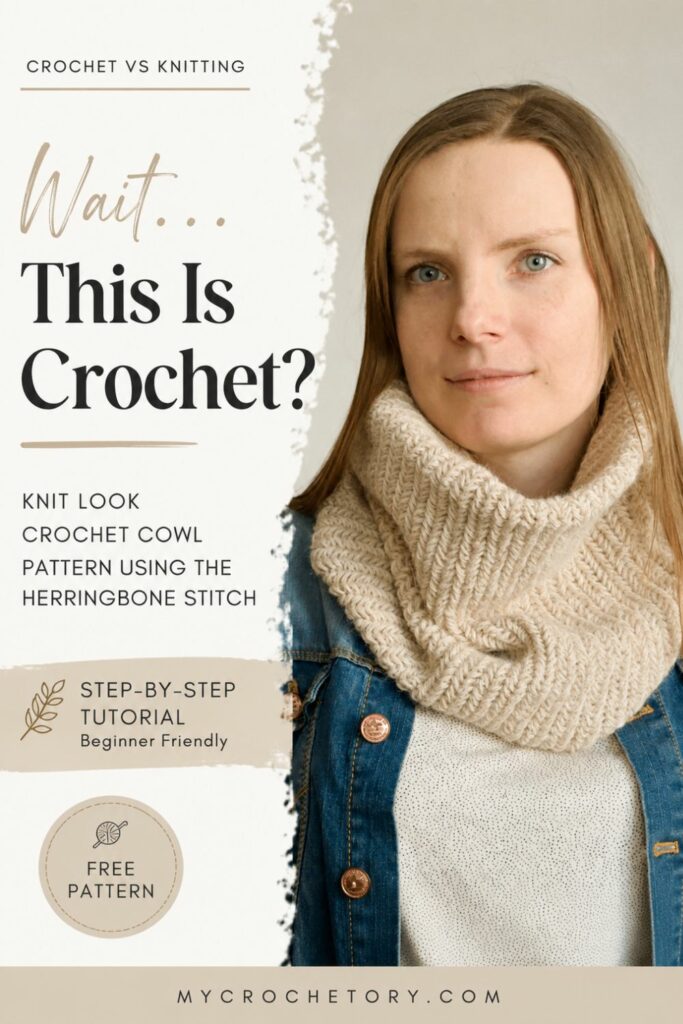
It looked like knitting, felt soft and stretchy, and had that clean, modern vibe I always love in handmade pieces. So of course, I had to turn it into a cowl.
This herringbone crochet cowl free pattern is simple to make and honestly such a joy to work on. You don’t have to count much or think too hard, just keep your hands moving and watch the rows build that pretty diagonal texture. It’s an easy herringbone stitch cowl pattern for beginners, but it gives a finish that looks far from beginner.
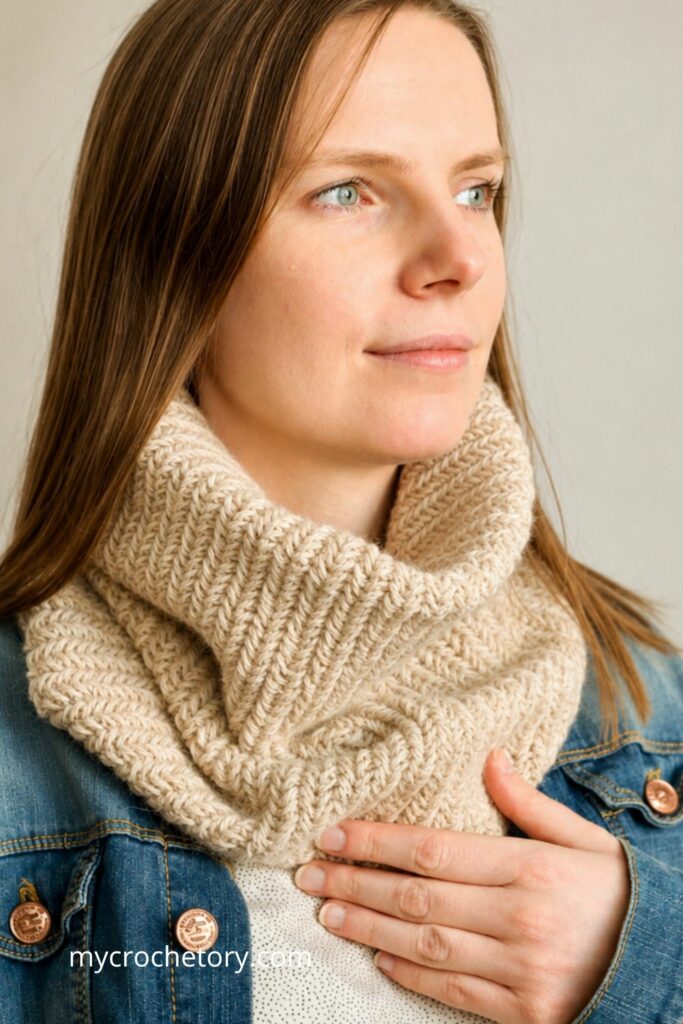
I used a DK weight yarn, and it created the perfect balance between structure and softness. The fabric feels cozy without being heavy, and it drapes so nicely around the neck. It’s one of those projects that you finish and immediately want to make again in another color.
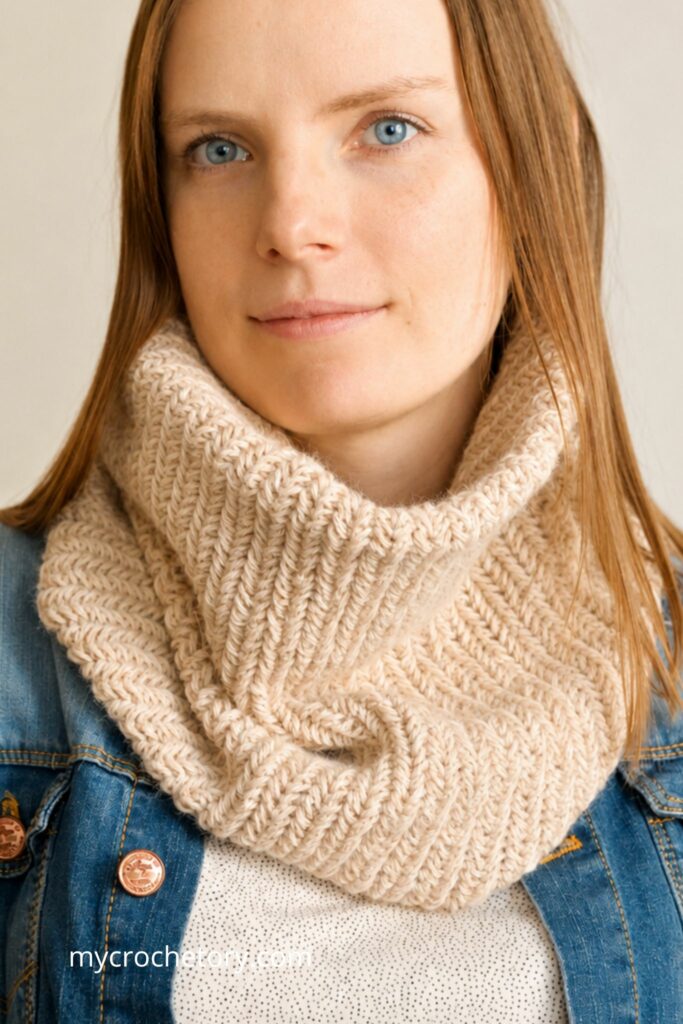
The herringbone crochet neck warmer pattern looks great on anyone, which makes it perfect for gifts. Neutral yarn gives it that classic knit look, while bold colors make it pop without losing the elegant texture. It’s quick, it’s relaxing, and it’s one of those patterns that remind you why crochet is such a satisfying craft.
About the Herringbone Stitch
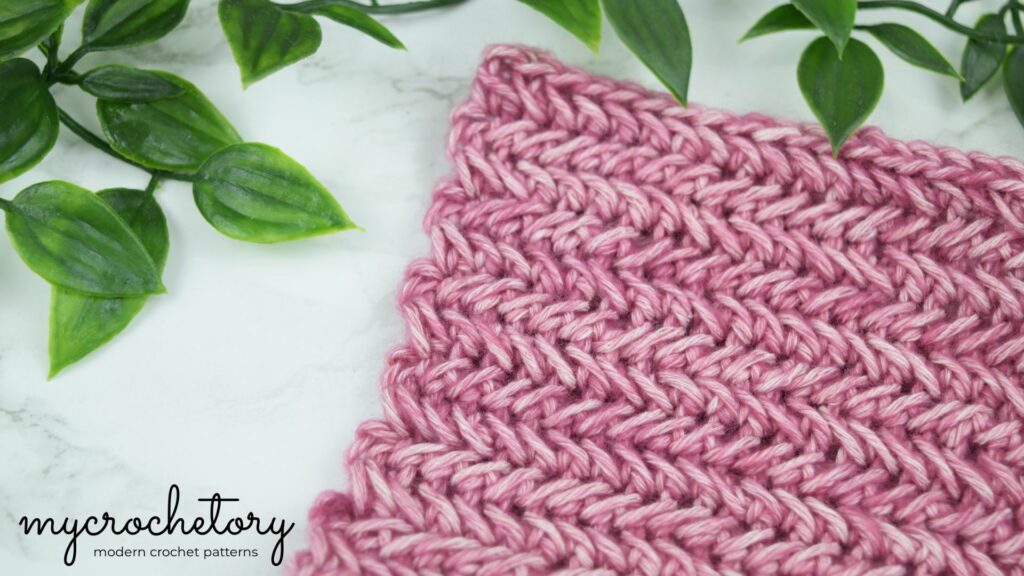
I’ve said it before, but it’s true — I have a bit of an obsession with this stitch. Every time I think I’ve moved on to something new, the herringbone stitch pulls me right back in.
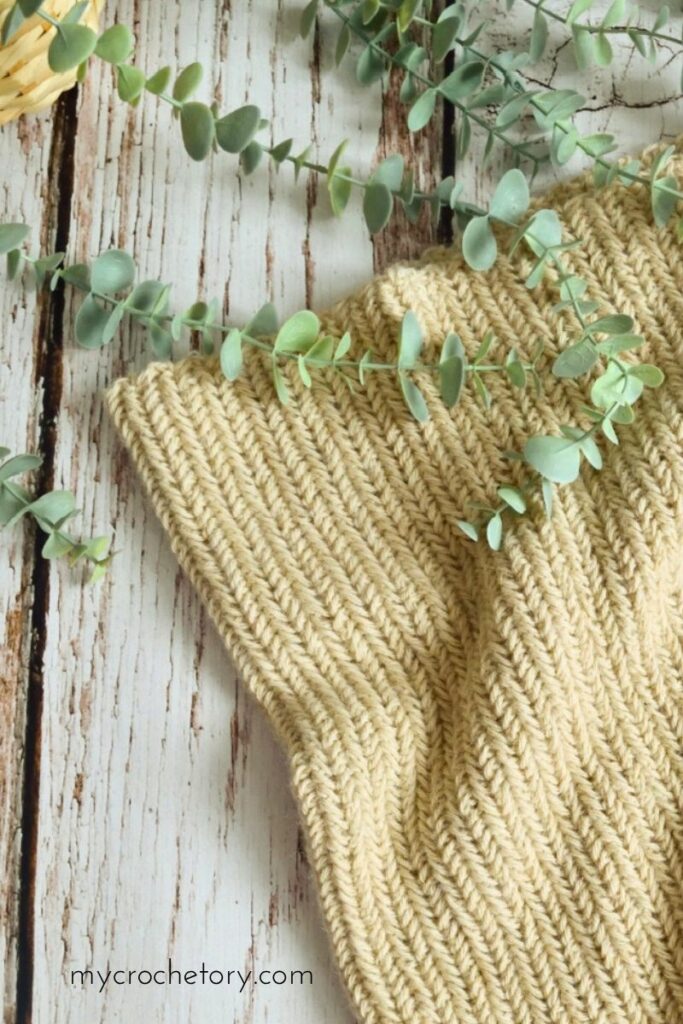
There’s just something about it. It looks like knitting, but it’s not. It feels firm in your hands, but the fabric drapes so softly when you’re done. And when you look closely, those tiny diagonal lines catch the light in a way that makes you stop for a second and think, “Okay… that’s pretty.”
This modern herringbone crochet cowl pattern is the perfect example of why I love it so much. The stitches stack neatly, the texture looks clean, and every row feels like progress. It’s simple, but it tricks the eye in the best way.
If you’ve been curious how to crochet a herringbone stitch, now’s your chance. It’s easier than it looks and you’ll see what I mean once you try it. You can also check out my crochet herringbone stitch tutorial if you like to see the motion before you start.
And if you end up loving this stitch as much as I do, stick around until the end of the post. You’ll find a few more of my favorite projects made entirely with the herringbone stitch — proof that I might actually be a little obsessed.
Once you get used to the stitch, the next thing that makes a huge difference is the yarn you pick. Let’s talk about that part.
Let’s Talk Yarn
I’ve learned something about crochet over the years. Even the prettiest stitch can fall flat if the yarn doesn’t play along. That’s why I took my time choosing the perfect one for this herringbone crochet cowl pattern — and I think I nailed it.
I used DROPS Puna, a 100% alpaca yarn that’s as soft as it looks. It’s warm without feeling heavy and has just enough bounce to show off the herringbone stitch perfectly. Each diagonal line stays sharp, the fabric drapes beautifully, and the whole cowl feels like it came straight out of a boutique store.
Halfway through the first skein, I already knew I’d want to make another one.
Other Yarns Worth Trying
If you like to experiment, here are a few other yarns that bring out the best in this stitch.
- Malabrigo Rios – 100% superwash merino wool, soft and springy, with stunning variegated colors that add depth to every row.
- Laines du Nord Ciliegia – 100% baby alpaca, silky, light, and so comfortable you’ll forget you’re wearing it.
- Rowan Alpaca Soft DK – a luxurious blend that keeps the herringbone crochet stitch crisp and clear.
- Sesia Baby Alpaca Fine – lightweight and airy, perfect for a soft DK yarn crochet neck warmer with beautiful drape.
Each of these yarns gives a slightly different mood to the project.
Variegated shades make it playful. Solid colors highlight the texture. Heathered tones create that cozy, handmade look we all secretly love.
Let’s Talk Color
If you want a timeless piece, neutrals like cream, stone, or grey will never fail you. But if you’re in the mood for something bold, go for rich forest green, copper, or burgundy. They make the modern herringbone crochet cowl pattern look effortlessly elegant.
And if you ever wonder how deep my obsession with this stitch goes, just wait until the end of this post. You’ll see a few more projects that prove I really can’t get enough of it.
A Little Yarn Wisdom
Choose a yarn that feels right in your hands. That’s the real secret to this cozy alpaca crochet neck warmer pattern. Once you find a fiber that glides smoothly through your fingers, the stitch will take care of the rest.
2025 Update: Best Yarns & Substitutes
Yarn shelves never stay the same for long. Every year new fibers appear, color palettes change, and suddenly there’s another must-try skein calling your name. If DROPS Puna isn’t available or you’d like to explore a few new options, here are some beautiful choices for your herringbone crochet cowl pattern this season.
Budget-Friendly and Beautiful
You don’t need luxury yarn to get that soft alpaca feel. A few budget-friendly options create the same cozy texture and elegant drape.
- Hobbii Baby Alpaca Mix – fluffy and gentle on the skin, perfect for a warm crochet neck warmer pattern that still feels light and breathable.
- We Are Knitters The Petite Wool – 100% Peruvian wool with a natural look that enhances the textured herringbone stitch and adds that handmade charm.
- KnitPicks Alpaca Cloud DK – smooth and airy, one of the softest affordable alpaca yarn substitutes that still keeps great stitch definition.
These yarns work beautifully for both simple projects and intricate stitches. You’ll get a soft, elegant finish and the structure you need for a polished result.
Soft, Sustainable, and Eco-Friendly
If you’re drawn to fibers that are as kind to the planet as they are to your skin, these are perfect alternatives.
- Lana Gatto Eco Alpaca – made with recycled alpaca fibers, soft and natural, with a beautiful gentle halo.
- King Cole Forest Recycled Yarn – a lovely mix of wool and recycled materials that gives a rustic texture to the modern herringbone crochet cowl pattern.
- Drops Sky – airy and light, combining baby alpaca and merino for that cloud-like softness we all love in cozy cowls.
Each of these yarns adds its own touch of personality — some fluffier, some smoother — but all bring that same comfortable, high-quality feel that suits this pattern perfectly.
My Honest Take
There’s no single “perfect” yarn. The best one is always the one that makes you excited to keep crocheting. A quick swatch is worth it before you start the full cowl — it helps you see how the fabric behaves, how it drapes, and how the herringbone stitch catches the light.
And a small piece of advice? When you find a yarn you truly love, keep a note of it. Because one day it’ll disappear from the shelves, and you’ll wish you had a few extra skeins tucked away.
Gift It!
Some patterns just have that “instant favorite” energy. This cowl is one of them.
It’s quick to make, feels soft and warm, and looks put-together without any extra effort. You can make it in an evening, wrap it the next day, and it already feels like something you’d find in a boutique.
It’s the kind of crochet gift idea for winter that people actually wear. Simple, thoughtful, and always appreciated.
If you like keeping things easy, there’s a printable ad-free version of this pattern available on Etsy and Ravelry so you can make it anytime without distractions.
Want a printable version?
👉 Find the ad-free PDF on Etsy and Ravelry.
Tips Before You Start
A few little things can make this pattern so much easier.
Keep your stitches soft and relaxed. If you pull too tightly, the fabric feels stiff instead of soft and flowy. Let the yarn move easily and the stitch will look much neater.
Count your stitches from time to time. The herringbone stitch looks tidy, but it’s not very forgiving. One extra or missing stitch can change the whole look, so it’s worth checking every few rows.
Give your cowl a light block when it’s finished. It makes the fabric smoother, helps the texture stand out, and gives that clean, polished look that everyone loves.
And just enjoy it. Once you find your rhythm, the rows come together beautifully. It’s the kind of project that lets you slow down and enjoy every stitch.
If you want to share your wips and finished crochet neck warmer pattern on social media, please, use hashtag #mycrochetory. I love to see your finished project!
HERRINGBONE CROCHET COWL PATTERN FREE
- Purchase the ad-free, printable PDF here on ETSY or here on Ravelry.
- Add this crochet neck warmer pattern to your Ravelry Queue HERE.
- Pin it for later.
Copyright 2021 – 2026 MyCrochetory. All right reserved. This crochet neck warmer pattern is property of Sylwia Kawczyńska @MyCrochetory. Please DO NOT sell the pattern and claim this pattern as your own. The pattern is for personal use only and may not be translated or reproduced in another language. Please respect my rights, DO NOT share or publish this pattern anywhere without my permission.
The Herringbone Crochet Cowl Pattern you make following this pattern is yours you are free to sell it, as long as you credit MyCrochetory as original designer. For more information, please, read Terms Page.
Materials & Tools:
- Yarn Drops Puna 50g = 110m (120,3 yds), 100% Alpaca, in Beige – 5 skeins.
- Hook size 5mm. Adjust hook size if necessary to obtain
correct gauge, - Tapestry needle (to weave and hide yarn ends),
- Scissors.
Level:
Intermediate – herringbone crochet stitch.
Sizes:
One size, (adjustable): Height: 17”/43cm; circumference: 25.25”/64.25cm
Gauge after blocking:
20sts x 14rows in 4”/10cm in Herringbone Crochet Stitch. If necessary, adjust hook size to obtain the correct gauge.
Before you measure, please take the time to block your swatch in the same manner that you will block your cowl.
General Notes:
- The pattern uses US crochet terminology.
- The cowl is worked back and forth in rows using the herringbone crochet stitch.
- The chain1 at the begnning of each row does not count as a stitch.
- The Herringbone Crochet Cowl is easily adjustable. To increase the circumference of the cowl, add more rows. To increase the height of the cowl, add more initial chains.
- If you are not familiar with the herringbone crochet stitch or need a refresher, check out my photo tutorial.
Stitches & Abbreviations (US terms):
st(s) – stitch(es)
yo – yarn over
rep – repeat
RS – right ride
WS – wrong side
Hsc (herringbone single crochet worked on RS) – insert hook in left leg of previous stitch, insert hook in both loops of next st from front to back and pull up a loop, yarn over and pull through all three loops on the hook.
RHsc (herringbone single crochet worked on WS) – Flip your work so the RS is facing you, insert hook in left leg of previous stitch, insert hook in both loops of next st from back to front and pull up a loop, yarn over and pull through all three loops on the hook.
PATTERN
Read all Notes before you start.
Chain 87.
You can also make any number of chains to make your cowl higher/smaller, but changes might result in a
different yardage requirement.
Row 1 (RS): sc in the second ch from hook working in the back bump of the ch, [insert your hook into left leg of previous st, insert the hook into the back bump of the next ch and pull up a loop, yarn over and pull through all three loops on the hook] rep to end. Turn. (87sts)
Row 2 (WS): ch1 (doesn’t count as a st here and throughout), sc in first st by inserting hook from back to front, RHsc to end. Turn. (87sts)
Row 3 (RS): ch1, sc in first st by inserting hook from front to back, Hsc to end. Turn. (87sts)
Repeat Rows 2 – 3 until your work is approx. 25.25”/64.25cm long.
Fasten off yarn, weave in all ends then block and seam the last row to the first row together to form a cowl (using your favorite method or mattress join stitch).
If you have any suggestions or have detected any mistakes, please feel free to email me at mycrochetory@gmail.com
Other Herringbone Crochet Projects You’ll Love
When I fall for a stitch, I want to use it on everything, and the herringbone stitch is no exception! It’s so satisfying to work with and brings something special to every project. Here are a few that I absolutely love:
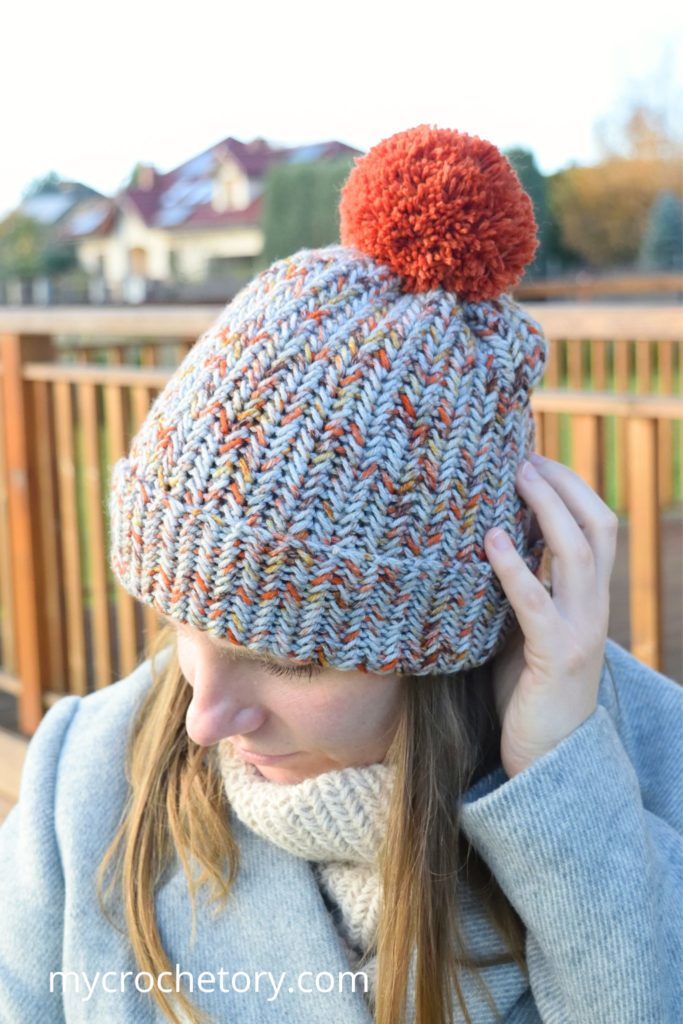
- Herringbone Crochet Hat: This hat uses the same technique as the cowl, where the way you place your hook creates those clean diagonal lines. It has that same gorgeous texture and works up surprisingly fast. You’ll feel so accomplished when it’s done!
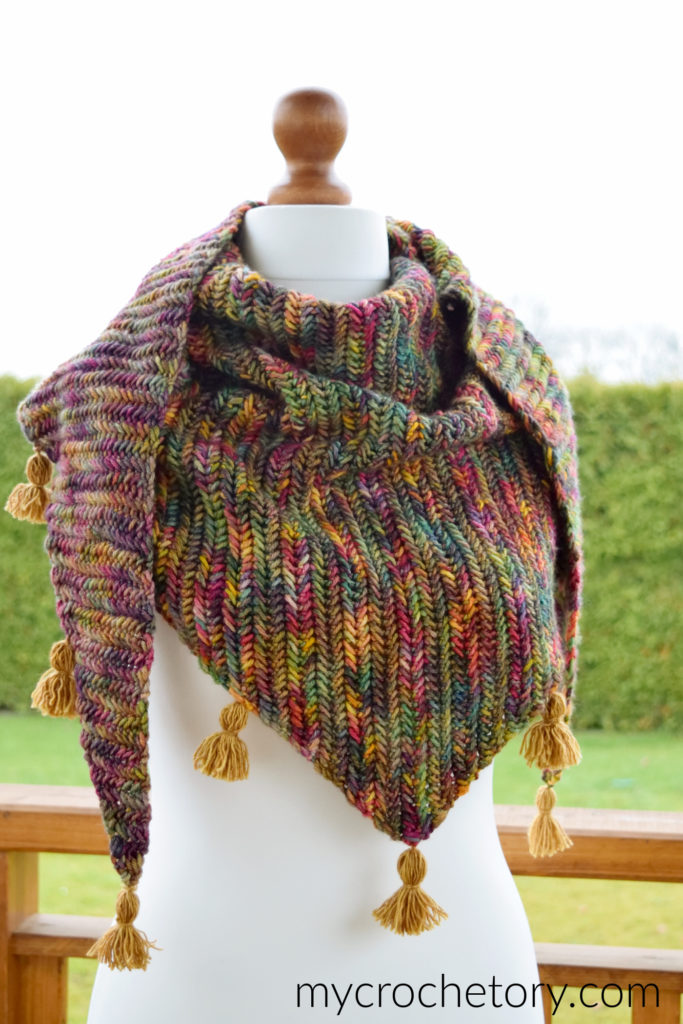
- Diana Herringbone Crochet Shawl: This shawl is worked tip to tip, and it’s so fun to see it grow row by row. The herringbone stitch gives it such a sleek and stylish finish—you’ll want to show it off the moment it’s done.
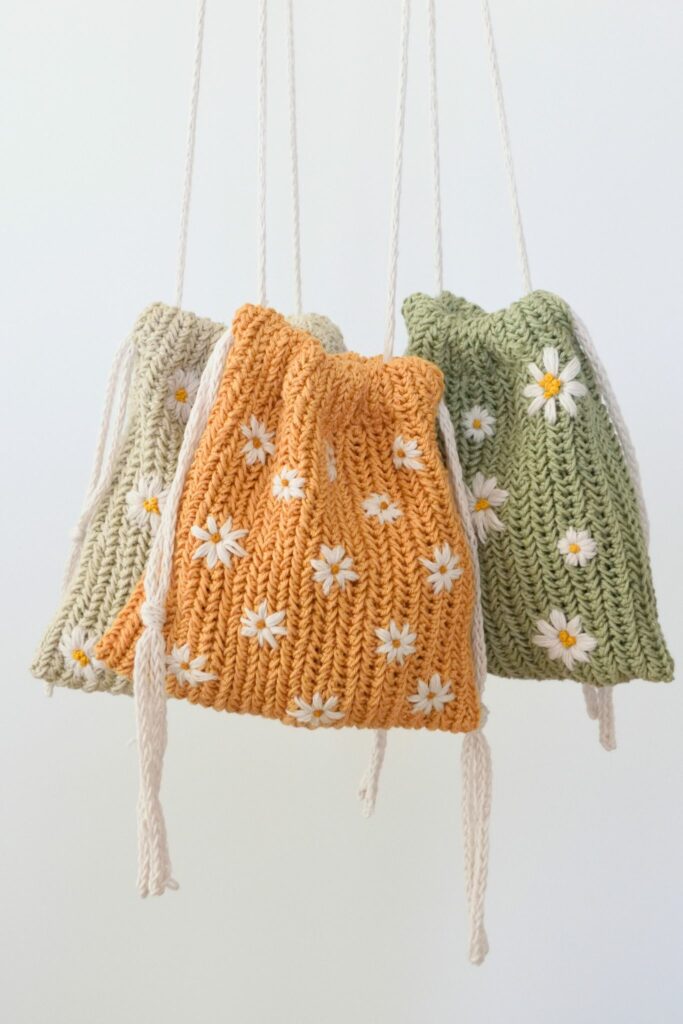
- Herringbone Crochet Drawstring Bag: This bag is one of my favorites. The stitch pattern looks amazing, and the finished bag is sturdy enough for anything you need. I use mine all the time, and I always get compliments on it!
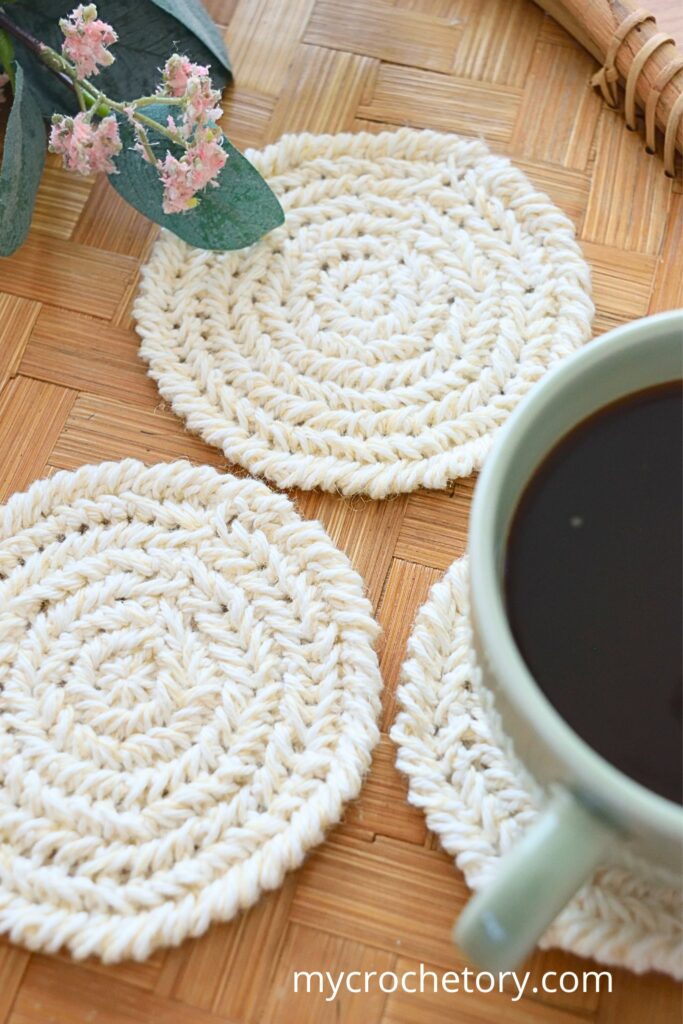
- Round Crochet Coaster Pattern: These coasters are my go-to for a quick win. They’re easy to make and look so polished with the herringbone stitch. They’re perfect for adding a handmade touch to your space or gifting to friends.
I’ve made each of these, and they all hold a special place in my crochet collection. Give one a try – I know you’ll love it too!
Don’t forget to save this Pin for easy reference: 📌
Share Your Work!
I always love seeing what you make from my patterns. Every version has its own charm — different yarns, colors, and little details that make it yours.
If you’ve made this cowl, share it on Instagram or Pinterest and tag it with #mycrochetory so I can see it. Your photos often inspire others to try the pattern too, and it’s such a joy to watch all those unique creations come to life.
Whether it’s your first project with the herringbone stitch or your tenth, I’d love to see your take on it.
What next?
Drop a comment below sharing your thoughts, questions, or even your favorite crochet tips! Your voice adds a vibrant thread to our crafting community.
Sharing is caring! If you found this guide helpful, consider spreading the love. Click the share button and inspire other crocheters.
Stay in the loop with my latest crochet guides, tips, and inspiration. Subscribe to my newsletter for exclusive content straight to your inbox. Never miss a stitch—subscribe today!
Happy crocheting, and may your yarn always be tangle-free!
Join my Facebook Group and Official Ravelry Group where you can find necessary support, you can ask questions or share your finished projects.
You can also follow my Instagram, Facebook page and Pinterest.
Updated: November 2025
Pattern copyright © MyCrochetory (Sylwia Kawczyńska). For personal use only.
LOVE it! How absolutely beautiful and looks snuggly warm!!!