Updated: 2 August 2024 by Sylwia (MyCrochetory)
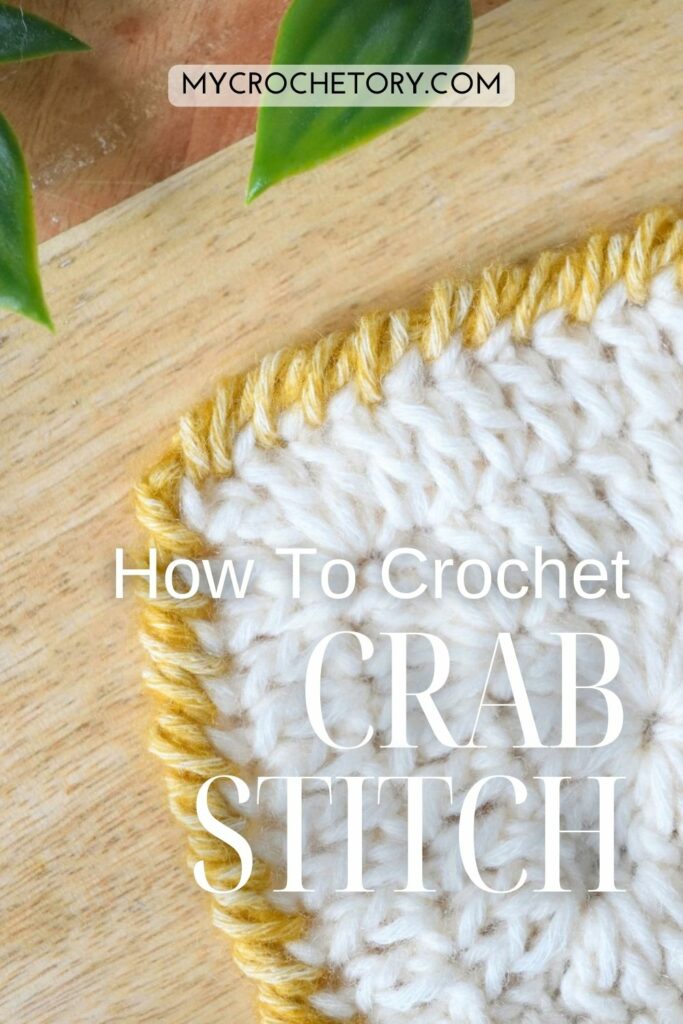
Learn Crab Stitch crochet with my easy-to-follow tutorial. Add a beautiful, twisted border to your crochet projects with detailed steps and tips.
Introduction
Are you ready to learn something new and fun?
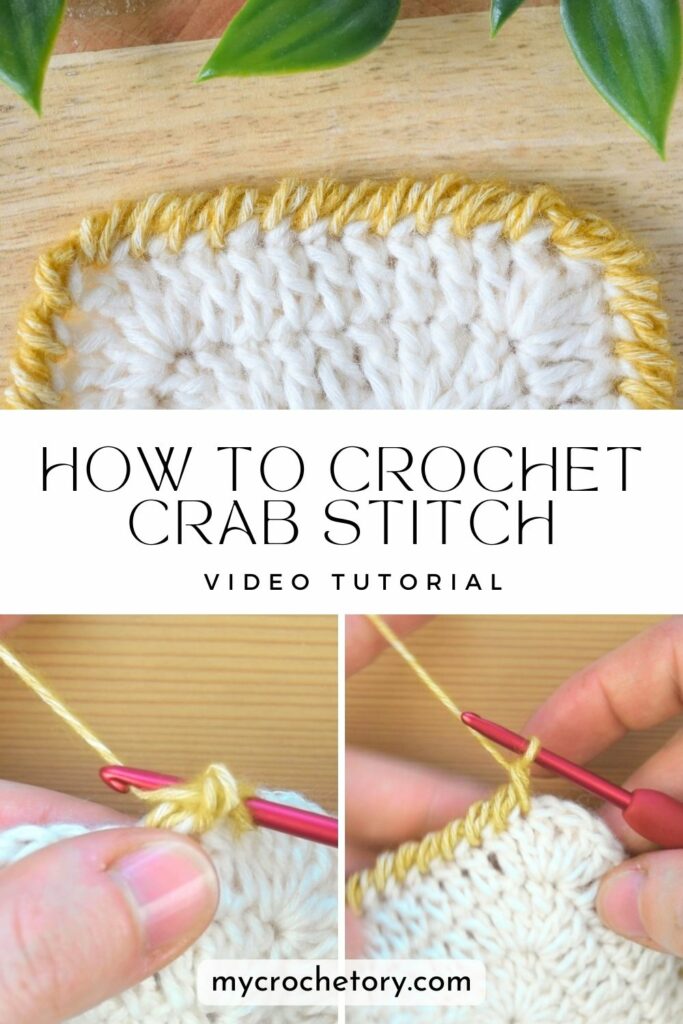
Today, I’m going to show you how to crochet the crab stitch, also known as the reverse single crochet. This new stitch is super cool and adds a unique, twisted border to your crochet projects.
If you’ve been crocheting for years or just picked up a hook, the crab stitch crochet will give your work a fresh, stylish look.
In this blog post, you’ll find a step-by-step photo tutorial, helpful tips for perfecting your stitches, and a video tutorial to make learning even easier. So, grab your crochet hook, and let’s get started!
By the way, if you’re looking for more crochet border ideas, check out these easy crochet borders.
What is the Crab Stitch?
Definition and Origins
The crab stitch crochet is a special stitch that’s also called the reverse single crochet. Why the funny name? Because you work it in the opposite direction of a normal single crochet.
Instead of going from right to left (if you’re right-handed), you go from left to right.
This creates a twisted, cord-like look that makes your crochet project look amazing. It’s a great stitch for adding a decorative edging to your work.
Visual Appeal
You’ll love how the crab stitch crochet looks! It gives your crochet items a neat, finished look. Think of it like the perfect frame around a beautiful picture.
It’s especially great for things like baby blankets, coasters, and other crochet projects that need a nice border.
Adding the Crab Stitch to Your Projects
Ideal Projects for the Crab Stitch Crochet
The crab stitch crochet is perfect for a variety of projects.
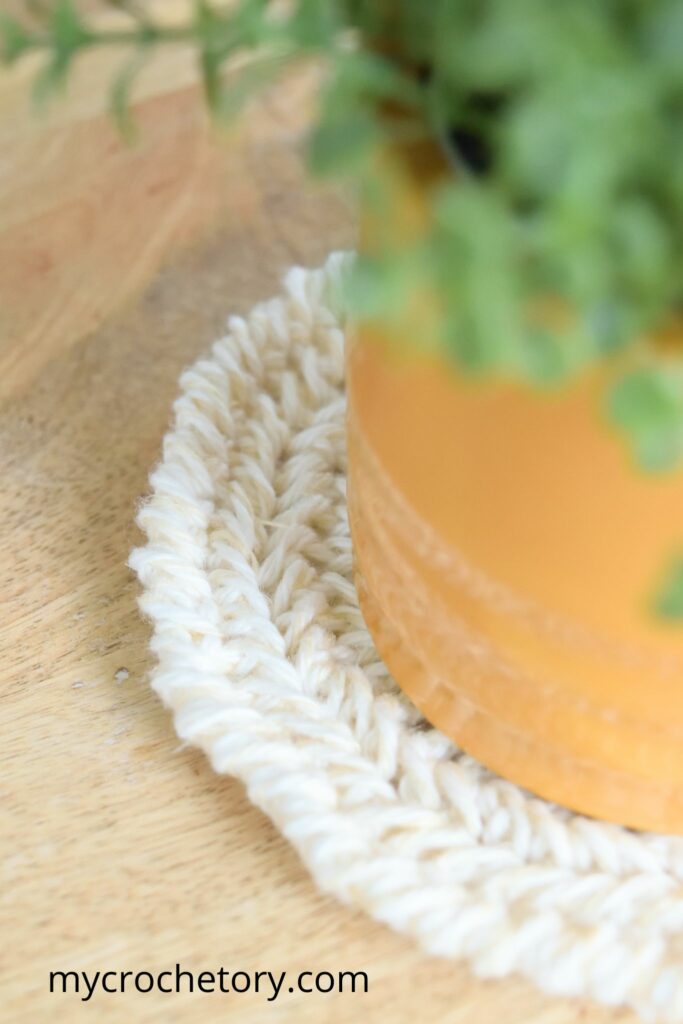
Use it on baby blankets, coasters, hats, and more to give them a neat, finished look. It’s especially lovely on crochet items with a contrasting color to make the twisted single crochet stand out.
Tips for Perfect Borders
- When working around corners, add 1-2 extra crab stitches in the corner stitch to keep it from pulling too tight.
- Experiment with different color combinations to find the look of the crab stitch crochet you love.
Left-Handed Crocheters, I’ve Got You Covered!
Special Tips for Lefties
Left-handed crocheters will work from right to left. The process is the same, just reversed. Don’t worry, you’ve got this!
Watch and Learn – Video Tutorial
Follow along with my step-by-step video tutorial to see the entire process in action. Watching the stitch being worked can make it much easier to understand.
TIP: To view this video tutorial properly, please disable any ad-blocker you have running.
The Step-by-Step Photo Tutorial
Materials You’ll Need
First things first, let’s gather our materials. You’ll need:
- Yarn: You can use any weight of yarn, but a medium worsted weight is a good choice.
- Crochet hook: Use a hook that matches your yarn. Check the yarn label for the recommended size.
Let’s Get Hooked: The Basics
Now, let’s dive into the fun part and start working on the crab stitch crochet row!
Here’s how to proceed:
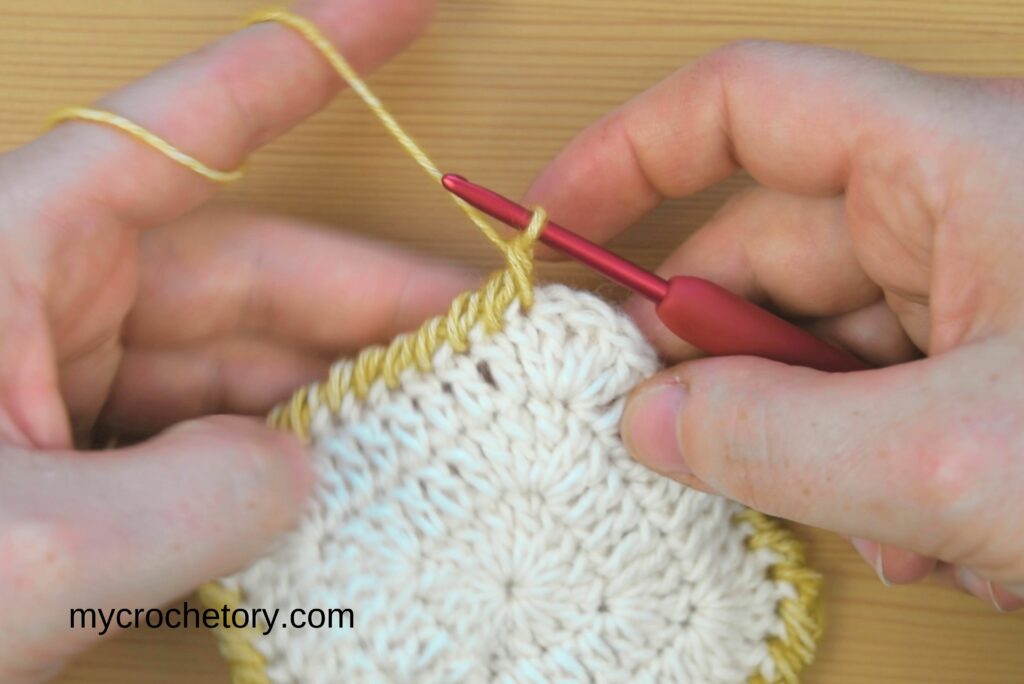
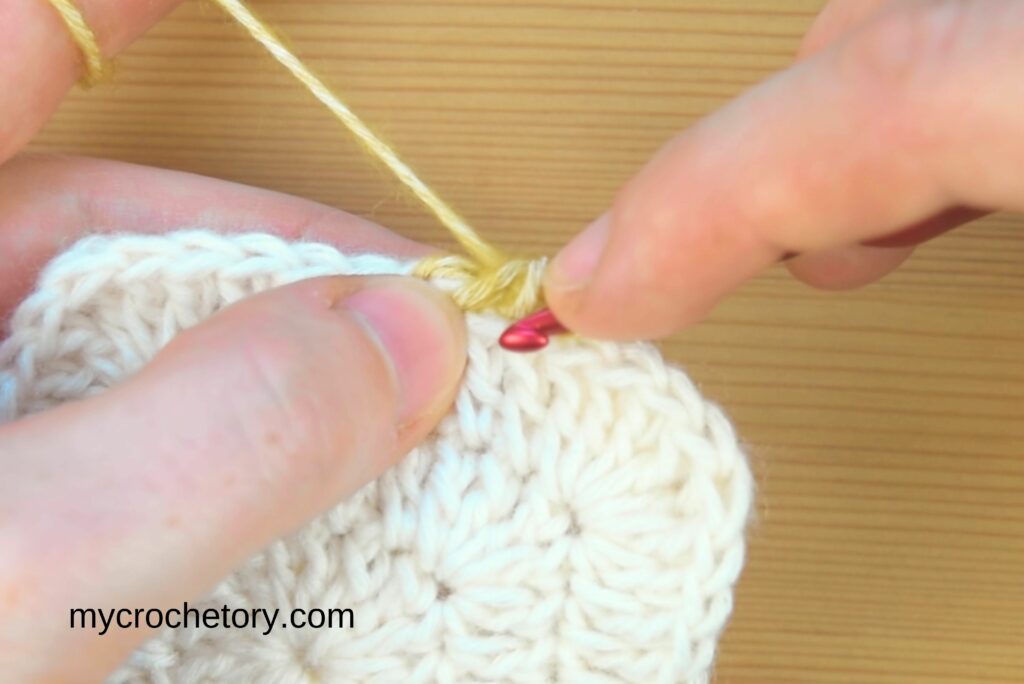
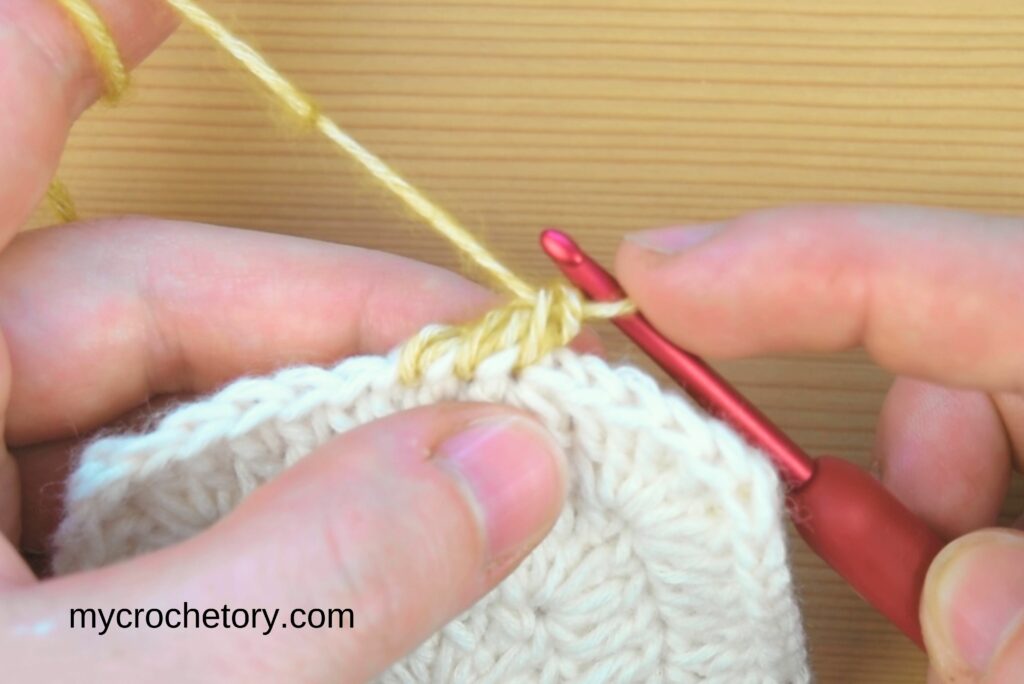
- You can either attach new yarn, or continue with the same yarn. Chain 1 and do not turn your work. Remember, we’re working in the reverse direction!
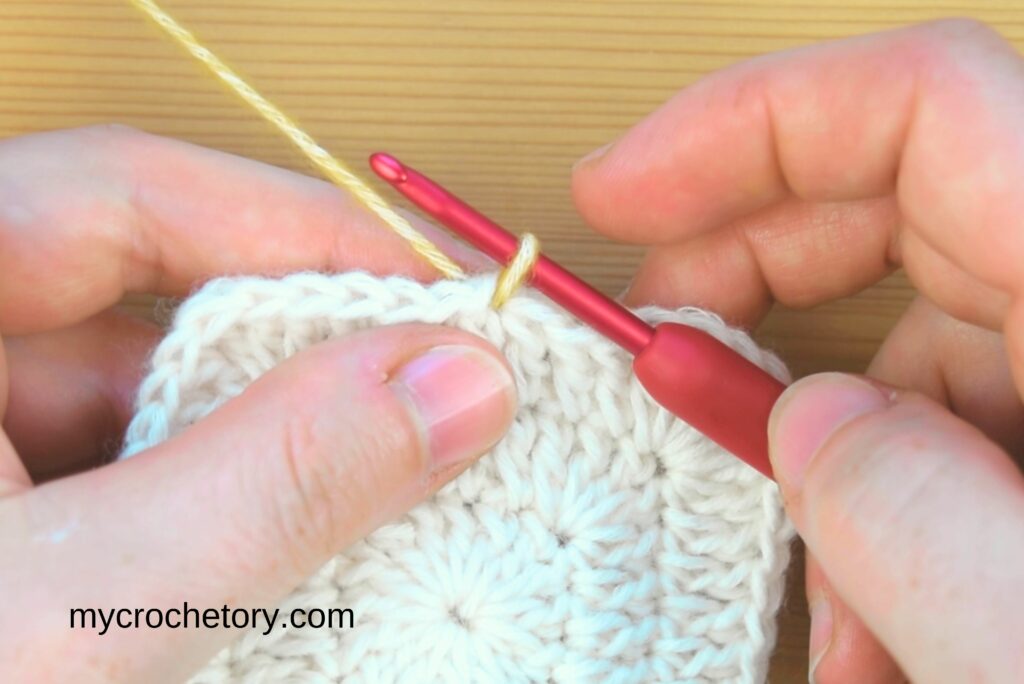
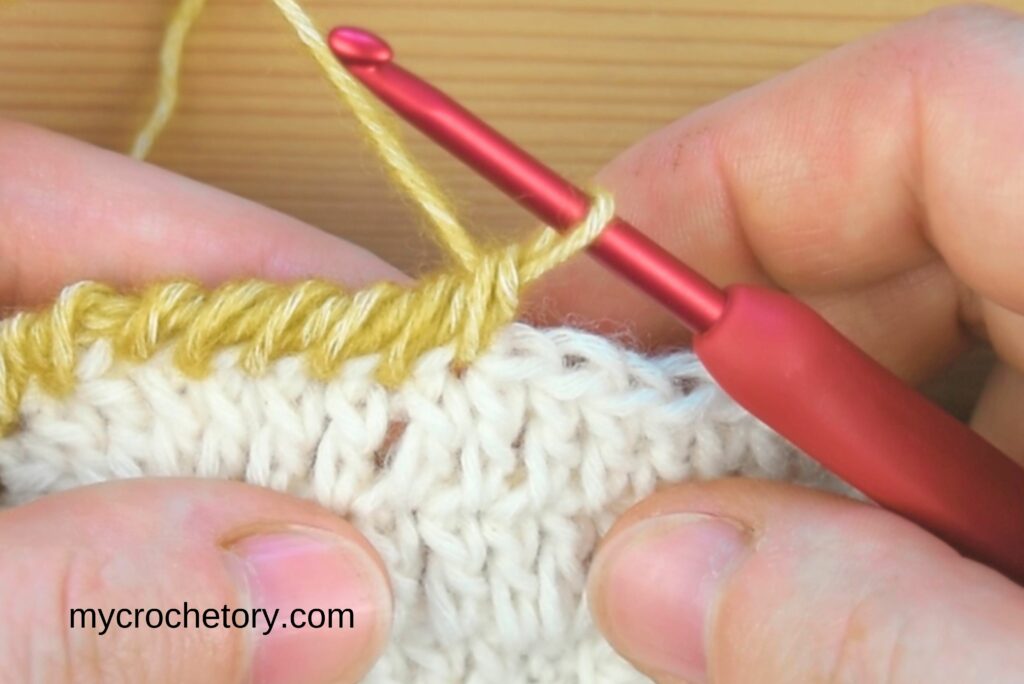
2. Insert hook into the next stitch to the right.
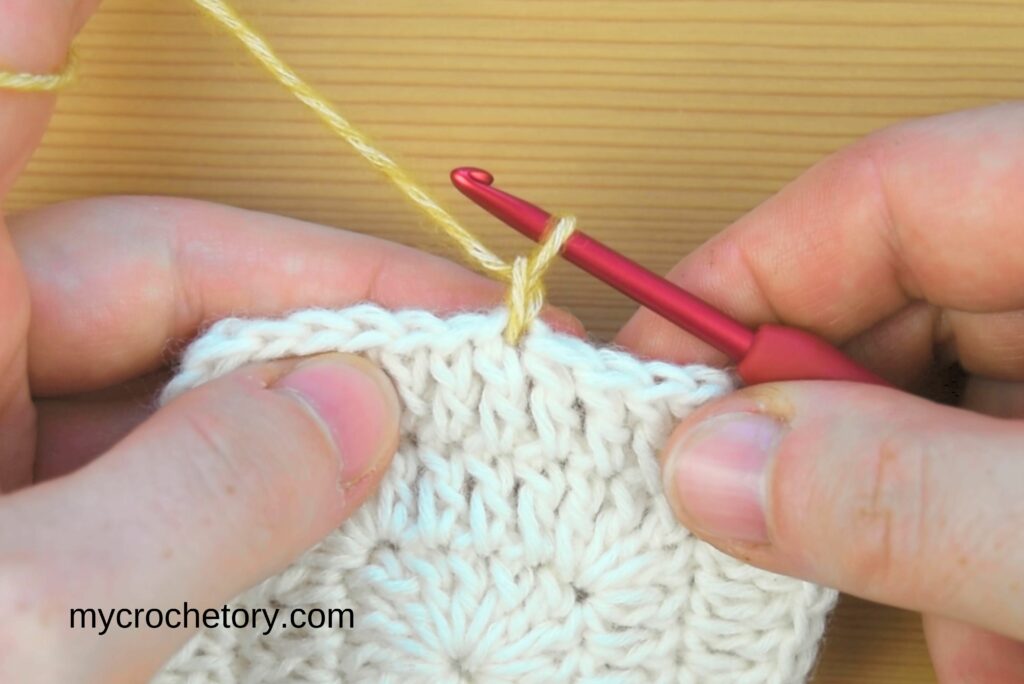
3. Yarn over and pull up a loop (you should have two loops on your hook).
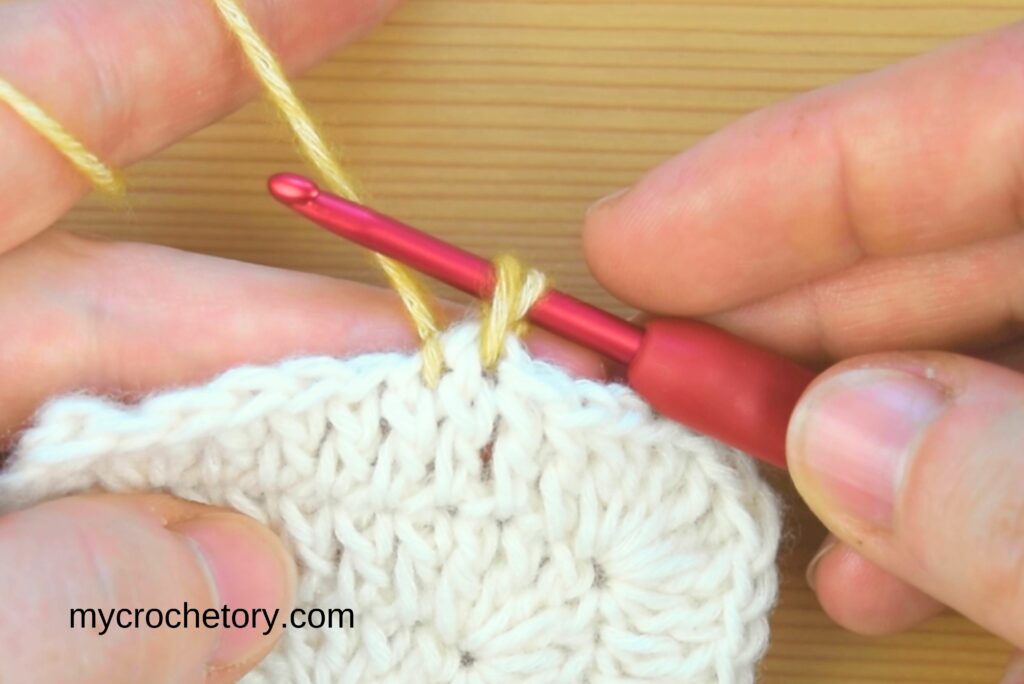
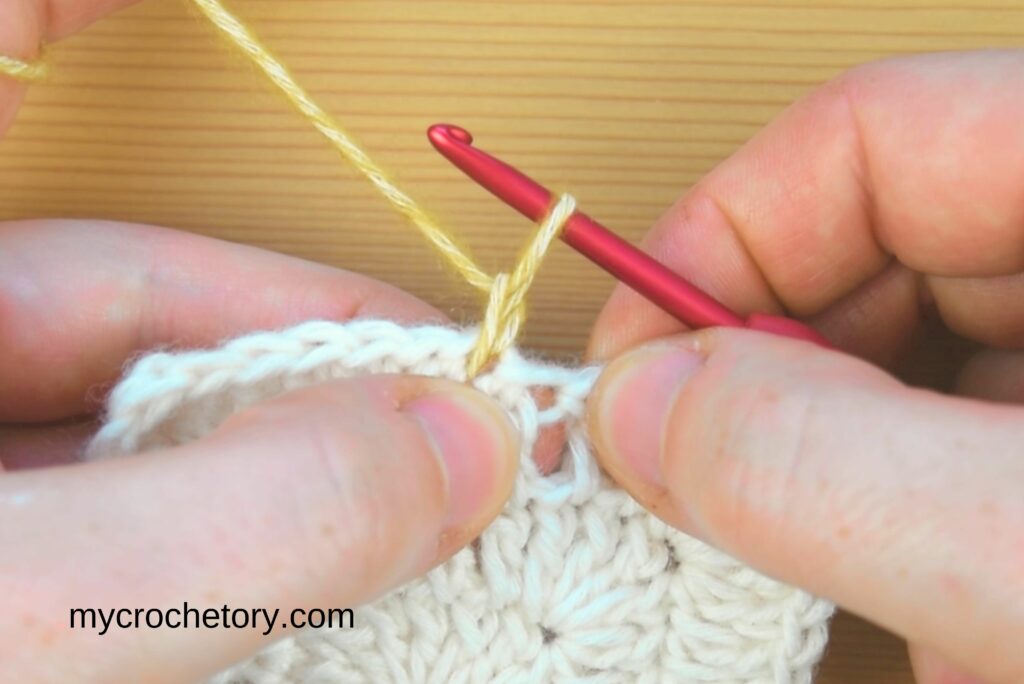
4. Yarn over again and pull through both loops on the hook.
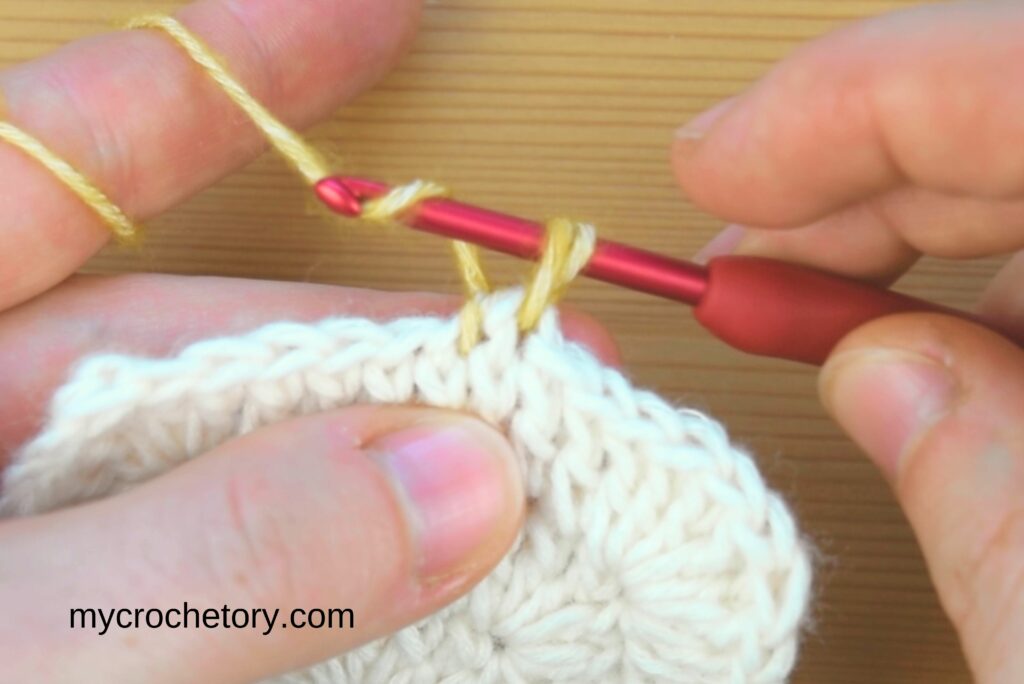

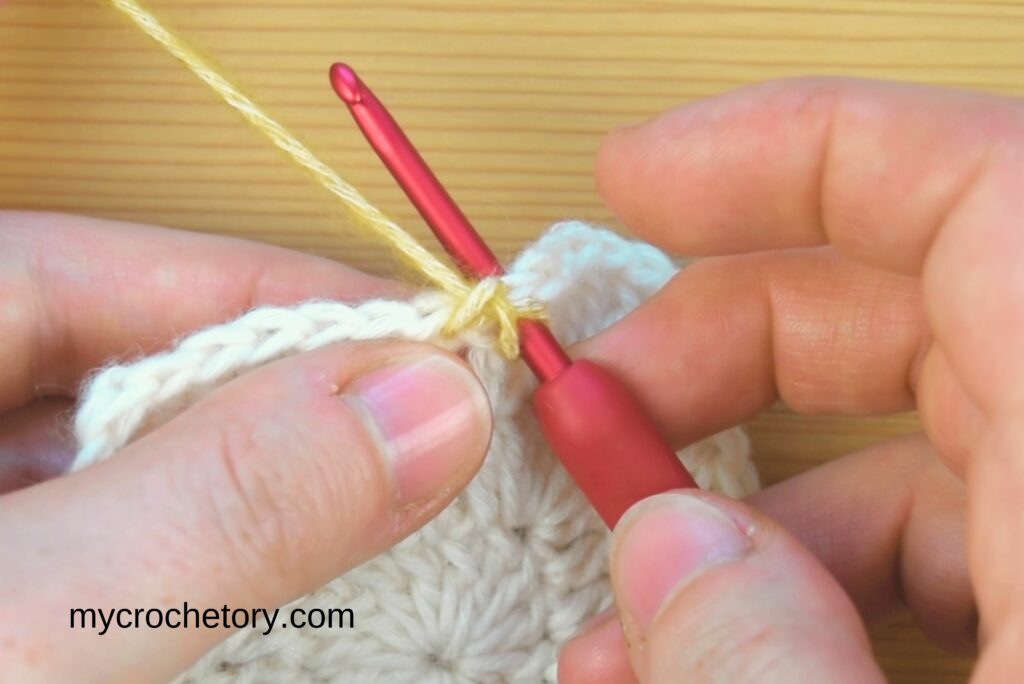
Congratulations, you’ve just made your first crab stitch!
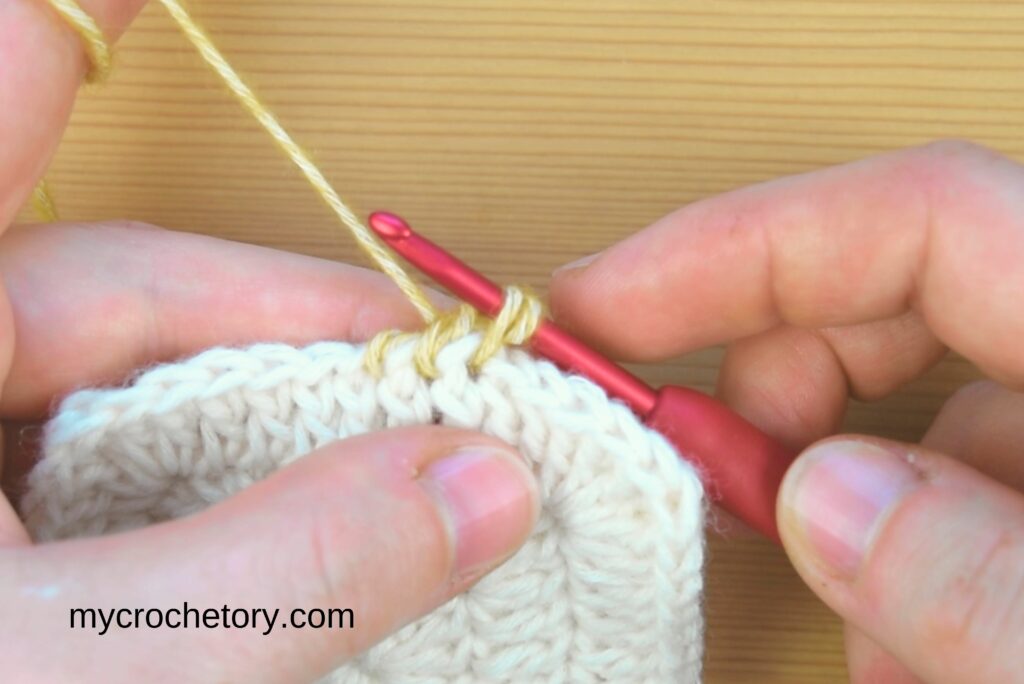
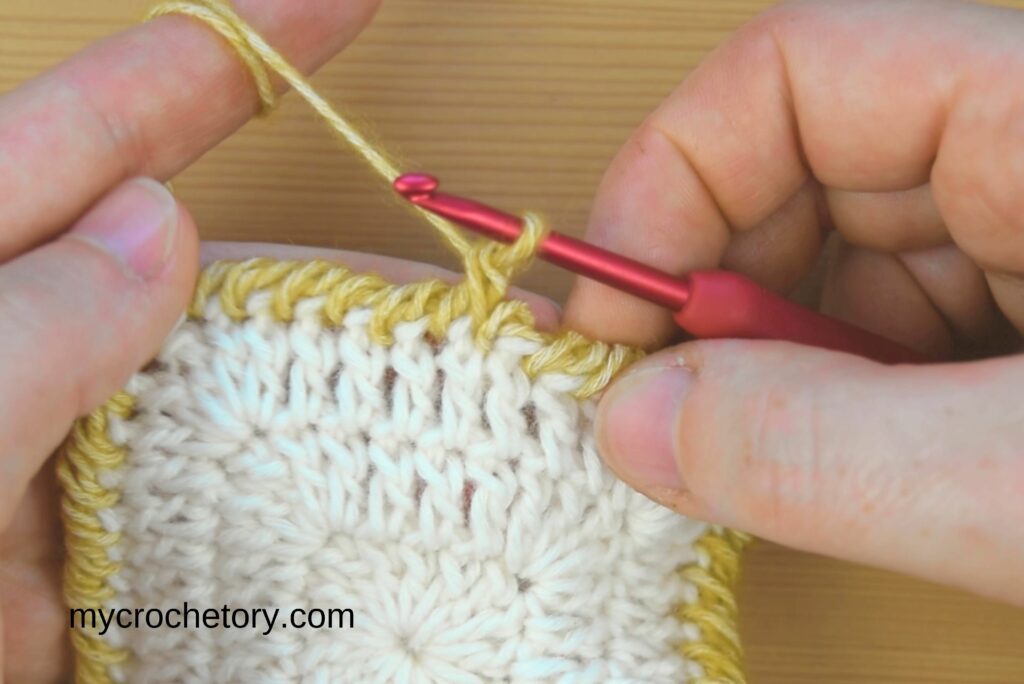
5. Repeat steps 2-4 for each stitch around the edge of your work.
Common Mistakes and How to Avoid Them
Don’t worry if it feels a bit awkward at first. With a little practice, it will get easier.
Keep your tension consistent, and practice on small swatches before you try it on a big project. This way, you’ll get the hang of crab stitch crochet without messing up your main work.
Finishing Touches
How to Finish Off Your Crab Stitch Border
So, you’ve made it all the way around your project with the crab stitch crochet. Now, it’s time to finish it off neatly. Here’s how to do it:
- When you get to the end of your round, make the last crab stitch in the same space as the first stitch. This helps to close the gap and make the border look continuous.
- After the last crab stitch, insert your hook into the first crab stitch you made at the beginning of the round. Yarn over and pull through the loop on your hook to make a slip stitch. This joins the end of the round seamlessly with the beginning.
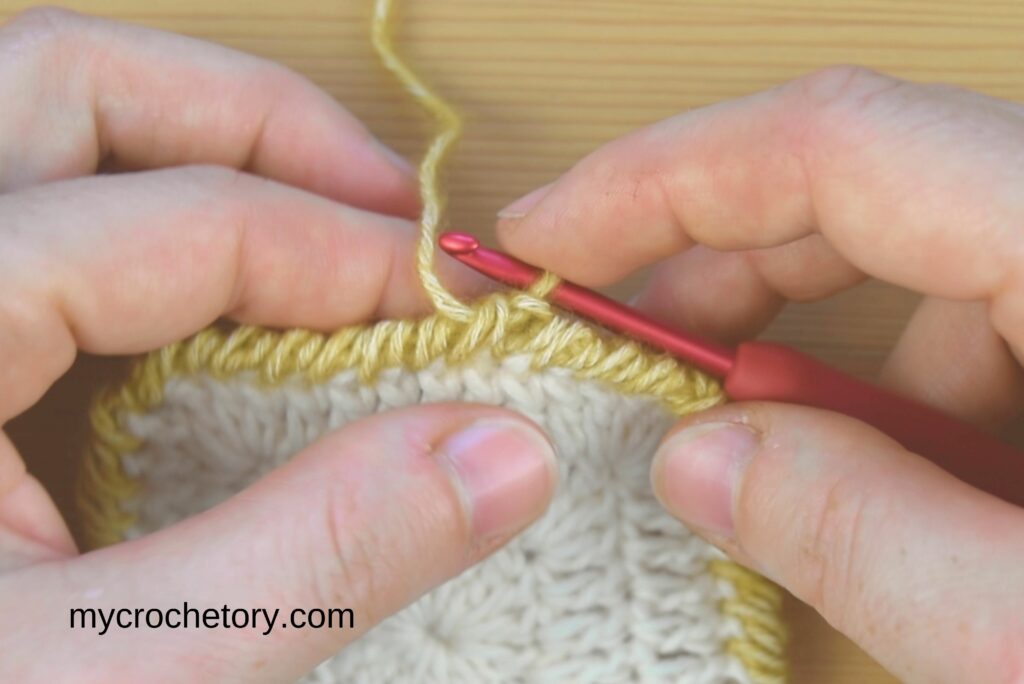
- Cut your yarn, leaving a few inches of tail. Pull the yarn through the last loop on your hook to fasten off.
- Use a yarn needle to weave in the tail ends. To do this, thread the yarn needle and weave the tail back and forth through the stitches. This secures the end and keeps it from unraveling. Be careful not to pull too tight, as you want the edge of your work to stay smooth and even.
For more border ideas, check out these easy crochet borders.
Troubleshooting and FAQs
Here are some common questions and issues you might encounter:
- If your stitches look uneven, try adjusting your tension. Practice makes perfect, and every crocheter’s tension is a little different.
- If you notice gaps where you joined the rounds, make sure you’re inserting your hook into the correct stitches and keeping your tension consistent.
- Remember, right-handed crocheters work from left to right, while left-handed crocheters work from right to left. The technique is the same, just mirrored.
MORE CROCHET STITCHES
If you found this crab stitch crochetr tutorial helpful, you might also like these crochet stitch tutorials:
- Herringbone Crochet Stitch Tutorial
- Crochet Moss Stitch Tutorial
- V-Stitch Crochet Stitch Tutorial
- Crochet Star Stitch Tutorial
- Clamshell Crochet Stitch Tutorial
- HDC between the stitches Tutorial
- How to crochet two rows of DC at the same time
Don’t forget to save this Pin for easy reference: 📌
I’d love to hear about your crochet adventures and see your beautiful creations. Drop a comment below sharing your thoughts, questions, or even your favorite crochet tips! Your voice adds a vibrant thread to our crafting community.
Sharing is caring! If you found this guide helpful, consider spreading the love. Click the share button and inspire other crocheters.
Stay in the loop with my latest crochet guides, tips, and inspiration. Subscribe to my newsletter for exclusive content straight to your inbox. Never miss a stitch—subscribe today!
Happy crocheting, and may your yarn always be tangle-free!
Join my Facebook Group and Official Ravelry Group where you can find necessary support, you can ask questions or share your finished projects.
You can also follow my Instagram, Facebook page and Pinterest.
Leave a Reply