Updated: 27 January 2025 by Sylwia (MyCrochetory)
Try the crochet waistcoat stitch for strong, knit-like designs. Get easy tips, a video tutorial, and step-by-step instructions today!

A Simple Stitch with a Knit-Like Charm
Have you ever wished your crochet projects could have that smooth, knit-like finish?
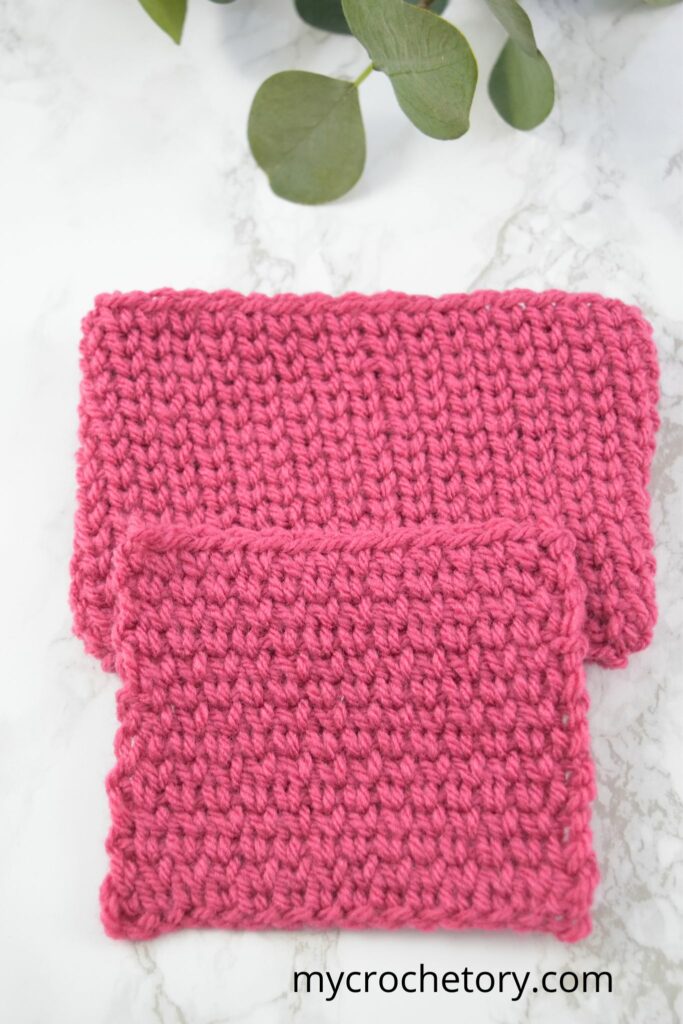
The only difference between the crochet waistcoat stitch (aka knit stitch) and a regular single crochet is where you insert your hook into the body of the stitch.
Enter the crochet waistcoat stitch! This amazing stitch, often called the crochet knit stitch, is a great stitch that combines the best of both worlds.
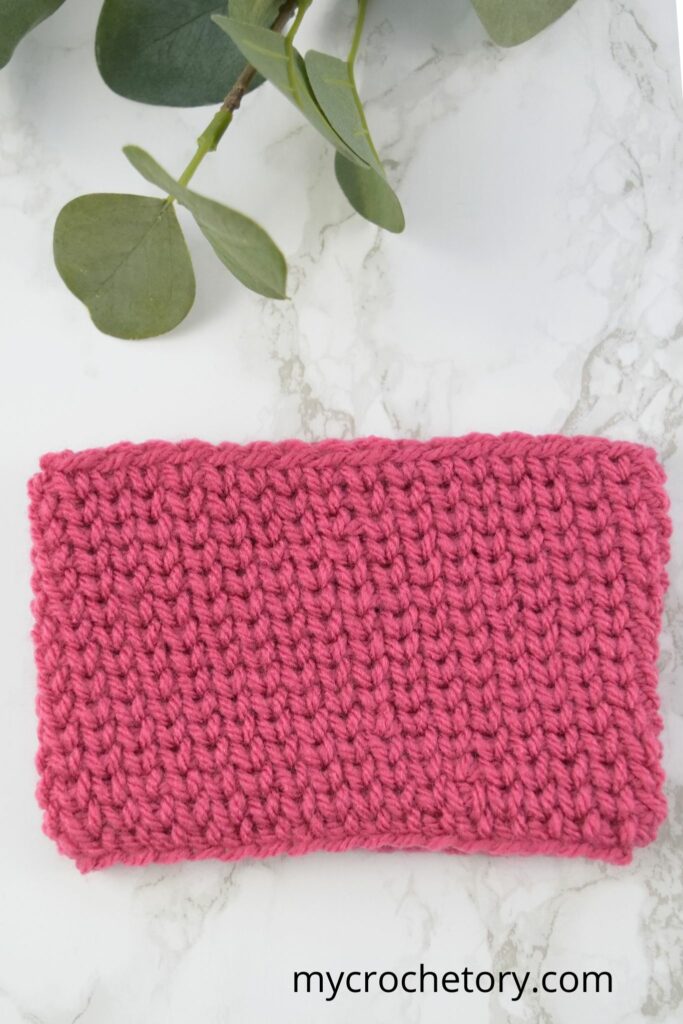
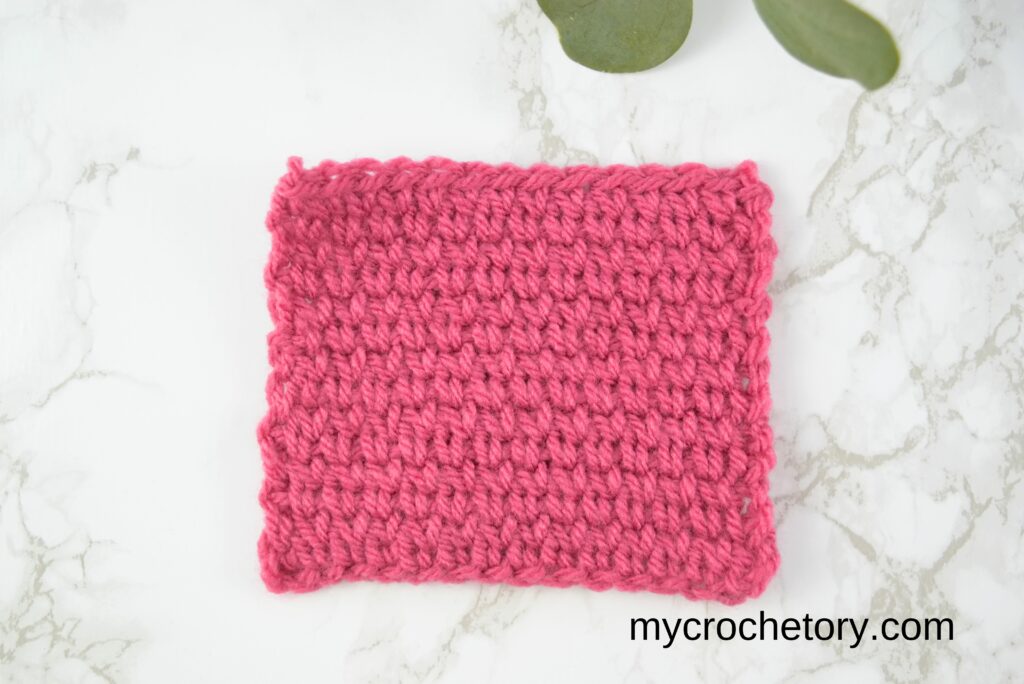
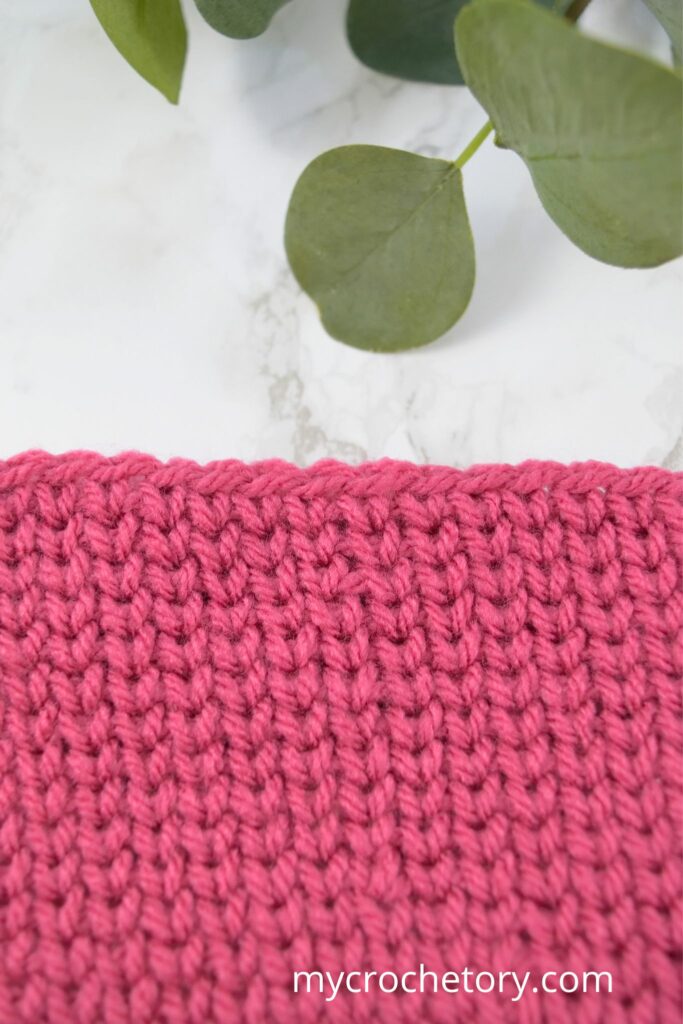
It gives your work a dense, structured texture with a modern “knit look.” If you’re making sturdy crochet baskets or cozy, boxy garments, this stitch is a must-try.
What makes the crochet waistcoat stitch stand out? The secret is simple: instead of inserting your hook in the usual spot, you’ll work into the center post stitch, just below the vertical bars. This creates the distinct knit-like look.
The result? Beautiful, knit-like V-shapes that mimic stockinette stitch. And don’t worry if it’s new to you – with some practice and the right tips, you’ll be a pro in no time.
Let’s get started with everything you need to know about the crochet waistcoat stitch, from basic techniques to advanced tips.
Get ready to add this versatile stitch to your repertoire and create projects that truly impress.
Video Tutorial for Visual Learners
If you’re someone who learns best by watching, we’ve got you covered! Check out my crochet waistcoat stitch video tutorial on YouTube for a step-by-step guide, complete with a photo tutorial to show each step clearly.
This free video will show you how to:
- Work the crochet waistcoat stitch in the round and flat in rows.
- Shape your projects with increases and decreases (two methods).
TIP: To view this video tutorial properly, please disable any ad-blocker you have running.
With close-up shots and expert tips, this video tutorial is the perfect companion to your crochet practice. Pause, rewind, and follow along at your own pace to master this awesome stitch.
The Knit Stitch Tutorial
Crocheting the Knit Stitch in the Round
The crochet waistcoat stitch works beautifully in the round. Here’s how you can achieve this look, whether you prefer joined rounds or a continuous spiral.
Joined Rounds
Start with a foundation chain. Join it into a circle using a slip stitch (sl st).

Chain one (this does not count as a stitch and applies throughout). Work one single crochet into each chain around. Join the last stitch to the first single crochet with a slip stitch.
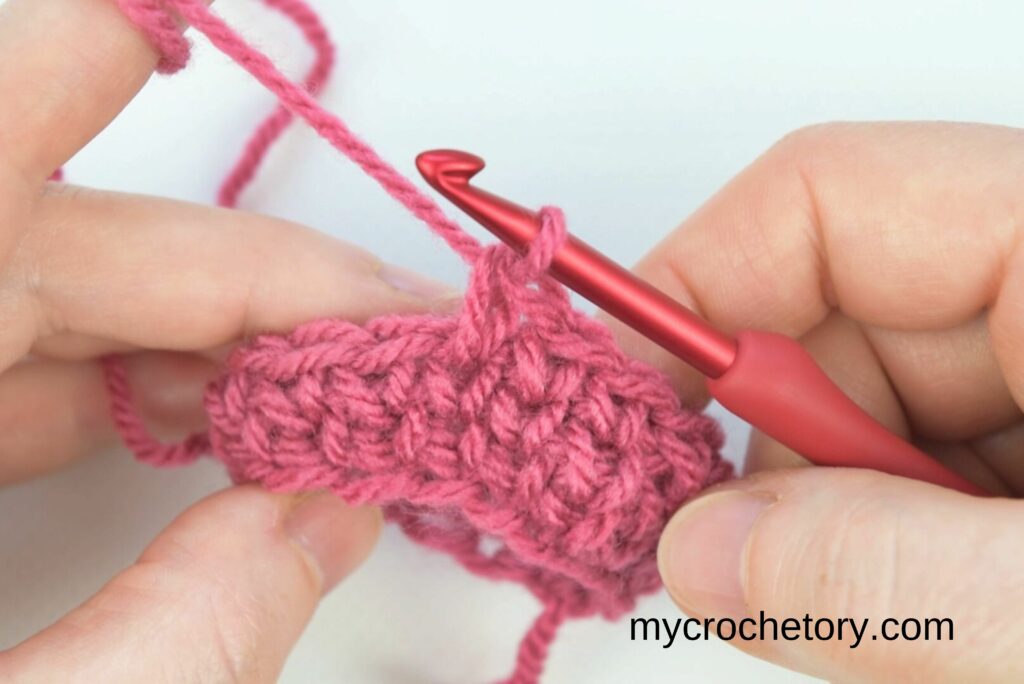
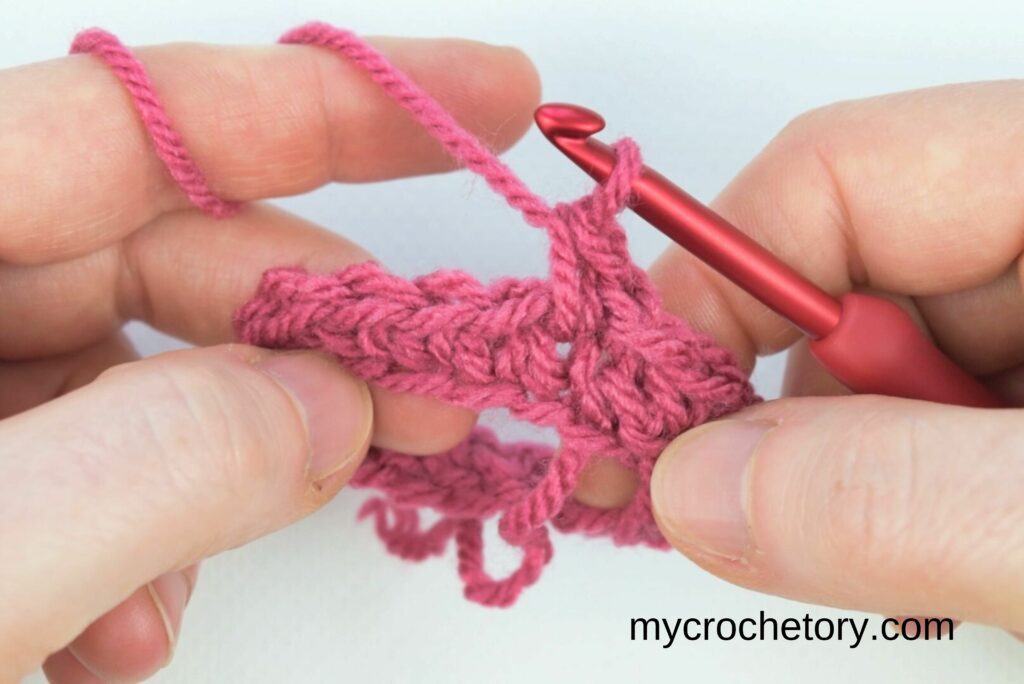
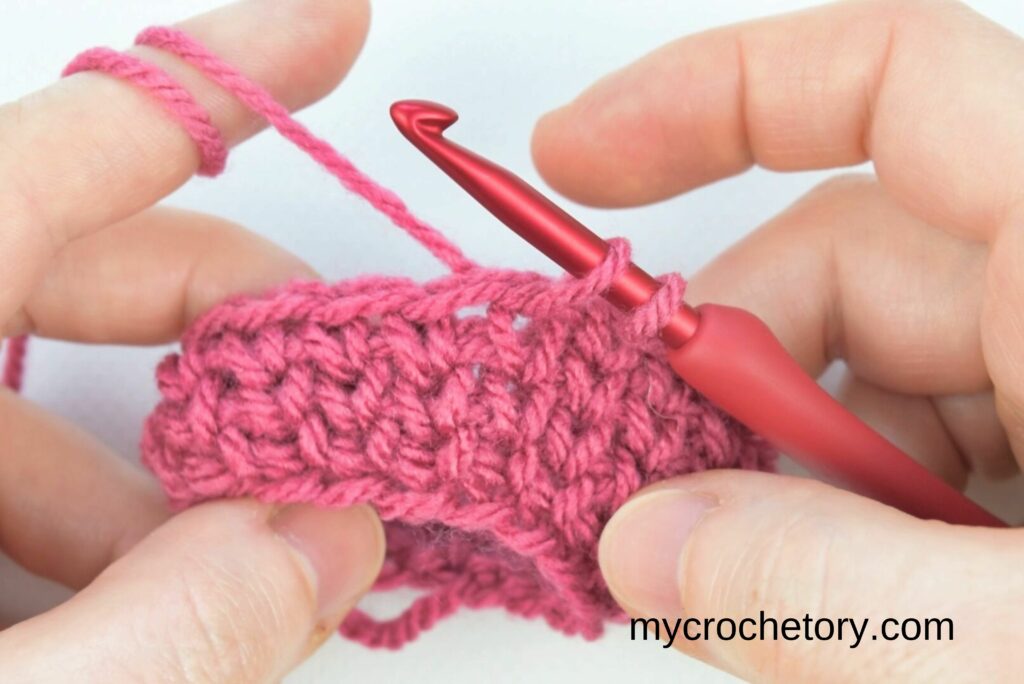
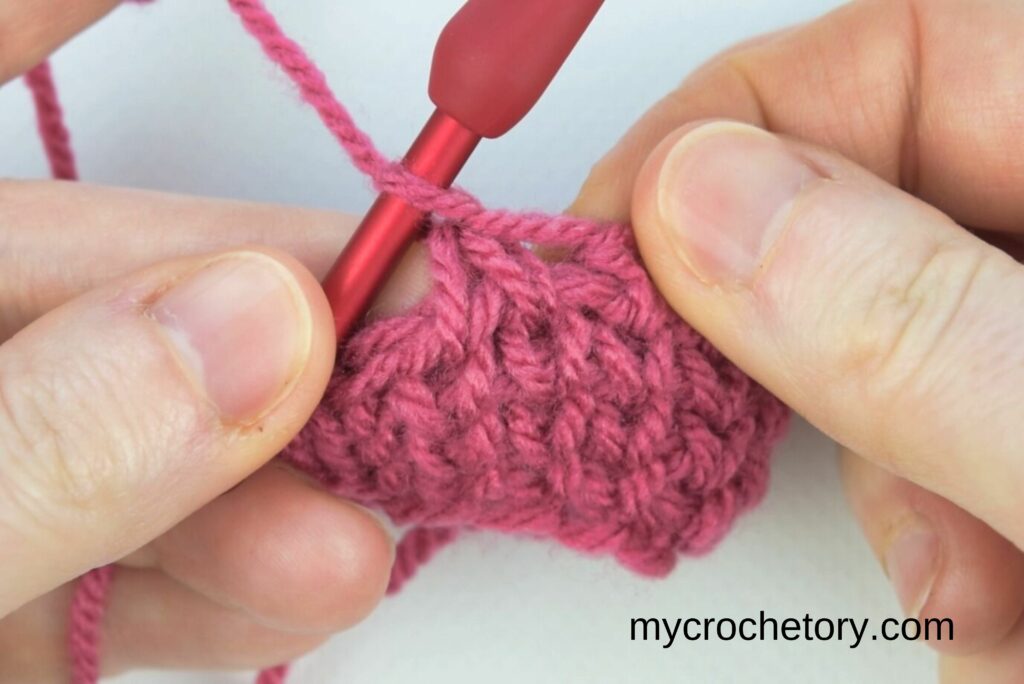
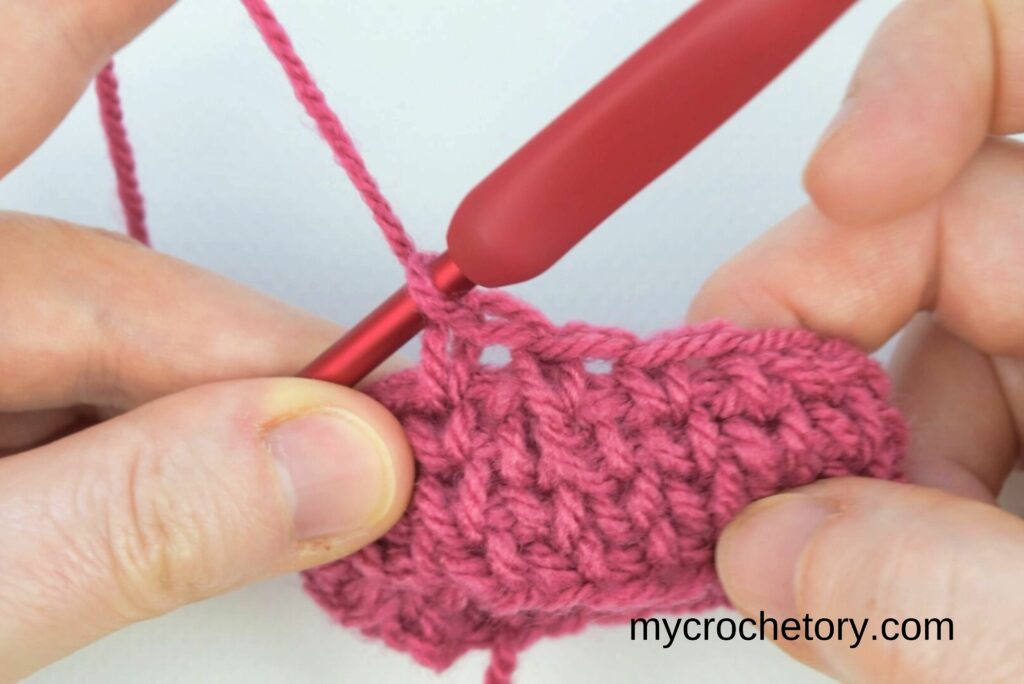
Begin the next round with a chain one. To crochet the waistcoat stitch, locate the vertical bars at the front of the stitch below.
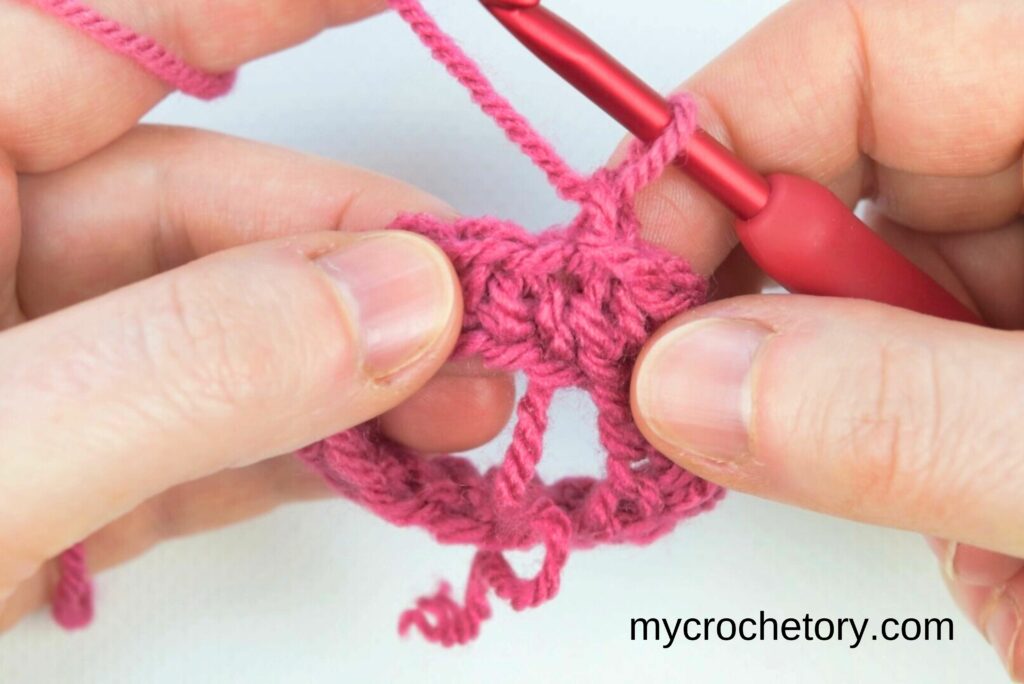
Insert your hook into the center post of the stitch, between the two legs of the vertical bar. Ensure your hook goes through the body of the stitch, not just the top loops.
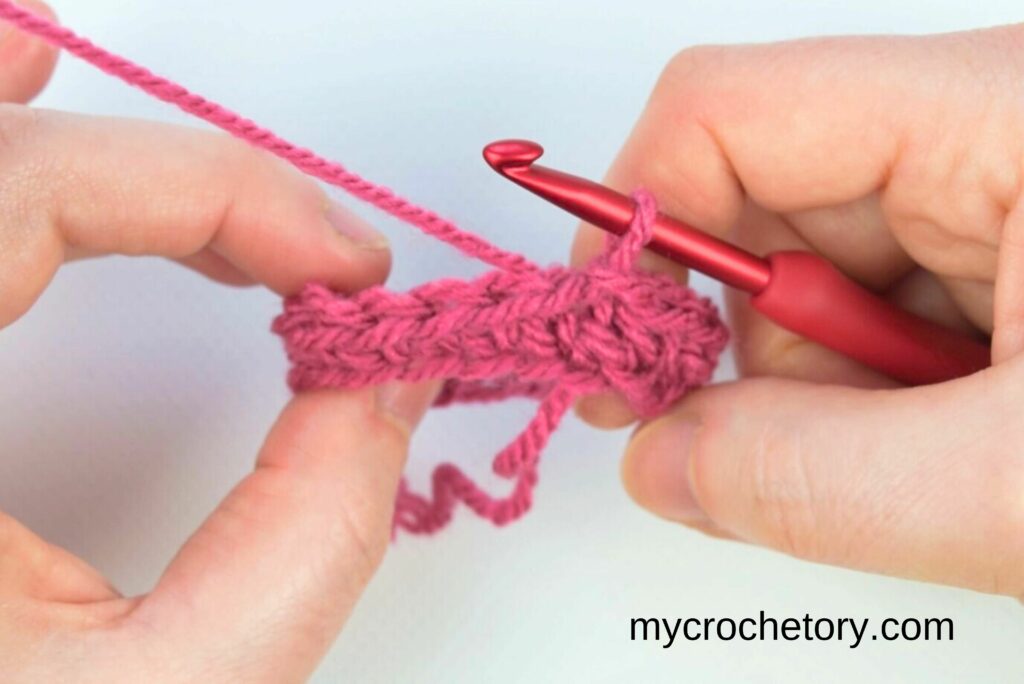
Yarn over, pull up a loop, and complete the stitch like a regular single crochet. Repeat this for every stitch in the round.
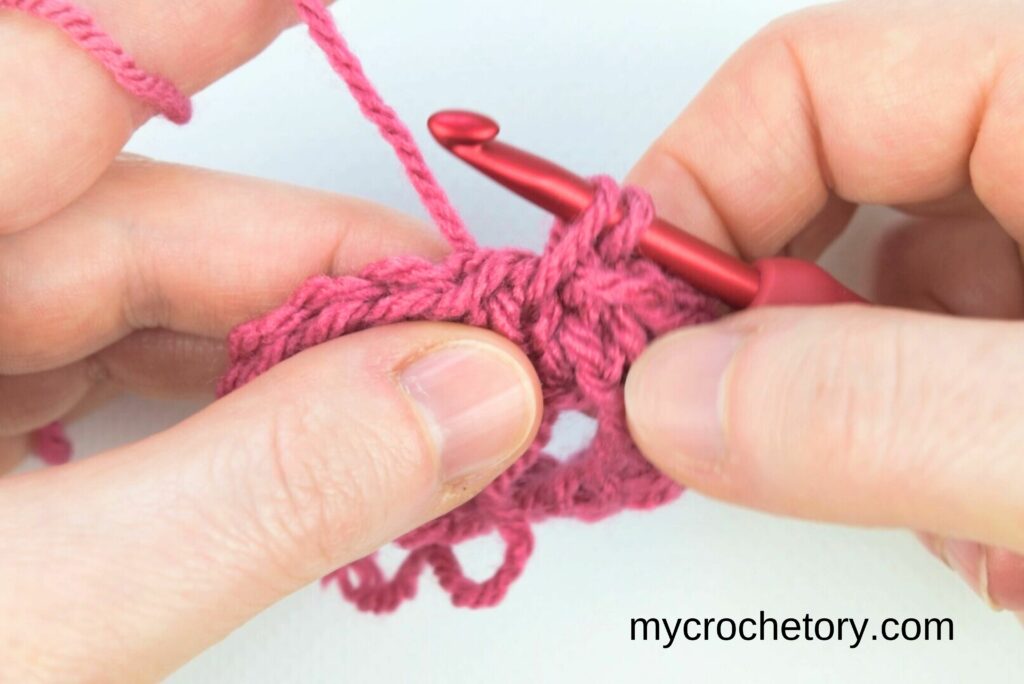
Join each round by working a slip stitch into the first stitch. Chain one to start the next round.
Spiral
Make a foundation chain of the length you need for your project. Join it into a circle using a slip stitch (sl st).
Crochet single crochet stitches into each chain of the foundation. When you reach the last chain, do not join the last stitch to the first stitch with a slip stitch.
Instead, work your first waistcoat stitch into the first single crochet of the round. This starts the continuous spiral.
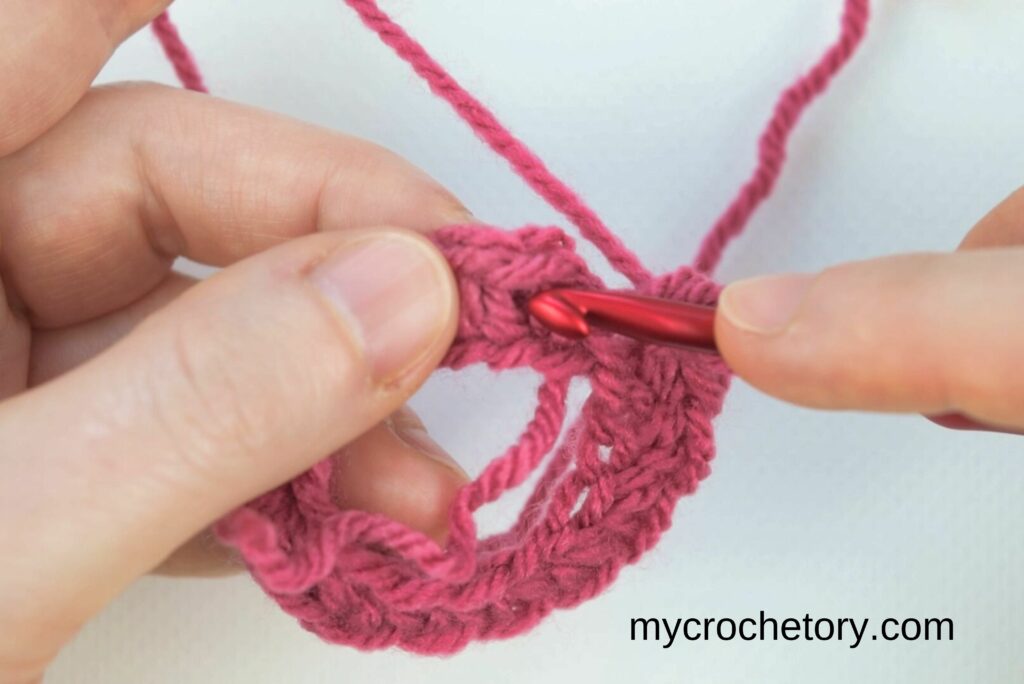
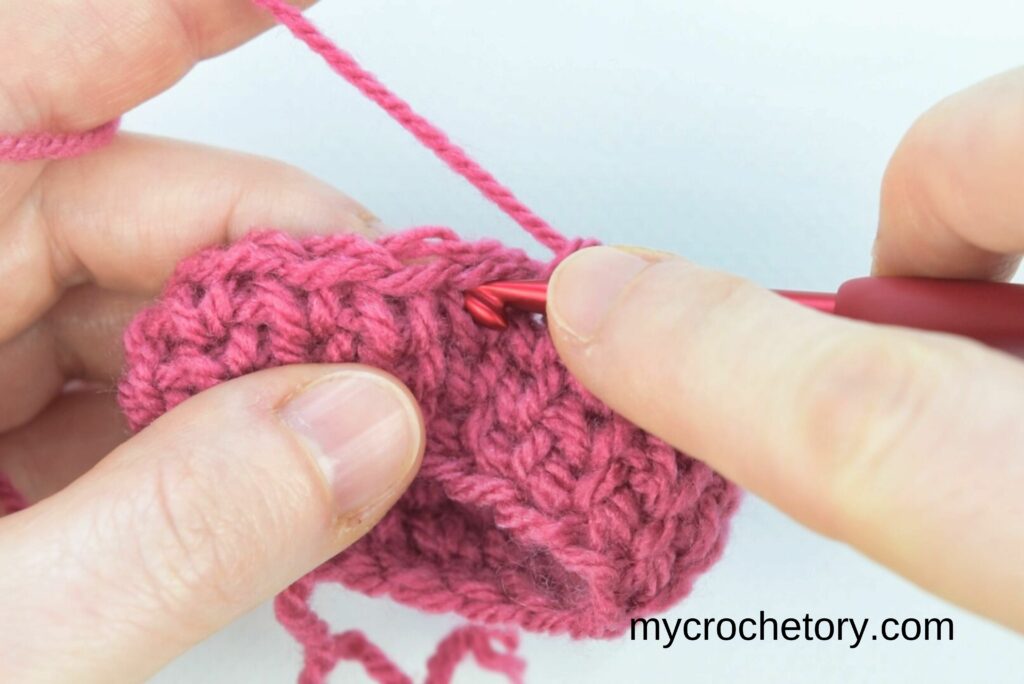
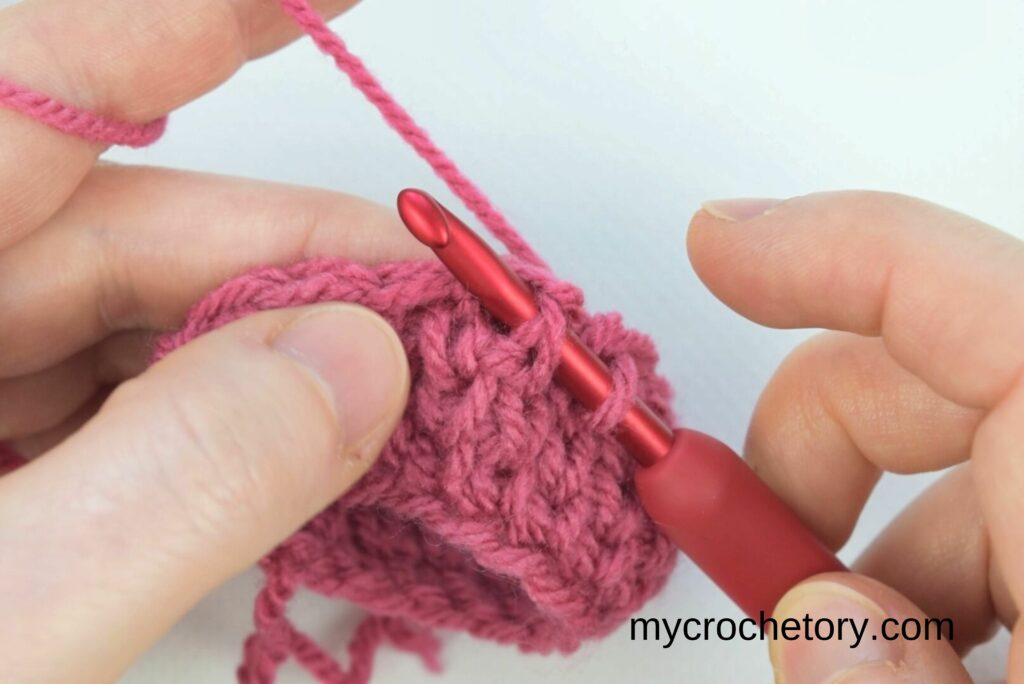
Find the vertical bars at the front of each stitch below. Insert your hook into the center post of the stitch, between the two legs of the vertical bar.
Yarn over, pull up a loop through the center post, and finish the stitch like a regular single crochet.
Continue crocheting in a spiral. Do not join the rounds with a slip stitch.
Keep crocheting waistcoat stitches in a spiral until your project is as big or as long as you want.
Tip: Use a stitch marker in the first stitch of each round. This will help you know where the round begins.
Comparing Joined Rounds and Spiral Patterns
Joined rounds offer precise boundaries, making it easier to count stitches and follow patterns. They’re ideal for bags or garments that need a polished look.
Spirals, on the other hand, flow seamlessly and are perfect for projects with uninterrupted textures.
Crocheting the Knit Stitch Flat in Rows
If you’re working on a scarf or a flat panel, here’s how to use the crochet waistcoat stitch:
Start with a foundation chain and work one row of single crochet stitches.
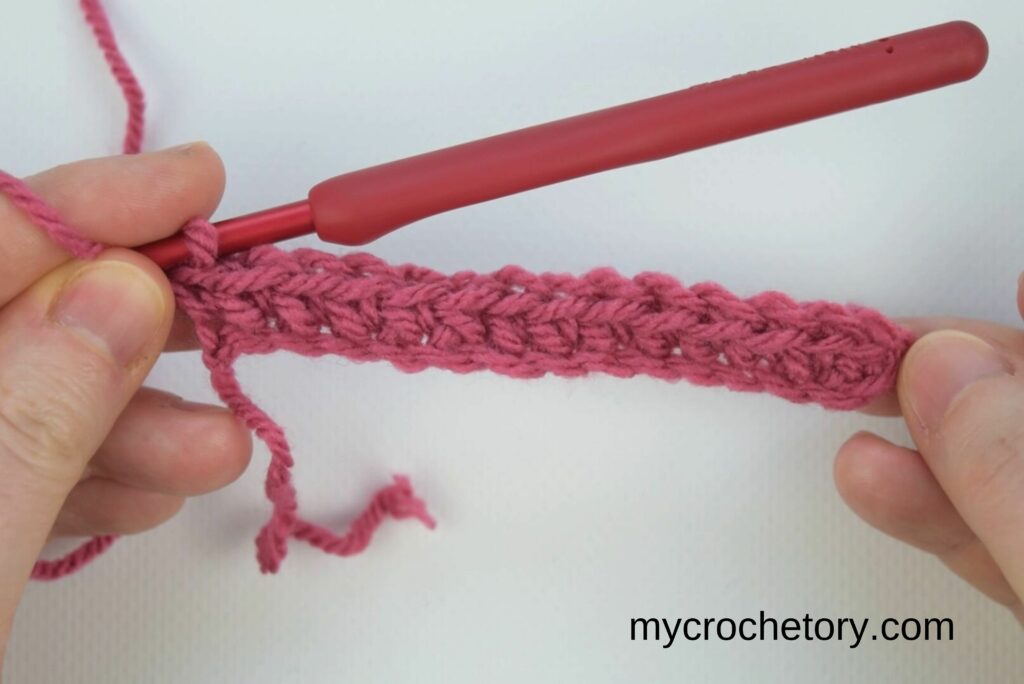
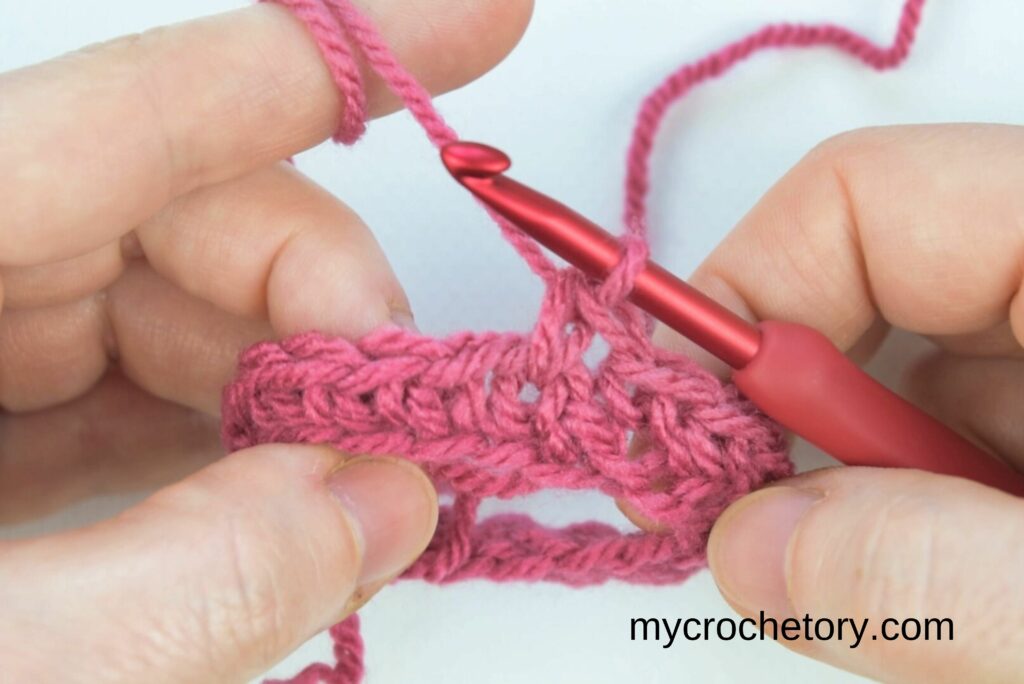
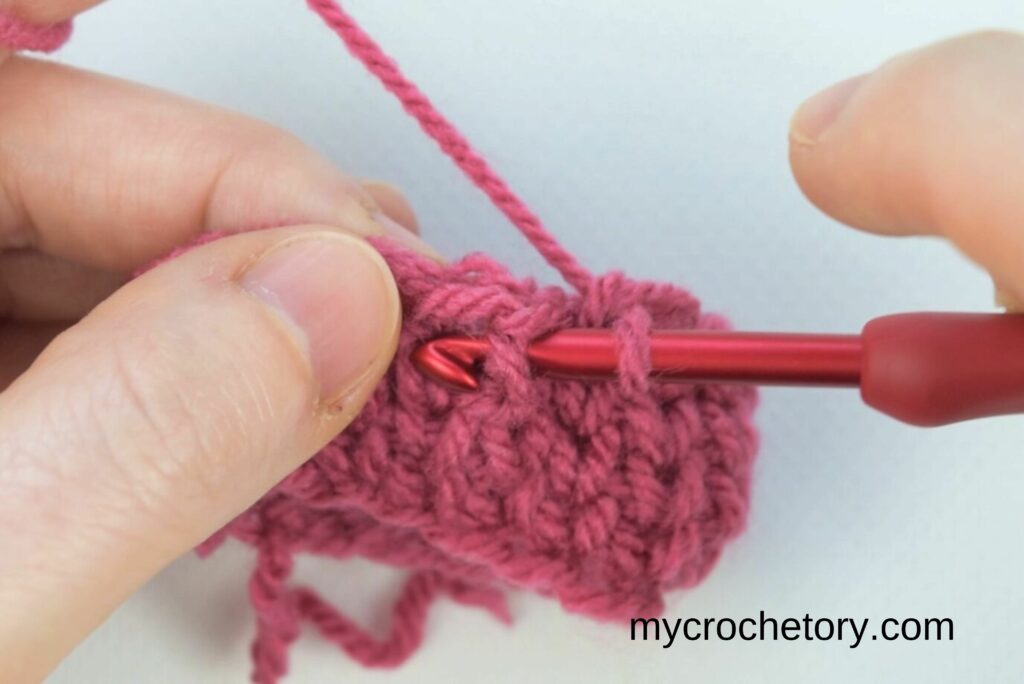
On the next row, insert your hook into the vertical bars instead of the top of the stitch, ensuring that your hook goes into the right spot for the best results.
Yarn over, pull up a loop through the center post, and finish the stitch like a regular single crochet.
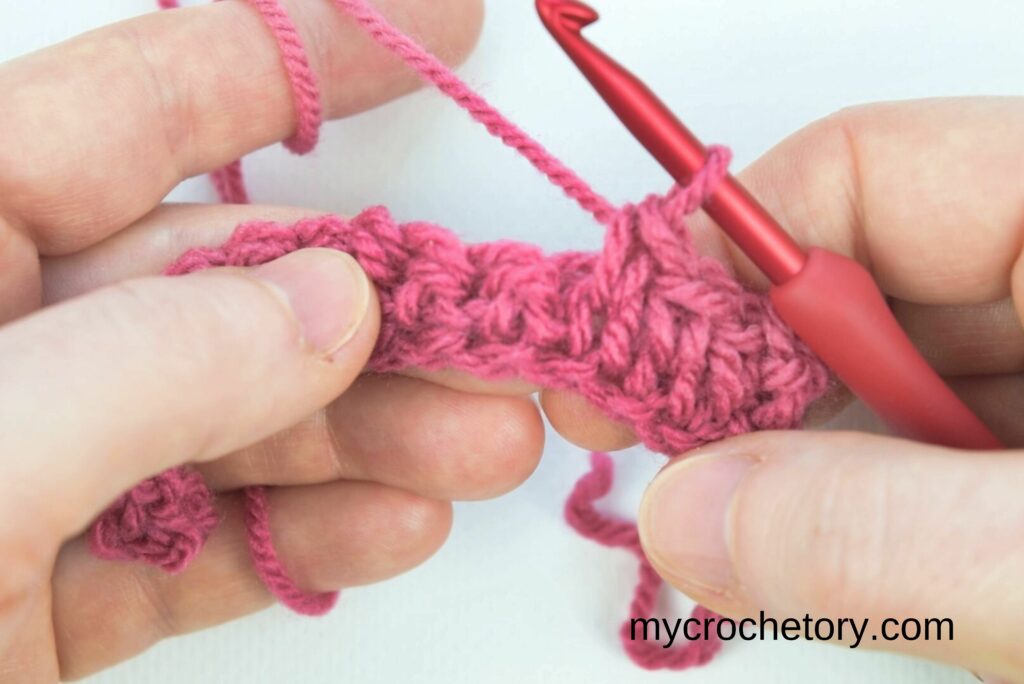
Work in the same manner to the end of the row.
Turn your work at the end of each row and chain one to keep the correct height.
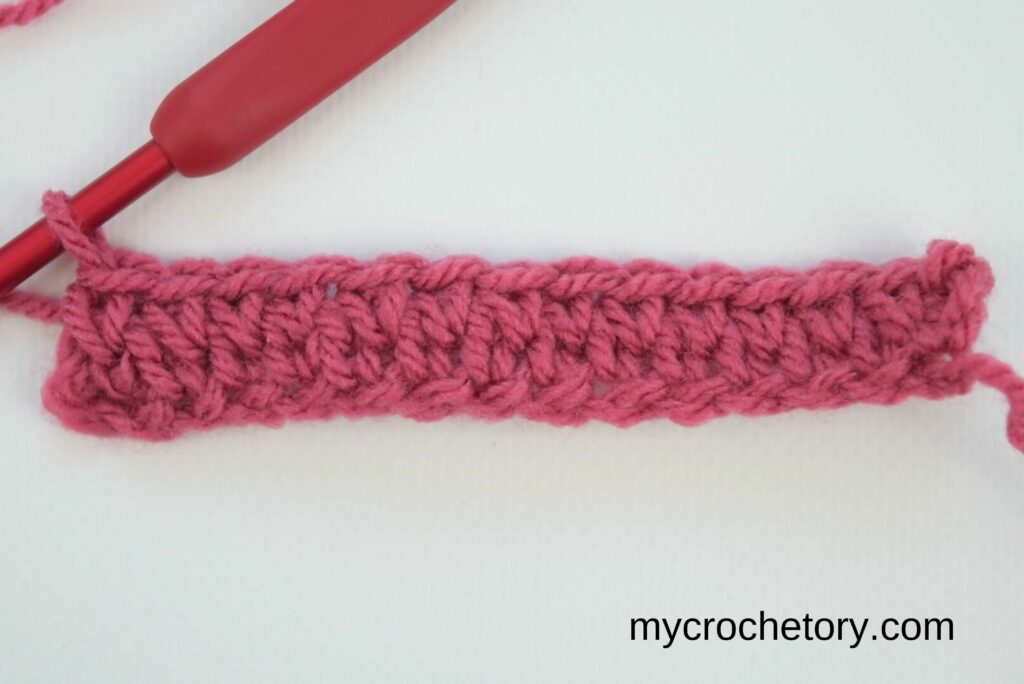
Keep crocheting waistcoat stitches in rows until desired length.
Keep in mind that the texture of rows may not look as uniform as in rounds due to the turning, but this unique stitch pattern adds character to flat projects.
How to Increase and Decrease
Increase
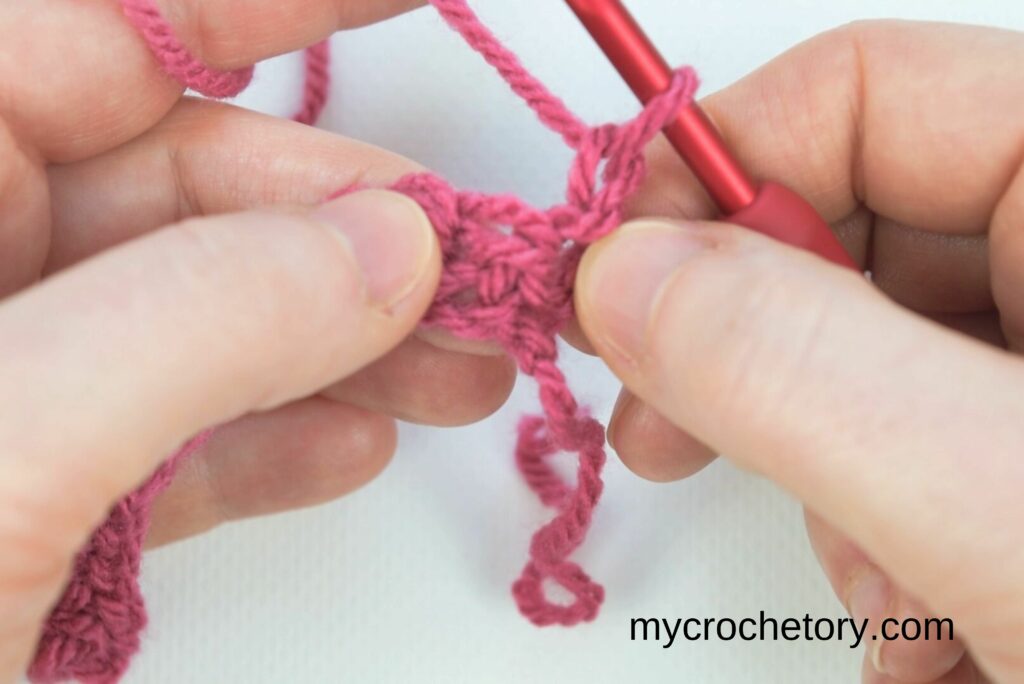
To increase with the crochet waistcoat stitch, find the vertical bar of the stitch where you want to add an increase. Put your hook into the center of the vertical bar, between the two legs of the stitch. Yarn over, pull up a loop, and finish the stitch as usual. This makes your first crochet waistcoat stitch.
Then, put your hook into the same vertical bar again. Make sure it goes into the same spot as before. Yarn over, pull up a loop, and finish the second crochet waistcoat stitch. Now you’ve added an increase by making two stitches in the same vertical bar.

Decrease Method 1
To start, look at the first stitch. Find the two vertical bars at the front of it. Insert your hook between these two bars, into the center of the stitch.
Yarn over and pull up a loop. Now you have two loops on your hook.
Next, go to the next stitch. Again, find the two vertical bars and insert your hook between them, into the center of the stitch.
Yarn over and pull up another loop. Now you have three loops on your hook.
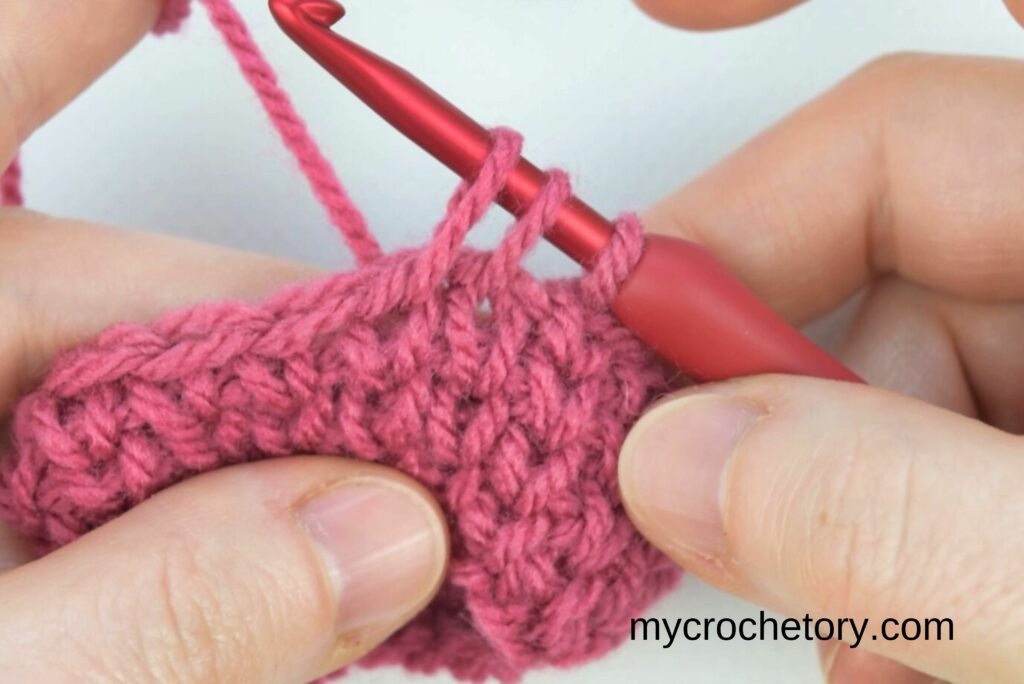
To finish, yarn over one more time and pull through all the loops on your hook. This completes the crochet waistcoat stitch decrease and keeps the knit-like look.
Keep repeating these steps for your project.
Decrease Method 2
Begin with the first stitch and locate the two vertical bars at the front. Insert your hook between these bars, going into the center of the stitch.
Rather than yarning over, bring the hook from the back to the front between the two decreasing stitches.
Then insert it between the bars of the second stitch.
Yarn over, pull up a loop, and finish by yarning over again and pulling through all the loops on the hook.
Tips for Waistcoat Crochet Stitch
Mastering the crochet knit stitch can take some practice, but these tips will make it easier:
- Use a larger hook size: A bigger crochet hook prevents your stitches from becoming too tight, especially if you’re a beginner trying this great stitch for the first time.
- Maintain consistent tension: Keeping your tension even ensures a smooth and uniform texture.
- Mark your stitches: Use a stitch marker in the first stitch of each round or repeat for accuracy.
- Experiment with yarn weights: Lightweight yarns create delicate textures, while bulky yarns make sturdy, dense fabric.
- Focus on stitch placement: Make sure your hook enters the vertical bars cleanly to achieve the signature knit-like appearance.
FAQs
Is the crochet knit stitch stretchy?
The crochet knit stitch creates a dense and sturdy fabric, so it’s not as stretchy as other stitches. This makes it ideal for projects requiring structure.
Is the crochet waistcoat stitch reversible?
No, the crochet waistcoat stitch is not fully reversible. The right side has the knit-like V shapes, while the wrong side has a different texture.
What projects work best with the crochet waistcoat stitch?
This stitch is perfect for baskets, hot pads, structured bags, and garments needing durability.
Can I use this stitch with multicolored yarn?
Yes! The crochet waistcoat stitch highlights color changes beautifully, especially in self-striping or variegated yarns.
Why do my stitches look uneven?
Uneven tension or incorrect hook placement can cause this. Practice and patience will help you improve consistency.
Now that you’ve learned all about the crochet waistcoat stitch, it’s time to grab your hook and yarn and give it a try. Happy crocheting!
MORE CROCHET STITCHES TUTORIALS
If you found this crochet waistcoat stitch tutorial helpful, you might also like posts:
- How to to crochet Herringbone Stitch
- Star Stitch Crochet Tutorial for Beginners
- How to Crochet V-STITCH
- Waffle Crochet Stitch Guide
- How to crochet Crab Stitch
- How to Crochet the Picot – the best way
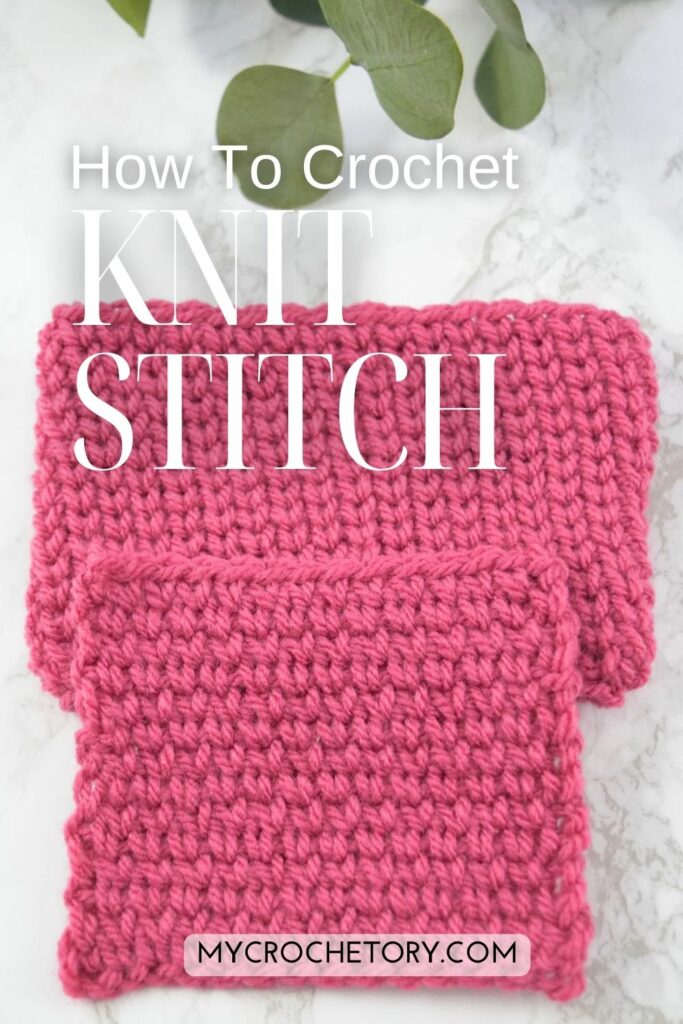
Don’t forget to save this Pin for easy reference: 📌
I’d love to hear about your crochet adventures and see your beautiful creations. Drop a comment below sharing your thoughts, questions, or even your favorite crochet tips! Your voice adds a vibrant thread to our forum community.
Sharing is caring! If you found this guide helpful, consider spreading the love. Click the share button and inspire other crocheters.
Happy crocheting, and may your yarn always be tangle-free!
Join my Facebook Group and Official Ravelry Group where you can find necessary support, you can ask questions or share your finished projects.
You can also follow my Instagram, Facebook page and Pinterest.
Leave a Reply