Updated: 12 January 2026 by Sylwia (MyCrochetory)
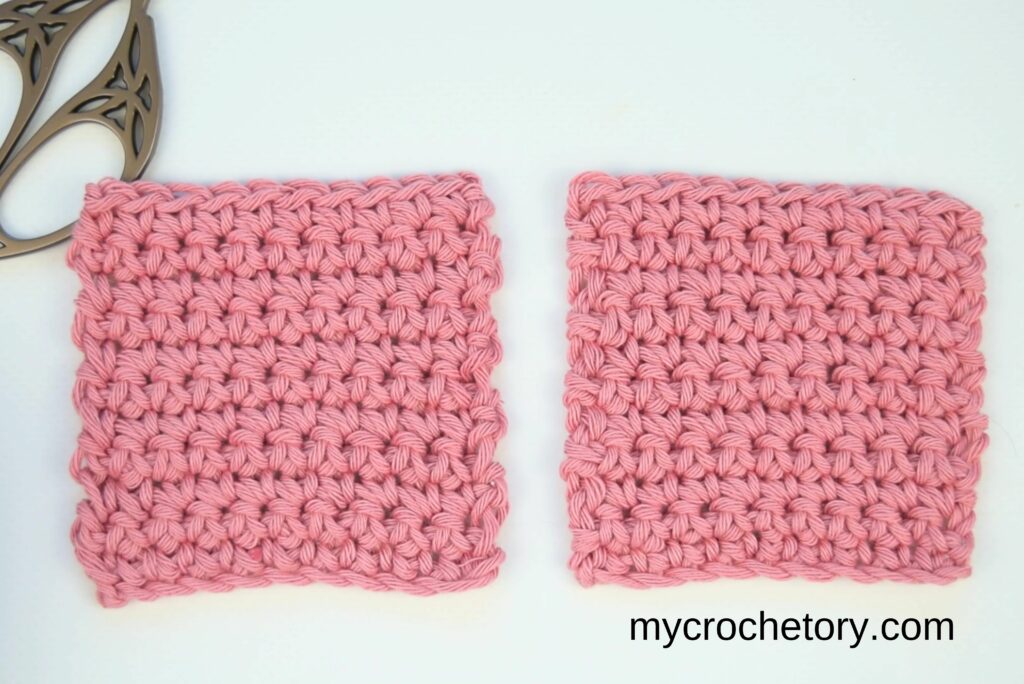
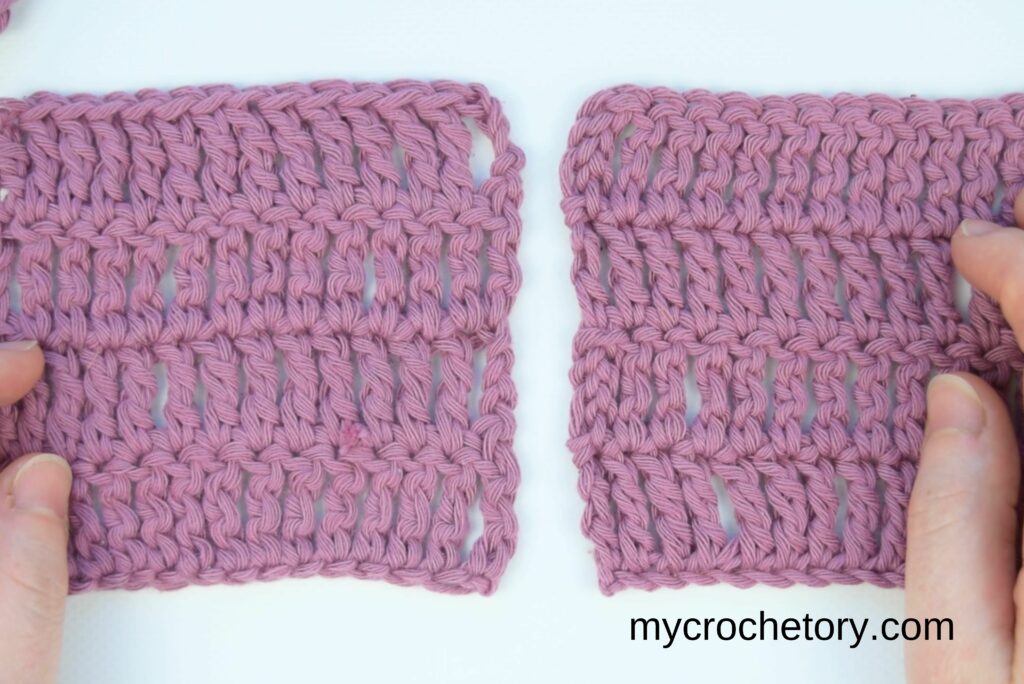
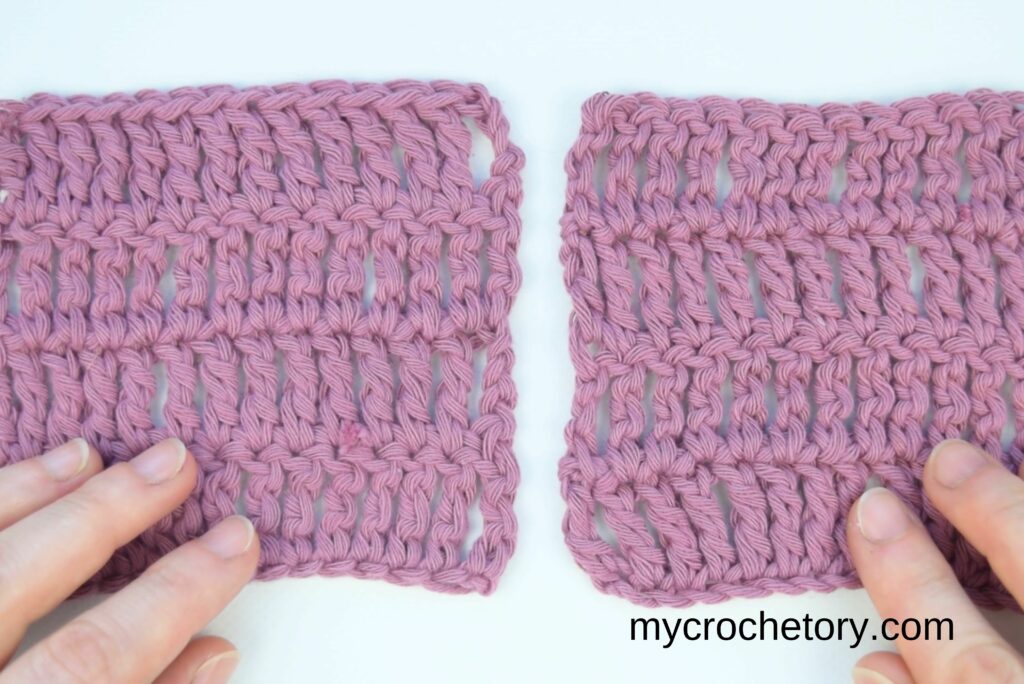
Most crochet projects do not fall apart. They just end up looking slightly off.
The stitches are even. The fabric feels good. And yet the sides never look as clean as you imagined. You block it. You tug it. You hope it will settle.
Sometimes it does.
Sometimes it really does not.
This is usually where straight edges come in. Not as a big, obvious problem, but as a small detail that keeps repeating row after row. It is easy to ignore until you cannot unsee it anymore.
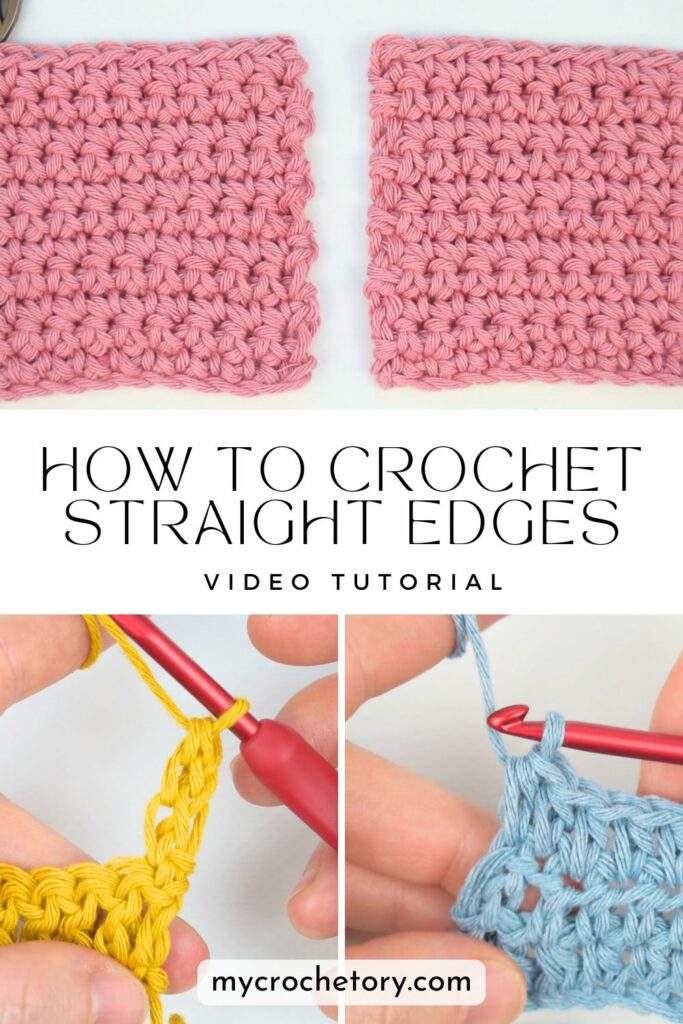
If you want to know how to crochet straight edges without constantly adjusting your work, this tutorial walks you through it in a practical way. I cover edge methods for single crochet, half double crochet, double crochet, and treble crochet, plus a step by step video so you can watch what actually changes at the edge.
No fixing later.
No tugging things into place.
Just cleaner sides from the start.
If crochet edges have been driving you a little nuts, you might like my newsletter. I share practical crochet tips, technique fixes, and patterns that actually work in real life. No spam, just helpful stuff you can use. You can sign up right here.
Why Crochet Edges Go Crooked (Even When Your Stitch Count Is Right)
Edges usually go wrong in one place.
At the turn.
The middle of the row is easy. Your hands know the rhythm. When you reach the edge, that rhythm breaks. You turn your work and suddenly you are paying attention again.
You hesitate. Just for a second.
You pick a spot and move on.
That tiny hesitation matters. Not once, but when it happens the same way over and over again. One row starts a bit differently. Another ends with slightly more tension. Nothing obvious. Nothing dramatic.
The stitch count stays correct. The fabric stays fine. But the outline slowly drifts.
Straight edges come from treating the start and end of every row the same way, every time. Once that part feels clear, the rest usually fixes itself without extra effort.
Common Edge Mistakes That Sneak In Without You Noticing
Most edge issues come from three spots.
The first stitch.
Sometimes it is obvious. Sometimes it hides right after the turn. Skip it once or twice and the edge starts shifting.
Turning chains.
They look important, but they are not always part of the stitch count. If you change how you treat them from row to row, the edge changes too.
The last stitch.
It often feels tight or awkward, so it is easy to stop early. That shortens the row without making it obvious.
These moments feel small while you crochet. That is why they are easy to miss. Once you know exactly where they happen, keeping edges straight gets much easier.

Watch the Video First If Edges Always Confuse You
If crochet edges make you slow down and squint at your work, start with the video.
Some edge stuff is just easier to see than to read about. The hook angle. Where the stitch actually sits after the turn. That tiny moment when you usually think, “I guess this is fine.” The video shows that moment clearly.
Watching one clean row from start to finish helps a lot. You see exactly where the hook goes, how the first stitch is handled, and what the last stitch really looks like when it is done right. No guessing. No rewinding your brain.
You can absolutely follow the written steps below on their own. The video is there so everything clicks faster when the edge usually feels fuzzy.
If edges have been bossing you around, let the video go first. Then come back and crochet with way more confidence.
TIP: To view this video tutorial properly, please disable any ad-blocker you have running.
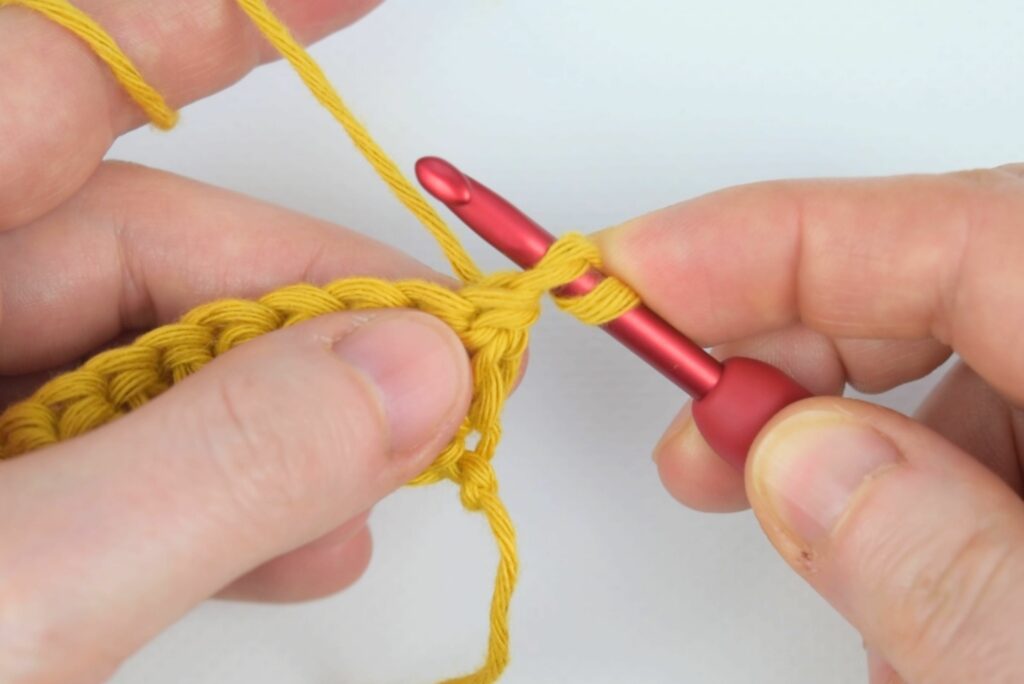
How to Crochet Straight Edges in Single Crochet
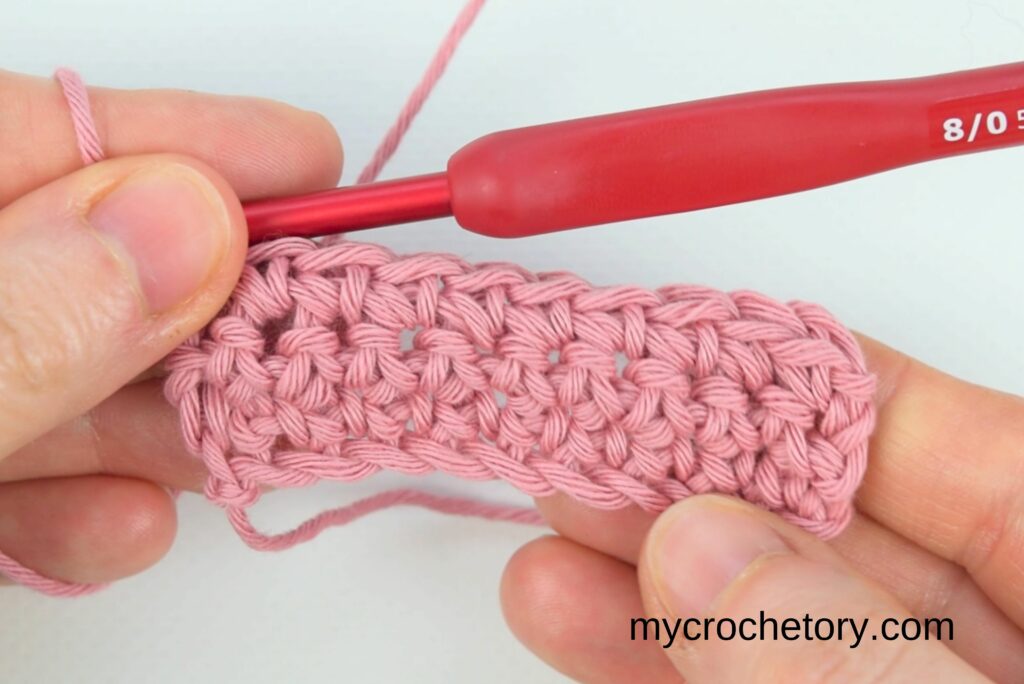
Single crochet feels simple until you look at the edges.
This stitch is short and compact, which means there is nowhere to hide. If the edge is off, you see it right away. That is why single crochet projects often end up with sides that lean or ripple even when everything else looks fine.
The key here is how you start the row.
Instead of using a standard turning chain that creates extra space, this method keeps the height controlled right at the edge. It helps the first stitch sit where it belongs and keeps the side from growing little bumps or gaps as you repeat rows.
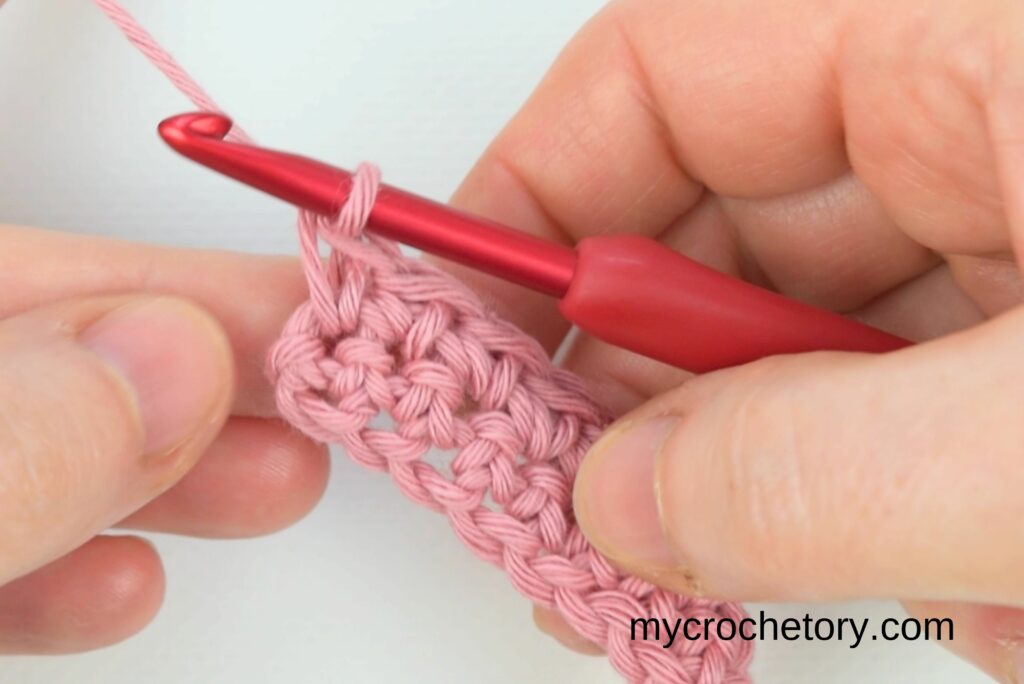
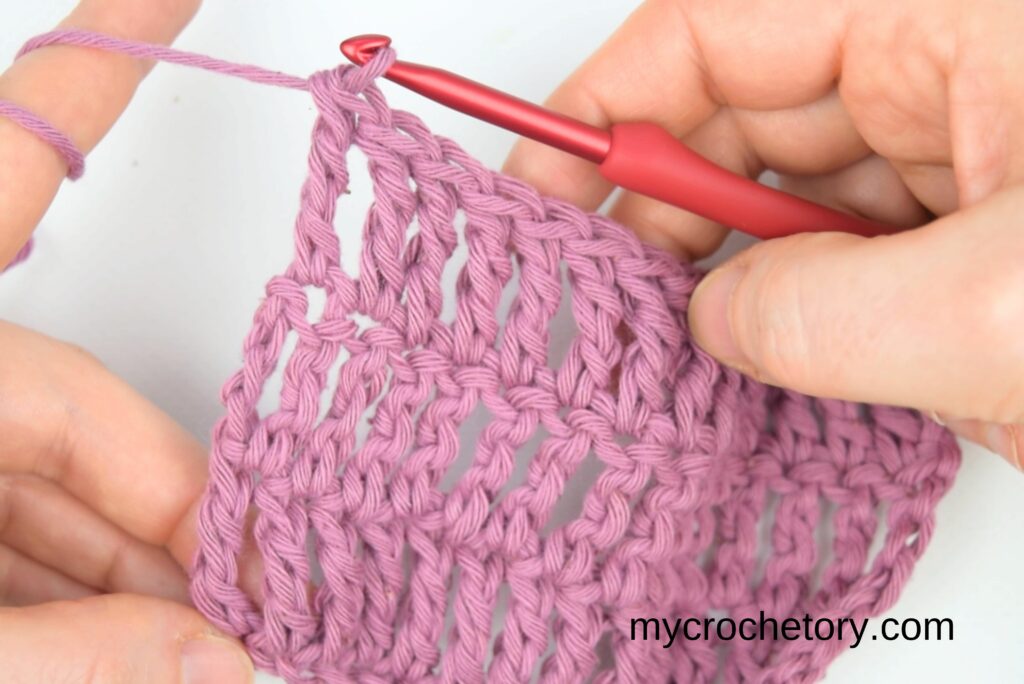
Once you get used to this row start, single crochet edges stop feeling unpredictable. The row begins cleanly, ends cleanly, and stays consistent from top to bottom.
Below, you will find the exact steps for the High Loop Start method. Follow them as written and focus on placing the first stitch the same way every time.
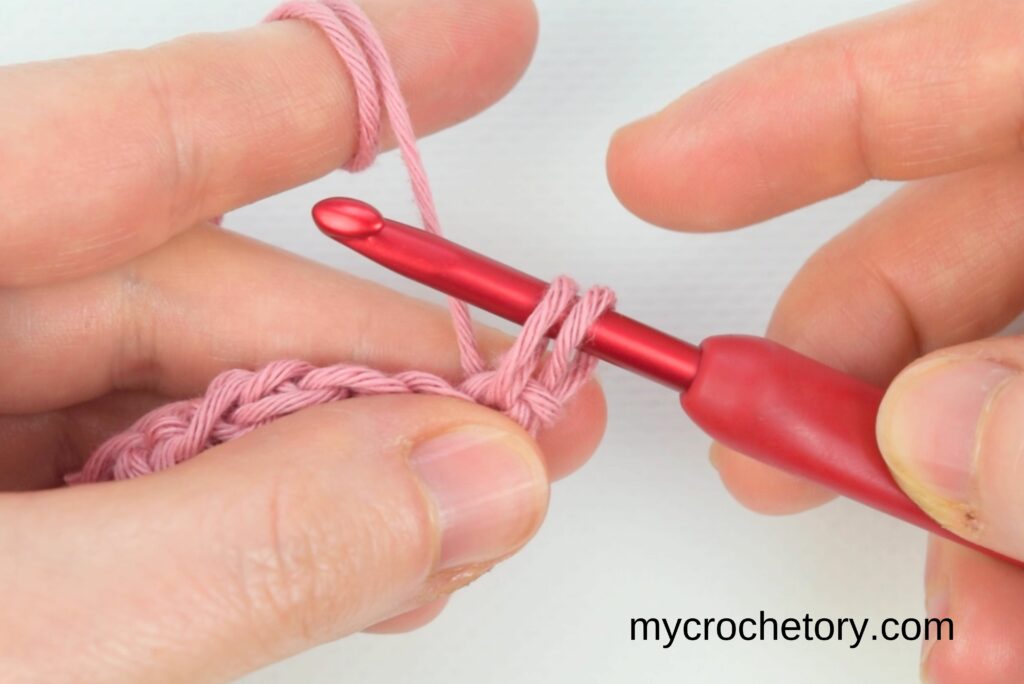
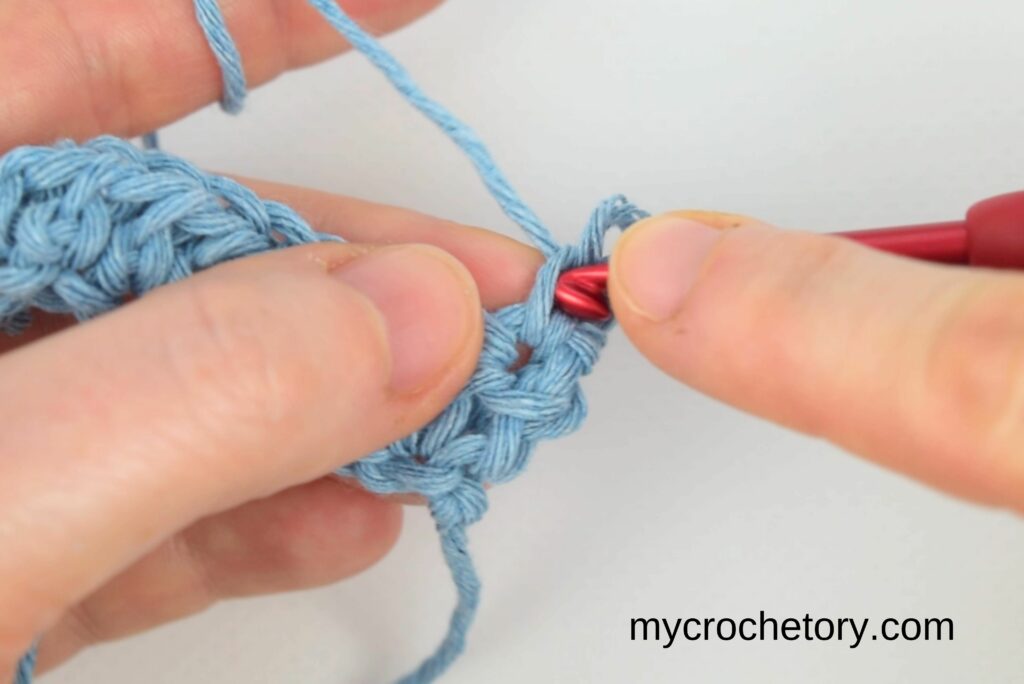
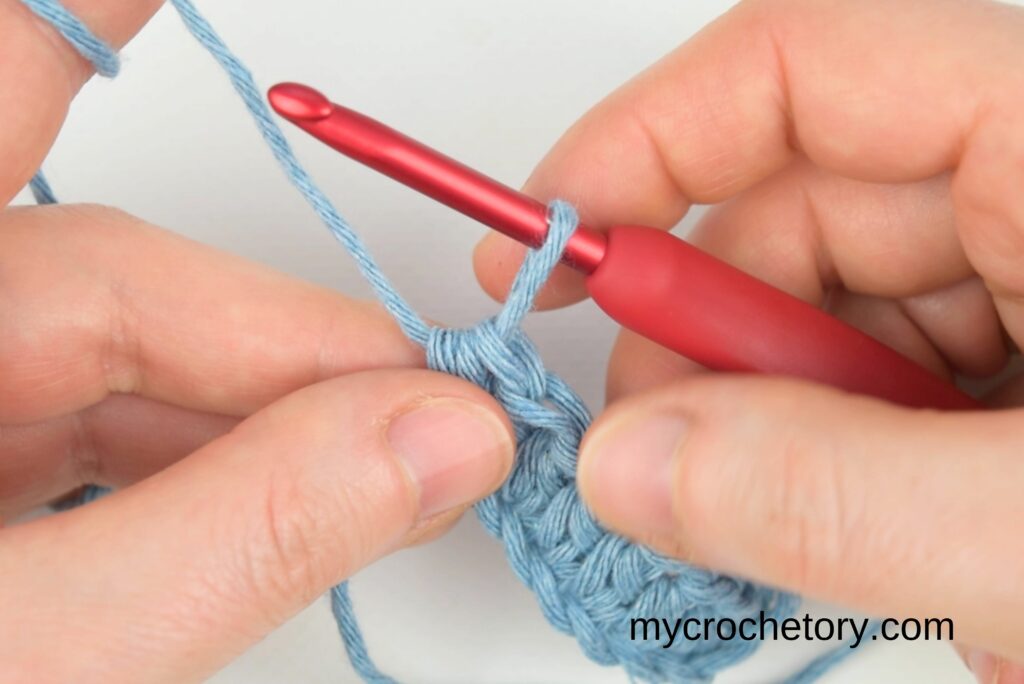
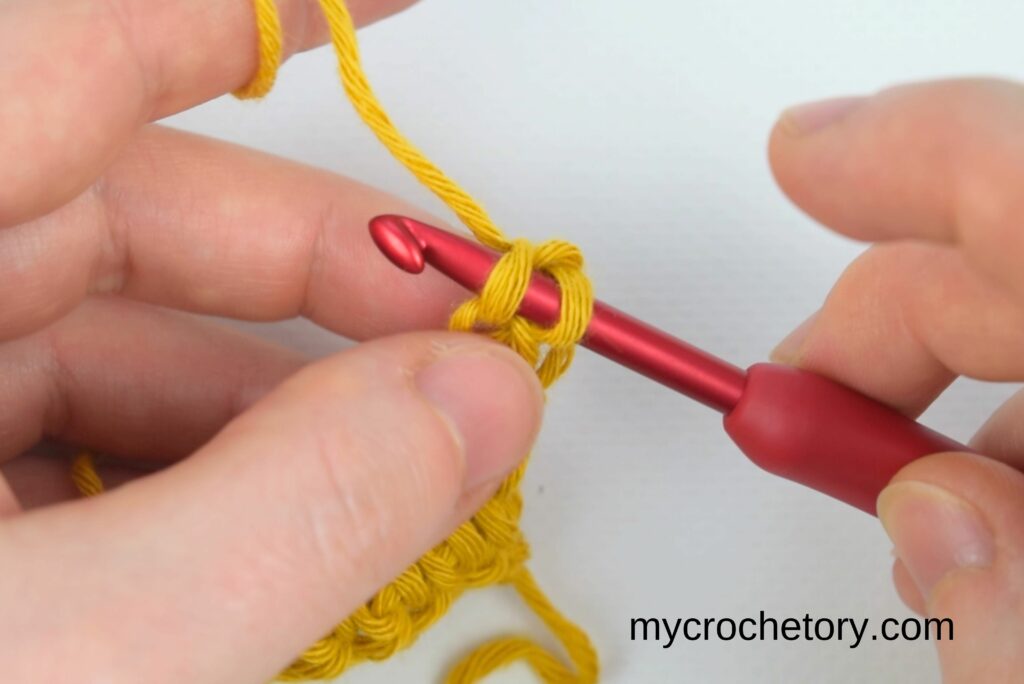
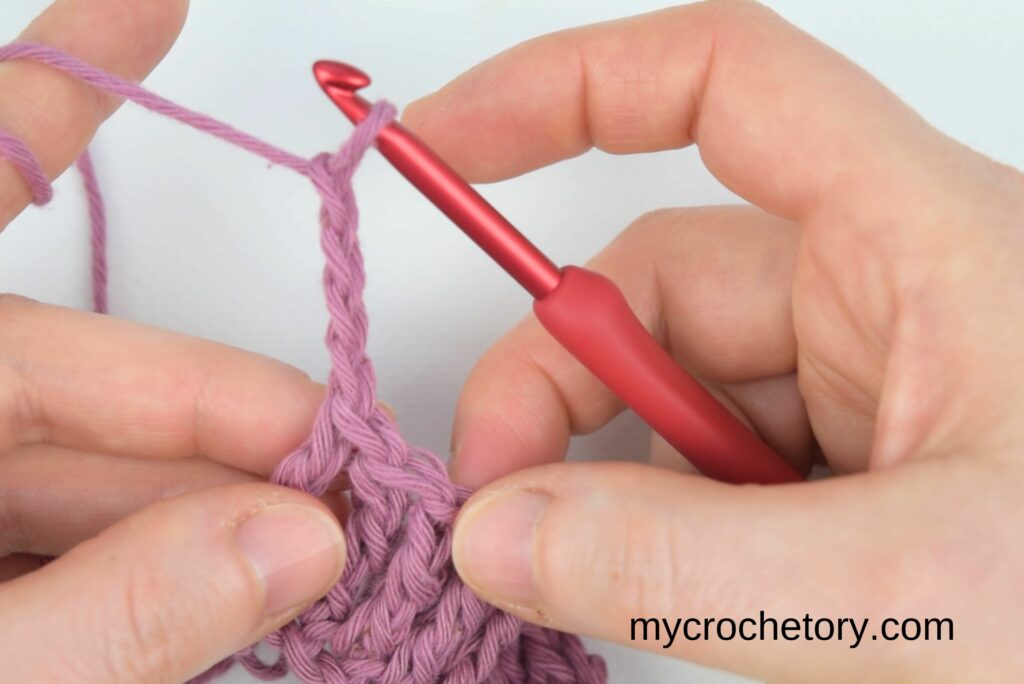
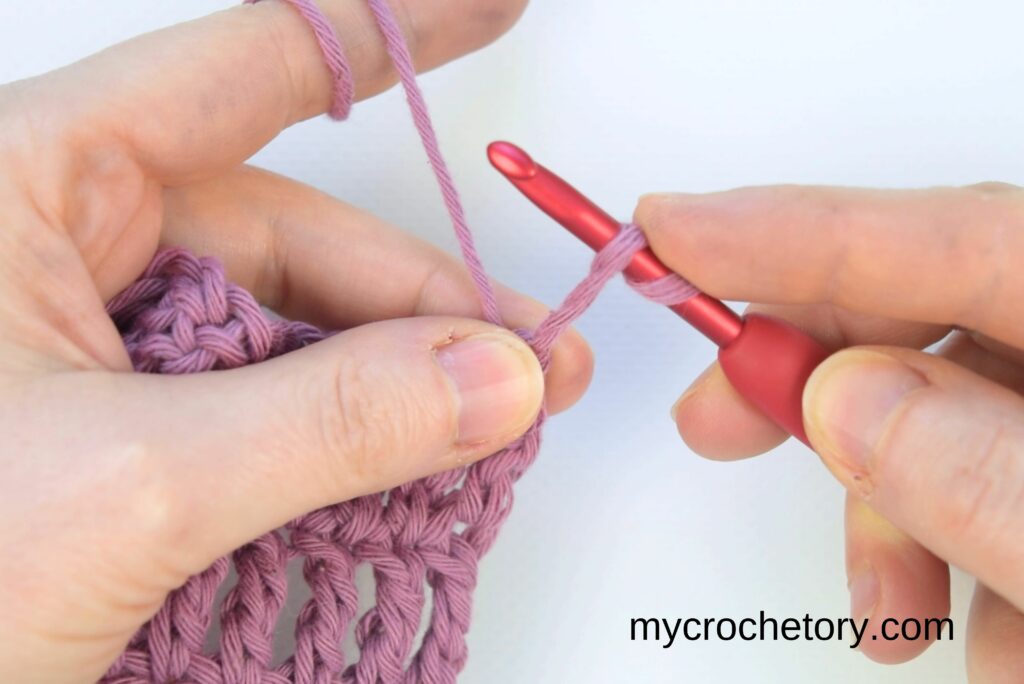
High Loop Start
Meet the High Loop Start – your new best friend for smooth, gap-free edges! No more awkward turning chains or weird gaps messing up your rows.
This little trick keeps everything flowing neatly, so your crochet looks effortlessly polished. Give it a try, and you’ll never look back!
Step-by-Step Instructions
Step 1:
Chain the required number of stitches and work your first row of single crochet as usual.
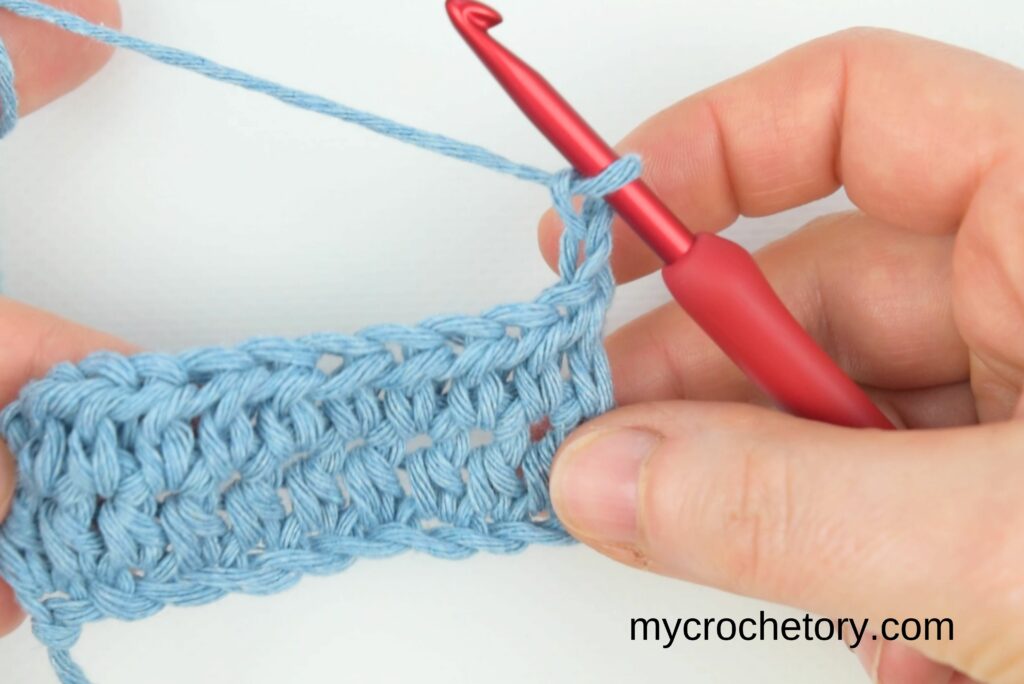
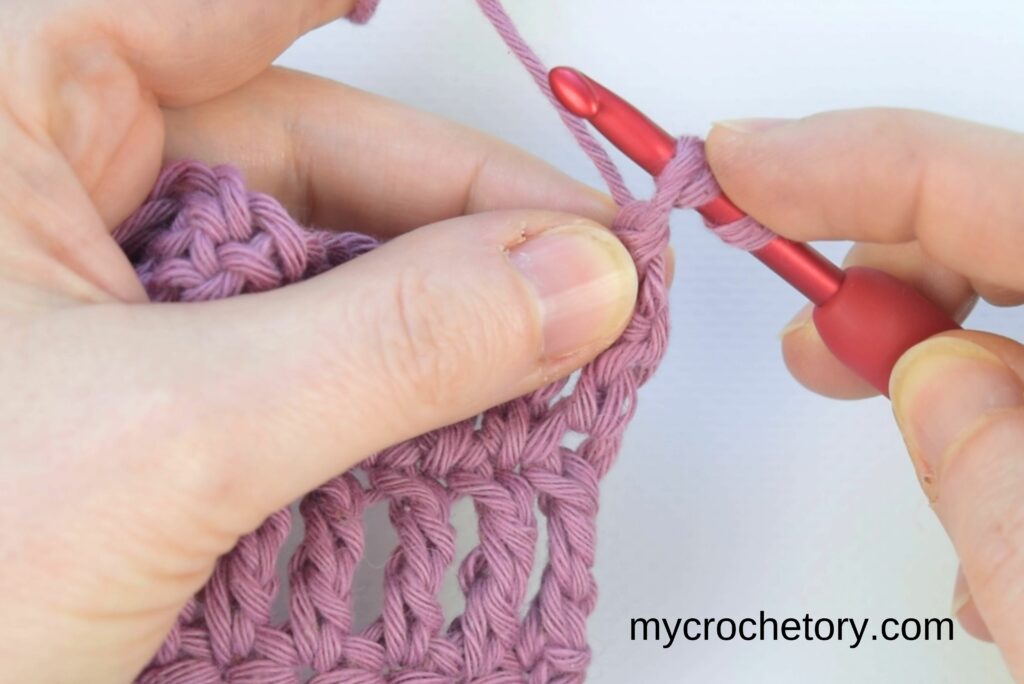
Step 2:
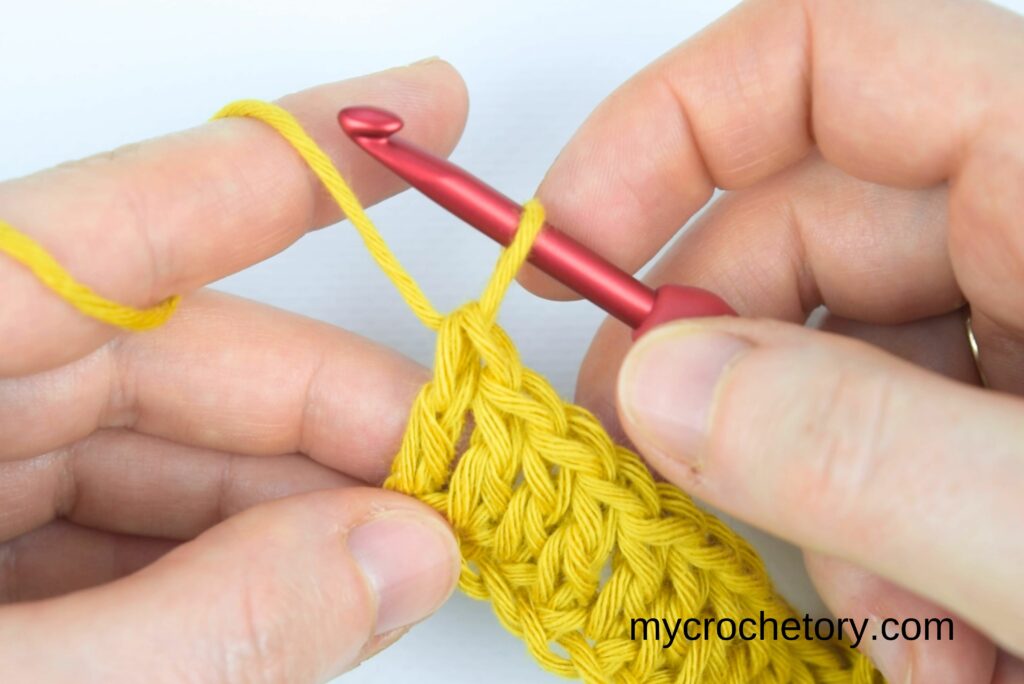
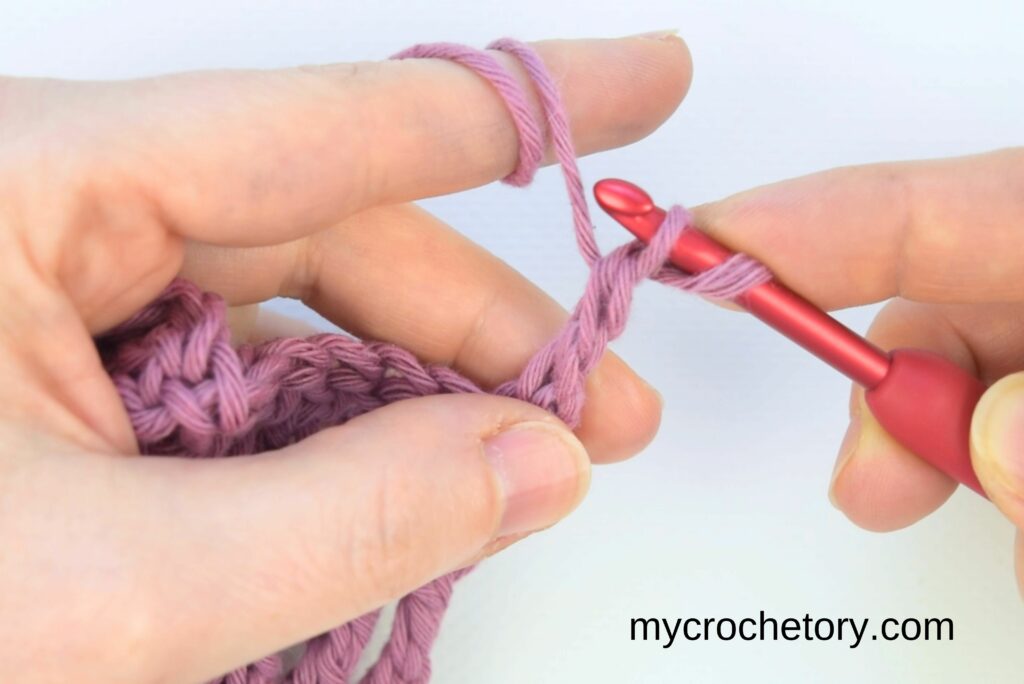
When you reach the end of the row, skip the chain 1. Pull the loop on your hook up to the height of a regular single crochet, then turn your work.
Step 3:
Insert your hook straight into the first stitch of the new row. Work a single crochet as you normally would.
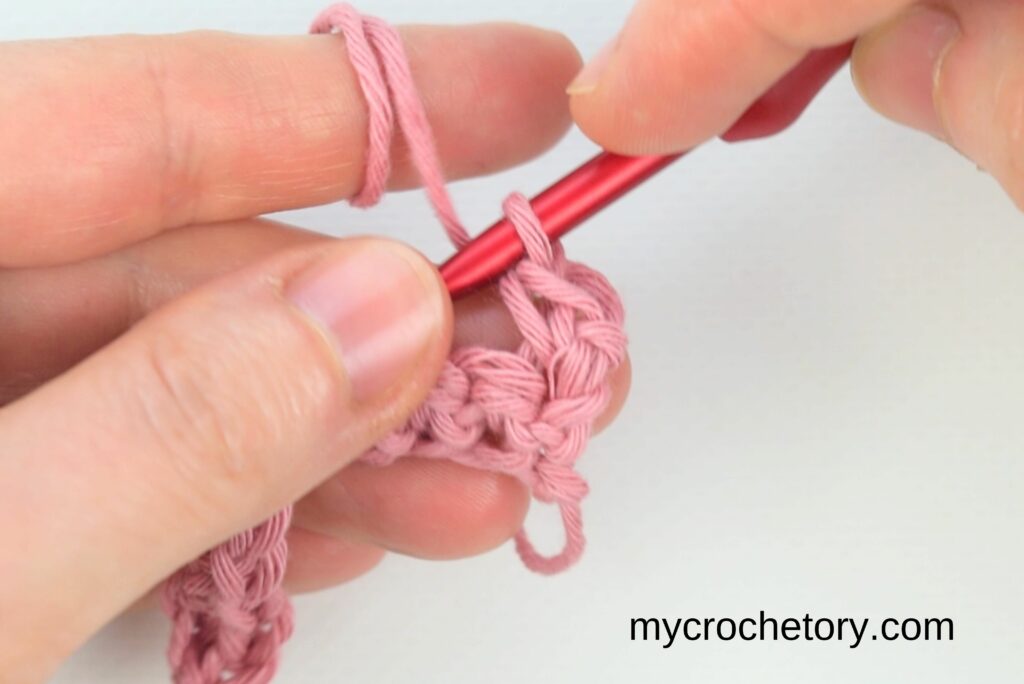
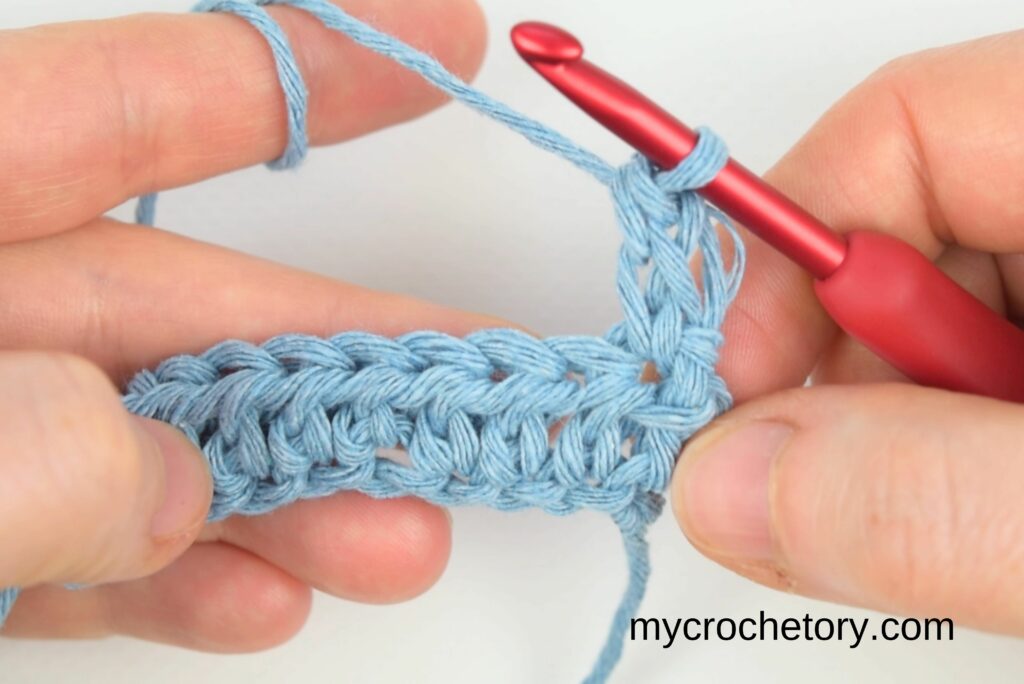
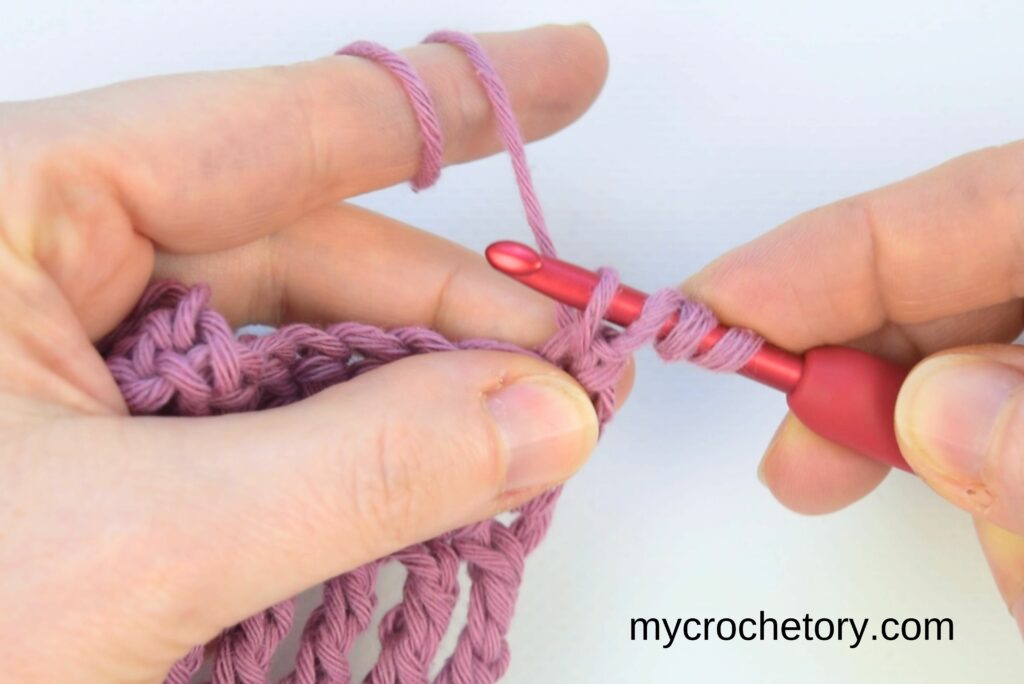
Step 4:
Continue working one single crochet in each stitch across the row. Keep your tension steady, especially near the edges.
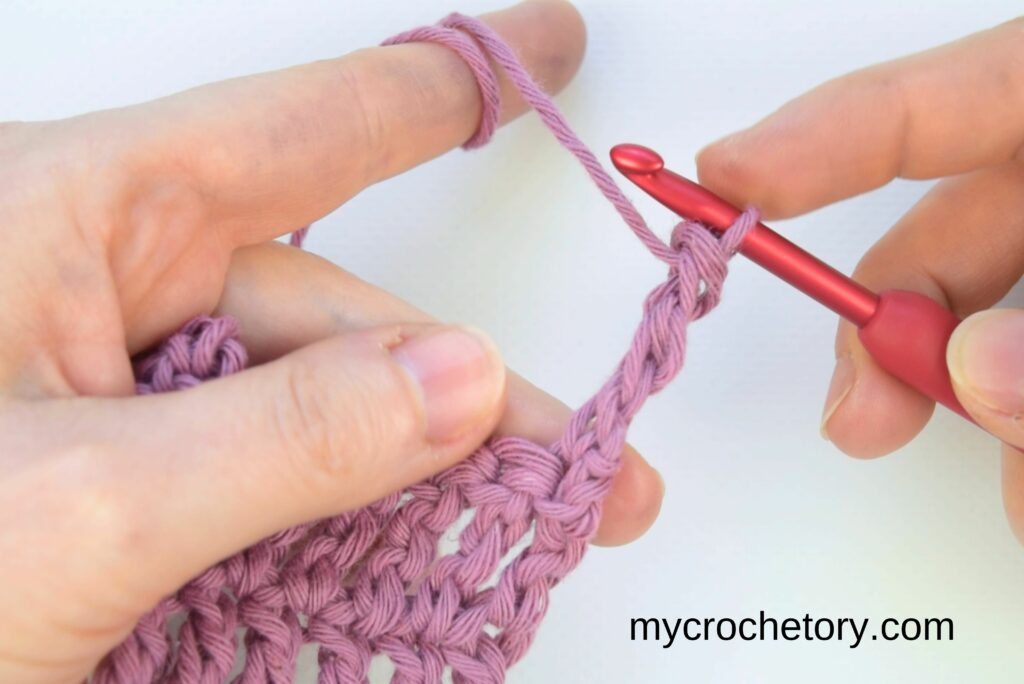
Step 5:
Place the final single crochet into the very last stitch of the row. Do not stop early.
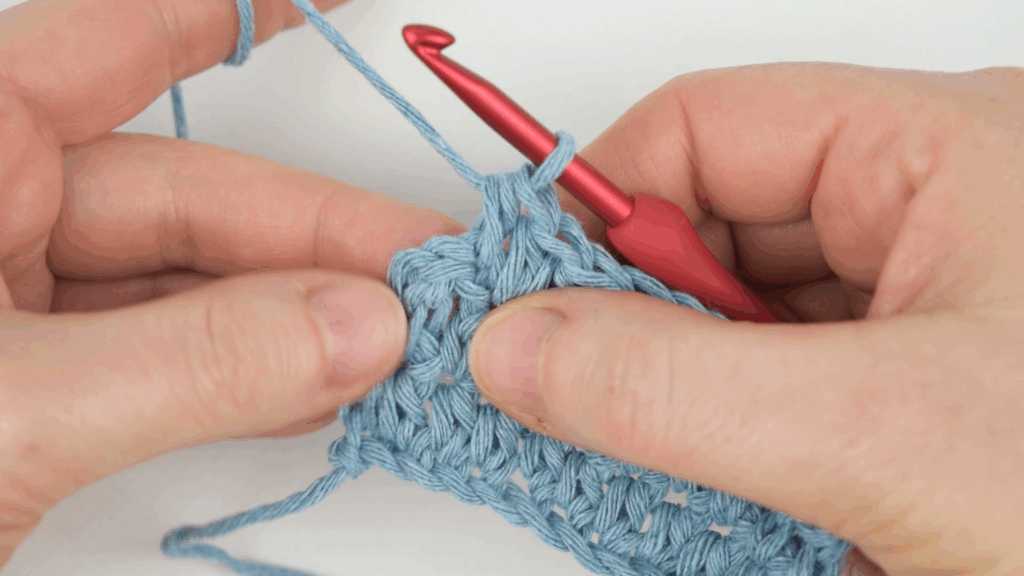
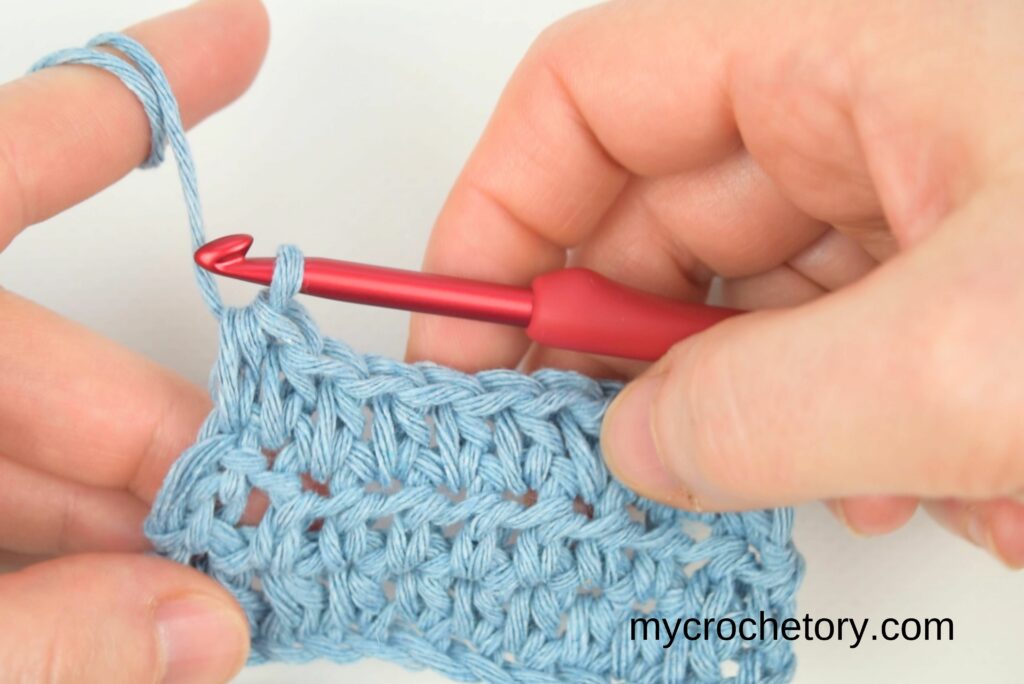
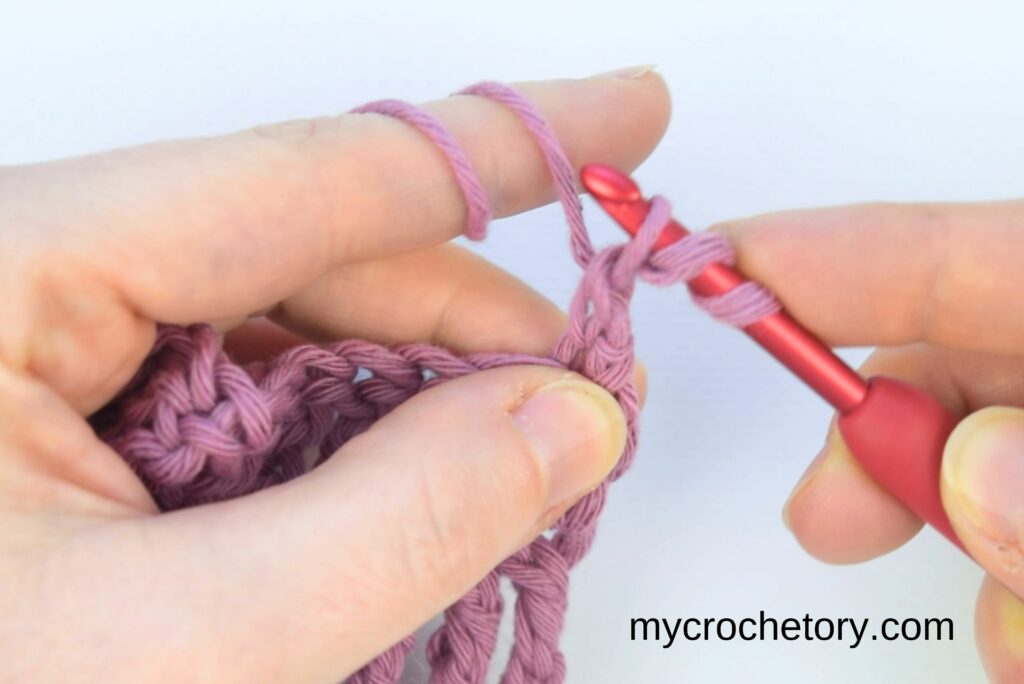
Step 6:
At the end of every row, repeat the same setup. Pull up a high loop instead of chaining 1, turn your work, and start the next row in the first stitch.
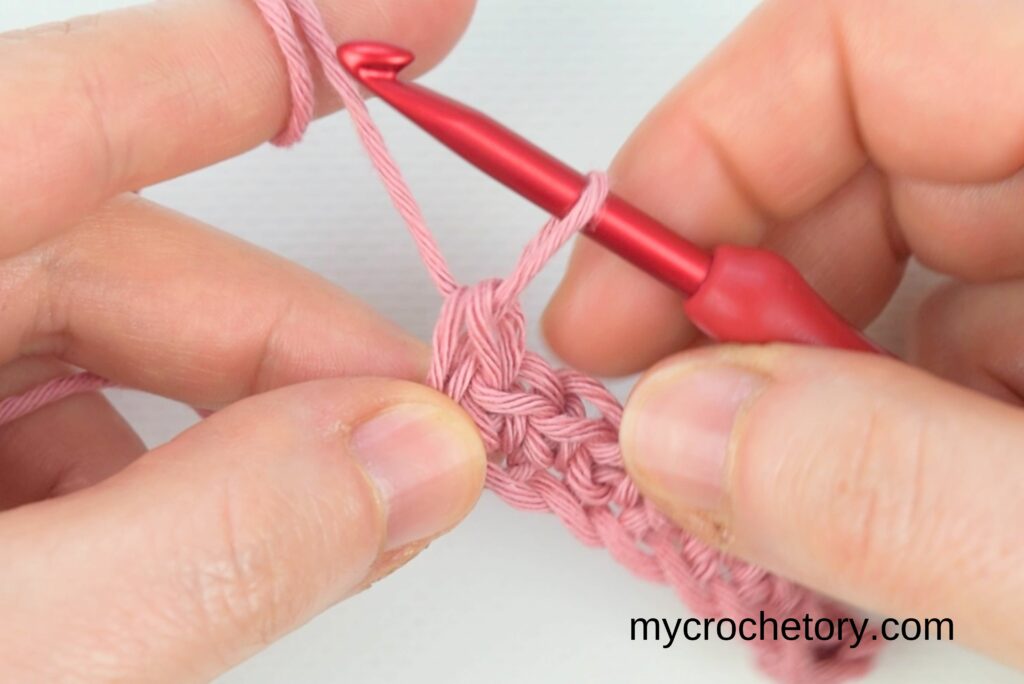
Quick pause. If you enjoy tutorials that explain the why, not just the steps, my newsletter is probably your thing. I send crochet tips, stitch ideas, and new tutorials straight to your inbox.
You can join here and unsubscribe anytime.
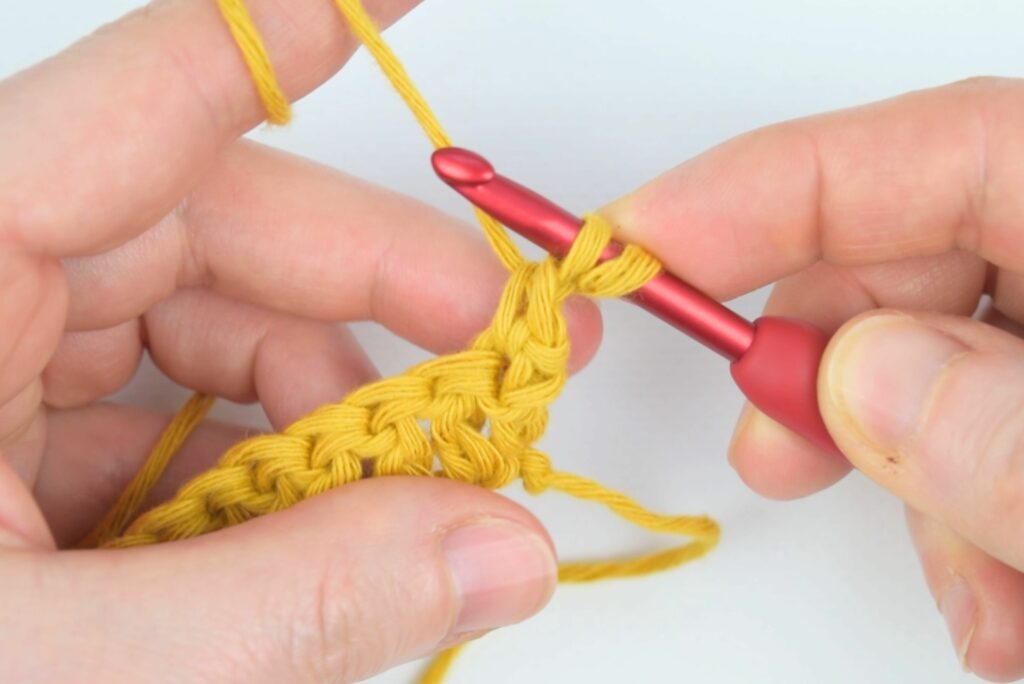
How to Keep Half Double Crochet Edges Straight
Half double crochet is sneaky at the edges.
It is taller than single crochet, but not tall enough to forgive sloppy starts. That in between height is exactly why the sides can start looking wavy or slightly loose, even when the middle looks solid.
This is also where turning chains start causing mixed signals. Chain two feels important, but it does not always behave like a real stitch. If the start of the row feels unclear, the edge usually pays for it a few rows later.
That is why this section gives you options.
Below, you will find three different ways to handle half double crochet edges. They all work. They just solve the problem in slightly different ways. One focuses on clean stitch placement. Another replaces the turning chain altogether. The third gives you a firm, no nonsense row start.
You do not need to use all of them. Pick the one that feels the most natural in your hands and stick with it. Consistency matters more than the specific method.
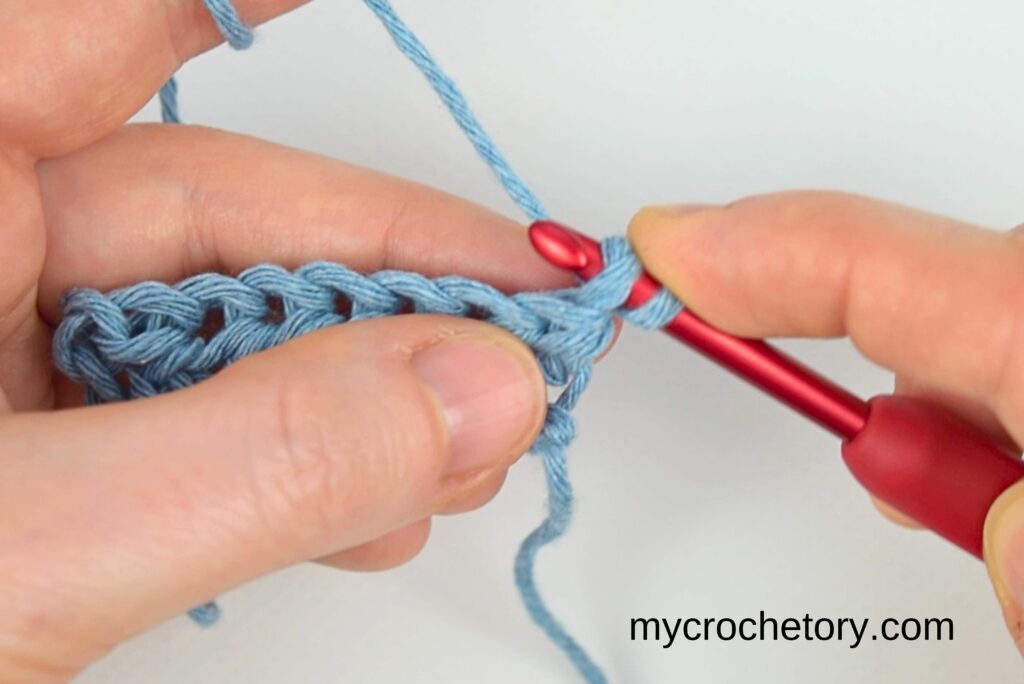
Method 1: No-Skip Edge Technique
The No-Skip Edge Technique keeps your half double crochet edges neat and even – no gaps, no missing stitches, just clean rows every time.
Follow these simple steps, and your edges will stay perfectly straight!
Step-by-Step Instructions
Step 1:
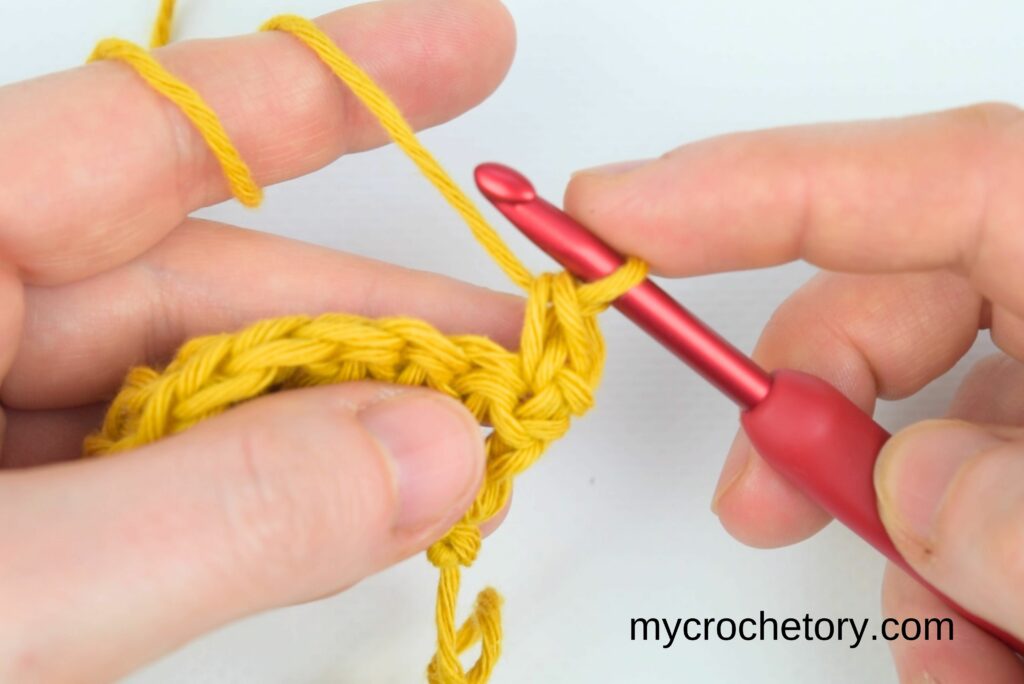
Chain the required number of stitches plus two. Place your first half double crochet into the third chain from the hook, then work half double crochet stitches across the row.
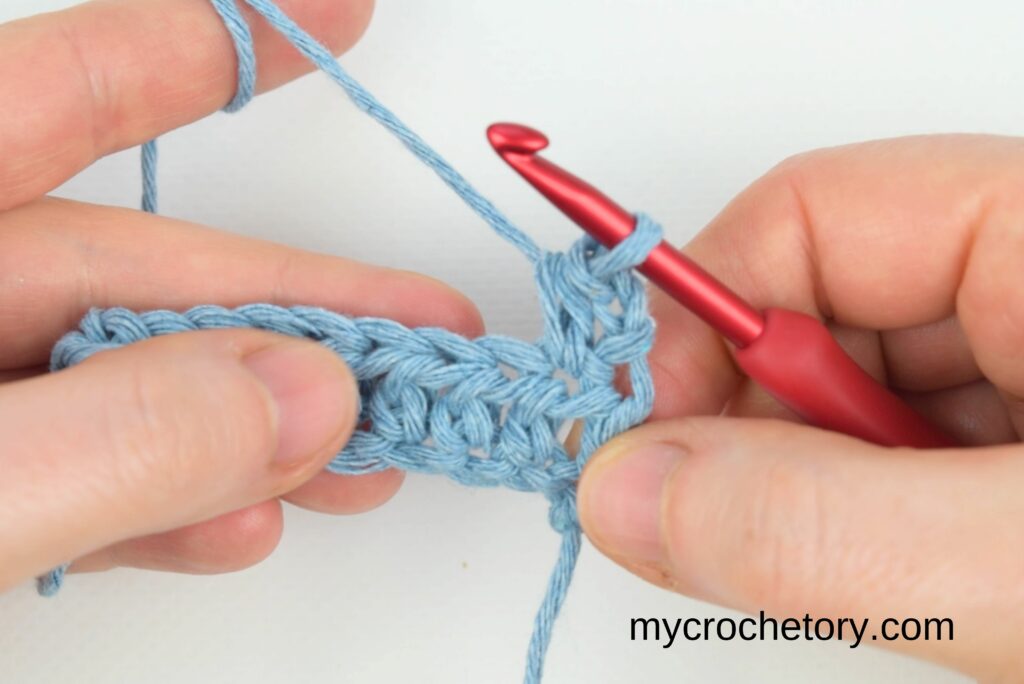
Step 2:
When you reach the end of the row, chain two and turn your work. This chain helps you turn but does not count as a stitch.
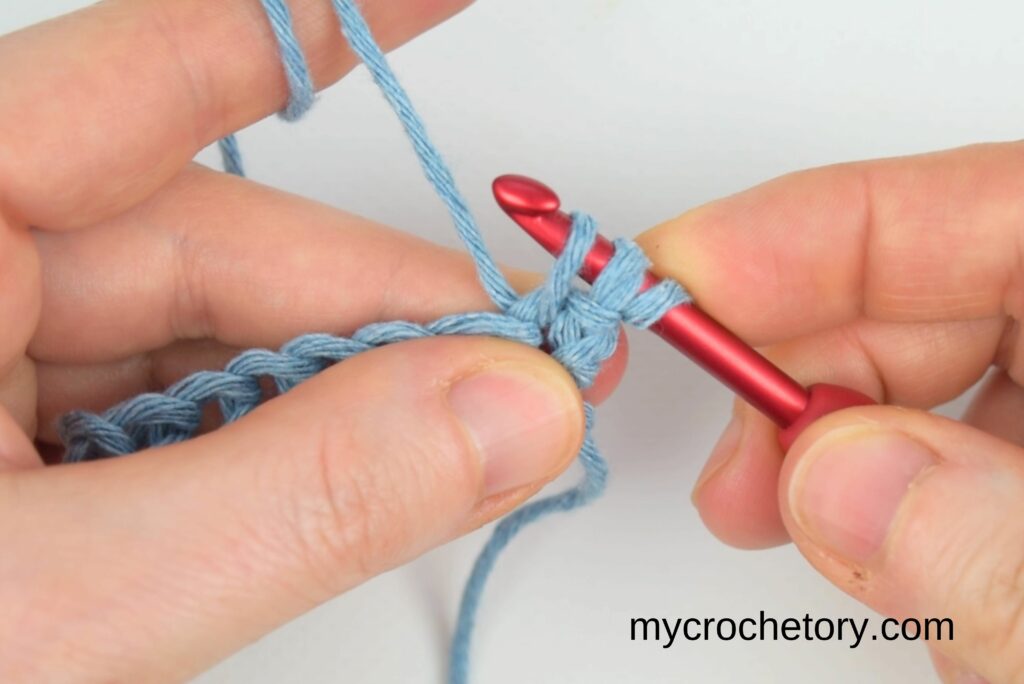
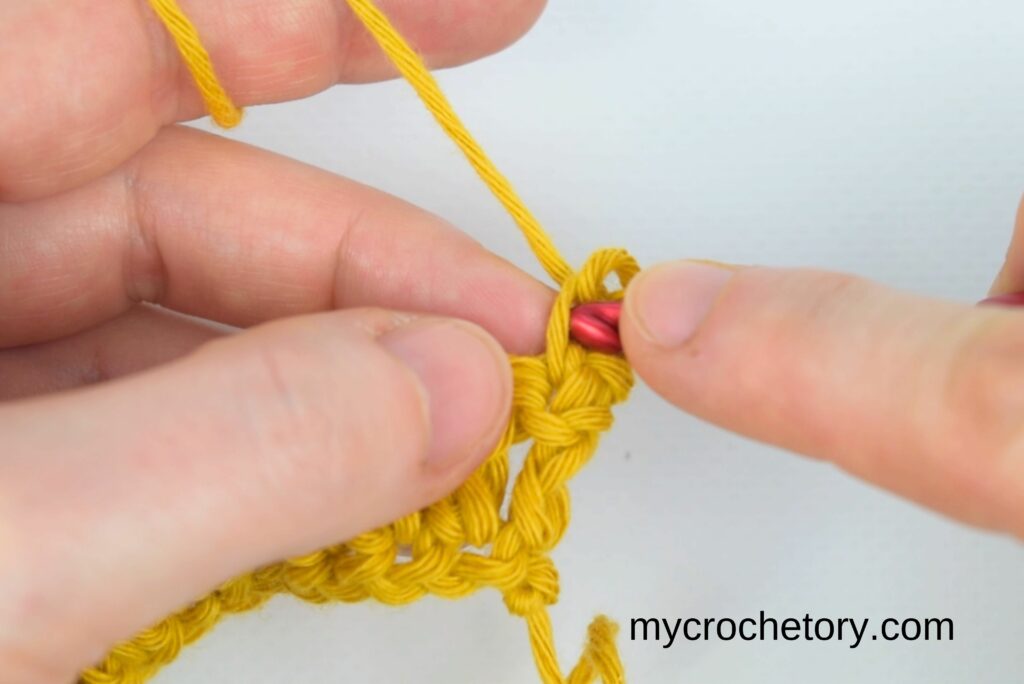
Step 3:
Yarn over and insert your hook into the very first stitch of the row, right below the turning chain. Pull up a loop and complete the half double crochet.
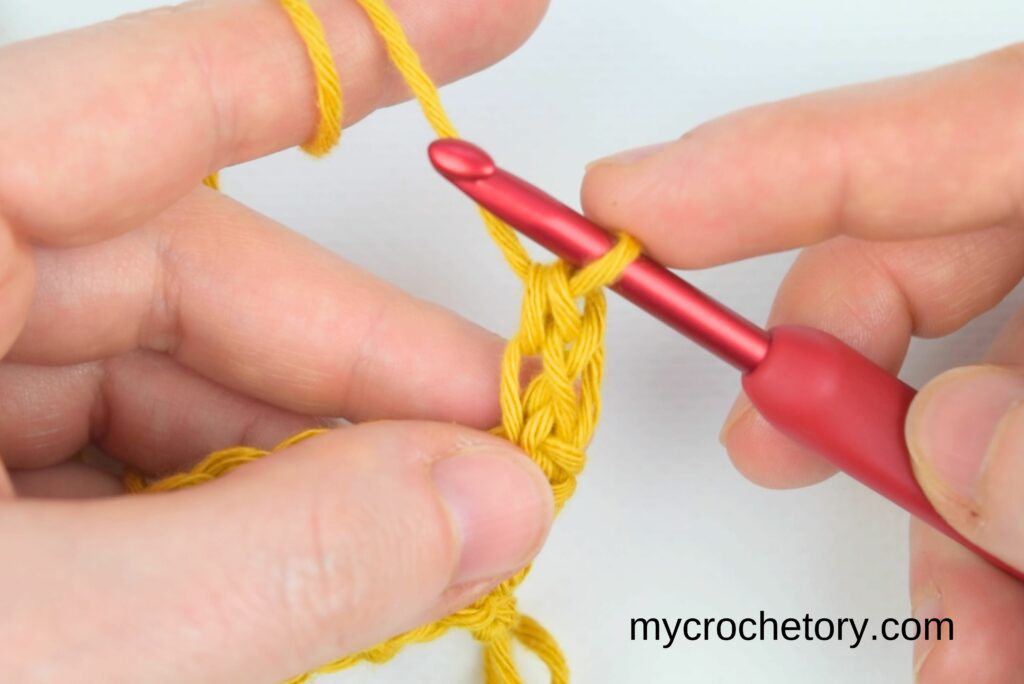
Step 4:
Continue working half double crochet stitches across the row, placing each stitch into the next stitch as usual.
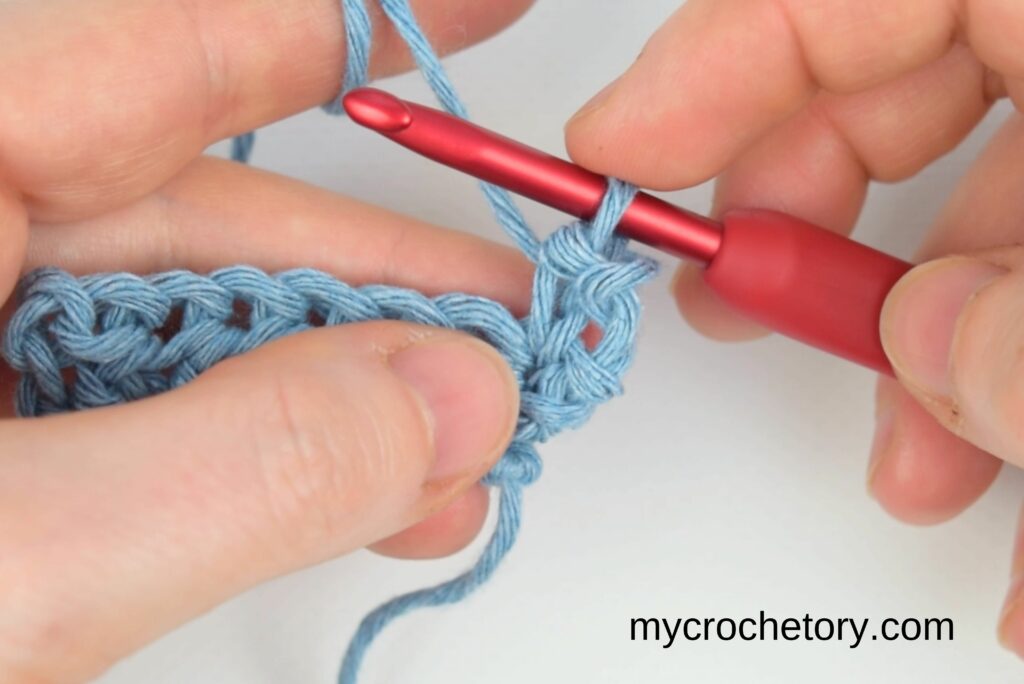
Step 5:
Work the final half double crochet into the very last stitch of the previous row. This stitch can feel tight, so take your time with it.
Step 6:
Repeat the same setup for each new row. Chain two, turn, and always start the row by working into the very first stitch.
This method helps you avoid gaps and keep your edges straight, giving your project a polished, professional look!
Method 2: Lifted Edge Technique
The Lifted Edge Technique keeps your edges smooth and gap-free by replacing the turning chain with a sturdier start.
Just follow these easy steps, and your rows will look neat and even every time!
Step-by-Step Instructions
Step 1:
Chain the required number of stitches and work the first row of half double crochet as usual.
Step 2:
When you reach the end of the row, skip the chain two. Pull the loop on your hook up slightly higher than usual, close to the height of a half double crochet, then turn your work.
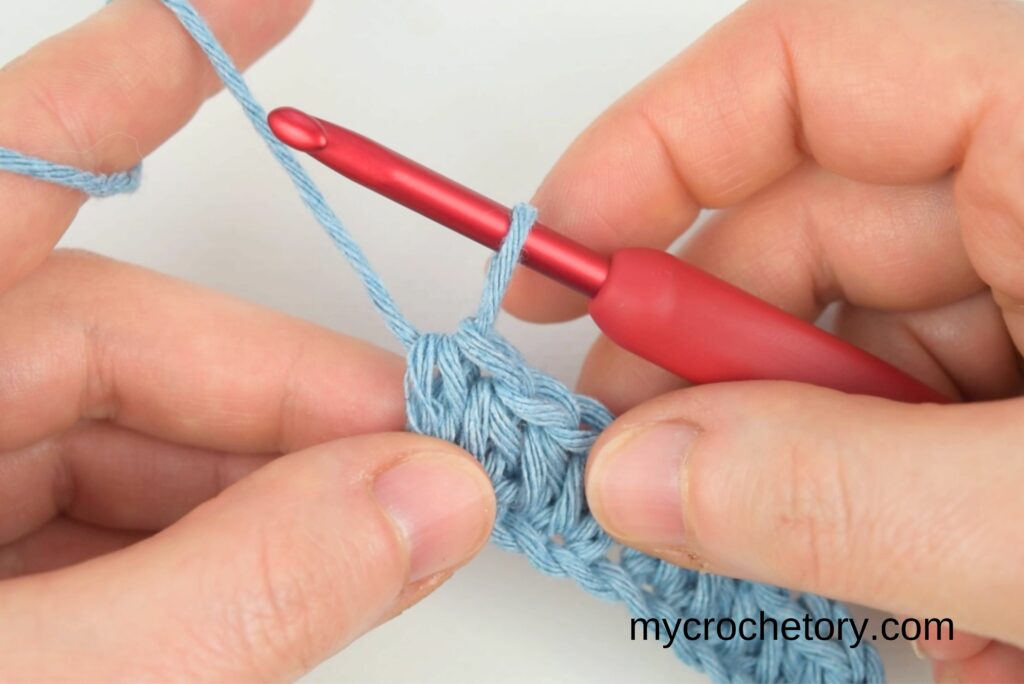
Step 3:
Insert your hook into the first stitch of the row and work a single crochet.
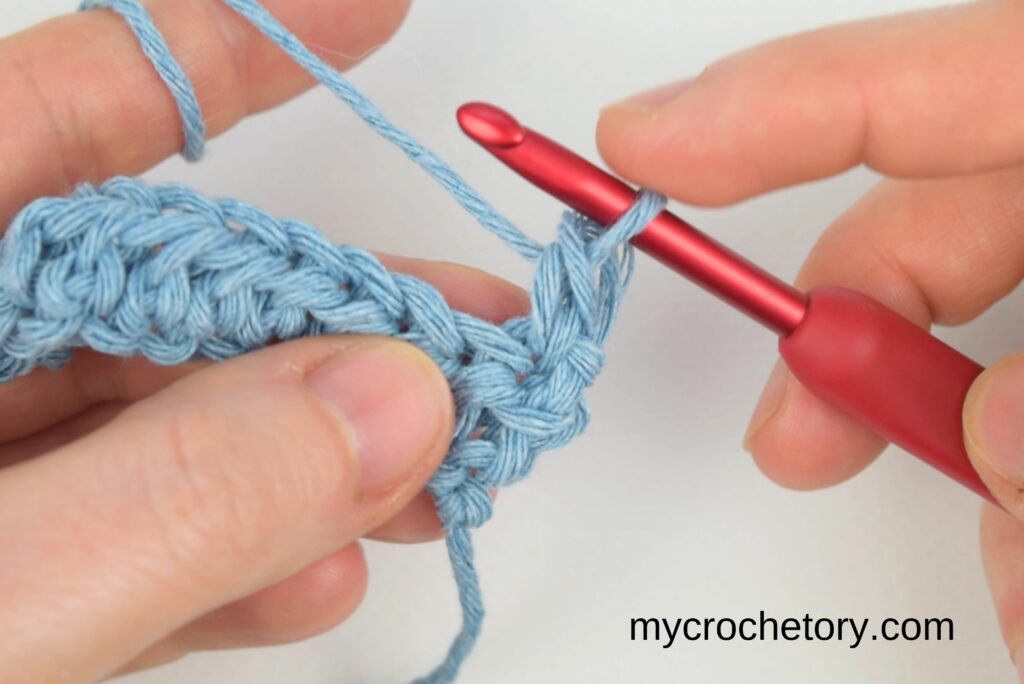
Step 4:
Do not move to the next stitch yet. Find the left leg of the single crochet you just made and work another single crochet into that strand.
Step 5:
Continue across the row by working half double crochet stitches in the remaining stitches as usual.
Step 6:
Place the final half double crochet into the very last stitch of the row, not into any turning chain space.
Step 7:
At the end of each row, repeat the same setup. Pull up a longer loop, turn your work, and begin with the two single crochets before continuing with half double crochet stitches.
Small clarity notes
• The two single crochets replace the turning chain
• Building height in steps helps close gaps at the edge
• Keep the lifted loop controlled, not loose
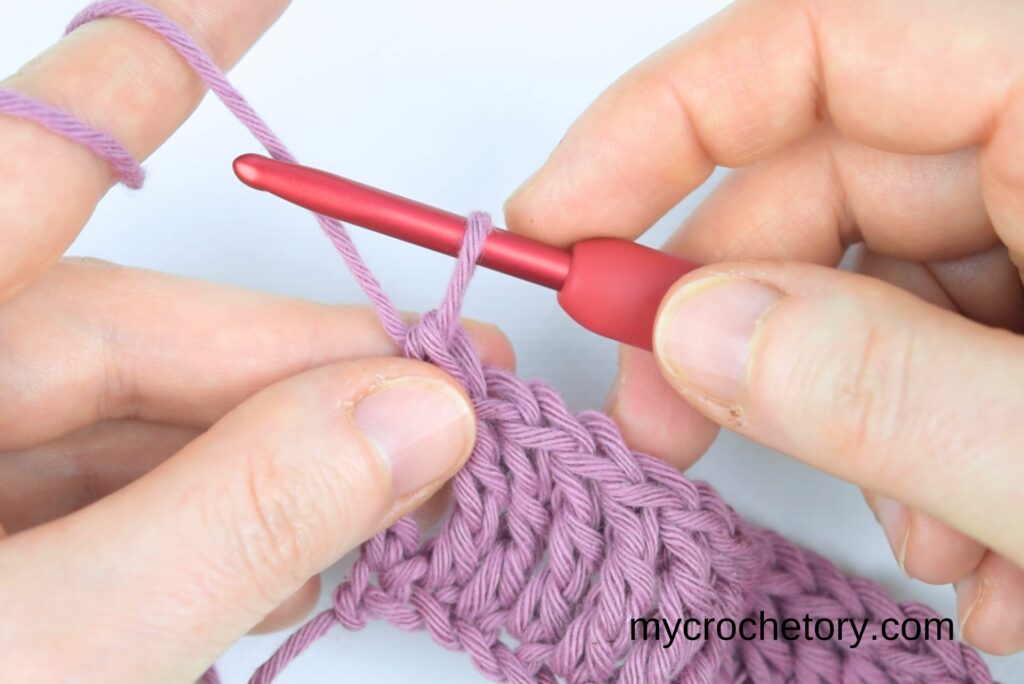
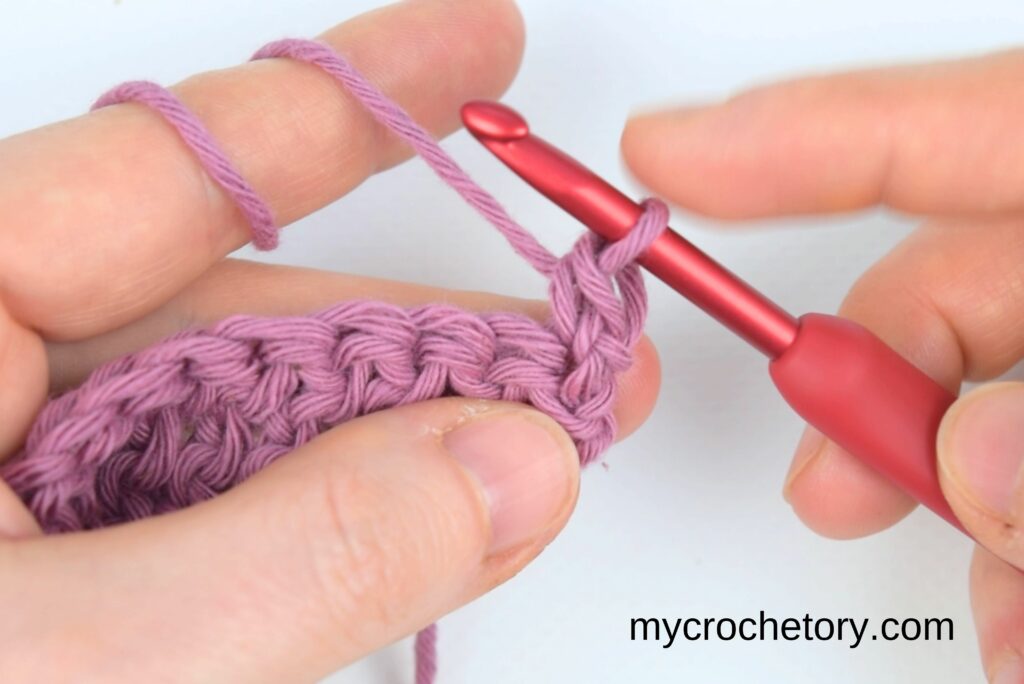
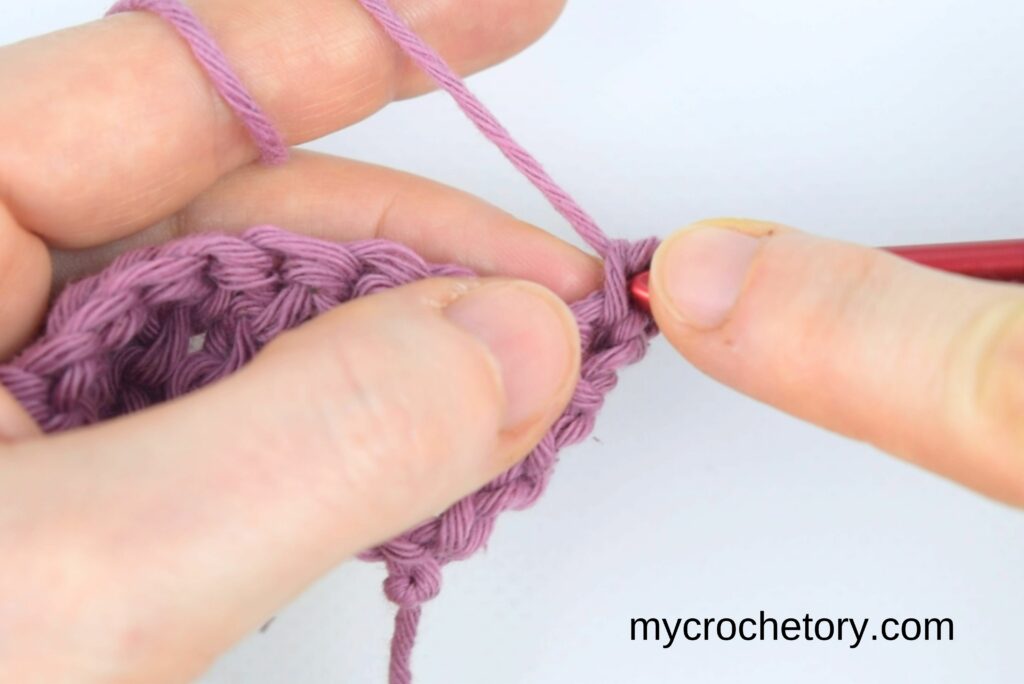
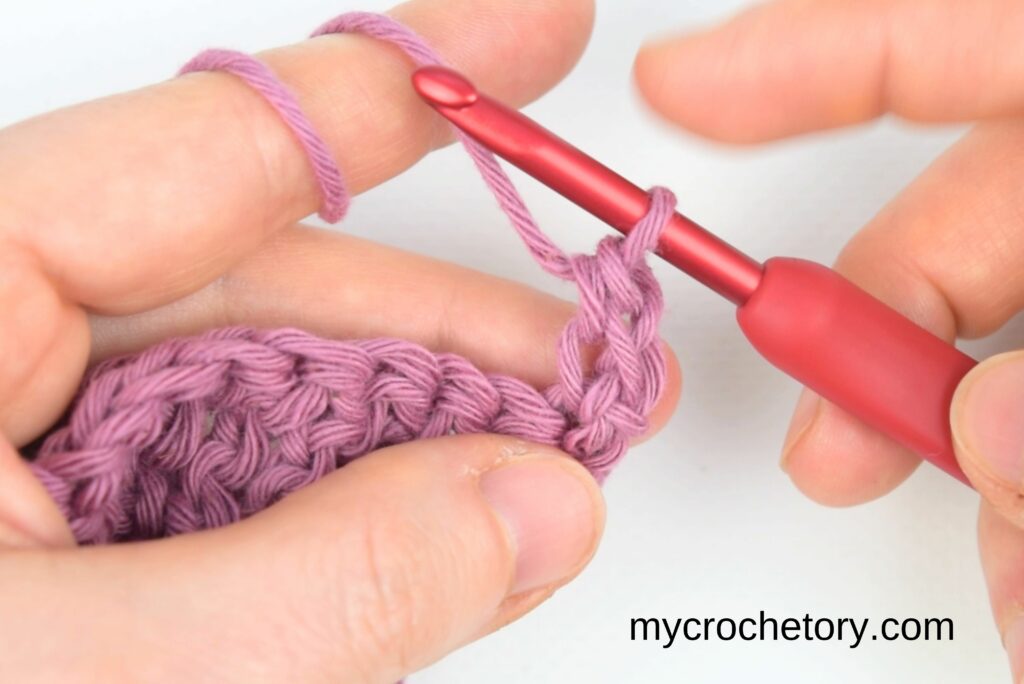
Method 3: Half Double Crochet Standing Stitch
This one is for anyone who is tired of turning chains altogether.
Instead of building height with chains, you start the row with a real stitch. That gives the edge a firm, clean look and keeps gaps from forming at the turn.
It can feel a little awkward the first time. That is normal. Once it clicks, this method becomes very satisfying to use.
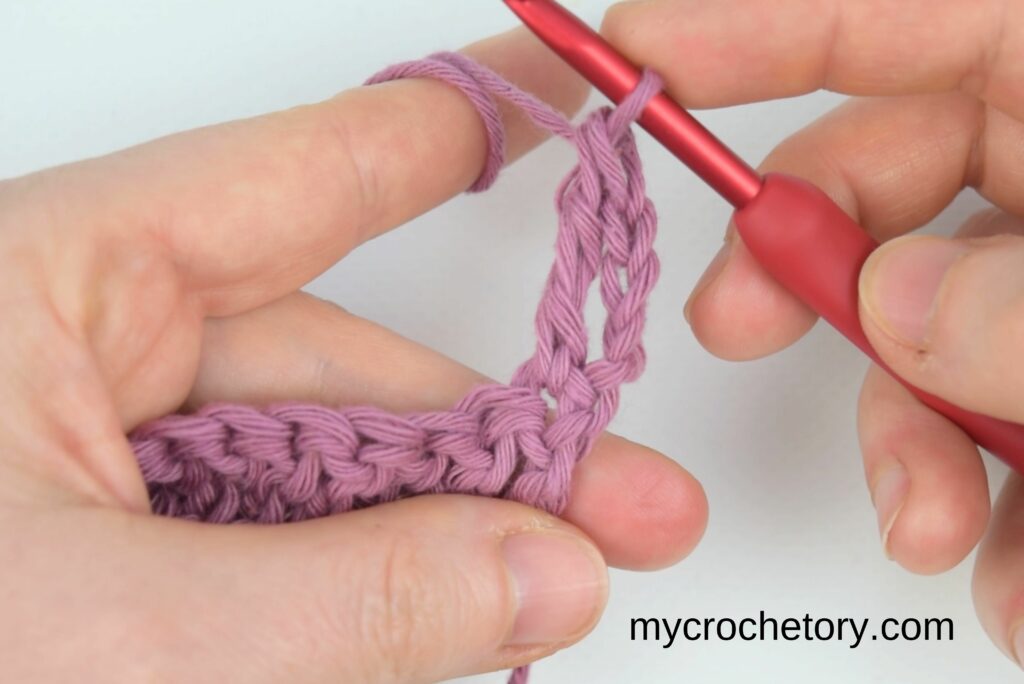
Step-by-Step Instructions
Step 1:
Chain the required number of stitches and work the first row of half double crochet as usual.
Step 2:
At the end of the row, skip the chain two. Stretch the loop on your hook slightly so it is just a bit shorter than a regular half double crochet, then turn your work.
This slight tension adjustment helps maintain the height of the stitch while preventing looseness.
Step 3:
Hold the yarn on the hook with your finger to keep the loop from slipping while you set up the stitch.
Step 4:
Bring the hook forward and then around behind the first stitch of the row. This helps position the loop and keeps the edge stable.
Step 5:
Insert the hook into the very first stitch of the row.
Step 6:
Yarn over, pull up a loop, then yarn over again and pull through all three loops to complete the first half double crochet.
Step 7:
Continue working regular half double crochet stitches across the row.
Step 8:
Place the final half double crochet into the very last stitch of the row, not into any turning chain space.
Step 9:
For each new row, repeat this standing stitch instead of chaining two.
Small clarity notes
• Keeping the loop slightly shorter helps control height
• Holding the yarn steady makes this much easier
• This method gives the firmest edge of the three
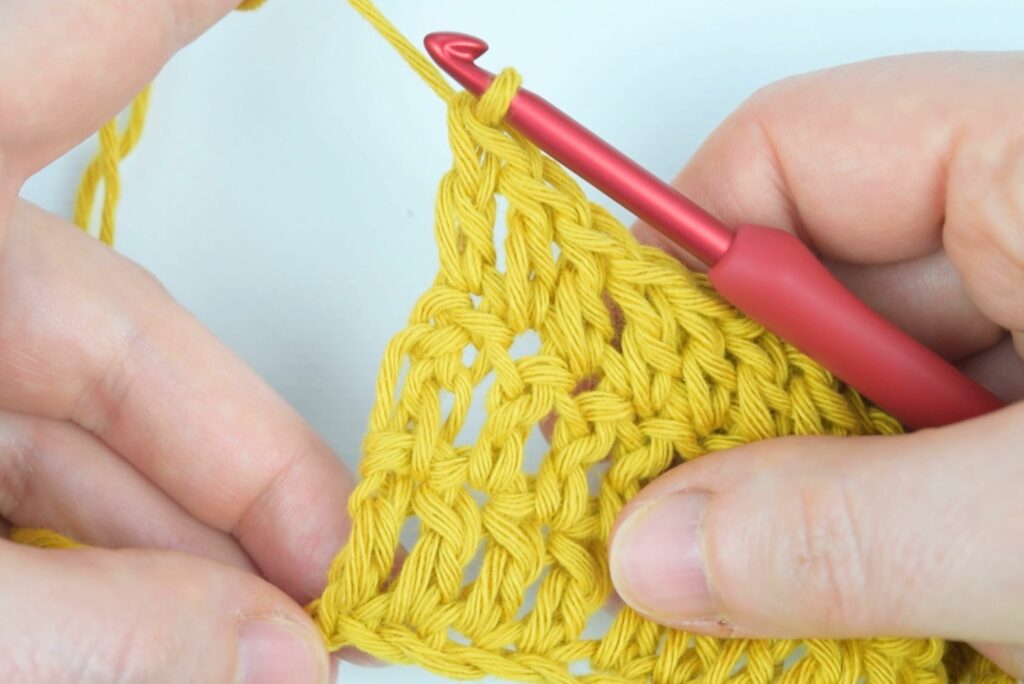
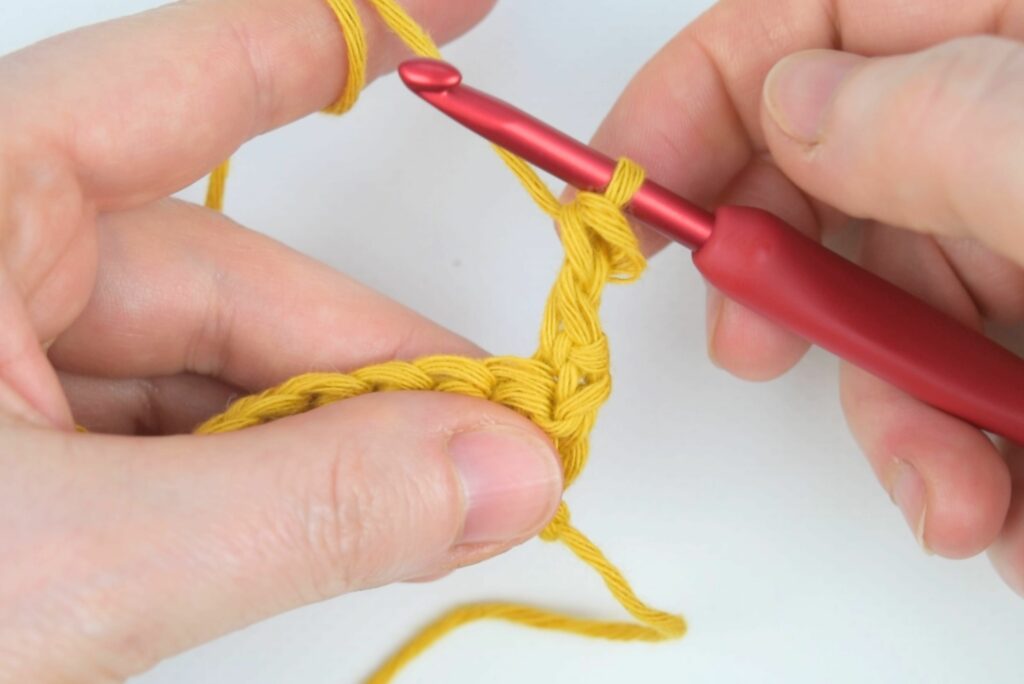
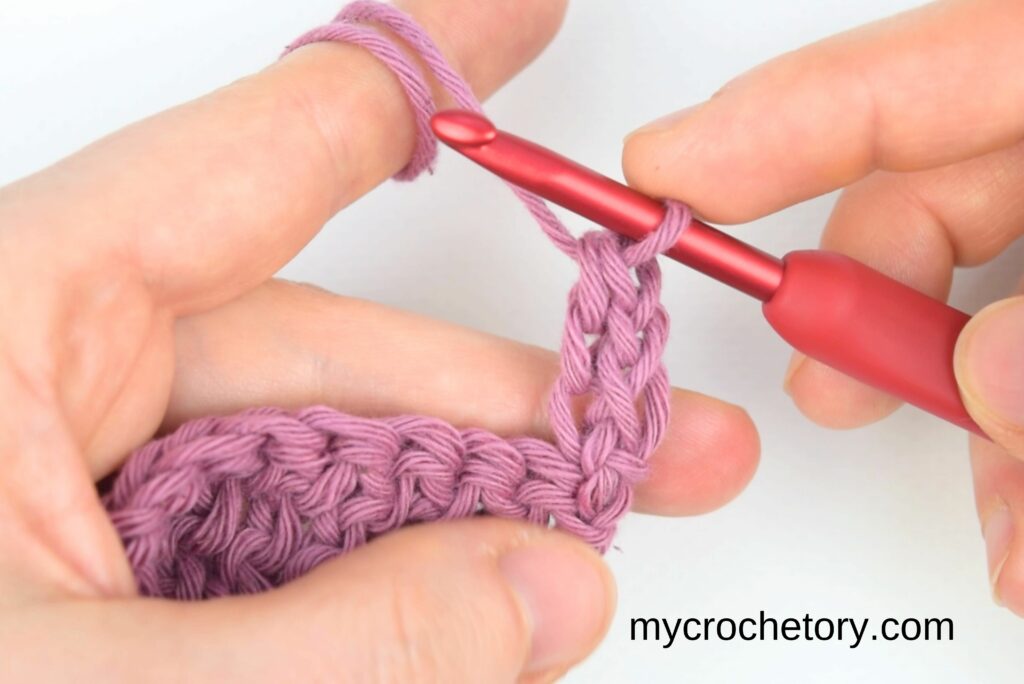
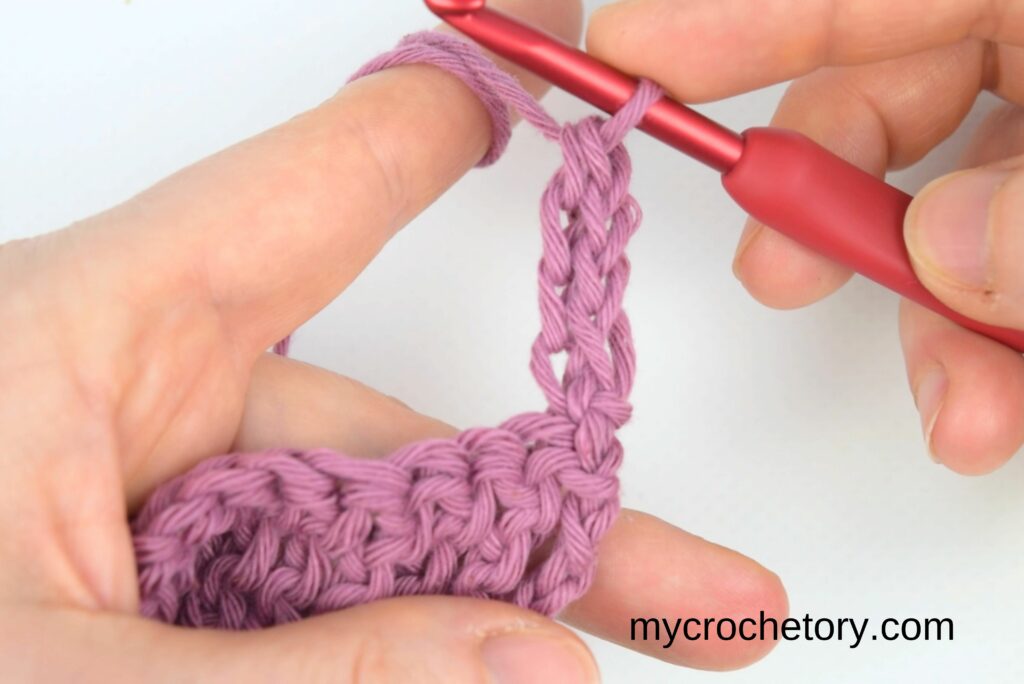
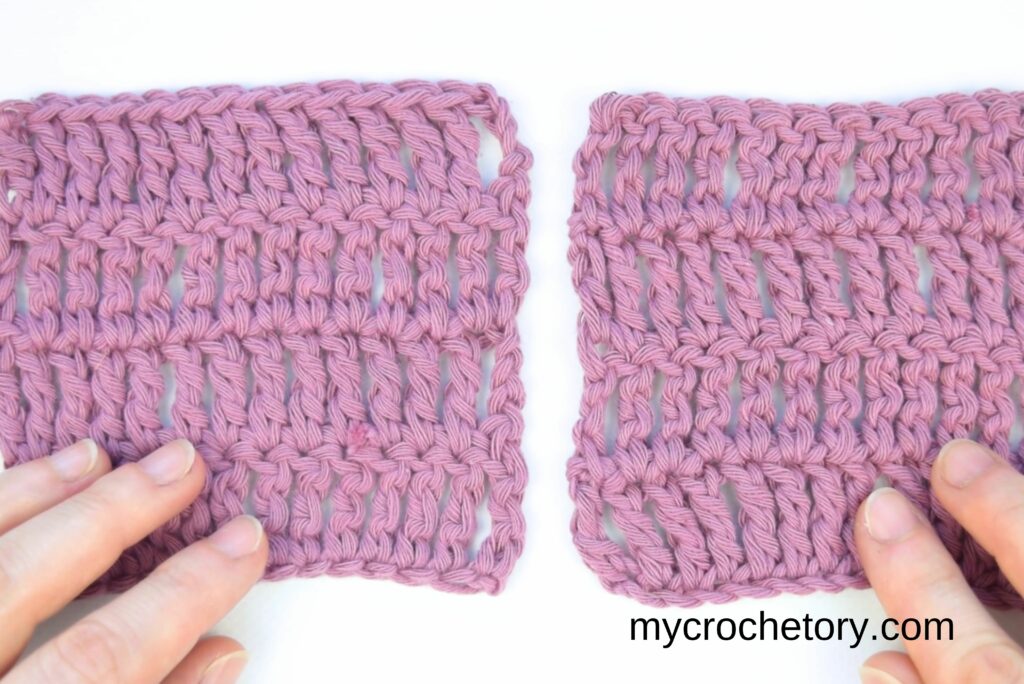
How to Keep Double Crochet Edges Neat and Even
Double crochet gives you height, but that height comes with baggage at the edges.
Those tall turning chains create space fast. If the start of the row is even a little off, gaps show up right away. And once a gap appears, it tends to repeat itself row after row.
This is also where many crocheters start feeling unsure about turning chains. Chain three looks like a stitch. Sometimes it behaves like one. Other times it really does not. If that decision shifts from row to row, the edge loses its straight line.
That is why this section gives you a few different ways to handle double crochet edges. One keeps the turning chain under control. One builds height more gradually. One skips the turning chain completely and starts with a solid stitch instead.
All three work. The best one is the one that feels the most reliable in your hands. Pick it, stick with it, and let the edge settle into a consistent rhythm.
Method 1: No-Skip Edge Technique
This method is all about removing guesswork at the start of the row.
Instead of skipping over anything that looks optional, you always work straight into the first stitch. That simple habit keeps the edge lined up and stops those little gaps from forming next to the turning chain.
Try it out, and you’ll love how easy it is!
Step-by-Step Instructions
Step 1:
Chain the required number of stitches plus three and work your first row of double crochet as usual.
Step 2:
When you reach the end of the row, chain three and turn your work. This chain helps you reach the height of the stitch but does not count as a stitch.
Step 3:
Yarn over and insert your hook into the very first stitch of the row, directly below the turning chain. Pull up a loop, then complete the double crochet.
Step 4:
Continue working one double crochet in each stitch across the row.
Step 5:
Work the final double crochet into the very last stitch of the row, not into the turning chain.
Step 6:
Repeat the same setup for each row. Chain three, turn, and always begin the row in the first stitch.
Small clarity notes
• The turning chain is only there for height
• The first stitch anchors the edge
• Skipping that stitch is what causes most edge gaps
Method 2: Lifted Edge Technique
If turning chains in double crochet keep leaving holes you cannot ignore, this method is for you.
Instead of jumping straight into a tall stitch, this start builds height in stages. That gradual lift helps the edge stay snug and keeps those wide gaps from showing up at the turn.
Step-by-Step Instructions
Step 1:
Chain the required number of stitches and work the first row of double crochet as usual.
Step 2:
When you reach the end of the row, skip the chain three. Pull the loop on your hook up slightly shorter than a regular double crochet, then turn your work.
Step 3:
Insert your hook into the first stitch of the row and work a single crochet.
Step 4:
Do not move to the next stitch yet. Find the left leg of that single crochet and work another single crochet into that strand.
Step 5:
Find the left leg of the second single crochet and work one more single crochet into it. This builds the height you need without creating space.
Step 6:
From here, continue across the row with regular double crochet stitches.
Step 7:
Work the final double crochet into the very last stitch of the row.
Step 8:
At the end of each row, repeat the same setup. Pull up a longer loop, turn your work, and begin with the three single crochets before continuing with double crochet stitches.
Small clarity notes
• The single crochets replace the turning chain
• Building height step by step helps close gaps
• Keep the lifted loop controlled, not loose
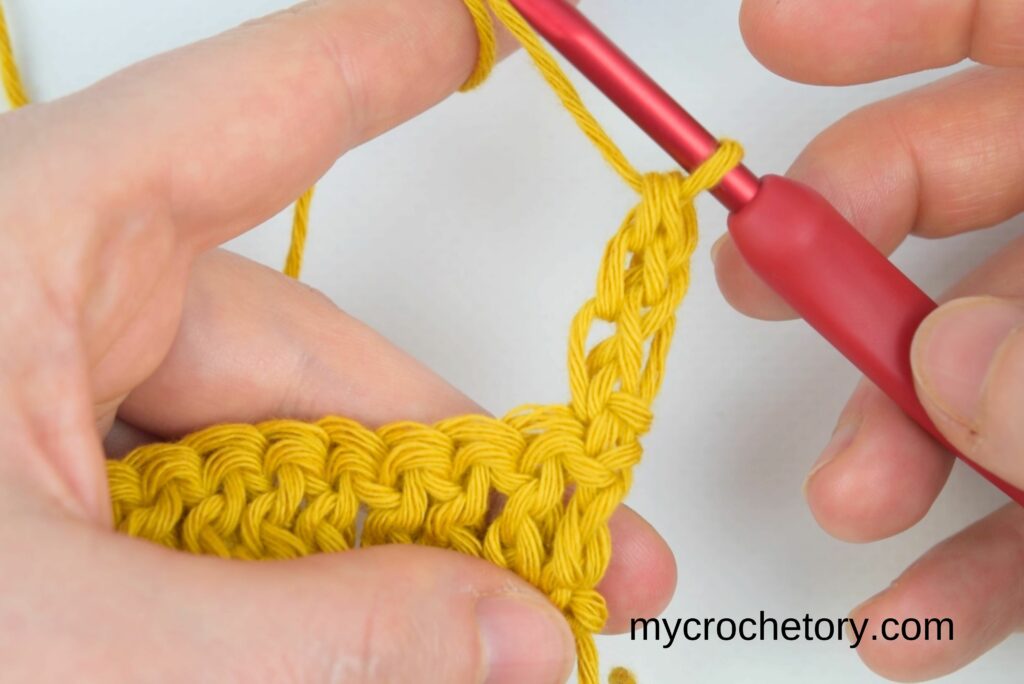
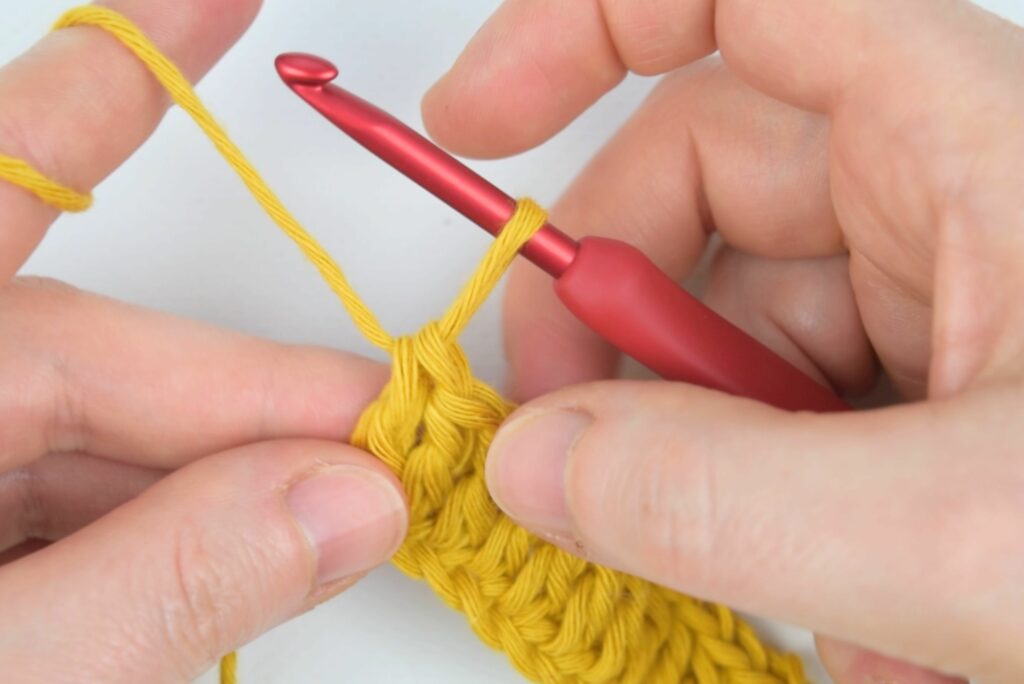
Method 3: Double Crochet Standing Stitch
If turning chains feel bulky or messy at the edge, this method skips them completely.
Instead of building height with chains, you start the row with an actual double crochet stitch. That gives the edge a solid, clean look and keeps gaps from sneaking in next to the turn.
It might feel a little strange at first. That is normal. Once your hands get used to it, this becomes a very satisfying way to start a row.
Step-by-Step Instructions
Step 1:
Chain the required number of stitches and work the first row of double crochet as usual.
Step 2:
At the end of the row, turn your work without chaining three. Stretch the loop on your hook slightly so it is just a bit shorter than a regular double crochet.
Step 3:
Hold the yarn on the hook with your finger to keep the loop from slipping while you set up the stitch.
Step 4:
Bring the hook forward and then around behind the first stitch of the row.
Step 5:
Insert the hook into the very first stitch of the row.
Step 6:
Yarn over and pull up a loop through the stitch. You should now have three loops on the hook.

Step 7:
Yarn over and pull through the first two loops on the hook.
Step 8:
Yarn over again and pull through the remaining two loops to complete the double crochet.
Step 9:
Continue working regular double crochet stitches across the row.
Step 10:
Place the final double crochet into the very last stitch of the row, not into any turning chain space.
Step 11:
For each new row, repeat this standing stitch instead of chaining three.
Small clarity notes
• Keeping the loop slightly shorter helps control height
• Holding the yarn steady makes the setup much easier
• This method gives the firmest edge of the three
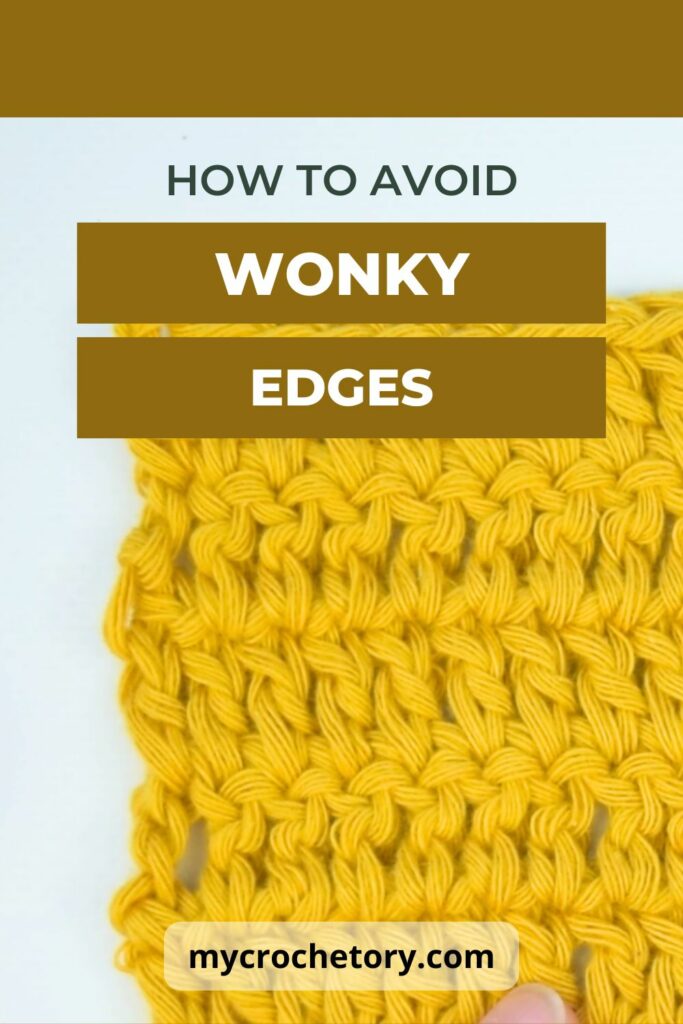
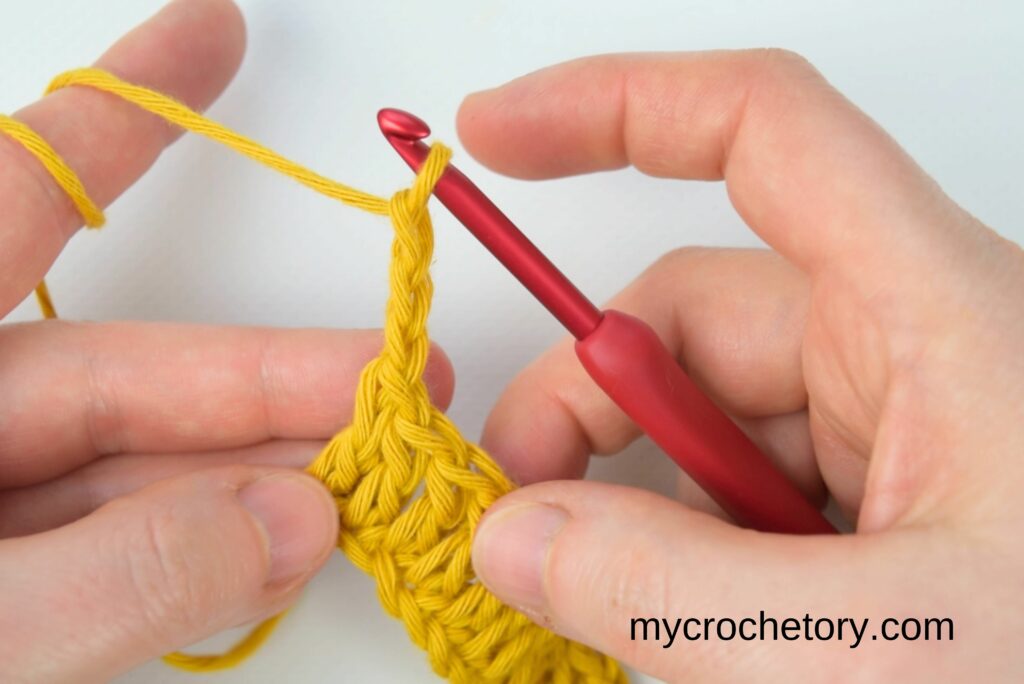
Treble Crochet: 3 Ways to Avoid Gaps & Unevenness
Treble crochet (TR) is a tall stitch, which means it’s prone to loose turning chains, gaps, and wavy edges if not handled correctly.
Below, I’ll guide you through three effective techniques to keep your treble crochet edges straight and tidy.
Method 1: No-Skip Edge Technique
Treble crochet is tall. Very tall.
And that height makes edges extra unforgiving.
With stitches this long, even a small change at the turn turns into a visible gap fast. Turning chains get looser. Edges start flaring. And the side of the project can look messy long before you realize what caused it.
This is also where a lot of crocheters start overthinking. Chain four feels huge. The first stitch feels far away. And the edge can look wobbly even when the rest of the row looks fine.
The good news is that treble crochet does not need fancy fixes. It just needs a more controlled row start.
Below, you will find three ways to handle treble crochet edges. One keeps everything anchored in the first stitch. One builds height gradually to close gaps. And one skips the turning chain entirely for a clean, solid edge.
As always, you do not need to use all of them. Pick the one that feels the most stable in your hands and repeat it the same way every row.
Step-by-Step Instructions
Step 1: Chain the required number of stitches and work the first row of double crochet.
Step 2: When you reach the end of the row, chain 4 and turn your work. This turning chain acts as a height adjustment but does not count as a stitch.
Step 3: Yarn over twice, then insert your hook into the very first stitch (directly below the turning chain). Yarn over, pull up a loop (4 loops on the hook). Yarn over and pull through two loops (3 loops remain). Yarn over and pull through two loops (2 loops remain). Yarn over and pull through the final two loops to complete the first treble crochet stitch.
Step 4: Work 1 TR in each stitch across the row.
Step 5: Work your last TR in the last stitch of the row, not in the turning chain.

Step 6: Repeat the Process: At the beginning of every row, chain 4, turn, and place the first TR into the first stitch.
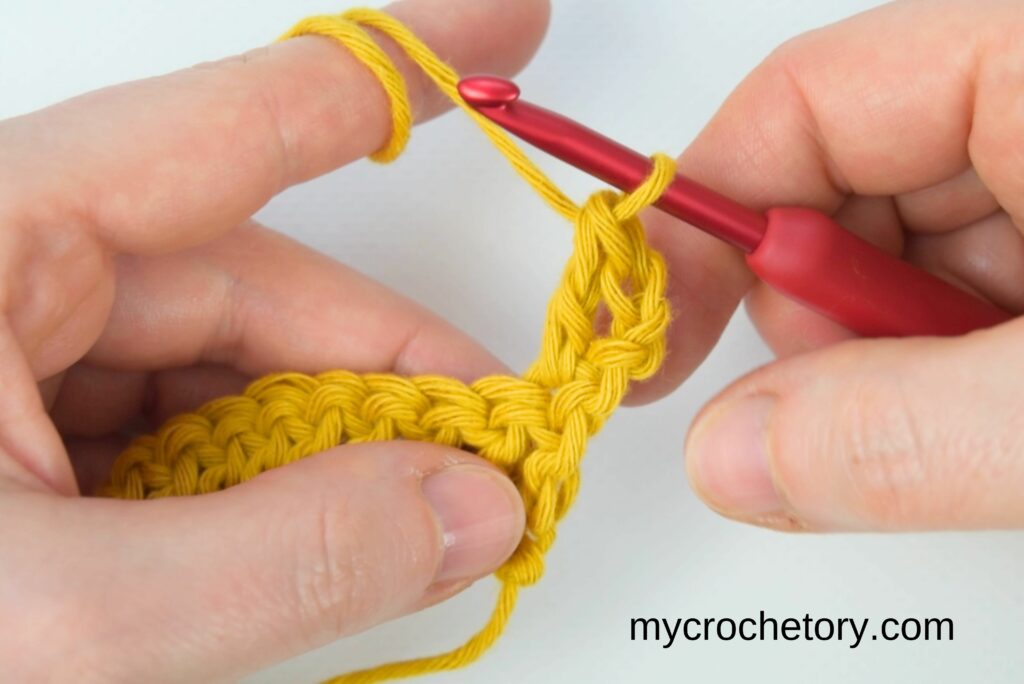
Method 2: Lifted Edge Technique
Say goodbye to those annoying gaps! Instead of jumping straight into a tall stitch, this technique builds height gradually for a smooth, seamless edge. A small tweak that makes a big impact!
Step-by-Step Instructions
Step 1: Work the first row of treble crochet normally:
Step 2: Instead of chaining 4, gently pull up the last loop on your hook so it’s slightly shorter than a single crochet stitch.
Step 3: Insert your hook into the first stitch of the row. Yarn over, pull up a loop, and complete a single crochet.
Step 4: Instead of moving to the next stitch, locate the left leg of the single crochet. Insert your hook into this strand, yarn over, pull up a loop, and complete another single crochet.
Step 5: Locate the left leg of the second single crochet and work another single crochet into it.
Step 6: Find the left leg of the third single crochet and work another single crochet into it.
Step 7: Now that you’ve built the height, work treble crochet stitches as usual across the row.
Step 8: Work the last treble crochet into the final stitch.
Step 9: Repeat the Process for Each New Row: nstead of chaining 4, use the long-loop + four SC method at the start of each row.
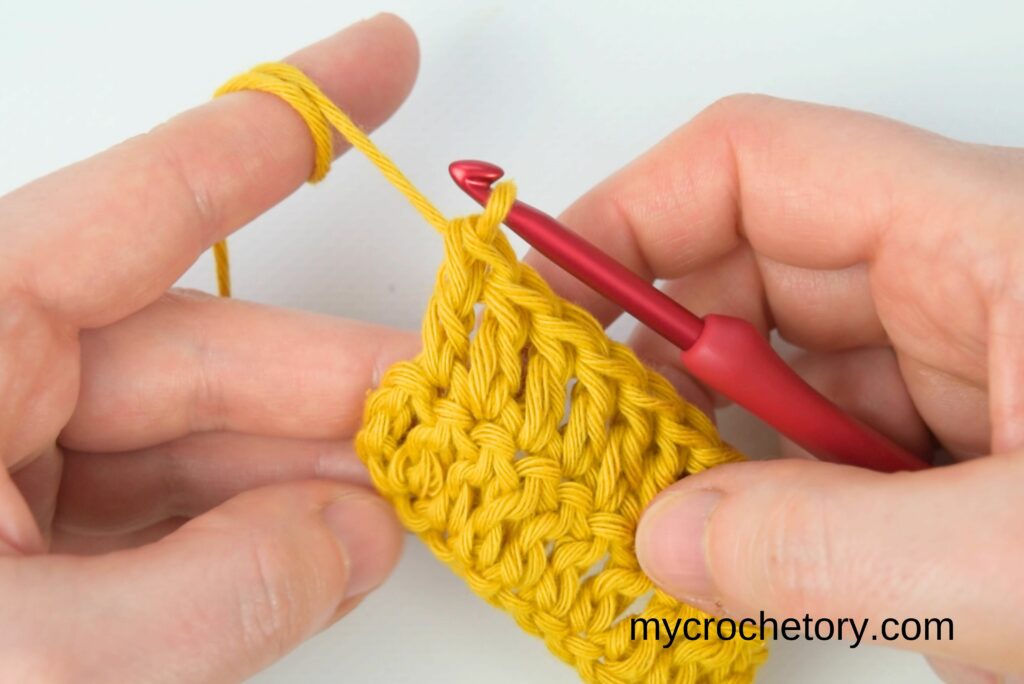
Method 3: Treble Crochet Standing Stitch
Forget the turning chain! This method gets your row started with a strong, gap-free stitch that blends right in. Your treble crochet edges will look cleaner, neater, and way more polished!
Step-by-Step Instructions
Step 1: Chain the required number of stitches and work the first row of double crochet.
Step 2: Instead of chaining 4, gently stretch the loop on your hook to make it slightly shorter than a regular treble crochet stitch and turn your work. This helps create a stable and even starting edge.
Step 3: Use your finger to hold the yarn securely on the hook. This prevents the loop from slipping and keeps the stitch uniform.
Step 4: Bring the hook forward and around behind the first stitch, then do it again.
Step 5: Keeping a tight hold on the yarn, insert your hook into the first stitch of the row.
Step 6: Yarn over and pull up a loop through the stitch (you now have 4 loops on the hook).
Step 7: Yarn over and pull through the first two loops on the hook (now you have 3 loops left on the hook).
Step 8: Yarn over again and pull through the next two loops on the hook.
Step 9: Yarn over one more time and pull through the remaining two loops on the hook. You have now completed your first treble crochet stitch without using a standard turning chain.
Step 10: Work regular treble crochet stitches in each stitch across the row.
Step 11: Ensure that your last TR is placed in the very last stitch of the row.
Step 12: Repeat for Each New Row: Instead of chaining 4 at the beginning of each row, start every row with this standing TR technique to maintain clean and even edges.
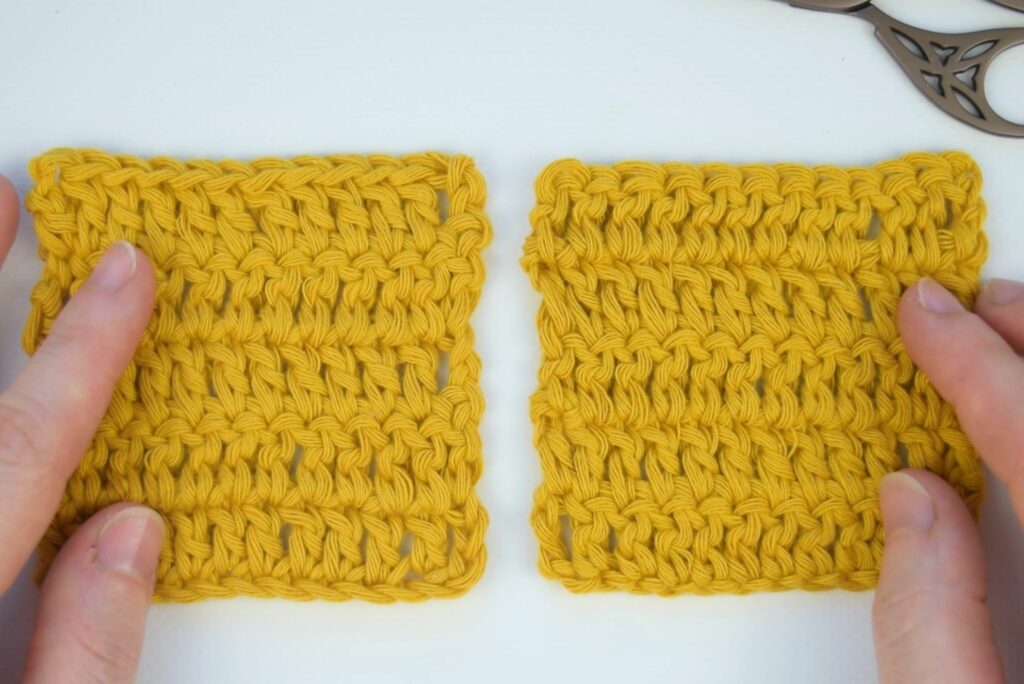
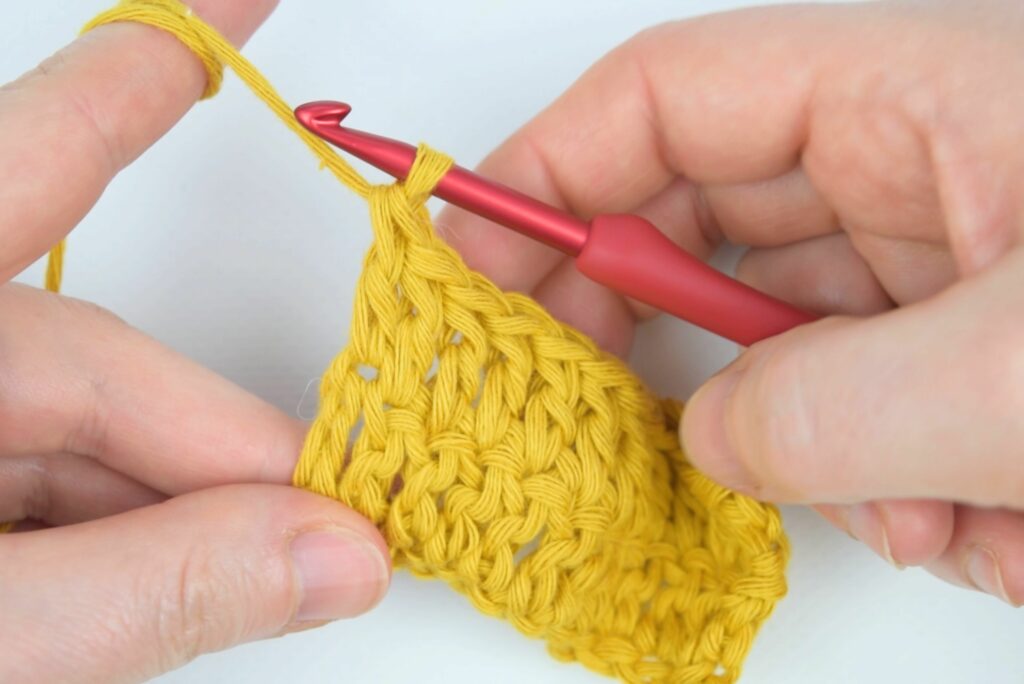
How to Choose the Right Edge Method for Your Project
If you are staring at all these options and thinking, okay, but which one should I actually use, this part is for you.
There is no single “best” edge method. The right choice depends on what you are making and how you plan to use it.
If you are working on a blanket or anything with long, straight rows, consistency matters most. Pick the method that feels easiest to repeat without thinking too much. No Skip and Lifted Edge techniques usually work well here because they keep the sides steady over many rows.
For scarves, wraps, and shawls, clean edges matter visually. Standing stitches often give the neatest outline, especially with taller stitches. They take a bit more focus at the start of the row, but the edge looks sharper.
With garments, comfort and flexibility come into play. If a standing stitch feels too firm, a lifted edge can be a better balance. It keeps gaps under control without making the fabric stiff.
The most important rule is this. Once you choose a method, stick with it for the entire project. Switching edge techniques halfway through is one of the fastest ways to end up with uneven sides.
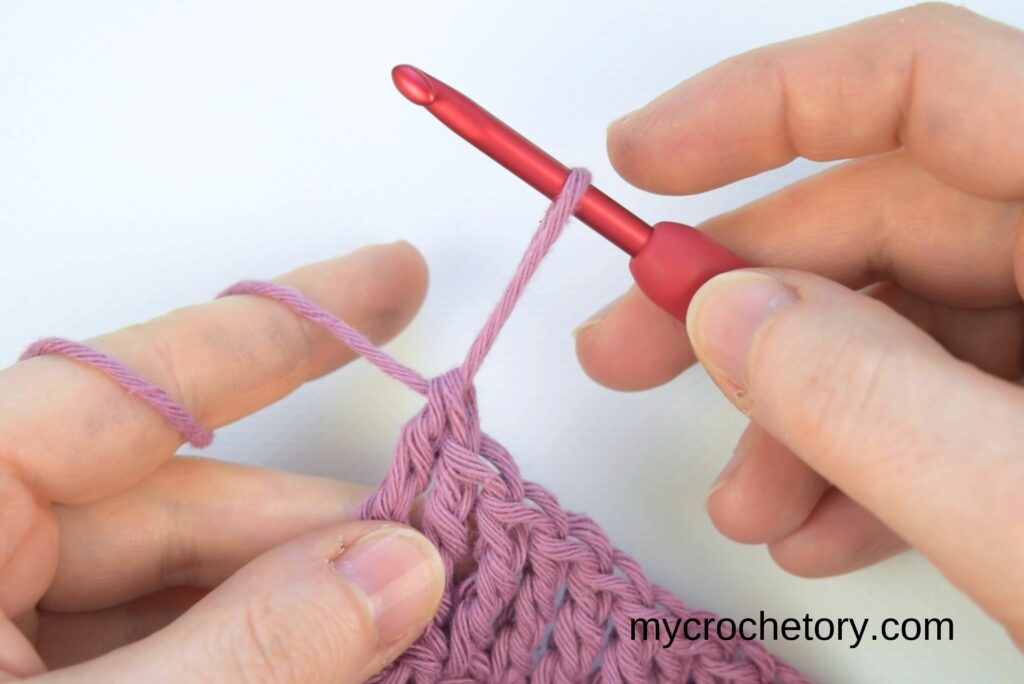
Small Habits That Keep Crochet Edges Straight
Once you have a good edge method, a few small habits make a big difference.
The first one is marking the edge stitches. A stitch marker in the first and last stitch of the row removes all guesswork. You stop squinting. You stop second guessing. You just crochet.
Counting stitches still matters, but it works best as a quick check, not something you obsess over every row. If the count is right and the edge looks clean, you are on track.
Pay attention to tension at the turn. Many crocheters pull a little tighter or looser right after turning without realizing it. Slow down for that first stitch and let the rest of the row flow naturally.
And finally, resist the urge to fix edges later. Tugging, stretching, or hoping blocking will solve everything usually hides the real issue instead of fixing it. Clean edges come from clear starts and clean finishes, not from adjustments after the fact.
Get those habits in place, and straight edges stop feeling like luck and start feeling reliable.
If you want more crochet tips like this, you can join my newsletter. It is where I share new tutorials, patterns, and small crochet fixes that make a big difference. No pressure, just an easy way to stay in the loop.
Crochet Straight Edges — FAQ
Why do my crochet edges look uneven even when my stitch count is right?
Because stitch count only tells part of the story. Most uneven edges come from inconsistent starts or finishes at the row edge. If the first or last stitch is handled slightly differently from row to row, the outline can drift even when the number of stitches stays the same.
Should turning chains count as stitches when I want straight edges?
That depends on the method you are using. Some techniques treat the turning chain as height only, while others replace it entirely. The key is picking one approach and using it the same way every row. Switching back and forth is what usually causes uneven edges.
What is the easiest way to keep crochet edges straight for long projects?
Choose one edge method that feels natural in your hands and stick with it from start to finish. For long projects like blankets, consistency matters more than the specific technique. Using stitch markers in the first and last stitch also helps a lot.
Why do tall stitches like double or treble crochet show edge problems more clearly?
Taller stitches create more space at the edge, especially around turning chains. Small changes at the row start become visible gaps much faster. That is why methods that control height or skip turning chains often work better for taller stitches.
MORE CROCHET INSPIRATIONS
If you found this crochet post helpful, you might also like posts:
- How to join yarn ends: 4 easy ways
- How to do a Russian Join
- How to crochet an invisible decrease
- How to crochet a magic ring
- How to foundation single crochet
Don’t forget to save this Pin for easy reference: 📌

I’d love to hear about your crochet adventures and see your beautiful creations. Drop a comment below sharing your thoughts, questions, or even your favorite crochet tips! Your voice adds a vibrant thread to our forum community.
Sharing is caring! If you found this guide helpful, consider spreading the love. Click the share button and inspire other crocheters.
Stay in the loop with our latest crochet guides, tips, and inspiration. Subscribe to our newsletter for exclusive content straight to your inbox. Never miss a stitch – subscribe today!
Happy crocheting, and may your yarn always be tangle-free!
Join my Facebook Group and Official Ravelry Group where you can find necessary support, you can ask questions or share your finished projects.
You can also follow my Instagram, Facebook page and Pinterest.
Wonderful❣️ Very well demonstrated and explained. Thank you so much!
These tips helped me so much with my ragged mountain edges! Thank you so much ! And I love the video but I also liked reading the instructions so you just did people who are right and left brained a big favor!!