Updated: 23 October 2024 by Sylwia (MyCrochetory)
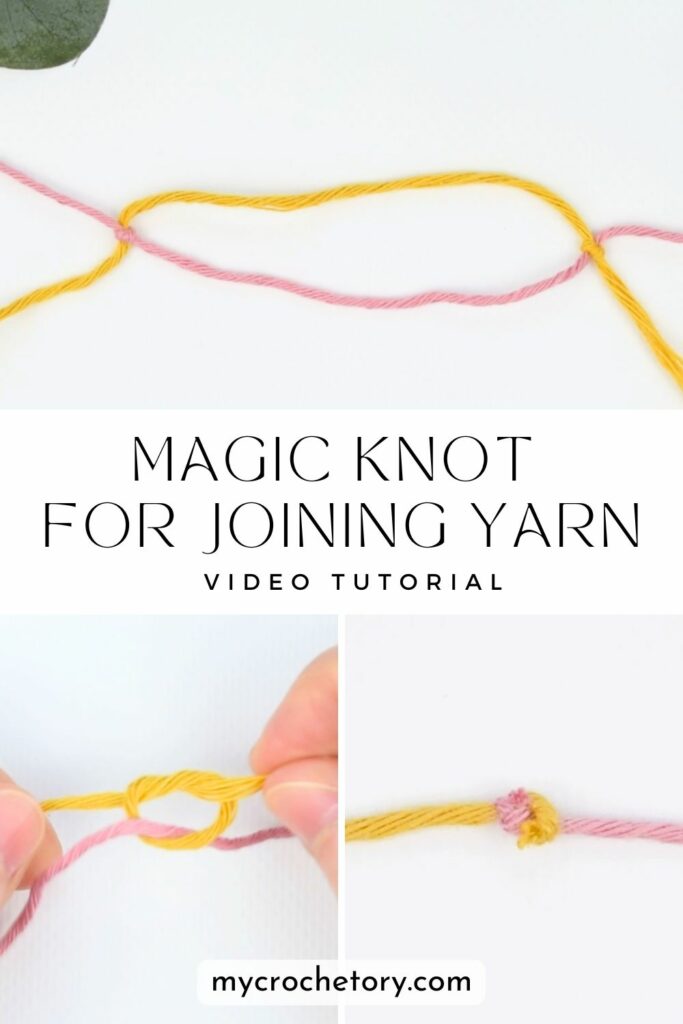
Learn the magic knot for joining yarn to create smooth, secure joins in your crochet or knitting projects. Perfect for easy, seamless yarn transitions.
Messy yarn joins ruining your crochet projects? I get it.
The magic knot for joining yarn is a simple, effective solution that makes your work look neat and professional. Perfect for new yarn balls or mixing colors.
Check out our video and picture tutorials below!
The Magic Knot for Joining Yarn: A Great Choice
When you start a new yarn ball, it’s important to join the ends of yarn securely. Some methods can make bulky joins or stand out in your work, which can be frustrating. T
he magic knot join offers a good quality finish that blends right into your project. This joining method works well with natural fibers, acrylic yarn, wool fibers, and even animal fibres like alpaca or mohair.
Trust me, once you try it, you’ll wonder how you ever managed without it!
Why the Magic Knot is Awesome
The magic knot yarn join is a favorite among crafters for many reasons.
First, the knot is almost invisible, so it won’t distract from your beautiful crochet stitches. This means your projects look neat and professional.
Plus, the magic knot is super strong. It holds up well even in larger projects like blankets or scarves, keeping your creations intact for a long time.
Another great thing is how versatile it is. The magic knot method works with all kinds of yarn, including pink yarn, natural fibers, and wool fibers, making it perfect for any project you have in mind.
Perfect for Any Project
The magic knot for joining yarn is ideal for all kinds of projects.
Whether you’re working on big projects like blankets or smaller crafts using animal fibres, this technique ensures your new yarn ball blends smoothly with the pieces of yarn you’re using.
It’s especially handy when dealing with long ends or different colors, keeping the front of your work neat and tidy. This makes the magic knot a versatile choice for any crochet or knitting project you undertake.
What You’ll Need
Before we get started, let’s gather everything you need.
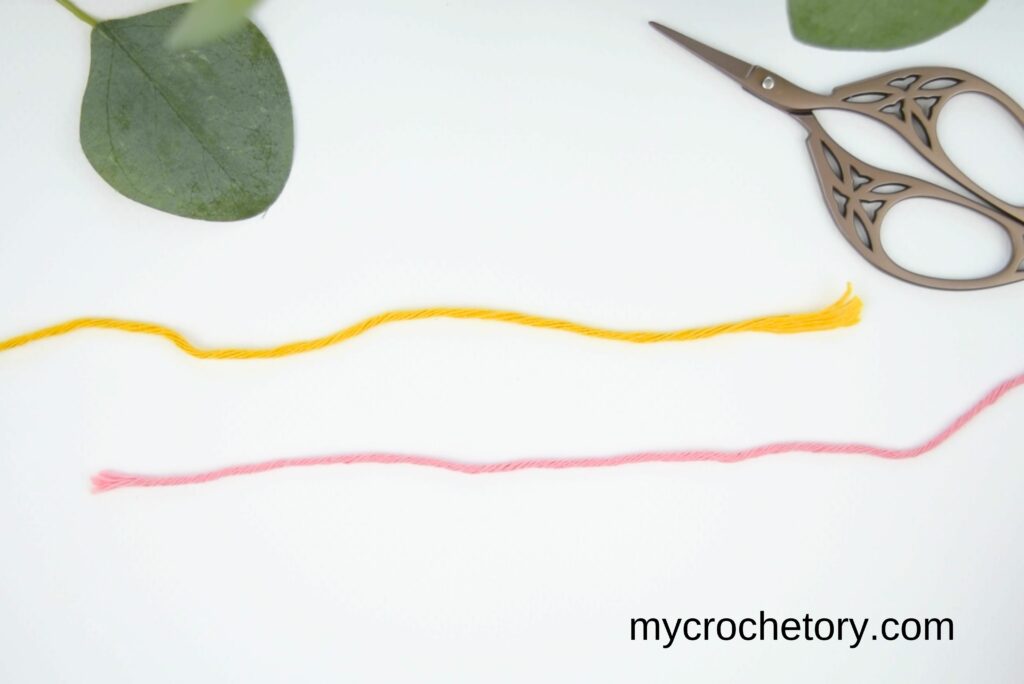
You’ll need two ends of yarn, a tapestry needle, and a pair of scissors.
Having these tools ready will make the process smoother and ensure you can complete the magic knot for joining yarn without any interruptions.
Video Tutorial
Check out our easy video and picture tutorials below. They show you the magic knot step by step, making it simple to tie a secure knot.
Whether you’re joining a new yarn tail or finishing a row, these guides will help you master the magic knot for joining yarn quickly.
TIP: To view this video tutorial properly, please disable any ad-blocker you have running.
Picture Tutorial
Here’s how you can create the magic knot for joining yarn in five easy steps:
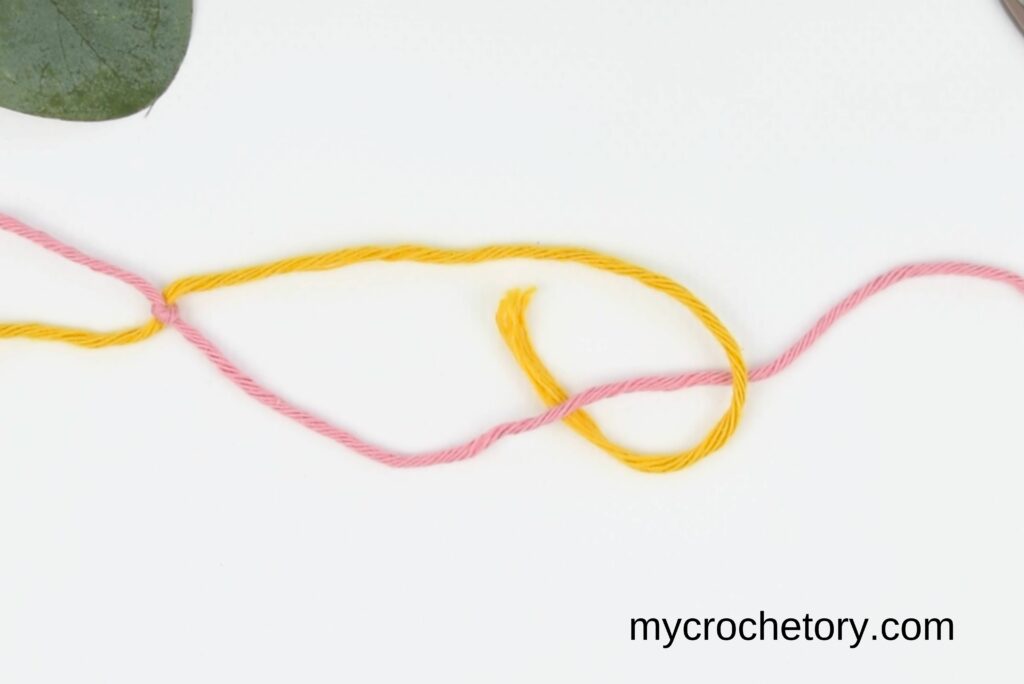
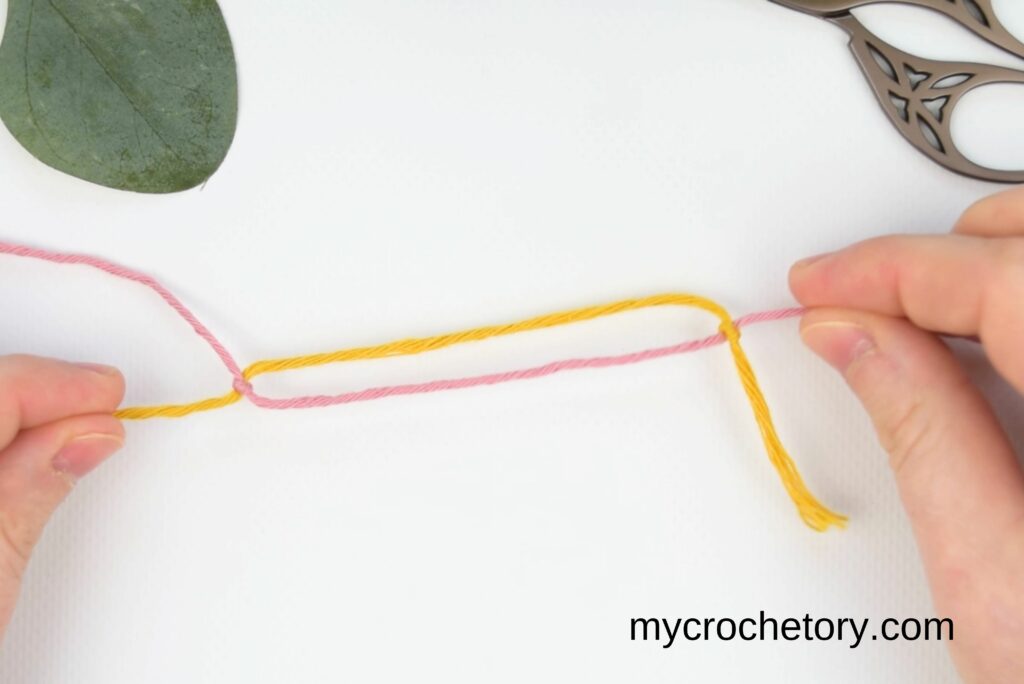
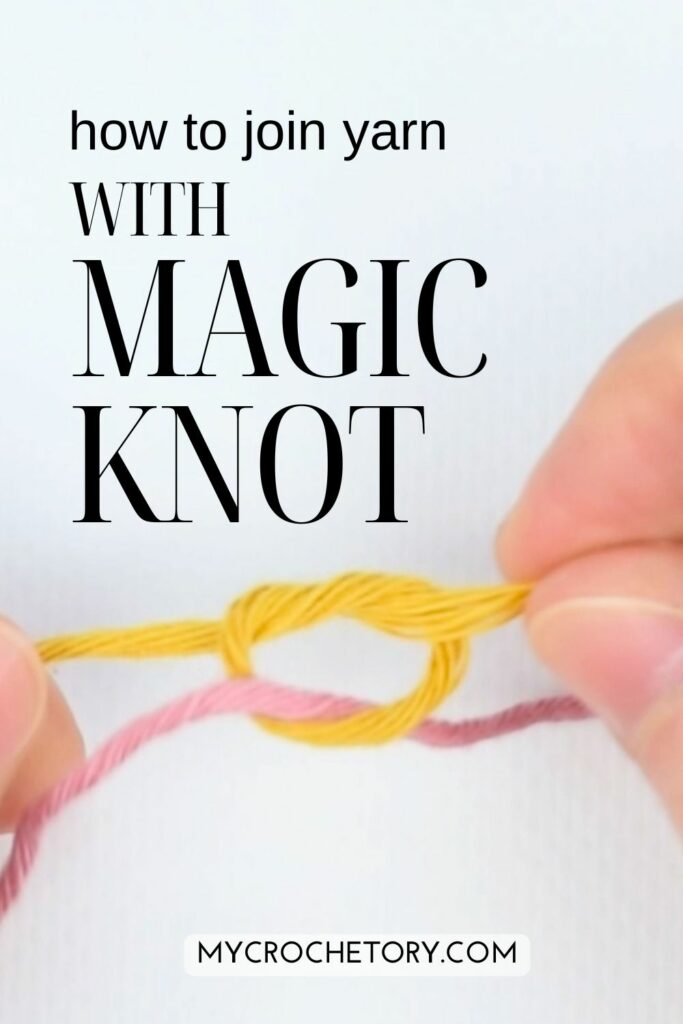
Step 1. Lay the two ends of yarn side by side, one on top of the other, just like in the picture.
Step 2. Take the pink tail and place it over the yellow yarn.
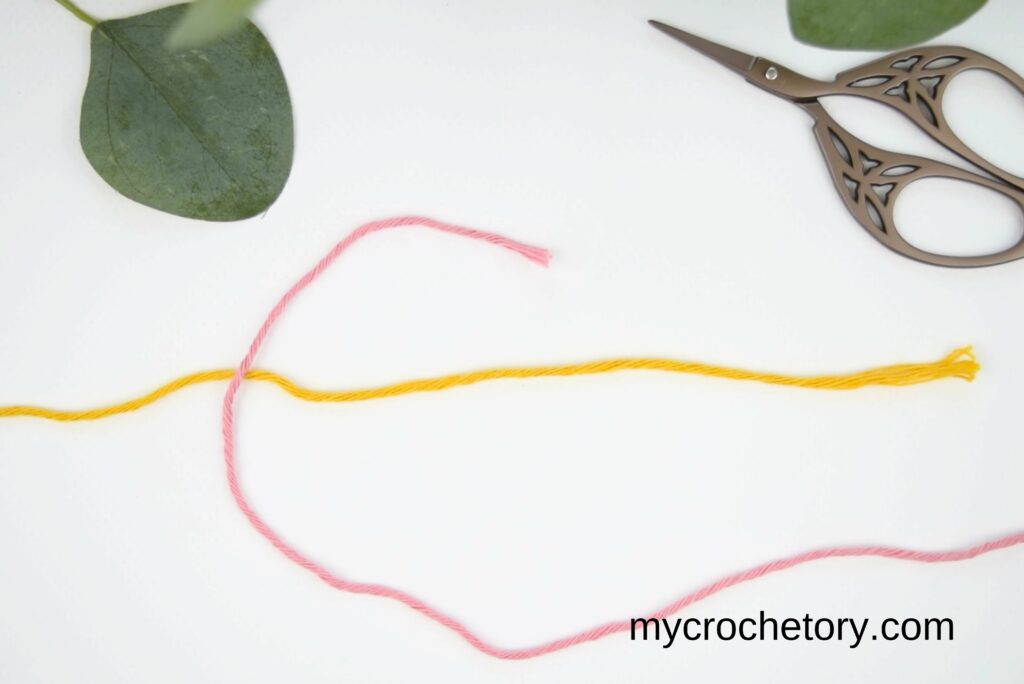
Step 3. Now, slide the pink end under the yellow yarn and over itself.
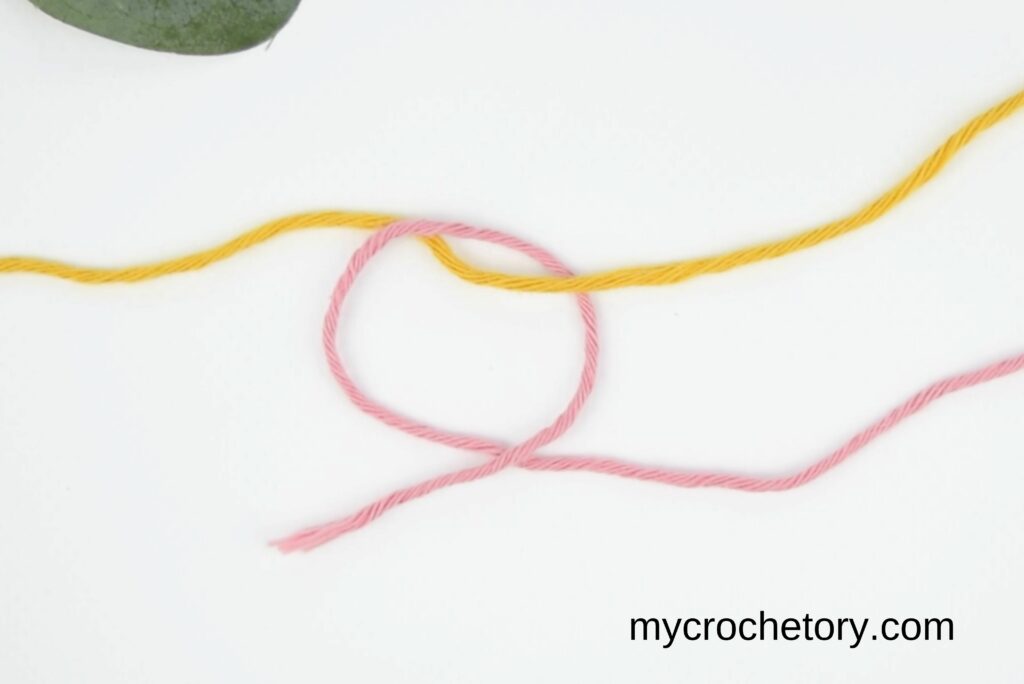
Step 4. Pull the tail through that loop coming in from below.
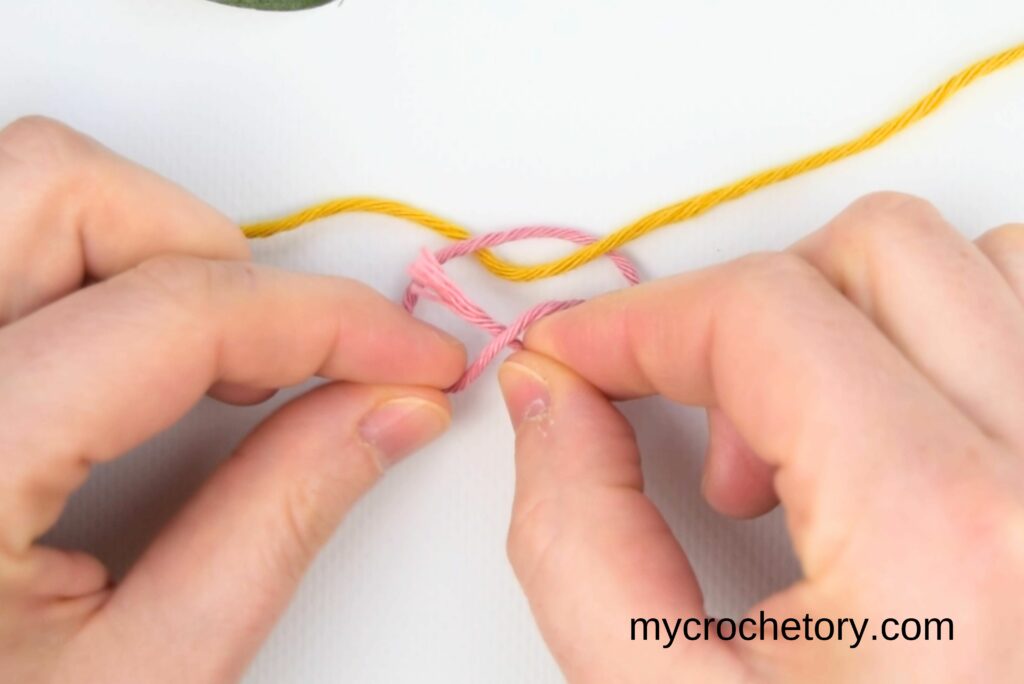
Step 5. Pull the knot as tight as you can.
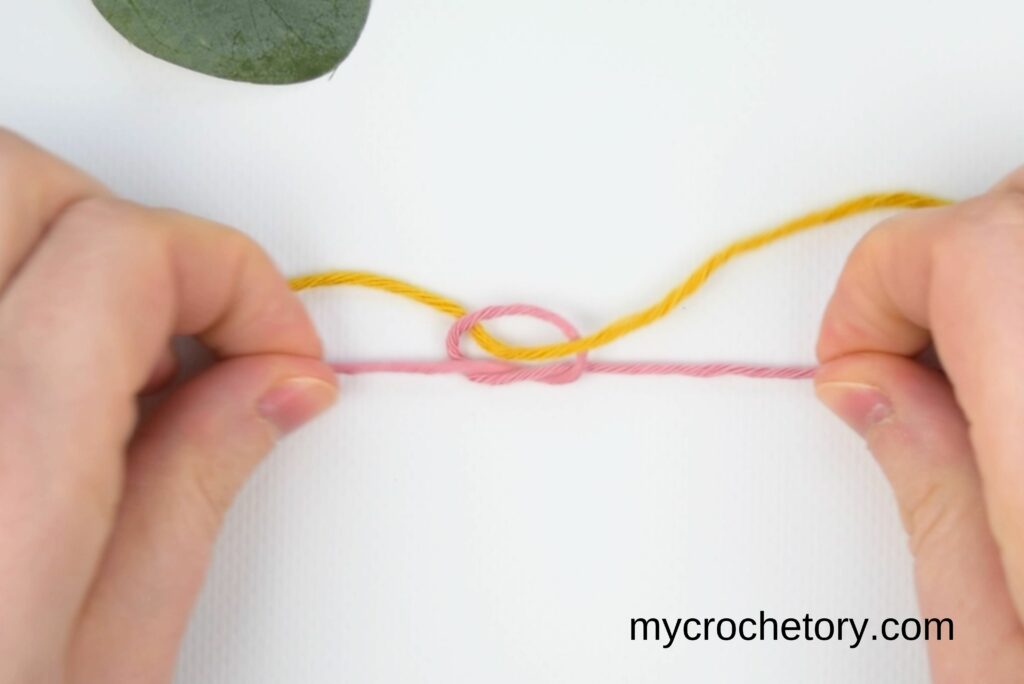
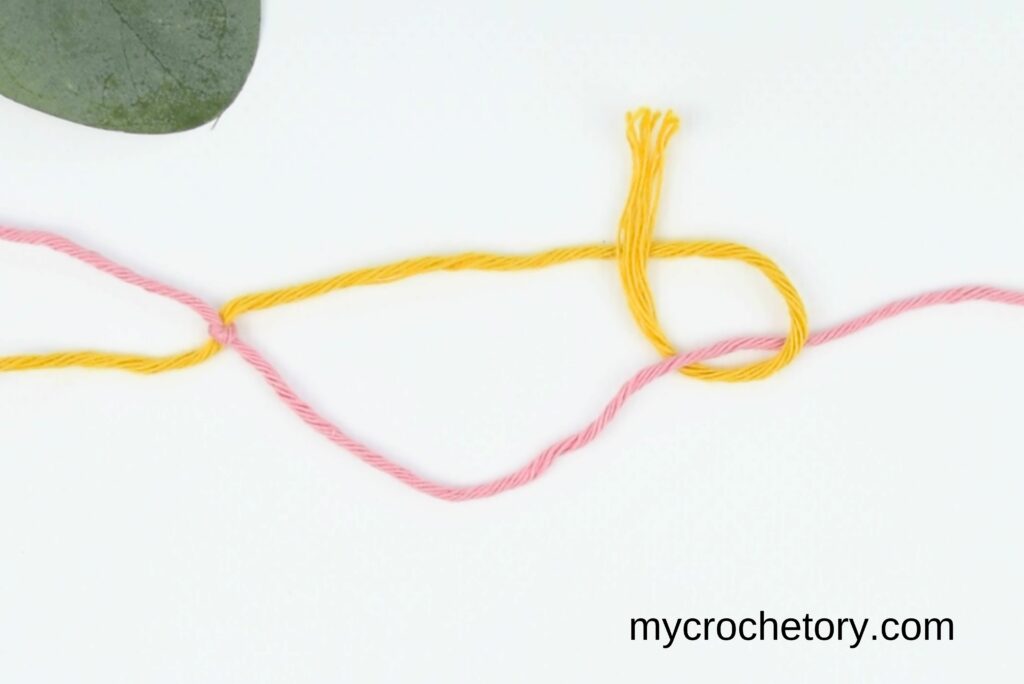
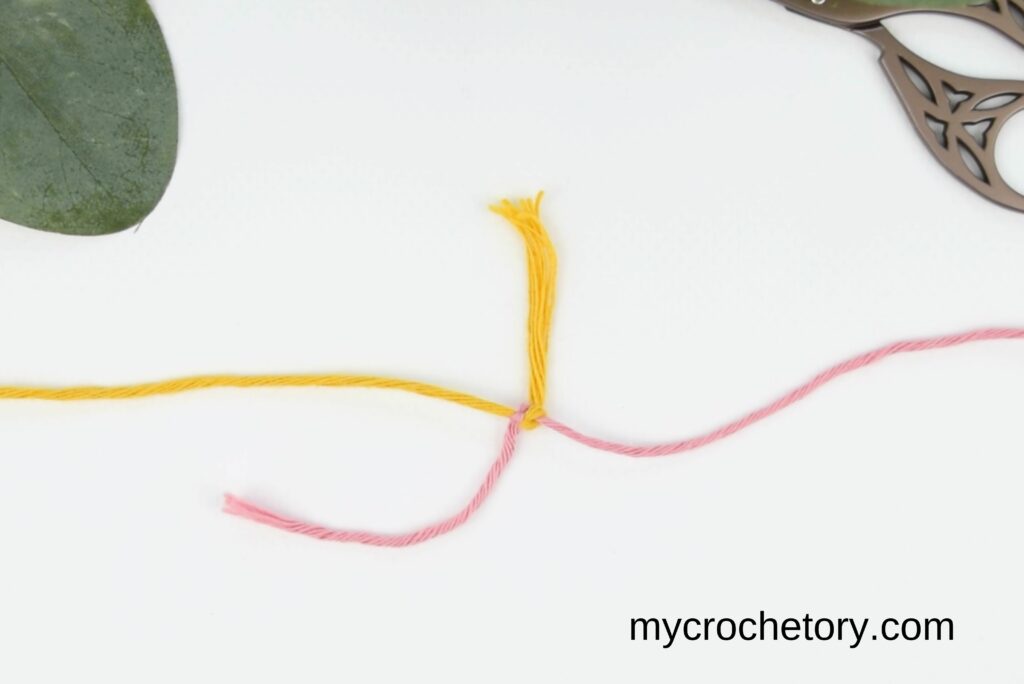
Step 6. Next, do the same with the yellow yarn. Bring the yellow end over the pink yarn, under it, and then over itself to tie a knot.
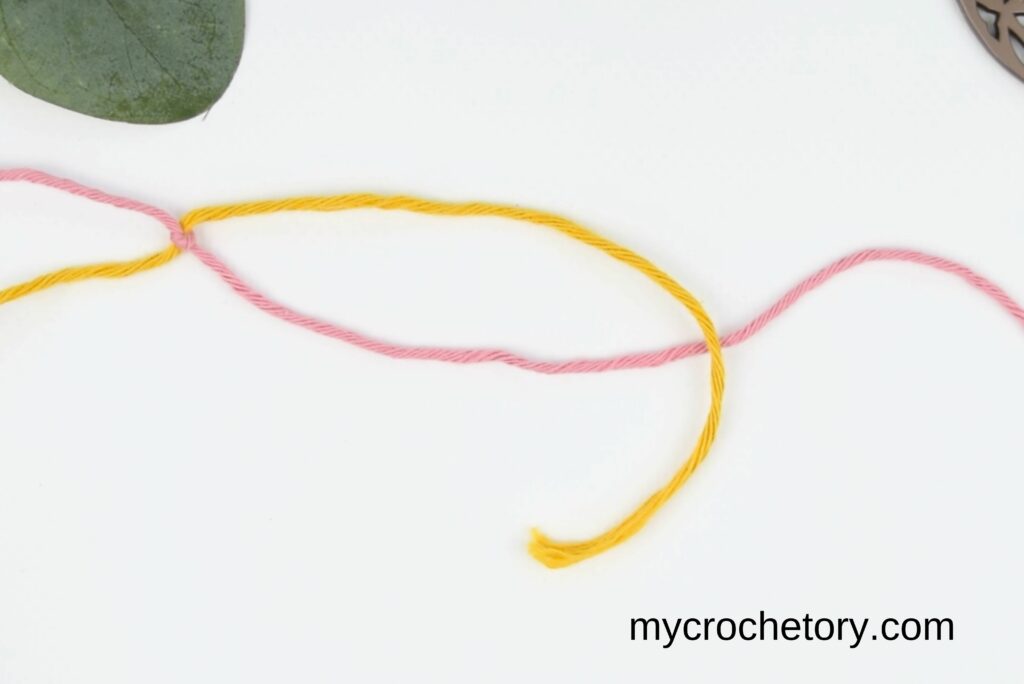
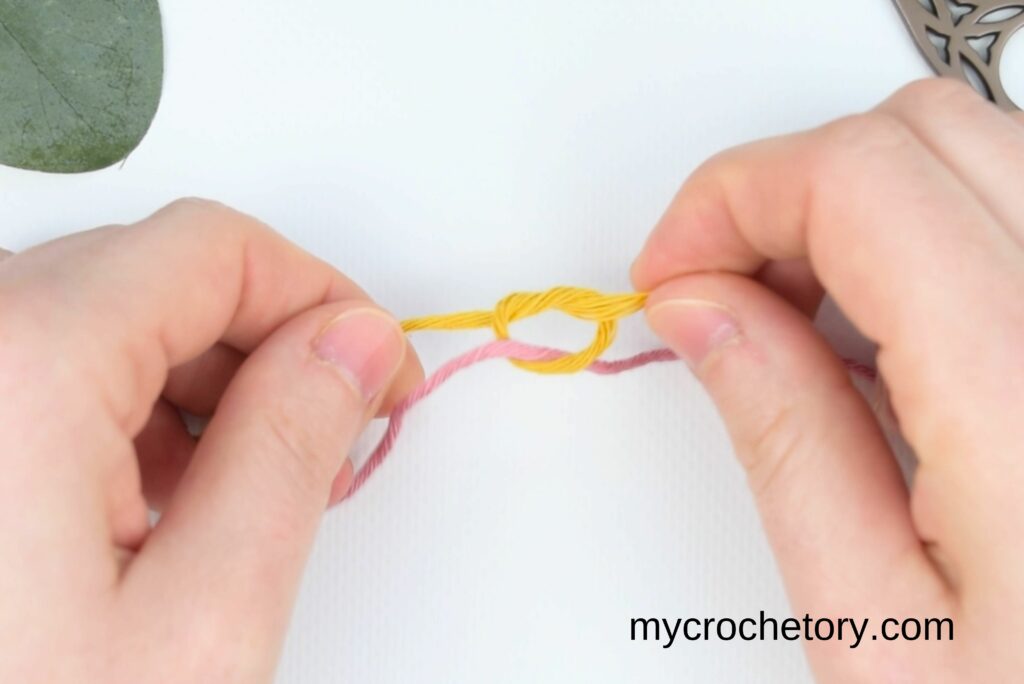
Step 7. Finally, pull on the working yarn (not the tails) until both knots meet in the middle.
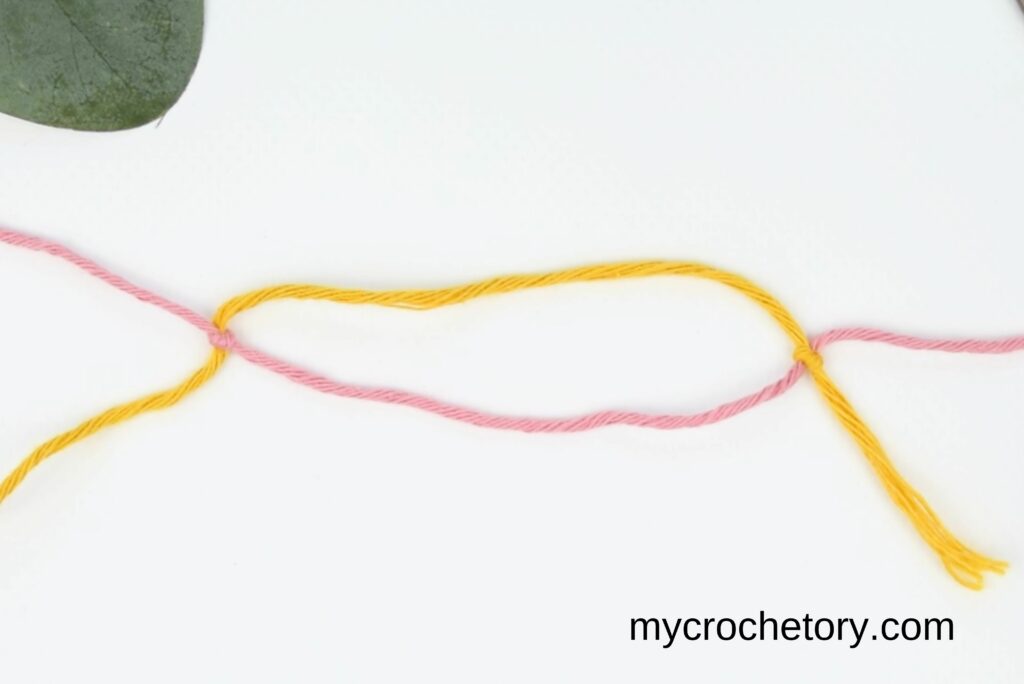
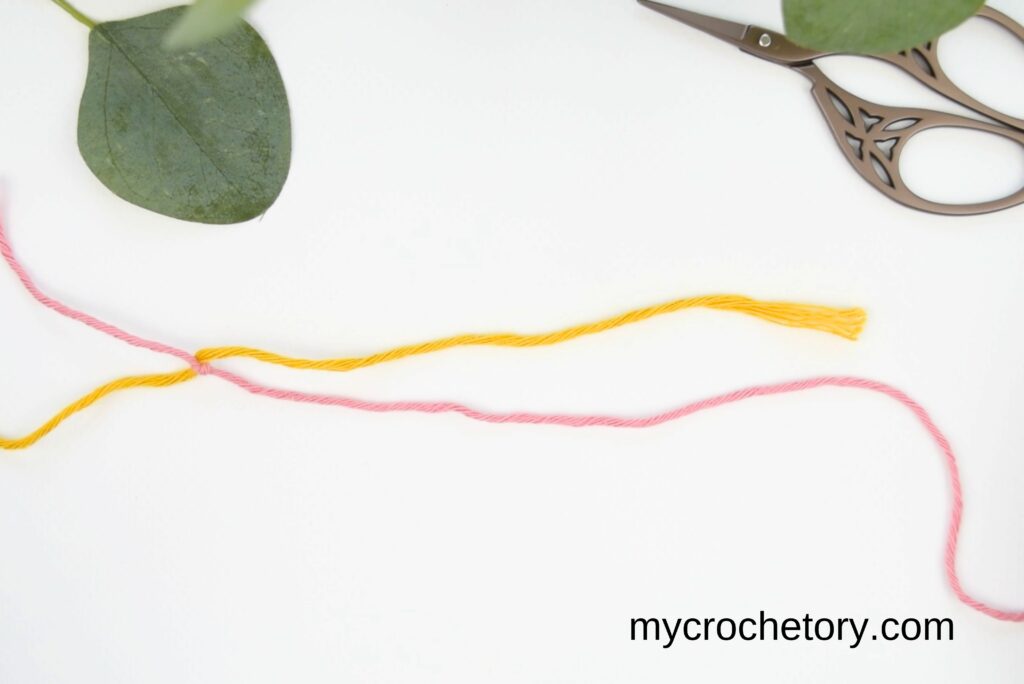
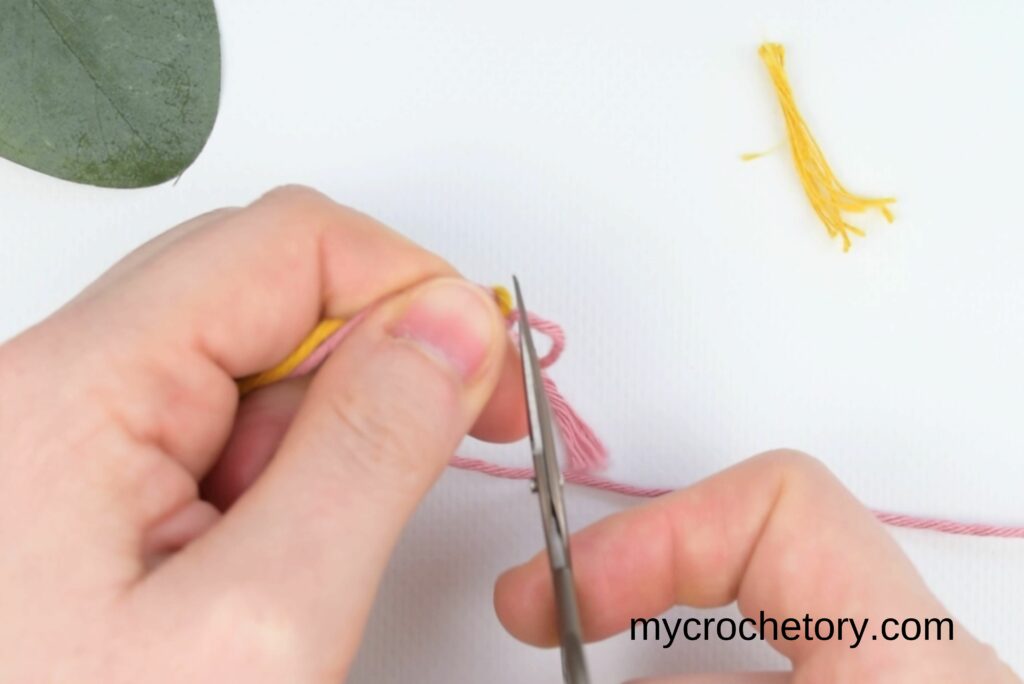
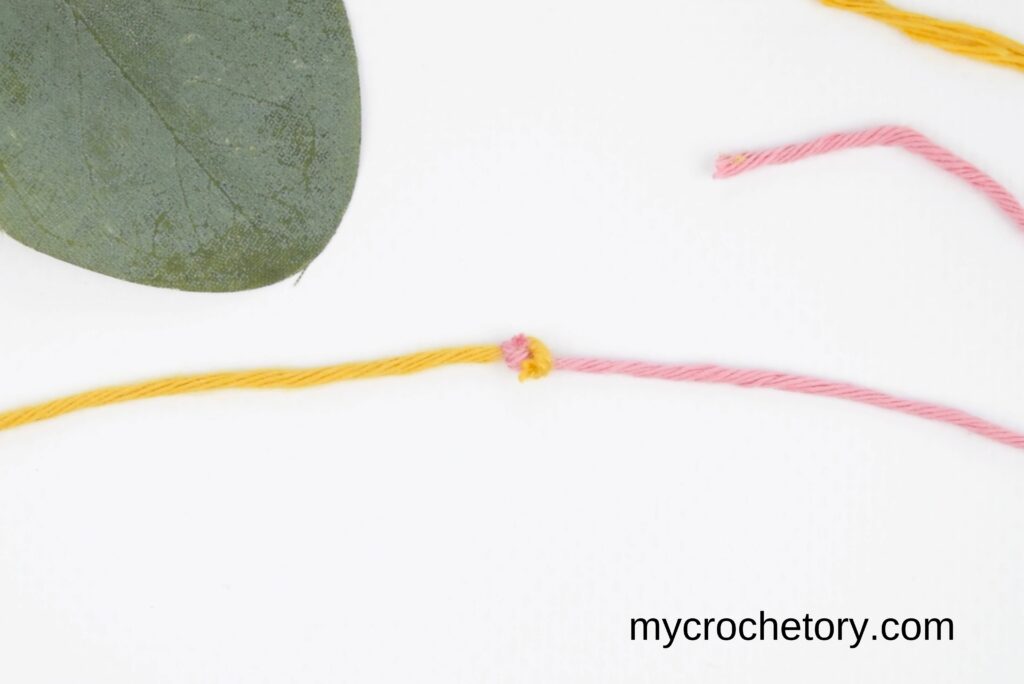
Step 8. Trim the tails with scissors, and you’re done! Now you can continue knitting/crocheting.
Tips for a Perfect Magic Knot For Joining Yarn
To make your magic knot flawless, keep these tips in mind:
- Use clean yarn to prevent knots from tangling.
- Choose the same type of yarn for both ends for consistency.
- Tie knots firmly but gently to avoid breaking the yarn.
- Keep your workspace tidy to prevent yarn from getting tangled.
- Practice on scrap yarn before using it in your project.
Alternatives to the Magic Knot
Looking to try different ways to join yarn?
Check out the Russian Join, a traditional and secure method many crafters love.
You could also try the Square Knot, which is easy but not as strong, or the Slip Knot for a quick join.
However, the magic knot method remains a favorite because it’s simple and strong.
MORE CROCHET PRO TECHNIQUES
If you found this Magic Knot For Joining Yarn tutorial helpful, you might also like posts:
- How to foundation single crochet
- How to double crochet 2 row at once
- How to make a slip knot – 3 Easy Ways
- How to crochet standing stitches
- How to crochet ribbing
- Mattress stitch join tutorial
Don’t forget to save this Pin for easy reference: 📌
I’d love to hear about your crochet adventures and see your beautiful creations. Drop a comment below sharing your thoughts, questions, or even your favorite crochet tips! Your voice adds a vibrant thread to our forum community.
Sharing is caring! If you found this guide helpful, consider spreading the love. Click the share button and inspire other crocheters.
Happy crocheting, and may your yarn always be tangle-free!
Join my Facebook Group and Official Ravelry Group where you can find necessary support, you can ask questions or share your finished projects.
You can also follow my Instagram, Facebook page and Pinterest.
Leave a Reply